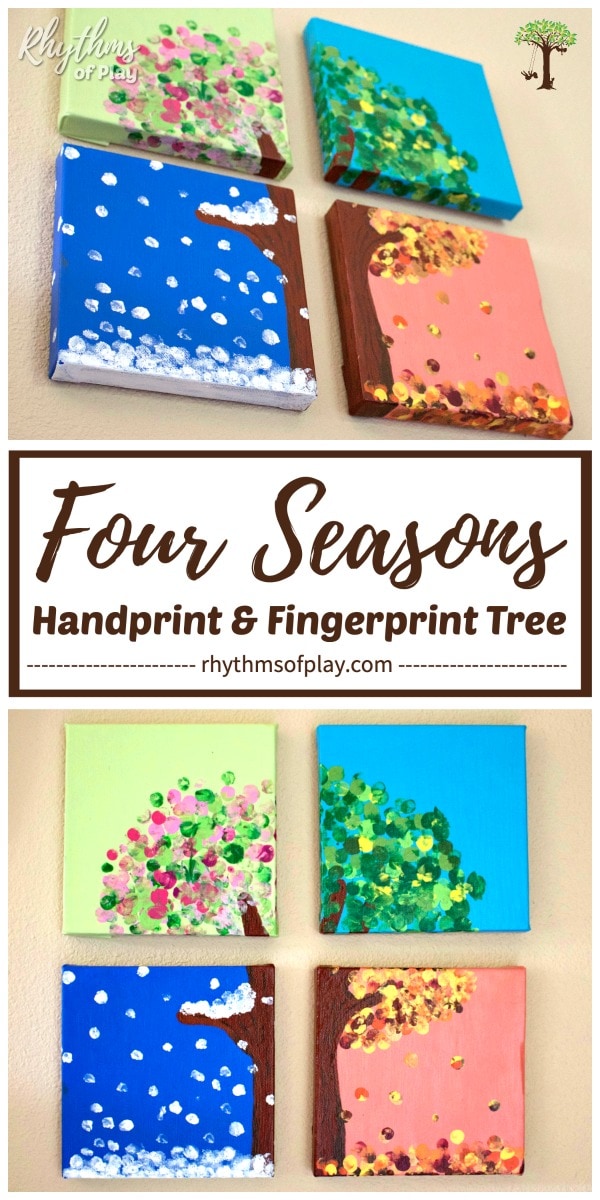
Make this four-season handprint and fingerprint tree with your kids!
Create a four-season handprint tree with fingerprint art leaves and snow in seasonal colors with toddlers, preschoolers, and kindergarteners at home or in the classroom. This handprint tree craft is a fun art activity and keepsake gift that kids of all ages can help make. With each of the four seasons represented, making seasonal handprint art is a great way to teach young children about the changing seasons while making beautiful fingerprint and handprint art.
Once finished, this four-season handprint tree is a unique fingerprint art keepsake craft and gift idea for mom, dad, or grandparents. Handprint and fingerprint art make a unique homemade gift idea for Mother’s Day, Father’s Day, Grandparent’s Day, Christmas, or a birthday. It also makes a lovely personalized piece of DIY home decor that families can treasure forever. You might also enjoy this list of homemade gifts kids can make.
Update 2025: My husband and I still have the four-seasons handprint tree craft in the photos my daughter and I made to give to her dad on Father’s Day in 2015 hung on our master bedroom wall. He loves it, and I enjoy waking up to it every day because it’s perfect for all seasons. First published on May 18, 2015, this post is regularly updated and occasionally republished to improve the content and remain current. Make this four-season art project at home or in the classroom with step-by-step instructions and the video tutorial below.
How to Make a Four Seasons Fingerprint Handprint Tree:
Make a handprint and fingerprint tree painting with one of the four seasons in each corner with this keepsake art activity. The instructions below share how to paint a four-season tree on four separate six-inch square art canvases. Alternatively, you can use four larger squares (with the larger hand and arm of an elementary school-aged child, teen, or adult), rectangular art canvases, rectangular or square wooden canvases, cardstock, or a large piece of art paper divided into four sections to create a similar seasonal tree painting.
The step-by-step directions below teach how to make fingerprint leaves to decorate each seasonal corner of the handprint tree painting. Alternatively, you can use an art sponge, bits of cotton balls, a cotton swab (cotton bud), or a pencil eraser instead of finger prints to make the different colors of seasonal leaves on the handprint tree and the snow in the winter corner.
If you are doing this four-season art activity with young children, such as toddlers, preschoolers, or kindergarteners, I recommend working in stages to complete it. For example, my two-year-old daughter and I worked on this handprint and fingerprint tree together for about ten to twenty minutes over five days. Scroll down for the craft supply list and all the DIY details to make this gorgeous four-season art idea.
Related: Fingerprint Art Magnets
Four Seasons Tree Craft Art Supplies:
- Choose one of the following (or one of the options mentioned above):
- Four six-inch square art canvases. (We used 6X6 inch square art canvases for this 4-season art project, but wooden canvases also work).
- Four six-inch square wooden canvas panel boards for painting.
- Acrylic paints in seasonal colors.
- Gold and copper metallic paint for some fall leaves (optional).
- Pencil for tracing hand and lower arm.
- Paper plate, paint pallet, or glass cutting mat to hold acrylic paint.
- Paintbrushes (this set includes a variety of paintbrushes and a foam brush).
- Choose one of the following to seal and protect 4 season painting (optional but recommended):
- Mod Podge and a foam brush.
- DecoArt Sealant and a foam brush.
- Spray varnish.
- Art apron or smock (optional but recommended to keep young children’s clothes paint-free).
Related: Best Art Supplies for Kids and Why Young Artists Should Use Them
Four Seasons Tree Painting (Handprint and Fingerprint Tree Art Video Tutorial):
The video tutorial below shows how to make a four-season tree painting with a child’s handprint and fingerprints representing all four seasons: spring, summer, fall, and winter. Scroll past the video for step-by-step instructions.
Related: Fingerprint Flower Glass Magnets
Four Seasons Fingerprint Tree Art Step-by-Step Instructions:
To keep this four-season art project fun for kids–it’s best to work on one step per day, but you can paint your four seasons art however you wish. Scroll past the instructions to see my project tips for making this handprint craft with toddlers, preschoolers, or kindergarteners. Scroll down for instructions on how to make this gorgeous four-season art project with kids.
This seasonal tree craft is a perfect art project for toddlers, preschoolers, kindergarteners, and even school-aged children. Step-by-step directions to create this handprint craft with all four seasons represented are posted below:
1. Paint each canvas square a different color for each of the four seasons:
- Start by choosing an acrylic paint color to paint the background of each seasonal square.
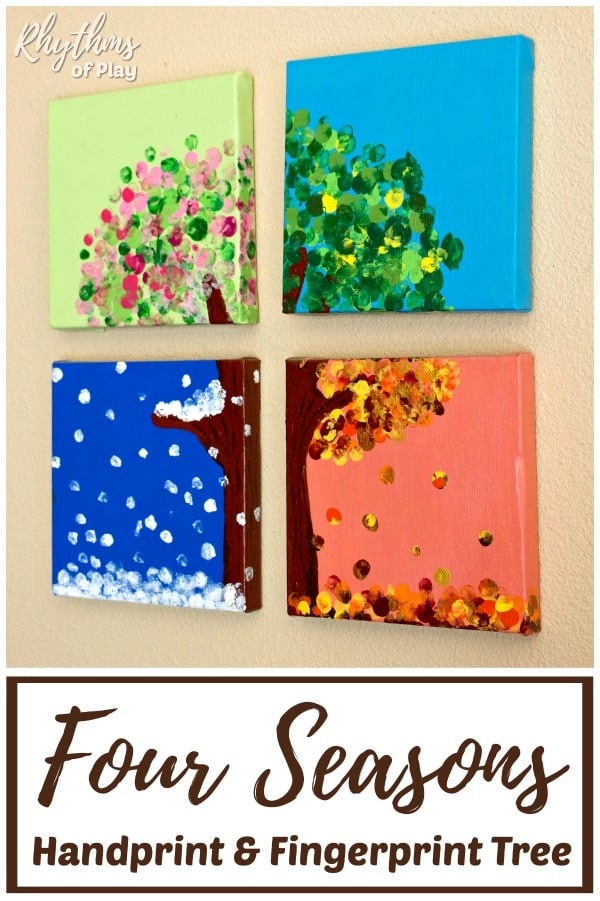
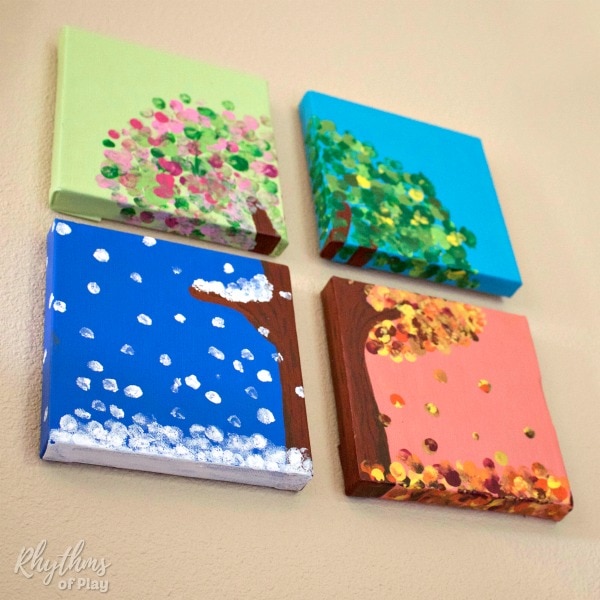
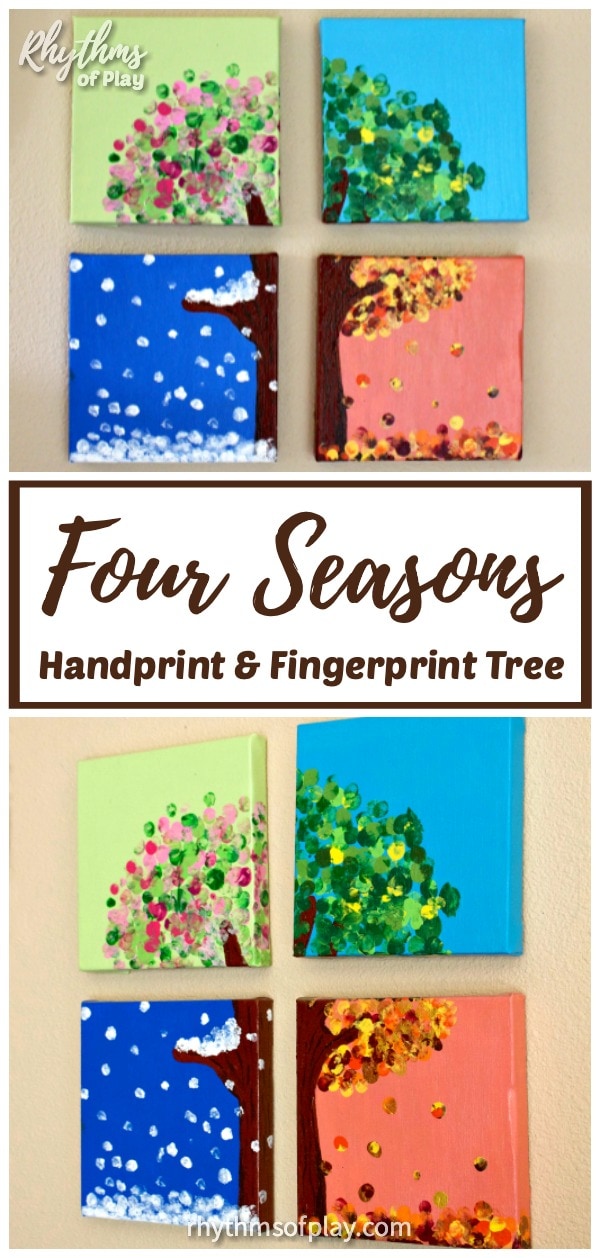
- The photograph above shows a light green background for spring, light blue for summer, coral for fall, and dark, bright blue for winter, but choose whatever colors you like.
- In the video, you will notice that the autumn seasonal square was initially yellow.
- I wanted my daughter to create several yellow and gold fall fingerprint leaves, so I repainted the background of the fall square with coral acrylic paint before she added the autumn fingerprint leaves.
- Invite children to paint each canvas with a flat wash paintbrush in the color of your choice, and feel free to join the fun!
- The DIY handprint art video tutorial above shows my daughter and I painting the square art canvases.
- Please allow the background paint color for each of the four seasonal canvases to dry completely before moving on to the next step.
2. Place art canvases into a single square shape to represent the four seasons:
- When the background color for each square canvas is completely dry, put all four seasons of the canvas squares together into a single square shape as follows:
- Place spring in the upper left corner, summer in the upper right corner, fall in the lower right corner, and winter in the lower left corner.
- In other words, place the four seasons in a clockwise circle, starting with spring on the top left and ending with winter on the bottom left.
- Arranging the fingerprint tree art in the order described above makes it possible to create fingerprint art with snow and autumn leaves on the ground of the handprint tree art.
- Alternatively, to produce the same effect, you can arrange each of the four season squares counterclockwise, starting with spring on the upper right and ending with winter on the lower right.
3. Trace your child’s hand to make handprint tree art:
- Put your child’s right or left hand and forearm in the middle of all four art canvas squares.
- Please ensure your child’s fingers are spread wide across as many individual squares as you can manage and their arm is dividing the lower two canvases, as shown in the quick video tutorial above.
- Finally, use a pencil to trace your child’s right or left hand and forearm with a pencil to create the framework for your four seasons handprint tree art.
- The photos and video show the handprint tree I made with my daughter’s right hand and lower arm.
4. Paint the handprint tree:
- Use a paintbrush to paint the handprint tree art the color of your choice.
- First, I painted the tree with brown acrylic paint (espresso).
- Then, I added thin lines with a smaller detail brush in darker brown acrylic paint (cinnamon) to make it look like a tree bark and give the trunk of the tree texture.
- The exact paint colors I used are in parentheses. However, the brand of acrylic paint you use might not use the same color names.
- Depending on your child’s age, this step may best be completed by a parent, a teacher, or a caregiver. Because my daughter was two when we created this seasonal handprint tree art project, I chose to paint the tree myself.
- In other words, I opted to paint it for my toddler and recruited her to help me paint the fingerprint art leaves and snow for each of the four seasons in the next step.
- Please look at how I painted the handprint tree in the photo below and the handprint art video tutorial.
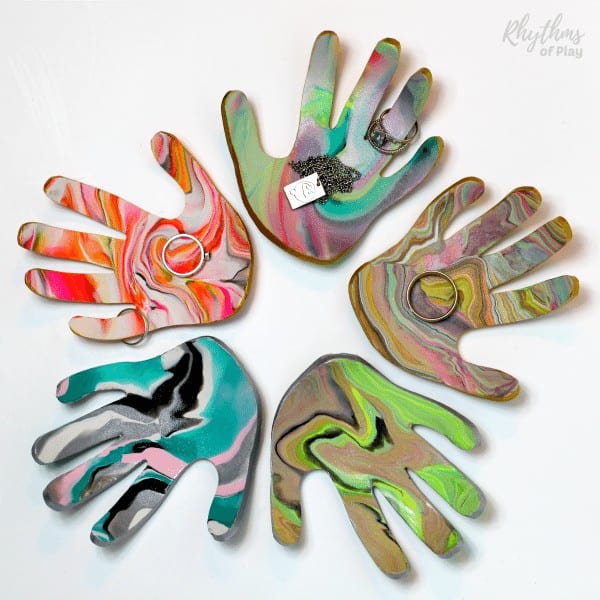
Related: Handprint Art Jewelry Dish and Ring Bowl
5. Invite children to use their fingertips to paint leaves or snow for each of the four seasons to complete the fingerprint tree art:
- Use two to ten seasonal colors for each square or corner of the fingerprint tree painting.
- Using more than two colors creates more texture and depth.
- It does not matter which colors you use to make fingerprint art leaves for this four-season handprint tree as long as you like them, and they remind you of the season’s colors.
- In the next section, I provided the colors we used to make the four-season fingerprint tree in the photos and video tutorial to help you decide which to use.
- To maintain the fingerprint tree’s round shape for the top two squares (spring and summer), instead of allowing your toddler or preschooler to put fingerprint leaves everywhere, use a piece of paper with a semicircle cut out and taped to the canvas square, as shown in the video.
- Paint one seasonal square at a time with the instructions below:
- Pour a small amount of each acrylic paint color for each seasonal square on a paper plate, glass cutting mat, or another non-stick paint pallet.
- Invite children to dip their fingers into the colors to create each seasonal square one at a time as follows:
- Spring blooms and leaves for the spring square canvas.
- Summer leaves for the summer square art canvas.
- Fall leaves for the fall square canvas.
- Snow for the winter square art canvas.
- Don’t be concerned if your children mix the paint while painting each seasonal square on their fingertips.
- Mixing paints will create a mottled leaf effect that looks gorgeous.
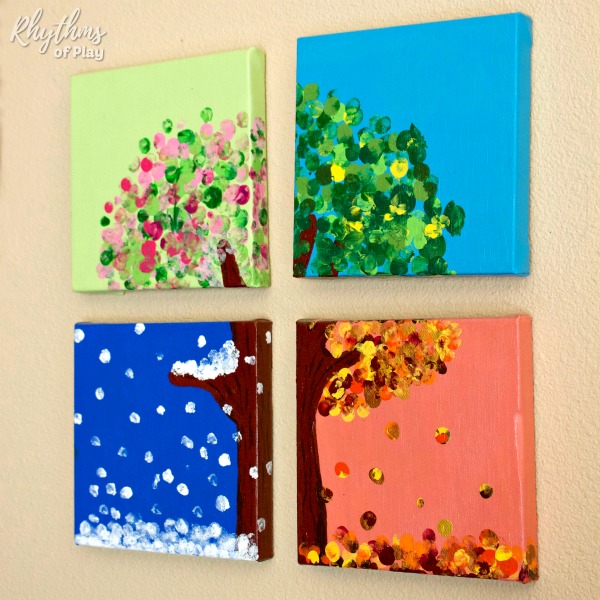
- Look at the photos of our four-season art to see how my daughter mixed some of the paint colors on her fingers for the fingerprint leaves she made.
- Add fingerprint art to the sides of the fall and winter seasonal canvas squares to give your fingerprint tree art a lovely 3-D effect.
Four Season Fingerprint Art Tree Paint Colors:
In the following sections, I provide the paint color names I put on a glass plate to make fingerprint leaves and snow to help you determine which colors to use for your fingerprint tree. You may not have the same paint colors we used, or the type of acrylic paint you use may not name them the same, which is fine.
To make four-season fingerprint tree art, you only need a smattering of colors in seasonal tones you like. However, as shown in the photographs, using multiple seasonal colors to paint each corner of the painting gives the fingerprint leaves more depth and texture and makes the handprint tree look beautiful.
Spring Corner of Four Seasons Fingerprint Tree art:
- Acrylic paint colors to make fingerprint spring blooms and vernal leaves on the handprint tree to represent spring:
- Pink blast
- Pink chiffon
- Light pink
- Leaf green
- Apple tart
- Kelly green
- To maintain the tree’s shape, use a piece of paper with a semicircle cut out and taped to the spring square, as shown in the video tutorial.
- Invite children to dip their fingers in the spring paint color dollops on a paper plate or another pallet.
- Next, invite them to make fingerprint tree leaves in spring colors by pressing their finger with paint onto the canvas (or paper).
Summer fingerprint art for the four seasons tree Craft:
- Acrylic paint colors to make fingerprint leaves to represent summer:
- Green paint
- Kelly green
- Christmas green
- Vineyard green
- Celery (light green)
- Apple tart (bright green)
- Bright yellow
- To maintain the tree’s shape, use a piece of paper with a semicircle cut out and taped to the summer corner. (Once again, the video shows this step in action.)
- Invite your child to dip their fingers in the summer paint colors.
- Then, create summer leaves on the handprint tree with their colored finger prints.
Winter fingerprint paint colors for handprint tree art:
- Acrylic paint color for snow on the winter square canvas: white.
- Invite your child to dip their fingertips in white paint on a paper plate (or use a paintbrush to paint onto their fingertips).
- Then, ask them to create fingerprint art snow by dotting their fingers onto the canvas.
- Make fingerprint art snow on the branch of the handprint tree, falling from the sky and on the ground below your four-season handprint tree.
- Add fingerprint art snow on the bottom and sides to give the winter art canvas a three-dimensional look.
Fall fingerprint tree paint colors for handprint tree Craft:
- Acrylic colors for the autumn corner of the fingerprint tree painting:
- Dark yellow
- Buttercream
- Tangerine (bright orange)
- Orange
- Cinnamon (dark brown)
- Espresso (brown)
- Wine
- Metallic copper
- Metallic gold
- Invite your toddler, preschooler, or kindergartener to dip their fingertips in autumn paint colors.
- Next, invite them to press their colored fingertips onto the canvas to create fingerprint art that resembles falling autumn leaves.
- As shown in the photos, ensure your child makes dots with their fingertips with the autumn colors on the lower portion of the canvas.
- This will give the 4-season art project the appearance of fall leaves on the ground.
- Put a few fingerprint fall leaves on the bottom and sides of the canvas to give the fingerprint tree painting a 3D effect.
- Allow Four Seasons fingerprint tree art to dry before moving on to the next step.
6. Apply a Top Coat to Preserve, Seal, and Protect Four Seasons Handprint Tree Art (optional):
- This step is optional but recommended.
- Seal and protect the four-season handprint art tree painting using one of the following methods:
- Spray an acrylic varnish.
- As shown in the video tutorial, use a foam brush to apply Mod Podge or another acrylic paint sealer to the surface of your handprint tree to seal and protect it.
- If you choose a liquid sealant that needs to be painted on, as I did, I recommend using foam brushes to avoid ruining your paintbrushes.
- Use long top-to-bottom strokes.
- Mod Podge goes on milky and dries clear, as shown in the video tutorial.
- Work quickly; it gets sticky.
- After applying the varnish or sealant, allow each of the four seasons of fingerprint tree art to dry completely.
7. Hang the four season hanprint tree painting, or give it to someone as a gift:
- Hang the four-season handprint tree with fingerprint leaves and snow as follows:
- As described in step two, arrange your four-season handprint tree with spring and summer on top and winter and fall on the bottom.
- Use a small nail, wire brad, or screw with an anchor (if needed) to hang each square.
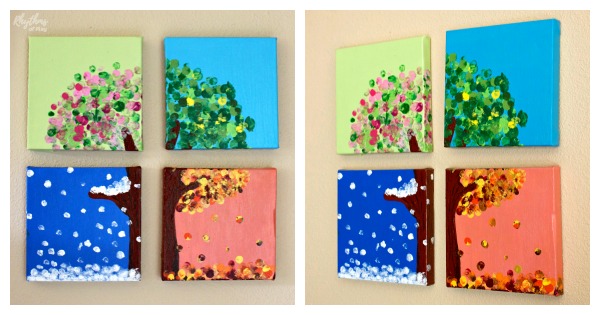
- Please ensure there is one-half to one inch of space between each seasonal art canvas square to give the handprint tree a three-dimensional look and provide the ability to see the fingerprint leaves and snow on the sides of each canvas, as shown in the photograph below.
- I recommend using a ruler or measuring tape to measure.
- Then mark the wall with a pencil with a small dot for each nail, brad, or screw.
- This will ensure each seasonal square of the handprint and fingerprint tree is hung evenly.
- Alternatively, you can gift this handprint keepsake craft to a family member, such as Mom, Dad, Grandma, or Grandpa.
- This four-season handprint tree is a perfect homemade gift kids can help make for Mother’s Day, Father’s Day, Grandparent’s Day, Christmas, or a Birthday.
Related: The Best Fingerprint Art Ideas for Kids
Four Season Handprint Craft Project Tips:
Splitting the handprint project into several different days makes it much easier to complete the entire project with a toddler. Here’s how my daughter and I made this beautiful four-season handprint craft:
- When my daughter and I made this four-seasons handprint tree art, we completed step one on the first day and then put the seasonal handprint project away for another day.
- The next time we worked on our four-season art project, we traced my daughter’s handprint and painted the handprint tree (Steps Two and Three above).
- Finally, we spent four days creating the four seasons of fingerprint tree art.
- In other words, we worked on making the fingerprint art for one seasonal square at a time. (Learn how we did it in Step Four.)
- We had loads of fun making this handprint art project together, breaking the steps up this way.
Related: Best Flower Art Projects for Kids
4 Seasons Art Project Kids Can Help Make:
This four seasons handprint and fingerprint tree art is a unique homemade gift idea that kids can make. Give fingerprint tree art to parents, grandparents, or extended family as a keepsake craft they can treasure. Or hang it somewhere and enjoy the beautiful DIY home decor.
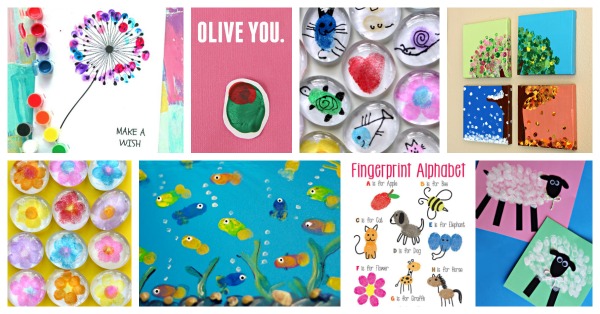
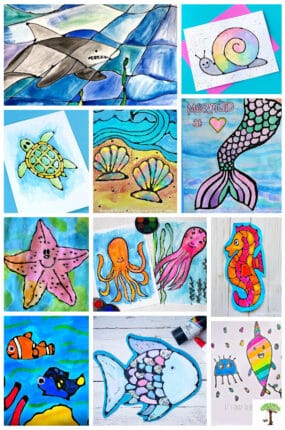
Check out this gorgeous collection of homemade gifts kids can make for more handmade gift ideas. (photo below) You may also enjoy this family gift guide with DIY and ready-made ideas for the whole family!
Learn more about Nell Regan Kartychok, author, photographer, and creator of this original four-season handprint art project and Rhythms of Play HERE!

More Handprint Art and Crafts
- Salt Dough Handprint and Footprint Heart
- Shell Frames with Handprint Art
- Four Leaf Clover Handprint Art with Printable Poem
- Handprint Shamrock with Printable Poem
- Valentine Handprint Art Ideas
- Handprint Christmas Carolers
- Christmas Handprint Art Ideas
- Handprint Art Jewelry Dish and Ring Bowl (photo below)
More Fingerprint Art and Crafts
- Fingerprint Art Glass Magnets
- Thumbprint Heart Magnet Craft
- DIY Thumbprint Heart Necklaces
- Thumbprint Heart Keychains
- Easy Fingerprint Flower Magnets
- Fingerprint Flower Necklace and Keychain Pendants
- Thumbprint Heart Crafts and Gift Ideas
- Christmas Fingerprint Tree Cards
- Fingerprint Lights Christmas Tree Cards
- Easy Fingerprint Snowman
- Fingerprint Love Bug Cards for Every Occasion
- Best Fingerprint Art Ideas for Kids (photo below)


Oh those are so cute. Perfect way to decorate my kids room.
Thanks — we love it too 🙂
Love handprint trees!
I’m so glad you like them!
What a great idea!! This would be perfect above our nature table.
It would be lovely above a nature table!
I love how they all hang together to make some great art – good idea!
We love it hanging on our wall! It is a lovely piece of art that my daughter and I made together–best thing ever 🙂
Nice activity! I have a group of 3/4 year olds so i’ll use tempera instead !
That’s great! Have fun!
Peakles loves this idea! It’s very cheerful and fun plus ideal for Father’s Day! Your post has been featured on this week’s Frugal Family Linky via Peakle Pie! Hope to see you joining in again soon and remember to pop by and grab your ‘I’ve been Featured’ badge too!
Thank you so much for featuring my work and thanks for hosting such an awesome link party! I grabbed my button and will be back for sure 🙂
I would really like this child-made artwork hanging on our wall! Thanks for linking up at the Thoughtful Spot!
This is such a beautiful keepsake idea. I will be featuring this post tomorrow at the Thoughtful Spot. Thanks for linking up your creativity!
This is brilliant! Pinning and all excited, because now I already know what we’re making for the grandparents for Christmas!!
I’m so glad you like it and are as excited as we are about it. I love how it turned out! We are giving ours to daddy for father’s day 🙂
Really beautiful and so creative ! Can’t wait to make it with my boys. Thank you very much. 🙂
Beautiful idea! The perfect Christmas gift for my children’s godmothers and godfather. Thank you for sharing your creativity with us. Your blog is wonderful!
Thank you! I’m so glad you liked it. I would love to see a photo of yours if you would be willing to share. 🙂
Very cute! I love the use of all of the seasons – it is a great keepsake!
Thank you! My daughter and I really enjoyed making it. It took us several days but it was so worth it! We have it hanging on our bedroom wall. 🙂
This is so cute. I teach Pre-K in Orlando, FL and want to have all 20 of my kids do one for their parents as an end of the year present. Now to figure out how to raise money for the canvases. :0)
That sounds like fun Leigh Anne, I’m sure the parents will love such a wonderful gift. 🙂
I work in a combo k/1st grade special ed classroom. We did this art work, but simplified it a bit. I just used construction paper. Cut 4 6×6 squares of different colored paper; one for each season. Placed them together to make one big square.
Then I painted the hand and forearm brown of each child and printed them in the middle of my squares. Separated the squares, let the brown dry before preceding the other painting. So much fun!
Thank you so much for sharing that with me Kathy! I love, love, love how you simplified it! Sounds like it was a great success! Your comment made my day 🙂
Oh my goodness, this is such a cute project. 🙂 Kids will love this idea! Can’t wait to try this out for an art project with the kids. 🙂
Thank you!
Love this! Having grandson make for mom for Christmas present. We are using tempera paints. They do not come out a bright as yours but still lovely.
That sounds wonderful, Regina! I’m so glad that you enjoyed this four-season handprint art project. I bet that his mom will love it!
hi, this looks AWSOME and I would love to try it! what I’m going to do is for each season I’m going to give my parents that part of the tree and at the end of the year, they are going to have a full tree. great thinking!
Hi Oliva! I love your idea of making one for each season to give as a gift, I hope they love it!
I just did it for Christmas and it looks AWESOME my parents will love it!
I’m so glad that you made the four-season handprint tree as a gift! Well done!
Thanks for this great project! I used it for a home school enrichment class (6 kids, grades 1-5.) Wish I could attach pictures! It was so fun that this was “artist-y” but attainable for all the kids.
Hi Dorothy,
I’m so glad that you found this four-season art project for kids, fun, educational, and attainable for a wide range of ages and abilities. My daughter and I had so much fun creating the original fingerprint art pictured here. And, the handprint tree my daughter made over 6 years ago continues to be one of our favorite pieces of artwork. Enjoy!
Nell