The step-by-step baby chick craft tutorial below explains how to make yarn pom-pom chicks with a fork, a DIY loom tool, or your fingers.
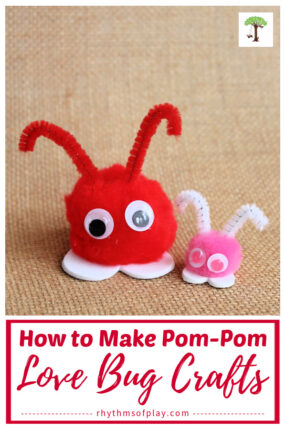
Here’s a spring chick craft tutorial that shares how to make pom-pom chick crafts with their chicken legs and feet attached without needing adhesives like glue. When my daughter and I designed these love bug stickers with attached antennas, we realized we could use the same DIY pom-pom technique to make pom-pom chicks with attached chicken legs without glue! Please scroll down to learn how to make pom pom chick crafts with your fingers, a fork, or a DIY loom tool. You might also enjoy this list of spring activities with even more baby chick craft ideas.
How to Make Pom Pom Chicks:
Baby chick crafts like these cute baby chicks are a classic craft idea for spring or Easter. This easy craft tutorial shares how to make simple baby chick crafts and pom-pom chicks into Easter toys and ornaments. I recommend reading through the step-by-step instructions and watching the video tutorial below so you know the steps involved and what to expect before starting this spring craft.
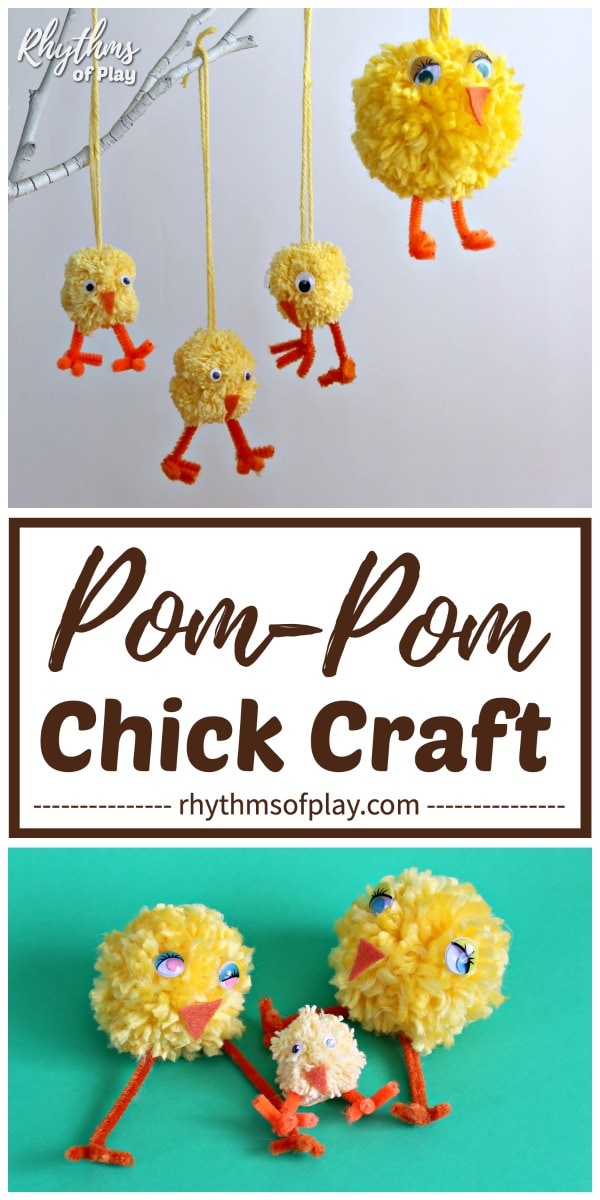
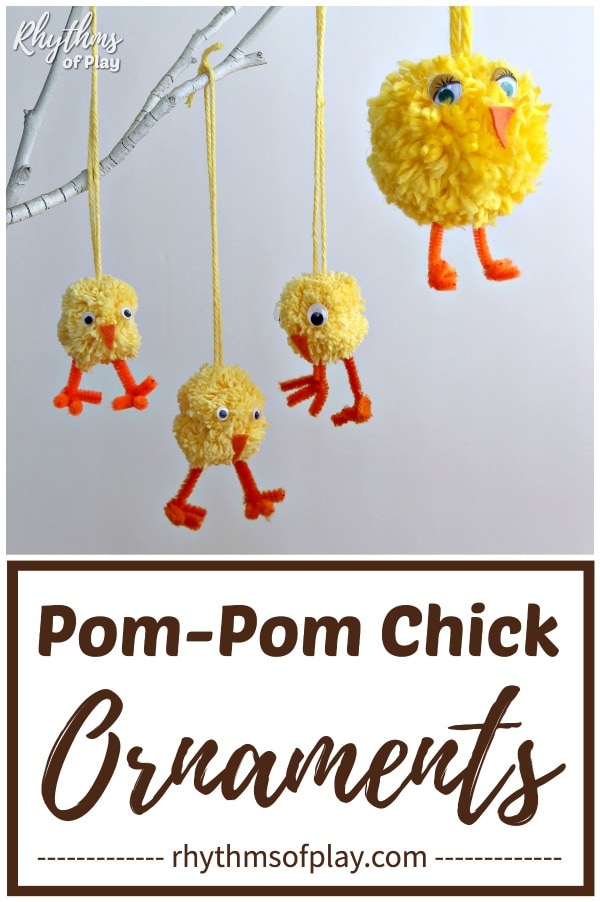
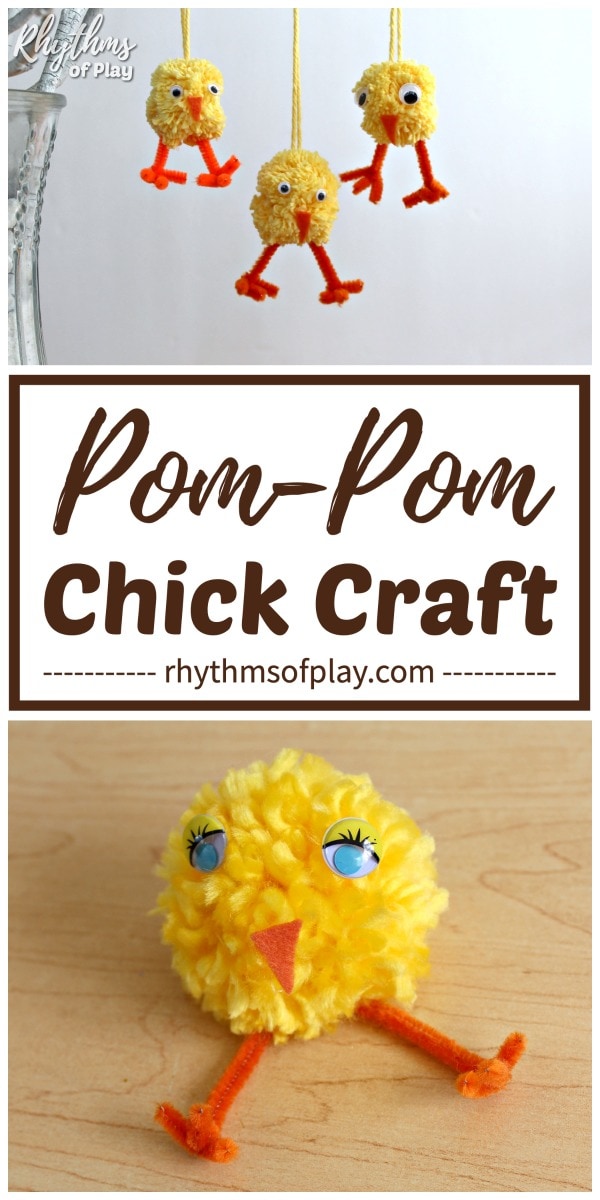
Doing so will also help you choose the pom-pom chick craft materials you want to use to make these adorable spring crafts, perfect for Easter. These chick crafts are fun to put into plastic eggs instead of chocolate on an easter egg hunt, in Easter baskets, and hanging from an Easter Tree, as shown in the photograph below.
Pom Chick Craft Supplies:
- Yellow yarn (choose at least one of the following):
- Acrylic
- Cotton,
- Wool blend
- Fine 100% merino wool
- Super bulky, chunky wool yarn
- An alternative yellow yarn
- Choose at least one of the following pompom makers:
- Fork (from your utensil drawer)
- Your fingers
- DIY Ball Knitting Multi-Function Loom Tool
- An alternative pompom-making tool or method
- Orange pipe cleaners or an assorted set of colored pipe cleaners with orange
- Black and white or colored googly eyes
- Sharp craft scissors or small sewing scissors (alternatives included in the last set of pom pom makers above)
Related: Baby Chick Craft Ideas
Should I use a fork, My Hand, fingers, or a loom tool to make Pom-Pom Chicks?
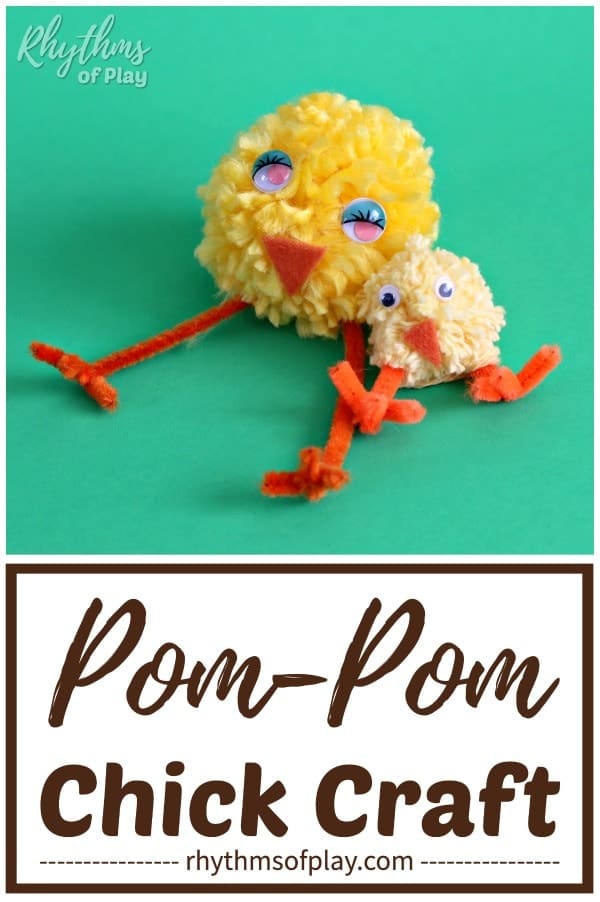
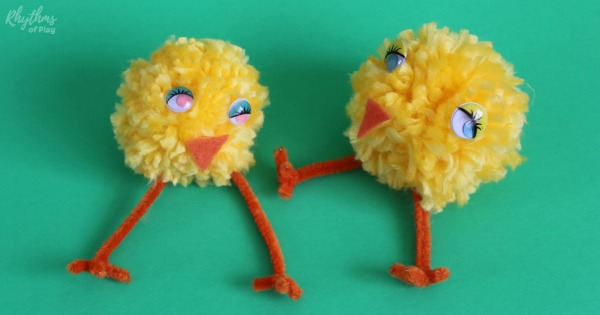
The craft supplies you use to make chick pom-pom crafts will determine the size and fluffiness of your pom-pom Easter chicks. The tiny baby chicks in the photographs are made with a fork and yellow cotton yarn, while the larger pom-pom chick crafts are made with a multi-function loom tool and chunky wool yarn. The small side of the multi-function wooden knitting loom tool makes a smaller DIY pom, while the larger side makes a bigger one.
You can also use your hand, or a few fingers, to make a yarn pom pom. Wrap the yarn around the base of four fingers, three fingers, or two fingers to make them different sizes. Making smaller and larger pom poms makes it possible to make fluffy yarn ball chick crafts with a larger body and a smaller head.
So the answer depends on your available materials, the type of pompom chick you want to create, and how large or small you want to make your chick crafts. Use the craft materials you like best to make your spring chick crafts look how you want them to. The step-by-step DIY instructions below provide instructions for several pompom chick options.
Step-By-Step DIY Pom-pom Chick Craft tutorial:
Read the instructions to learn how to make pom-pom baby chicks with attached chicken legs, with or without an ornament hanger, or a larger body and a smaller head. Each pom chick craft takes approximately 10 to 20 minutes to make. Scroll down to watch the video tutorial to see each step of this simple DIY pom-pom tutorial in action. The video tutorial shows how to make pom-pom chick crafts with a fork, but your fingers or a loom tool can be easily substituted.
1. Cut a pipe cleaner to make the chicken legs:
- Cut a 3-5 inch section of an orange pipe cleaner.
- Next, cut two more sections about 1 to 2 inches long.
- Fold the longest of the three sections into a “V” shape and set aside to use in step four.
- Set the other two cut sections of the pipe cleaner aside to make the chicken feet in step nine.
2. Cut a strand of yarn:
- Snip off a strand of yellow yarn about a foot or two in length.
- Place it in one of the following locations, depending on what you are using to make the pompom:
- Between the 2nd and 3rd tines (prongs) of a fork at their base.
- If using all four fingers, place the yarn between your middle and ring fingers (or between the two if using only two fingers) at the base of the fingers.
- Into the groove of a loom tool.
- This strand of yarn will be used to tie the pompom together in step 5.
3. Wrap the fork, your fingers, or a loom tool with yarn:
- Take a skein of yellow yarn (or make chick crafts another color) and lay one end of the yarn across the tines of a fork, your fingers, or place it on one side of a loom tool and hold it down with your thumb, as shown in the video below.
- Next, repeatedly wrap the yarn around the fork, your fingers, or the loom tool until you have a thick pad of yellow yarn.
- Snip off the excess yarn.
4. Tuck pipe cleaner legs into the pad of yarn:
- Place the tip of the folded “V” shaped pipe cleaner into the yarn so it sits between the strands of wrapped yarn.
- Pipe cleaners are sharp enough to break yarn when tied too close to them. So, it is best to ensure that the pipe cleaner legs are securely wedged under the yarn strands to keep the homemade pom from breaking and falling apart once it is tied together.
- Look at the video tutorial to see how we hide the pipe cleaner deep in the pad of yarn to keep it from cutting (or breaking) the yarn.
5. Tie yarn to create the pom-pom:
- Next, grab the section of yarn placed between the fork’s tines, at the base of your fingers, or in the groove of the loom tool, and wrap it around the yarn pad.
- Then, tie the yarn tightly while ensuring the pipe cleaner chicken legs are on either side.
- If you use your hands or fingers to make the yarn pom instead of a fork or loom tool, you may need to slide the yarn pad off them before tying it, or ask a parent, teacher, or friend to tie it for you.
- Tie the yarn once more to make a square knot.
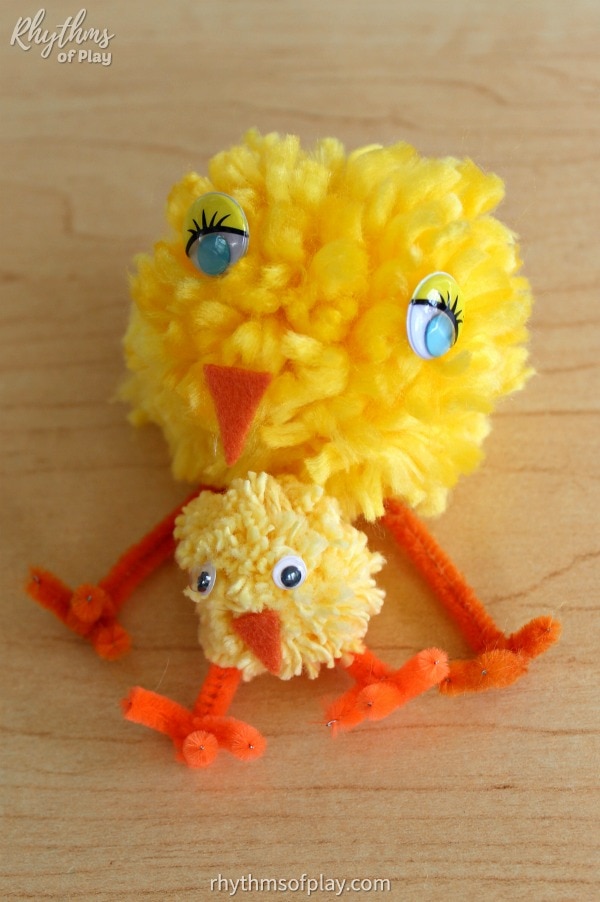
- Trim the yarn used to tie the pom together to make a simple chick craft, or leave it long to make this craft into a pom-pom chick ornament, or tie it to a larger or smaller pom pom to make a chick with a small head and a larger body.
- Baby chick ornaments look cute hanging on the Easter tree, Christmas tree, or even a rearview mirror!
6. Slide the yarn pad off, turn it over, and tie it again:
- Carefully slide the tied pad of yarn off the fork’s tines, your fingers, or the loom tool and turn it over.
- If you are using your fingers and have removed the yarn pad before making the first tie, flip it over and tie it again.
- Then, tie another square knot to secure the yarn loops in place.
7. Cut the yarn loops:
- Use a pair of sewing scissors or sharp craft scissors to cut the loops of yarn to make it into a pom-pom.
- Cutting the yarn loops with a dull pair of scissors is challenging. Sewing scissors make it much easier to cut various types of yarn.
- Leave the yarn used to tie the pom long if you want to use it as an Easter ornament hanger, tie it to a larger and smaller pom pom to make a chick with a head and body, or trim it off to make a single pom-pom chick craft.
8. Trim the yarn of the pom-pom chick craft:
- Next, give the pom-pom a haircut. Trim it with scissors so the yarn is all approximately the same length.
- Gently wiggle the pom of yarn around as you work to make it into a nice fluffy ball with a pair of baby chick legs sticking out of the bottom.
- Once again, you can trim the yarn you used to tie the pom together to make a simple pom-pom chick craft.
- Alternatively, leave it long to make it into a hanger for a pom-pom chick ornament or tie it to a larger or smaller pom pom to make chick crafts with a large body and a smaller head.
9. Make the chicken feet:
- Grab the pipe cleaner sections set aside in step 3.
- Wrap one section from the front to the back around the bottom of each leg to make the left and right chicken feet for each pom-pom Easter chick craft.
- Fold the pipe cleaners at the bottom of each leg to make feet, as shown in the video.
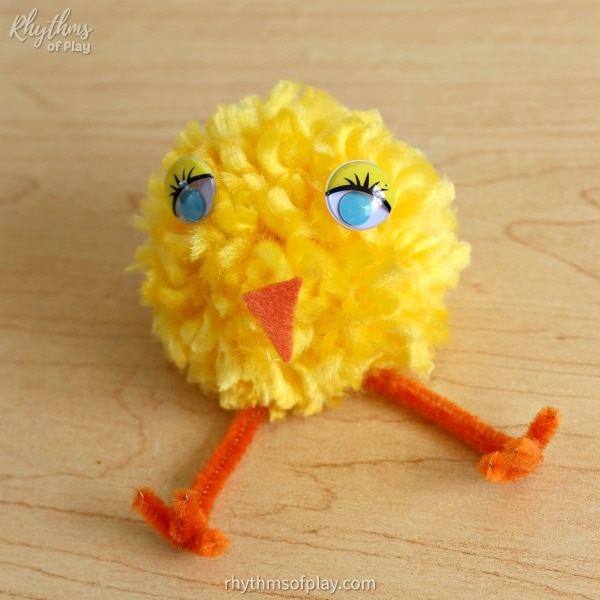
10. Glue the beak onto the pom-pom Chick:
- Cut a small orange felt triangle and glue it onto the pom-pom to make the baby chick’s beak.
- Alternatively, you can cut a small diamond-shaped piece of felt, fold it in half, and glue the back of the fold to the chick’s face so it has an upper and lower beak.
11. Put googly eyes on the baby Pom chick’s face:
- The googly eyes listed in the craft supply section are stickers that make putting them right on the DIY pom-pom easy, but the adhesive often doesn’t have enough sticking power.
- (Optional) Use additional craft glue or a hot glue gun to attach the googly eyes more securely.
Pom-Pom Baby Chick Craft Step-by-Step Video Tutorial:
The written DIY instructions above include the same steps as the video below. However, they are placed in a slightly different order to make it easy to make pom-pom chick crafts with your fingers, the wooden loom tool recommended in the craft supplies, or a fork, as shown in the video tutorial below:
Related: Fun Spring Activities
Baby Chick DIY Ornaments:
Pom-pom Easter chicks make a great candy alternative to put into Easter eggs and Easter baskets and use on egg hunts. And, as mentioned above, these cute baby chick pom-pom crafts can also be used as Easter ornaments, to hang on the Easter tree, or even on a rearview mirror!
In other words, trim the yarn used to tie the DIY pom-pom together to make it into a simple chick craft, or leave it long to use as a hanger to turn these cute pom-pom crafts into Easter ornaments, as shown in the photograph below.
Cute Baby Chick DIY Pom Pom Crafts:
This simple tutorial gives instructions on how to make pom-pom baby chick crafts and ornaments with attached legs. You may also like to try your hand at these cute pom-pom love bugs with attached antennas.
Pom-pom Easter chicks can be used as Easter Toys, cute ornaments, or a fun candy alternative that can be put into Easter eggs for Easter baskets and egg hunts.
For more ideas, look at cute baby chick crafts, Easter traditions, and fun spring activities for kids!
Learn more about Rhythms of Play HERE.
Spring Arts and Crafts Activities for Kids and Adults:
- Easy Bunny Craft
- Ladybug Magnets
- Felt Flower Crafts
- Hungry Caterpillar Craft and Toy
- Fingerprint Flower Magnets
- Flower Lei Necklaces
- Watercolor Rose Art
- Toilet Paper Roll Birdhouses
- Best Flower Art Projects
- Rainbow Arts and Crafts
- Real Flower Craft Ideas


Leave a Comment