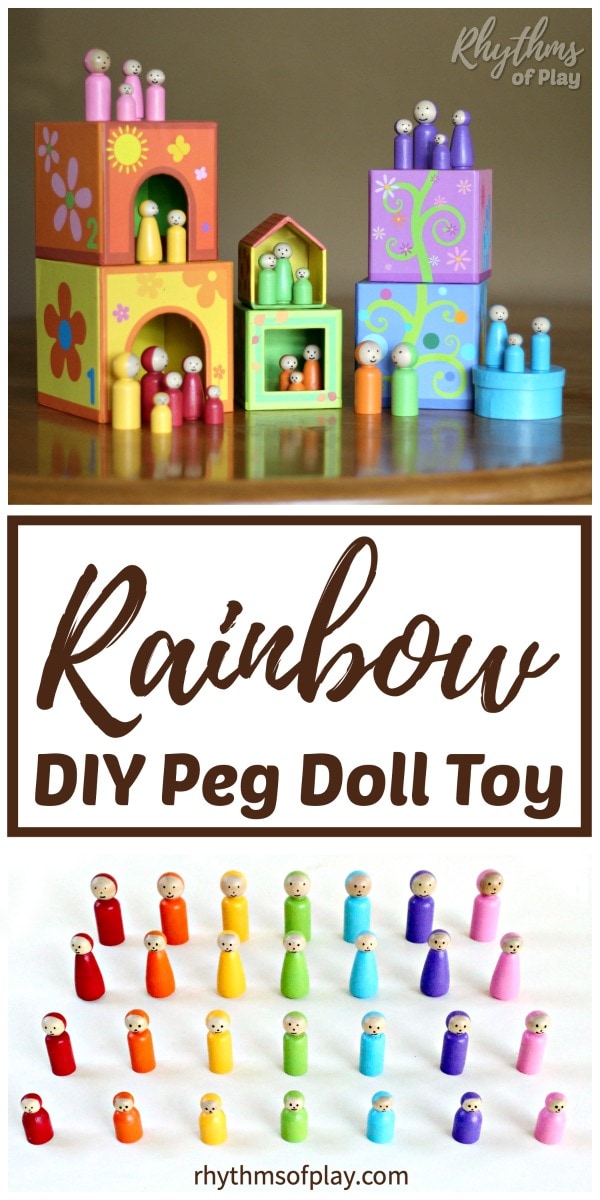
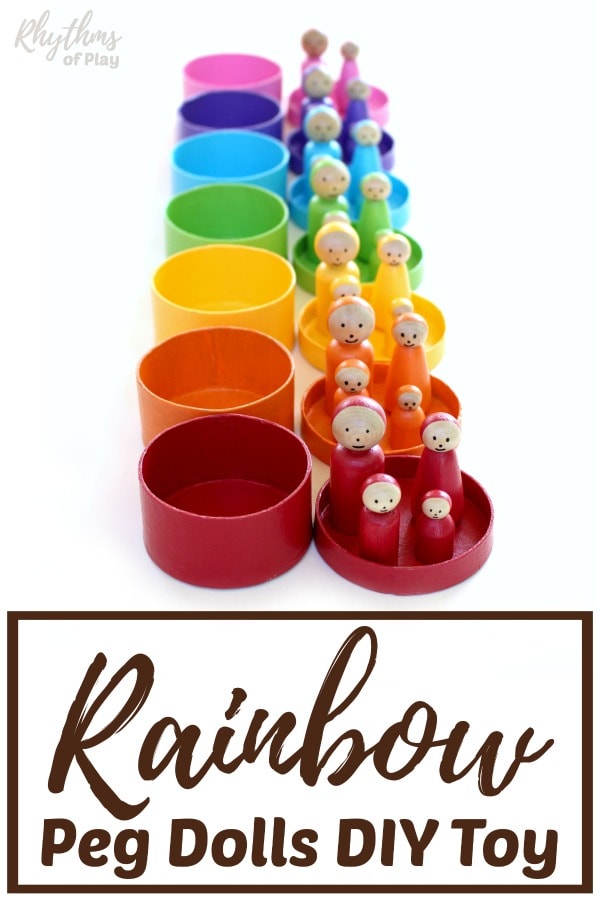
This fun rainbow craft is also a DIY Toy for kids! DIY rainbow peg dolls are a homemade toy that makes a great gift idea for Christmas or a child’s birthday.
Here’s a homemade wooden toy that you can make for, or with, your kids–Rainbow peg dolls! Children love to use their imaginations as they play with these cute little wooden peg dolls in a rainbow of colors.
Children commonly use handmade toys like these rainbow-colored wooden peg dolls for pretend or imaginative dramatic play and color matching games in Montessori and Waldorf education.
This set of handmade DIY rainbow peg dolls makes it super easy to set up as a color matching activity. Each box can act as a container for each colored peg doll family and double as a container for color matching. Or, have the kids match up the different body shapes for even more fun!
Related: DIY Rainbow Colored Wooden Blocks

Related: The Best DIY Building Block Sets for Kids
Rainbow Wooden Peg Doll DIY Project
My daughter and I are not fans of taking a paint color out multiple times for the same project, so we figured out a way to paint wooden peg dolls in a rainbow of colors that only requires you to get out each paint color once!
This makes it possible to make a whole set of rainbow wooden peg dolls in an afternoon or paint one color a day for a week to make a complete set of DIY rainbow peg dolls.
You’re welcome… We like easy! 😉
Related: DIY Rainbow Ringer Game For Kids
Rainbow Wooden Peg Dolls DIY Toy Supplies
- Wooden peg dolls (Contains enough peg dolls for this project and a few others listed below.)
- Small round paper mache boxes with lids
- Acrylic paint
- Incredible Nib
 or extra fine tip paint pens
 - Sealant
- Paintbushes

Note: The wooden peg doll set listed above has enough peg dolls to make homemade rainbow peg dolls toys for children, and you will have enough left for a few other projects. Try any of the other wooden peg doll crafts below!
More Wooden Peg Doll Craft Ideas
- Monarch Butterfly Peg Dolls
- Peg Doll Boats
- Acorn Peg Dolls
- Fall Fairies
- Winter Fairies
- Elf Ornaments
- Angel Ornaments
- Nativity Scene
Related: DIY Waldorf Square Geometric Puzzle
DIY Rainbow Peg Dolls Step By Step Tutorial
Please read through this step-by-step rainbow peg doll tutorial before you begin making your own homemade rainbow peg dolls. The steps listed below are designed to help you make rainbow peg dolls in the fastest and easiest way possible.
Use one paint color at a time as you progress through the following steps. Once finished with one acrylic paint color, repeat with the next paint color until you have made a complete set of DIY wooden rainbow peg dolls for kids.

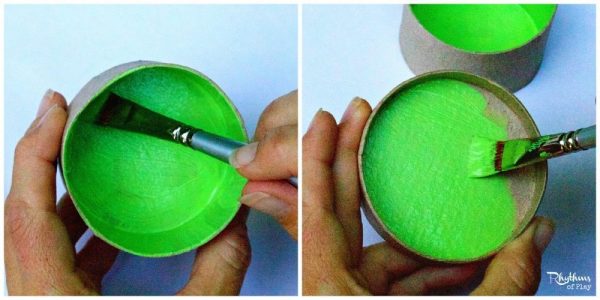
Step 1 – Choose a color to paint the inside of one paper mâché box and lid.
Painting paper mâché boxes with acrylic paint give them a vibrant color and make them MUCH sturdier.
Start making a complete set of rainbow peg dolls with matching color boxes by painting the inside of one box and lid with one paint color from the rainbow of colors you have selected.
Don’t paint the outside of the box yet. Trust us; there is a method to our madness… Read on to find out why!
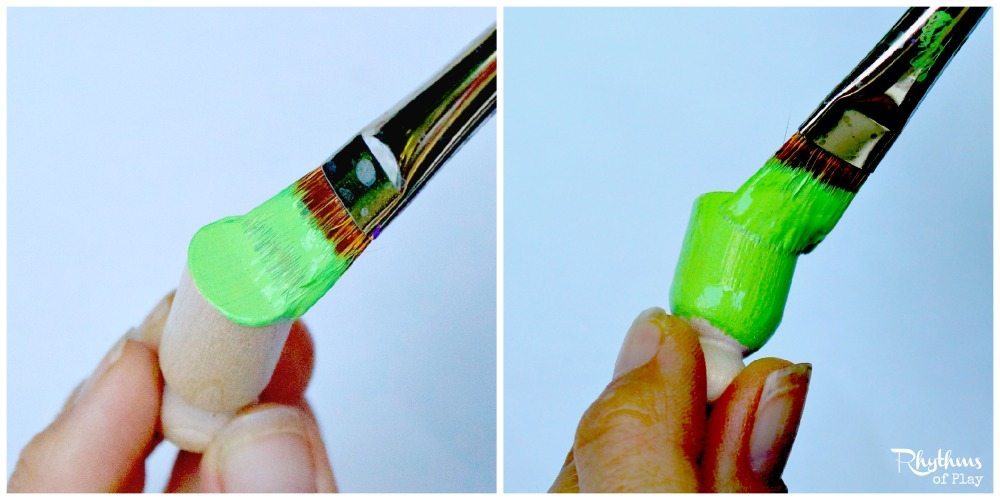
Step 2 – Paint the Wooden Peg Doll Bodies
Use the same paint color to paint one wooden peg doll family (mom, dad, kid, baby) the same color as the inside of the box you just painted.
Hold on to the head of each peg doll as you paint each peg doll from the bottom up. Do not paint the neck or the head of the wooden peg doll family yet. We will complete that step later. Next, paint the bodies starting at the bottom of each peg doll.
Once finished painting the body of each peg doll, the paint on the bottom should be dry enough to put it down on a piece of newspaper or scrap paper to dry. Move it slightly a minute or two after setting it down to ensure that it will not permanently stick to the paper.
Another option is to allow them to dry head down in an egg carton, but again, you will need to make sure the sides of the bodies don’t stick to the egg carton because they will still be slightly wet.
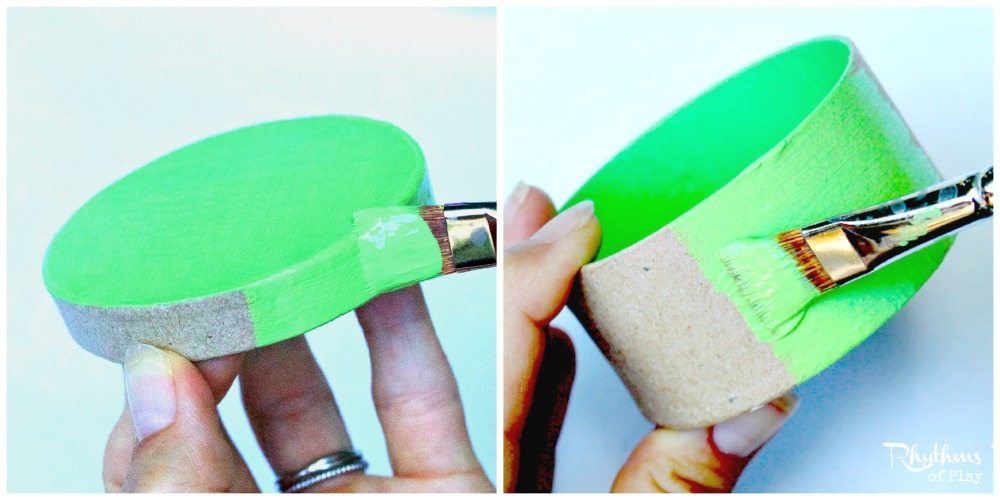
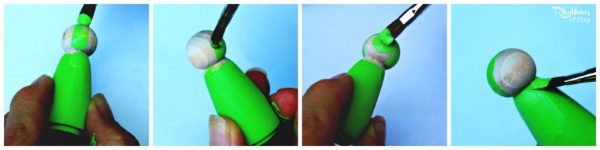
Step 3 – Paint the Outside of the Paper Mache Box and Lid
While the peg doll bodies are drying, paint the outside of the box and lid the same color… We did not paint the bottom of the boxes, and you don’t have to either!
Step 4 – Paint the head and neck of each peg doll in the same color family (mom, dad, kid & baby)
- Look at the head of each peg doll and decide where you would like the face to be.
- Paint a line from shoulder to shoulder right in the middle of the head. Don’t worry if your line is a bit messy, peg dolls always look better when finished than you think they will.
- Next, paint the back of head and neck.
- Carefully paint the neck under the face of the wooden peg doll.
- Clean up the line around the peg doll face to make it as nice as possible.
Step 5 – Touch up the paint on each of the peg dolls and matching boxes in the same color family.
If any areas on the box, lid, or wooden peg dolls need a little extra paint, touch them up before putting the acrylic paint color away and moving on to the next color.
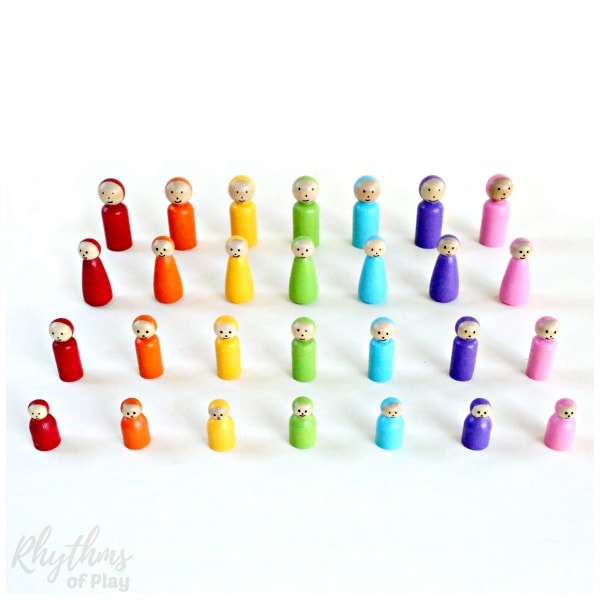
Step 6 – Repeat Steps 1 – 5 until you have a complete peg doll family and matching box set in every color
Complete Steps 1-5 until you have created a wooden peg doll family and matching paper mâché box set in every color before moving on to the next steps.
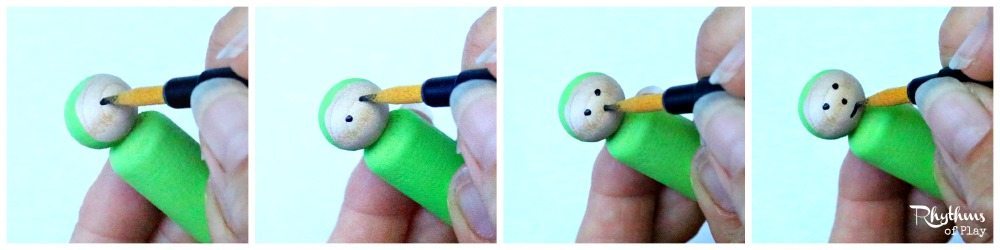
Step 7 – Paint the face of each peg doll craft (optional)
Please note: Faces are optional and are often left blank in Waldorf education to allow children the opportunity to give any emotion they wish to each doll. When there is no face, or the face is neutral, a peg doll can be happy, sad, angry, etc., and this can help children with social-emotional development as they learn through play.
If you would like to paint faces on your peg dolls, paint them all simultaneously. This will cut down on time it takes to make them because you will only need to get out your incredible nib and a spot of black acrylic paint
 (or a black extra fine tip paint pen
 ) ONCE!
Originally, we used a tool called the incredible nib to create simple neutral details on the face of each peg doll. An incredible nib is a pointed stiff painting tool that can be used as a paint pen after dip it into acrylic paint. You can also use an extra-fine tip paintbrush or an extra-fine tip black paint pen
 if you prefer.
How to Paint a Wooden Peg Doll Face
To make a simple neutral face for a peg doll, make a dot for each eye, a dot or an upside-down “U” for a nose, and a small straight line for the mouth.
8. Apply a Sealant to the inside of all boxes.
Use a foam brush to apply Mod Podge to seal and protect the paper mâché boxes that hold each peg doll family.
9. Seal and Protect Handmade Rainbow Peg Doll Bodies
Starting at the base of each wooden peg doll, use a foam brush to apply Mod Podge to the bodies of the rainbow-colored peg dolls. Hold the peg doll by the head to make it easy to paint them, and don’t worry about applying a sealant to the heads. We will get to that in step 11.
We used Mod Podge to seal and protect our homemade peg doll toys for kids. Mod Podge is a water-based glue and finish that goes on white and dries clear.
10. Apply a sealant to the outside of each paper mache box for each peg doll family
These cute little boxes become almost as solid as wood after they have been painted and sealed. While you wait for the bodies to dry, paint the outside of each of the paper mache boxes.
11. Last, apply a sealant to the head of each Peg Dolls
Paint all the heads of the peg dolls once the paint has dried on each of the wooden bodies. Why should you wait until step 11 to paint the head? We found it A LOT easier to paint the head when you can hold onto the body. This is why we paint them after the bodies have dried.
Related: Best Rainbow Suncatchers for Kids
Handmade Wooden Toy Dolls for Kids
Children love to use their imaginations as they play with these rainbow-colored handmade toy dolls for kids. DIY rainbow peg dolls are also super easy to set up as a color matching activity.
Each paper mâché box can act as a container for each peg doll family and double as a container for color matching activities. You can even invite the kids to match up the different body shapes for even more fun!
Learn more about Rhythms of Play HERE!
More Peg Doll DIY Toys to Make for Kids
- Monarch Butterfly Peg Dolls
- Peg Doll Boats
- Acorn Peg Dolls
- Fall Fairies
- Winter Fairies
- Elf Ornaments
- Angel Ornaments
- Nativity Scene
You may also like this awesome collection of easy rainbow art projects for kids (and Rainbow Crafts, Too!)!


Very pretty project, and I like the Monarch Butterfly idea also. Fun to get so much joy out of a few simple materials plus playtime!
I agree. I love it when I enjoy making something that my daughter enjoys playing with. Win/win 🙂
These are wonderful! I can see making these as Christmas gifts!
Thank you, I love how they turned out 🙂 They would make great gifts!
These turned out beautifully! Such vibrant color. Thanks for sharing at #WeLoveWeekends – I hope you’ll come back to share with us again this week!
This is so inspiring! My daughter would seriously love this!
Thank you! I’m so glad you are inspired by them. They are really easy to make they just take a bit of time. I found making them to be really enjoyable and quite meditative. Give it a try, your daughter will be so happy you did. I know mine is 😉
Do all the dolls completely fit inside the box closed?
Yes, Jennifer! All four dolls of each color fit inside each colored box. They close and stack beautifully!
Love the ideas! I was thinking of doing some myself but was wondering if mod podge is safe for a toddler that mouths everything?
Good question, Valene. I hear you loud and clear.
Mod Podge is non-toxic, but I don’t think it’s a good idea for toddlers that can’t keep things out of their mouths to suck on it on a regular basis. It may be best to wait until your child is not mouthing objects as much.
Nell