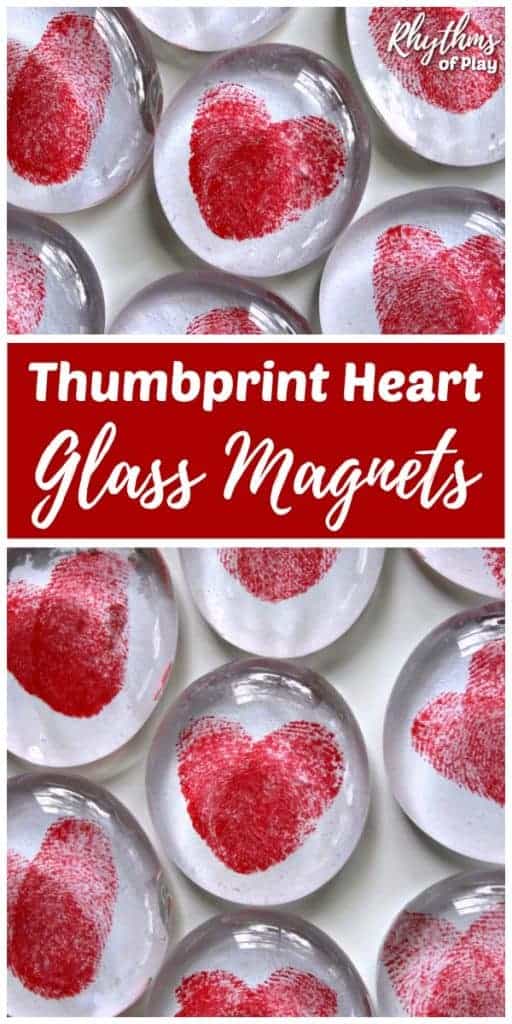
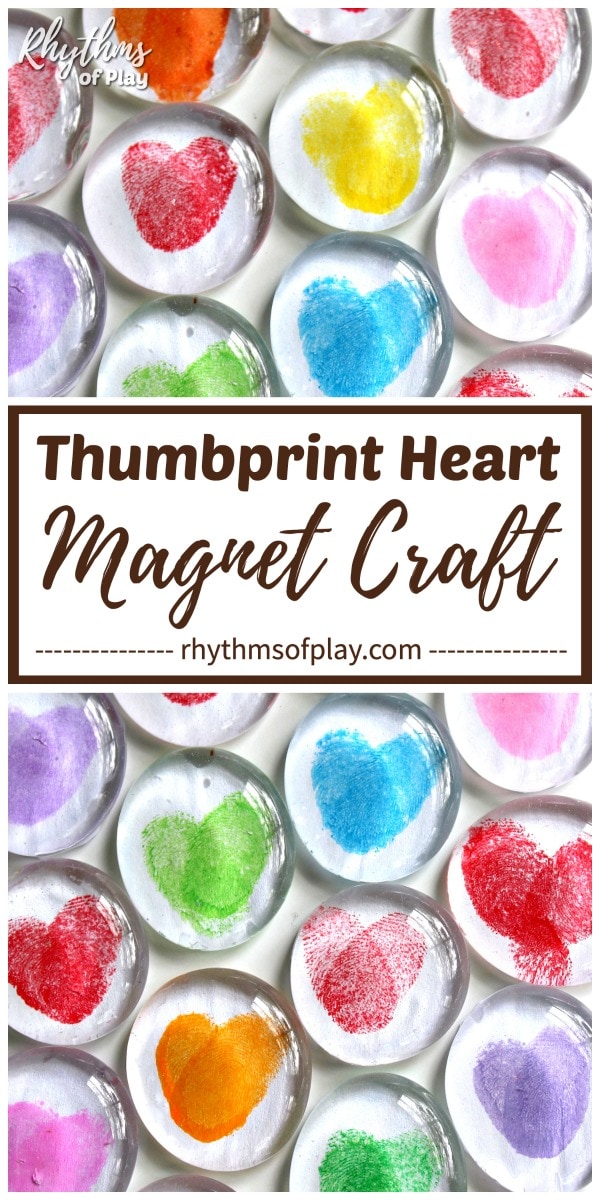
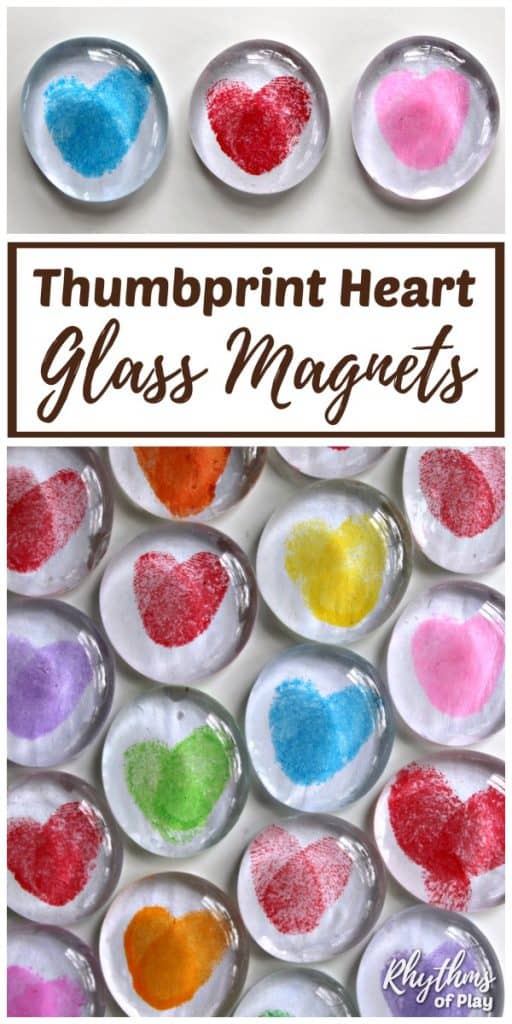
Thumbprint heart magnets are an easy heart craft and a homemade gift idea for kids or adults to make for friends, family, and loved ones. These easy glass gem magnet crafts with heart prints are perfect for Valentine’s Day, Mother’s Day, Father’s Day, Grandparents’ Day, Teacher Appreciation Day, anniversaries, memorials, and Christmas. Fingerprint heart magnets also make great homemade DIY birthday party and wedding favors!
DIY thumbprint heart magnets turn simple keepsake crafts into something you can use! Using just a few basic supplies, you can transform your children’s, students’, or your own thumbprints and fingerprints into tiny, cute, heart-shaped prints to display within glass button magnets for the fridge, lockers, magnetic calendars, and more! This heart craft tutorial is perfect for beginning to advanced artists and crafters of all ages and makes a great gift, keepsake, or rainy-day activity. You might also enjoy these beautiful homemade Gifts Kids Can Make.
Thumbprint Heart Magnets for Kids and Adults
Simple homemade keepsakes and heart crafts like these thumbprint magnets are always a favorite with friends and family. People of all ages enjoy making them as much as they enjoy receiving them. Fingerprint heart refrigerator magnets are an easy craft and a fantastic gift idea for Valentine’s Day, Mother’s Day, Father’s Day, Grandparents’ Day, Christmas, a wedding anniversary, Teacher Appreciation Day, or a birthday, for kids or adults.
For example, handmade keepsakes like these easy heart crafts make great classroom handout gifts for Valentine’s Day. DIY fingerprint magnets also make excellent homemade favors for weddings and birthday parties. Thumbprint heart magnet crafts can also be made to serve as a memorial and handed out as keepsakes to friends and family to remember or commemorate a loved one who has passed, at a celebration of life or a memorial service. You might also enjoy making fingerprint magnets with various creative designs, in addition to the heart prints shown in the photographs, for this easy craft tutorial.

The Original Fingerprint Magnets:
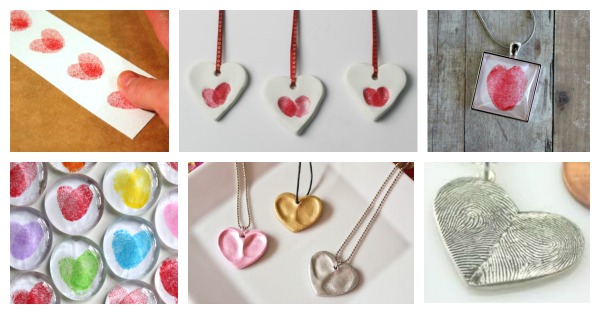
My daughter and I invented this gorgeous thumbprint heart craft idea when we made the first fingerprint art magnets to give to our family and friends for Valentine’s Day and Mother’s Day in 2017. A few fingerprint art ideas and creative glass magnet craft tutorials were available online at the time. There were also some adorable thumbprint heart craft tutorials. However, there weren’t any DIY tutorials for fingerprint- or thumbprint-themed magnets made with glass gems. So, I decided to create this step-by-step glass magnet craft tutorial for YOU!
I think they are one of the simplest yet most extraordinary craft inventions, and I’ll bet your kids will, too! Update: Unfortunately, several nefarious copycats have tried to claim my daughter’s precious artwork and our invention as their own. Fortunately, you have found the original photographs and craft tutorials for fingerprint heart magnets here in this post! Scroll down to learn how to make heart magnet glass gem crafts with children (or adults) at home or in the classroom. This fingerprint heart glass magnet craft tutorial is regularly updated to keep the content current. You might also enjoy painting watercolor surprise heart art.
Make Thumbprint Heart Magnet Crafts for Valentine’s Day, Mother’s Day, Father’s Day, Grandparents’ Day, Teacher Appreciation Day, or Christmas:
Once these easy crafts are finished, there are several creative ways to use these adorable decorative magnets around the home, office, classroom, or workplace. As mentioned, they also make gorgeous personalized gifts for a variety of occasions.
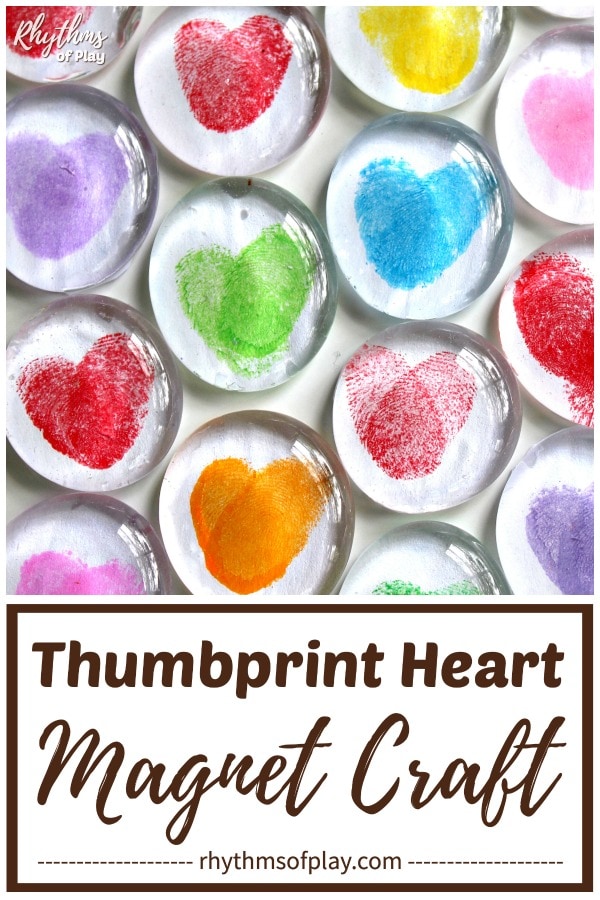
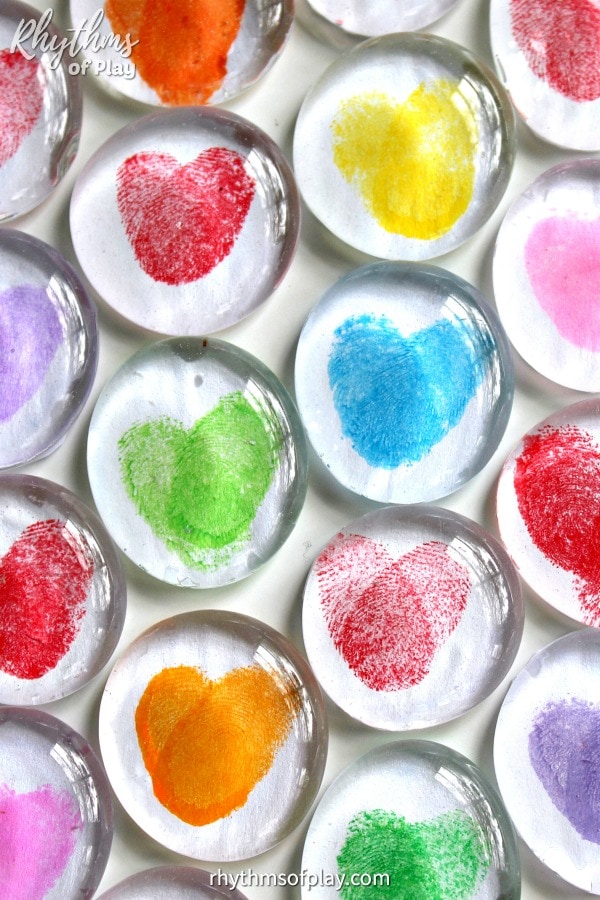
Fingerprint magnets can be customized in various colors, making charming gifts for loved ones, unique home decorations, and touching mementos. Scroll past the step-by-step craft project instructions and video tutorials below for fun ideas and unique ways to use these adorable homemade heart gems at the bottom of the post. You might also enjoy making these easy Heart Candle Holder Crafts.
How to Make Thumbprint Heart Magnets:
The step-by-step video tutorial and instructions below teach how to make thumbprint magnets. Fingerprint and thumbprint heart glass magnets are delightful, personalized crafts, perfect for creating keepsake gifts or decorative items for friends and relatives. These brief how-to instructions will give you an overview of these simple fingerprint crafts. To see the complete step-by-step fingerprint heart magnet craft tutorial, scroll past the video tutorial below the craft supply list in the next section.
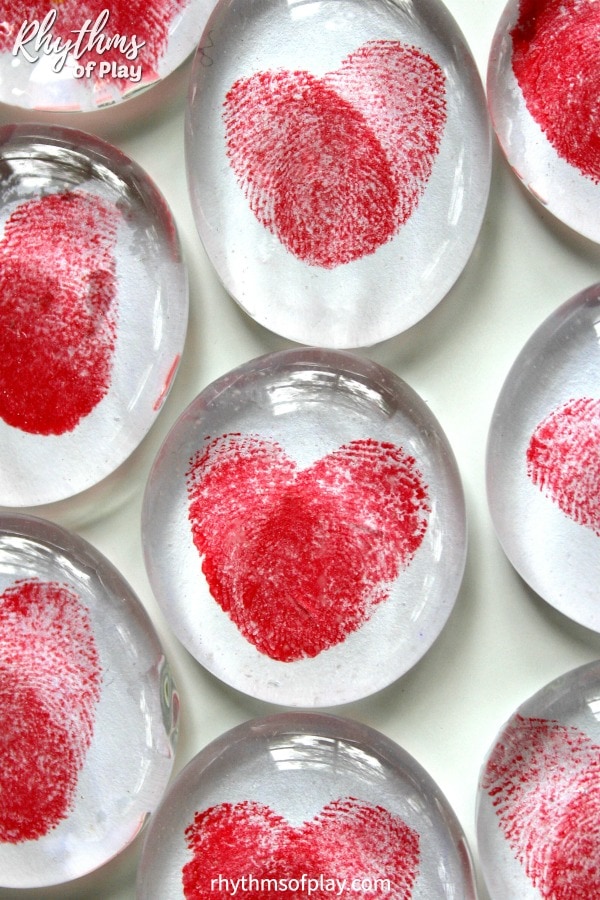
First, select large, clear glass gems, cabochons, flat-backed marbles, or floral stones that are not covered with any iridescent film or coating. (These glass stones are typically available at hobby, floral, dollar, or craft stores and on Amazon.) Ensure that the glass gem is large enough to fit over the thumbprint or fingerprint hearts. Next, press your thumb (or finger) into a non-toxic, brightly colored fingerprint ink pad (or lightly brush with acrylic paint), and then stamp it onto a piece of paper to create a thumbprint or fingerprint heart.
Making a heart out of thumbprints is easy. To form the heart shape, stamp two thumbprints (or fingerprints) at a slight angle to each other. Overlap the thumbprints at the bottom and ensure they are slightly apart at the top to create the two upper lobes of the fingerprint heart. Once the ink or paint dries, apply glue or adhesive to the flat side of the glass gem, then attach the stone to the heart print. When the glue is dry, attach a small round ceramic magnet to the back of the glass stone to complete the fingerprint heart craft. Now that you have a basic idea of how to make fingerprint heart magnet crafts, gather the craft supplies in the next section. Then watch the video tutorial, and read through the step-by-step directions for more detailed instructions.
DIY Fingerprint Heart Craft Supplies:
To make the thumbprint magnets in the photographs, gather the fingerprint heart craft supplies from the list below to make these precious heart gems. Then use the video and complete the step-by-step thumbprint heart magnet craft tutorials below to understand better how to make them for Mom, Dad, Grandma, Grandpa, siblings, friends, your favorite teacher, extended family, and other relatives. You might also enjoy this list of thumbprint heart crafts, which includes several other heart craft ideas and DIY projects you can try.
- Cardstock: Bright white, heavyweight paper works best for fingerprint magnets.
- To pre-cut paper circles for thumbprint magnets, use a circle cutter or a precision knife on a cutting mat to trace the glass stones.
- Acrylic paint and a small paintbrush or fingerprint ink pads.
- Extra-large clear glass gems (without any iridescent coating or finish).
- The glass stones used to make these crafts are also called flat-backed marbles, cabochons, glass floral stones, glass buttons, or glass domes.
- Small detail scissors or big kid scissors for crafts.
- Mod Podge glue, B6000 adhesive, or another clear-drying white PVC glue, and a foam brush. (Glues and adhesives can ruin your regular paintbrushes.)
- Craft magnets: Small, round ceramic magnets work best.
- Or purchase round clear glass gems and magnets together –> HERE!
- Please note: These glass gems are perfectly round and smaller than the extra-large clear glass gems recommended for this thumbprint heart craft above. Thus, they may not fit over your thumbprint heart prints. However, they might work if you use your pinky finger to make the heart prints.
How to Make Thumbprint Heart DIY Glass Magnets Step-by-Step Video Tutorial:
Watch the video tutorial below to see how my daughter and I make the thumbprint heart magnets shown in the photographs. You will notice that we used fingerprint ink pads to make the thumbprint heart magnets in the video and pictures for this DIY tutorial. You can also lightly brush acrylic paint onto fingertips to make them, but I recommend using it sparingly if you do. Large blobs of paint will create too much dimension or texture for the glass gem to sit flat and adhere well to the thumbprint heart art. Below the video tutorial are more detailed step-by-step instructions for making these fingerprint heart crafts.
Related: Slow Falling Hearts Sensory Bottle
Thumbprint Heart Magnet Craft Step-by-Step Directions for Kids and Adults:
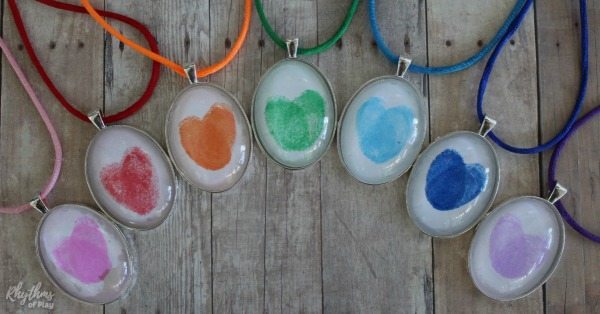
Use the step-by-step directions and how-to tips below to make fingerprint or thumbprint hearts into glass gem magnets. Alternatively, you can make thumbprint necklaces (photo below) or thumbprint keychains using a similar craft process. Please scroll down for detailed directions to make fingerprint heart magnet crafts with glass gems or floral stones. You might also enjoy this list of thumbprint heart craft ideas; it contains even more handmade keepsake gift ideas for kids (and adults).
1. Prepare the surface to make thumbprints and fingerprints:
- Choose a flat surface to create thumbprints or fingerprints in heart shapes.
- Bright white cardstock works best.
- Other papers are usually not thick enough to withstand making fingerprint magnet crafts.
- The glue can often blur fingerprint art if the paper is not strong enough.
- Optional: Precut cardstock circles to match the size of the glass stones before starting this simple craft project.
- If you are a teacher making these thumbprint crafts in the classroom, I recommend precutting paper circles to speed up the crafting process.
- Use a pencil to trace the glass stones and cut them out.
- Alternatively, you can use a precision knife with a cutting mat to trace glass gems and cut them out, or use a handy circle cutter to pre-cut cardstock circles.
2. Apply ink or paint to thumbs or fingers to make heart prints:
- Press your thumb or finger into a fingerprint ink pad, or use a foam brush or a small paintbrush to lightly brush a small amount of acrylic paint onto the fingertips or thumbs to create thumbprint art.
- Thumbprints make larger heart prints, index or pointer fingerprints make medium heart prints, and pinky fingers make the smallest heart prints.
- Please note: My daughter and I used fingerprint ink pads to make the heart gems in the photographs for this fingerprint magnet craft tutorial. However, a small amount of acrylic paint also works well for making fingerprint art prints.
3. Make thumbprint or fingerprint hearts:
- Stamp fingerprints or thumbprints to make small heart shapes that fit under glass stones or gems.
- How to make a heart out of thumbprints or fingerprints: (Step-by-step instructions to make fingerprint or thumbprint heart art prints for magnet crafts):
- Press the thumb (pointer finger or pinky) onto bright white cardstock with a lot of ink (or a small amount of paint), as shown in the video tutorial below.
- Use the tip of your pointer finger or pinky to make smaller heart prints, and your thumb to make larger heart prints.
- (Optional) Press your thumb (or fingertip) into a finger ink pad to reapply the ink or paint (if needed) before completing the other side of the heart print.
- Tilt your thumb (or finger) slightly and press it on the paper to complete the thumbprint or fingerprint heart.
- Ensure that the two thumbprints (or fingerprints) are placed at a slight angle to each other.
- This will create the two upper lobes of the heart and a rounded point at the bottom.
- Press the thumb (pointer finger or pinky) onto bright white cardstock with a lot of ink (or a small amount of paint), as shown in the video tutorial below.
- Repeat the steps above to make several more fingerprint hearts.
- If you make the art prints onto a single sheet of cardstock instead of pre-cut paper circles, leave at least two to three inches of space between each thumbprint heart print on the paper, as shown in the video tutorial below.
- Please ensure the thumbprints or fingerprints are dry before moving on to the next step.
4. (Optional steps) Use a permanent marker to draw simple faces, designs, And Write Names on the fingerprint hearts before gluing them to the glass stones:
- My daughter used a permanent marker to make faces on these thumbprint heart crafts.
- Leave them plain if you don’t want your thumbprint heart crafts to have faces or other hand-drawn designs.
- It is also optional to write the child’s name or initials somewhere on the front or back of the thumbprint heart print. This is especially helpful and recommended when working with more than one child.
- If you write the name on the back, ensure it is in small print at the top so it is visible when the magnet is glued on in step 6.
5. Glue a glass gem on top of each fingerprint heart:
- Place a drop of clear-drying glue or adhesive on the flat side of the glass gem.
- I don’t recommend using hot glue to attach the glass stone, as it doesn’t adhere well to glass gems. In my experience, hot glue often detaches from the glass cabochon gem over time, and the fingerprint-magnet craft eventually breaks apart.
- A little glue or adhesive goes a long way. Please don’t use too much; it can smear the thumbprint heart (especially if you use fingerprint ink) and blur it.
- If you use B6000 adhesive, please do so outdoors or in a well-ventilated area. It emits toxic fumes that children and sensitive individuals should avoid.
- Next, press the glass gem, flat-backed marble, cabochon, or stone onto the fingerprint heart (glue side down) to attach it to the paper with the thumbprint heart.
- Press down on the glass gem, slightly twist it to distribute the glue evenly, and remove any air bubbles, as shown in the photograph (and video tutorial) below.
- Ensure the glue is dry before moving on to the next step.
- Allowing the glue to dry overnight is best, but these easy crafts can be rushed if necessary:
- Scroll down to read the comments below the post for my suggestions to teachers who have made these heart gem crafts in the classroom with their students for Valentine’s Day and Mother’s Day.)
- Allowing the glue to dry overnight is best, but these easy crafts can be rushed if necessary:
5. Cut away the remaining paper from each Fingerprint heart craft (If needed):
- Once the glue is dry, use a small pair of scissors to trim and cut away the excess paper around the glass gem or stone, as shown in the video below.
- It doesn’t need to be cut perfectly.
- If the paper lifts slightly from the glass gem while cutting, you can glue it back down in the next step, as shown in the video tutorial below.
- This step might be unnecessary if you have already made and used pre-cut cardstock circles for fingerprint heart magnets. However, even pre-cut circles may need a snip or two to trim any excess paper around the edges of the glass dome.
6. Glue a magnet to the Back of the Glass Stone or Gem to complete each thumbprint heart magnet craft:
- When the glue is dry, attach a small magnet to the back of the glass stone or gem:
- Use a foam brush to apply clear-drying glue or adhesive to the back of the glass gem with the thumbprint heart art attached, as shown in the glass gem magnet video tutorial.
- Paint the edges of the paper with glue to ensure it adheres completely.
- Place a magnet on the back of each glass gem and allow the thumbprint heart magnets to dry overnight.
Related: Heart-Shaped Scavenger Hunt
Fun Ways to Use Thumbprint Art Glass Magnets:
Once completed, glass magnet crafts like fingerprint magnets with different seasonal symbols or characters, and these sweet thumbprint hearts offer a multitude of creative and practical uses:
- These charming magnets can adorn refrigerators, filing cabinets, or magnetic boards, adding a personal touch to kitchen decor while holding notes, recipes, or children’s artwork. Fingerprint flower magnets are equally lovely.
- DIY magnet crafts also make unique, handmade gifts for friends and family, especially when you personalize them with specific colors or designs, such as team colors for favorite sports teams or for teammates at the end of the season.
- Personalized keepsakes like these easy heart crafts make excellent Valentine’s Day handouts for friends and classmates, as well as homemade wedding and birthday party favors.
- Thumbprint magnets also make touching keepsakes for young and old alike, whether you make these mementos with toddlers, preschoolers, and kindergarteners to remember their tiny hands and fingers once they are grown, or the prints of an ailing loved one to give to family and relatives at a celebration of life, memorial service, or funeral.
- In an educational setting, teachers can use heart magnets as fun, engaging tools for classroom activities such as organizing schedule boards, highlighting student work, or teaching basic math concepts to young children.
- Fingerprint art glass magnets also make a great addition to a home office or homeschool setup, brightening workspaces while helping to organize papers and calendars.
- For those who enjoy selling handmade items, glass magnet crafts are popular at craft fairs or online marketplaces. They offer a creative outlet and potential income.
In essence, glass magnet crafts, such as these thubprint heart magnets made with large glass buttons, combine aesthetics with functionality. This makes them versatile additions to any space. Happy heart crafting!
Related: Easy Heart Sewing Projects for Beginners
Thumbprint Heart Craft Gift Idea for Kids and Adults:
Thumbprint heart magnets are a fun craft and gift idea that friends and family will LOVE! Each one is unique, making it a special reminder of the person who created it. Whether you keep them for yourself or share them with someone else, these handmade magnets are a creative way to show loved ones how much you care.
Heart magnets are an easy gift idea that kids can make. Mom, Dad, and grandparents cherish handmade gifts from their children and grandchildren. Each thumbprint heart magnet captures a moment in time and gives children a sense of pride in creating something heartfelt for parents, grandparents, teachers, and friends.
The endless color and design options make it easy to adapt this heart art activity to different ages and themes. Best of all, making these heart crafts creates lasting memories and a handmade reminder of love. You may also like DIY Photo Necklaces or these other unique DIY gifts for him or her.
If you enjoyed this DIY gift tutorial, please visit our ultimate family gift guide. It includes several more DIY and ready-made gift ideas for the whole family, as well as homemade gifts kids can make. Or scroll down to see a few more heart crafts you might enjoy.
Learn more about Nell Regan Kartychok, author, photographer, and creator of this original craft, and Rhythms of Play HERE!

More Fingerprint Heart Art and Craft Ideas for Kids and Adults:
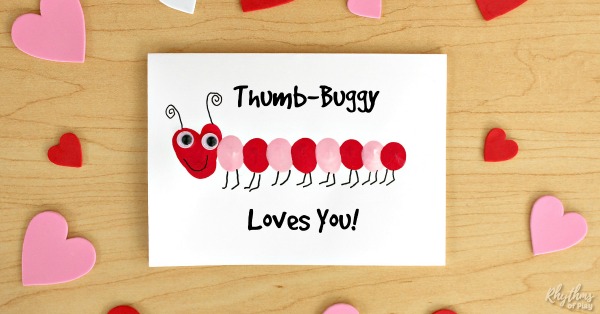
Make Thumb-Buggy fingerprint love bug cards to accompany your thumbprint magnets. We have even provided message ideas for Valentine’s Day, Mother’s Day, and many other occasions.
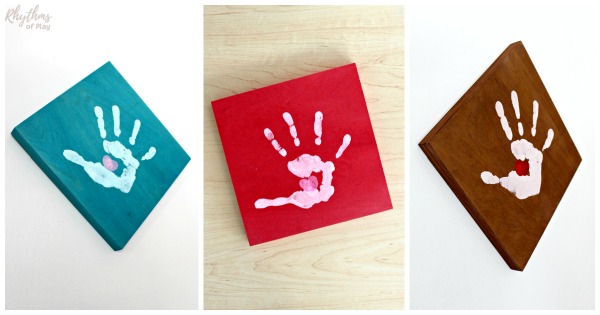
Another fun thumbprint heart craft is handprint art keepsakes. This homemade thumbprint craft is a great gift idea for parents and grandparents. As you can see in the photograph below, a thumbprint heart is sitting in the palm of each handprint craft.
Or scroll through these thumbprint and fingerprint heart crafts and gift ideas that moms, dads, and grandparents will love! The cute heart craft ideas and suggestions on this list each include complete step-by-step instructions and are fun to make with children from toddlers to teens at home or in the classroom. Best of all, most of them make great handmade gift ideas.
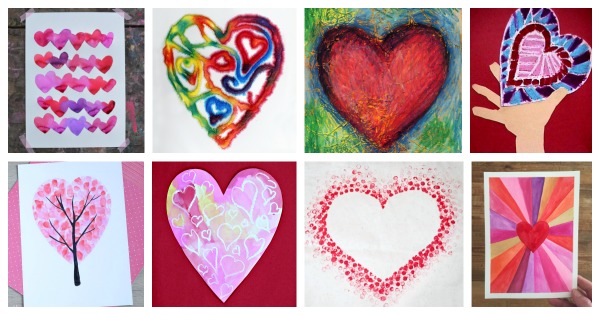
Heart Art Projects and Painting Ideas for Kids and Adults:
Pop over to look at this gorgeous collection of heart art! Or, gather inspiration from these Valentine’s Day art projects and painting ideas. Click on either link to see them all!
More Heart Crafts and Gift Ideas for Kids and Adults:
Check out the ideas below for even more heart-themed craft gift ideas and projects for kids (from toddlers and preschoolers to teens) and adults!
- Love Bugs Heart Craft
- DIY Heart Leaf Lanterns
- Personalized Heart Candle Holder
- Quadruple Heart Candle Holder
- Easy Heart Sewing Projects for Beginners
- Heart with Celtic Knot Woodburn Tutorial
- Salt Dough Heart with Handprint and Footprint
- Tissue Paper Decoupage Heart Picture Frame
- Heart Tree
- Surprise Heart Art Painting
- Hanging Heart Suncatcher Prism
- Heart Art Salt Painting
- Slow Falling Hearts Sensory Bottle
If you Enjoy Making Heart Magnets, You Might Also Like:
- Love Birds Sewing Tutorial with Free Printable Pattern
- Fingerprint Art Magnets
- How to Make a Fairy Garden Step-by-Step Tutorial
- 15 Backyard Pallet Projects with Step-by-Step Tutorials
- Heart-Shaped Nature Scavenger Hunt


I love this it is so neat! Where did you find the gems? Are they the ones for floral?
Thank you Desiree! Everything you need to know is listed in the materials section above, with links to all supplies 🙂
I tried this over the weekend and all the glass gems came off. They came completely off the glue, cleanly. I’m so upset after spending hours doing the thumbprints with my daughter. I followed the directions and even tried two types of glue (an all purpose craft glue and mod podge) and two types of paper. Any suggestions?
I am so sorry that you have had so much trouble, Jessica!! I would be upset too! That’s not what we experience at all when we make thumbprint heart magnets and we have made them several times. We used cardstock and Modge Podge. Maybe you used too much Modge Podge, or maybe the glass gems needed to be washed first because there was something on them? I’m at a total loss!
What type of paper were you using? I am thinking gloss or coated paper may not allow the glue to stick properly?
Hi Jennifer!
We have learned that cardstock works best to keep the thumbprint heart looking good with all of the glue smeared on the top and bottom of it. I don’t think that glossy paper would work well either. The cardstock we used is listed in the supply section. 🙂 Happy crafting!
My kindergarteners made these for Mother’s Day! Probably the easiest and best gift I will ever send home! Their mothers are sure to keep these magnets forever! Thanks for sharing!
Thanks, Shellie! I’m so glad that thumbprint heart magnets were easy to make, and, the best gift you have ever sent home!! Hearing that makes my day!
Hello Nell!! I absolutely love this craft, what a wonderful idea! I made them yesterday afternoon using 160gsm card and mod podge and let them dry overnight. They are fully stuck on but you can still see some white mod podge residue – is this likely to disappear in the next few hours, do you think? Because I would have thought that come this morning they would be fully dry!
Kind regards,
Shibani
Hello Shibani!
I’m so glad that you enjoyed making thumbprint heart magnets! It should disappear??
Sometimes the glue can take a while to dry depending on how much was used. This is why we find it best to use a very small drop of Mod Podge squeezed between the thumbprint heart and the glass gem. A little goes a long way!
Blessings,
Nell
Thank you so much for the swift response, Nell! Very impressed ☺️ I did use the same amount as per your video so I am not sure why that happened 🙁 I even re-did them by brushing an even smaller amount of Mod Podge (matte) on and it did the same think and some of the brush marks were still visible.
I did, however, use a light cream card – do you think that would have made a difference? I am now re-doing them using white card taken from an old greeting card to see if that works better
Kind regards,
Shibani
Hi Shibani!
Yes, using white instead of cream should work much better for this fingerprint art craft. I am wondering if you tried it yet, and how your fingerprint magnets turned out?
Nell
Hi! Did you use Mod Podge gloss or matte? You can see the Mod Podge (dried and splotchy) on mine. I tried another with barely any Mod Podge, and it still had the same effect. Just curious! Thanks.
Hi Maria,
Great question! We used gloss because I wondered if matte would make the fingerprint art magnets look a bit hazy. Did you use matte?
I came across your idea on Pinterest. I loved your idea so much and thought it was so well put together I added it in my post of “70 plus Super Easy Valentine’s Day Crafts To Do With Your Kids.” Thank you for giving my readers, and I, something easy and fun to do with our kids this Valentine’s holiday!
Thank you, Starr! I’m so glad that you like our Thumbprint heart magnet crafts and decided to include them in your round-up of Valentine’s Day Crafts! I hope your readers enjoy it!
Nell
Hi Nell!
Thank you for posting this cute idea. I plan to do it in a few days for my son’s Valentine’s Day party as a keepsake to take home. We only have 75 minutes for kids to complete and let dry. I plan to stay and glue on the magnets later, but am wondering how long it typically takes the modge podge to dry? My materials haven’t arrived yet, so I can’t experiment beforehand. I’m curious if I were to bring a blow dryer, if this may help speed up the drying time? I’m hoping to glue the magnets so they can take them home that day as we head off to mid-winter break.
Last question, do you think a glue gun would work best/dry quicker to attach the magnets or have you had good success with the modge podge glue keeping a good hold? TIA 🙂
Hi Desiree!
Excellent questions!
Here are a few ways to make it quicker.
First, cut small circles of cardstock about the size of the glass gems.
Next, invite the kids to make a thumbprint heart on the cardstock circle. The fingerprint ink only needs about 5 minutes to dry, just make sure they don’t smudge before putting Mod Podge on them.
Use the smallest tiniest drop of Mod Podge for quicker drying time, and press the glass gem down firmly in order to squeeze all of the air bubbles out and allow the glue to distribute evenly under the glass gem in order to attach it firmly to the cardstock.
Allow them to dry for as long as you can. I know you don’t have long. 🙂
Finally, paint Mod Podge on the back to add the magnet or try a glue gun as you suggested.
Good luck! I hope they can dry quickly enough!
Nell
Thank you for all of your input! I will experiment and cut out some pieces beforehand. 🙂
You’re welcome, Desiree.
I hope they work and dry quickly… Good luck!
I found Thumbprint Heart Glass Magnets (VIDEO) very helpful. Thank you for this fun craft idea!! 🙂
Thank you, Savanna! I’m so glad that you enjoyed this fun thumbprint heart craft and gift idea!
Do you think that acrylic paint would work instead of an ink pad?
Great question Julie! Acrylic paint would work. The fingerprints will be a bit sloppy, and the thumbprint heart art a little less defined, but it will totally work! Just make sure that you wait for the thumbprint hearts to dry completely before gluing the glass gems on top. Happy crafting!
Hi. Like another poster – we have limited drying time! Curious if we could attach the paper to the magnet ahead of time? Then in class, only need to do the ink thumbprint and glue it to the glass. Let me know if you’ve tried this before.
Thanks!
Hi Catherine, glad to know that you have already read the quick crafting tips I gave to another reader with the same problem in the comments above. 😉
I think it would work to attach the paper to the magnet first, but I have never tried it. It might be helpful to have another person hold the magnet from underneath while each child stamps their heart. Otherwise, it may slip and mar the fingerprint heart. After giving it some thought, I’d say go for it–give it a try–it will most likely work!
Good luck and happy thumbprint heart crafting,
Nell
Hi, I keep looking for the actual directions to make the marble fingerprint craft but I can only locate the items list. Where do I find the actual step-by-step directions on how to make them?
Feeling real dum… 🙂
Hello Juanice, I’m sorry that you are having trouble finding the instructions to make the fingerprint magnets. The step-by-step written instructions and video tutorial sharing how to make them are in THIS POST (click the link to go straight to it) below the descriptions of the types you can make and the video tutorial. Scroll past both to read the written instructions. It looks like you clicked the link to the thumbprint heart magnet tutorial instead of scrolling past it for the directions to make fingerprint art magnets. I hope that makes sense! Happy holiday crafting!
They are there. It is just a little difficult to read because it isn’t separated out like a “recipe” would be. Instead of being able to print one simple set of instructions from start to finish, you have to print the entire blog and then go through and sort it out.
Hi Tiffany, The instructions are clearly printed in step by step format. The video tutorial helps anyone that needs a quick how-to, while the instructions answers any questions people may have. I wanted to insure this thumbprint magnet craft tutorial is a helpful resource for everyone! I start with brief instructions so fingerprint magnet crafters have an idea of what to do before going through the detailed step-by-step instructions. The instructions provide several options depending on the craft materials you have available, who you are making them with, and what you plan to do with them because I wanted to make it easy for anyone to make these simple crafts they way they’d like to. When the instructions were simple, I received lots of questions, so I decided to make the instructions as comprehensive as possible.
I did these with my sons kindergarten class and they seemed to really enjoy this! Thanks for the great idea!
You’re welcome, Amanda! I’m so glad you were brave enough to make thumbprint magnets with a class of kindergarteners. Well done!
I plan to do this craft in Sunday School class on Sunday. I made a sample last night and it turned out great. I designed the cardstock round discs on my Cricut machine and cut out 42 per page (1.1 inches each). Perfect size to fit the marbles. I will clean the marbles with alcohol prior to class.
The only thing I worry about is there is not much wait time for it to dry completely but it will hopefully dry between class and end of church. Thank you for this cute idea.
Well done, you sound ready to go Wanda. I’m so glad that you are making this craft with your Sunday School. Since you have already cut the paper, you can put them together a bit faster. I would recommend allowing the fingerprint art to dry 5-10 minutes before gluing it to the glass gem so it doesn’t smear. Once you glue the flat side of the gem on the artwork, give it about 10 to 20 minutes to dry (longer if you can) before gluing the magnet to the back. Waiting until the paper can no longer move is ideal, but do what you can. And finally, advise everyone to handle them with care when they transport them until they are able to dry completely. Good luck!
Where is the video?
Hi Shelly, the step-by-step video tutorial that shows you how to make thumbprint heart magnets is posted below the written instructions. Happy magnet crafting!
Curious if it would work with hot glue?
Hi Laurie,
That is a difficult question to answer, because the answer is both yes and no. You can use hot glue, but there are several reasons it won’t work as well as the glues and adhesives recommended. Hot glue is difficult to work with, it will turn yellow over time, which will obscure the art, and it is likely to detach and break apart, as crafts made with hot glue so often do. Especially glass crafts, hot glue has a difficult time staying attached to glass. So yes, you can use it to make thumbprint heart magnets, but it is not the best choice. Happy Thumbprint heart magnet crafting!
LOVE THIS! I’ll be making these with my nursery babies for their parents for Mother’s/Father’s Day.
Thank you for such great directions, video, supply list and follow up. I also thank those who tried the project and gave their input.
I’m so glad you appreciate this thumbprint heart craft idea and everything included. I was chuffed beyond belief when my daughter and I invented these simple glass gem crafts many moons ago. The thumbprint heart magnets we made still adorn our refrigerator, filing cabinets, and magnetic white boards. It fills my heart with joy and lights me up each time I see these simple crafts made by her and others. Thank you for making even more to touch the hearts of the mothers and fathers of the babies you care for. Happy thumbprint heart magnet crafting!
What size are the gems for fingerprints? Are they 1″ in diameter?
Hi Dee, great question. I used the extra large clear glass gems that are slightly larger than an inch to make the thumbprint heart magnets in the photographs. The bigger the better. Smaller glass gems often don’t have enough room for the fingerprint hearts to fit underneath, but prints can be made smaller (use your pinky finger instead of your thumb) to fit when needed. Happy magnet crafting!