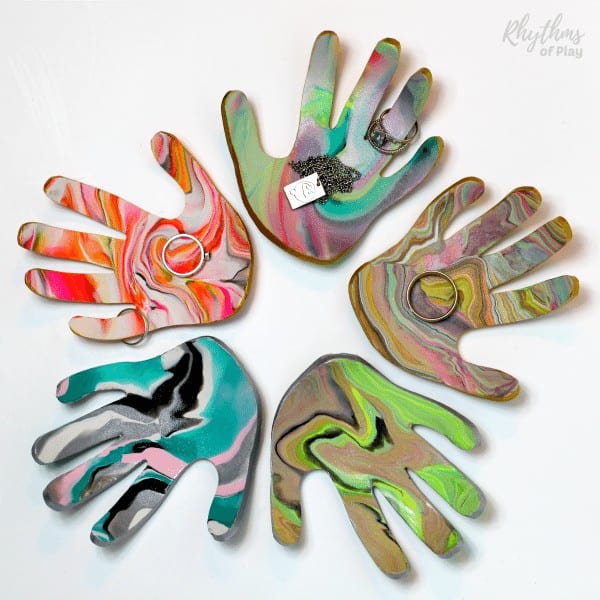
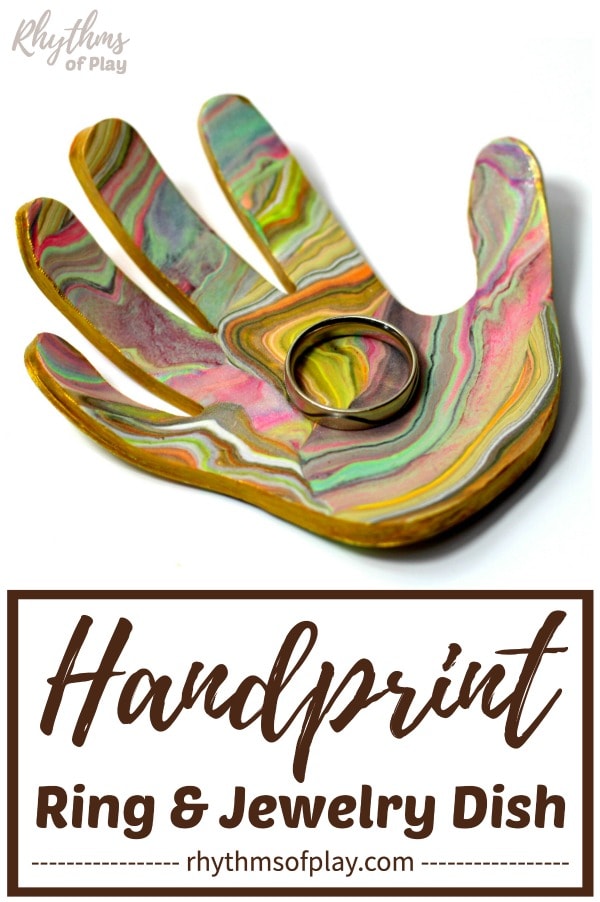
Learn how to make a polymer clay ring dish in the shape of a handprint keepsake with these easy craft instructions, complete with a video tutorial.
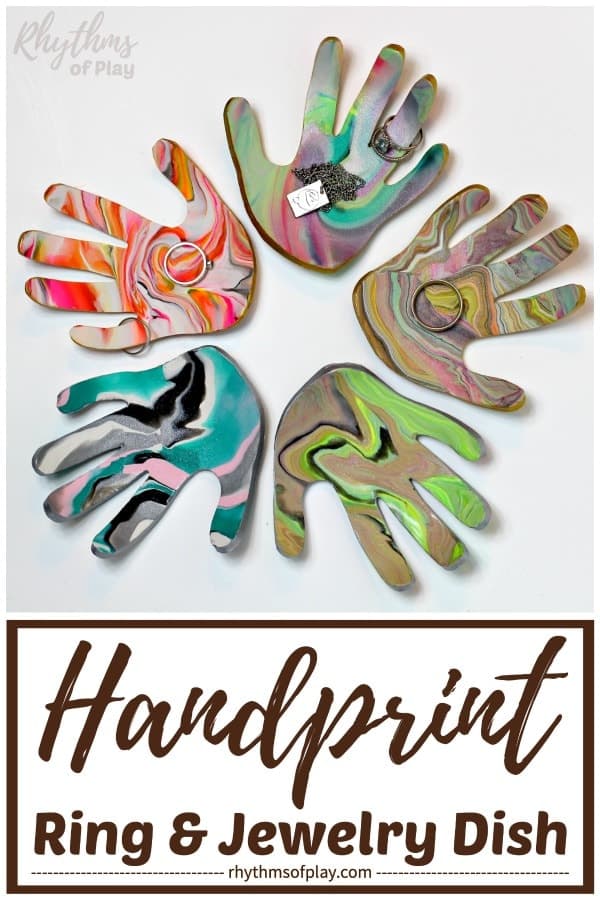
A handprint art ring dish or jewelry bowl made with marbled polymer clay is a unique clay craft project and a homemade gift idea that kids can help make. Handprint keepsake crafts, such as this DIY clay jewelry dish, are fun to create while children are young, allowing you to have a record of their baby handprints as they grow. Once finished, these gorgeous handprint crafts make perfect gifts for Mother’s Day, Father’s Day, Grandparents’ Day, Christmas, birthdays, or just because, any time of year.
This clay handprint craft idea is perfect for babies, toddlers, preschoolers, and kindergartners to make with the assistance of a parent or caregiver. However, older kids, teens, and adults will also enjoy making these personalized, handmade gifts for someone they love. You can also use a clay handprint bowl as a soap dish or change bowl. These handmade keepsake crafts offer a lovely spot to store coins, such as the spare change from your pocket or other small items you’d like to display. For more DIY gift ideas, please visit these homemade Gifts Kids Can Make.
Use the DIY marbled clay ring dish step-by-step tutorial below to make a handprint jewelry bowl with your children for someone you love. Alternatively, you can make a personalized handprint ring dish for yourself with these simple step-by-step DIY clay craft instructions. First published on November 2, 2016, this clay craft tutorial is regularly updated and occasionally republished to enhance its content. You might also enjoy making a Four-Season Handprint and Fingerprint Tree.

Marbled Clay Ring Dish and Jewelry Bowl DIY:
The clay bowl ring dishes by “A Beautiful Mess” inspired our handprint jewelry dish and ring bowl with one crucial difference. Instead of using this clay idea to make round clay ring bowls, we made clay handprints! In other words, we made our clay jewelry dishes in the shape of my daughter’s handprint to give away as Mother’s Day and Father’s Day gifts. Her grandparents loved them, and so did her Father and I! You might also enjoy this list of homemade gifts kids can make.
Although many copycats have replicated their gorgeous ring bowls over the years, they were the first to share how to marble clay and turn it into a beautiful ring dish on the World Wide Web. I started using the marbled clay project directions they provided. However, over the years, I have continued to experiment with mixing different types of polymer clay in various ways to create other beautiful effects.
Working with Polymer Clay to Make Handprint Keepsake Crafts:
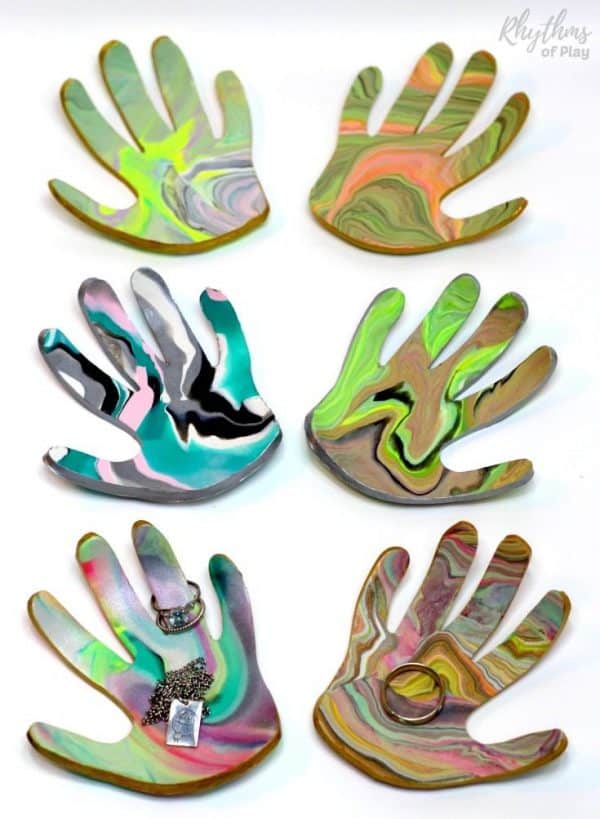
After creating several marbled polymer clay ring dishes, as shown in the photographs, I have discovered a few additional tips on how to make clay handprints effectively. One of my best tips is washing your hands before working with polymer clay to prevent staining the clay with fingerprints. I also recommend using hand cream before handling and shaping polymer clay to make it less sticky and keep it from sticking to your hands.
When creating a clay ring dish or jewelry bowl in the shape of a handprint, it’s also a good idea to wash your hands to remove excess clay between projects, as this helps prevent staining soft polymer clay colors with other colors. This is especially important when working with white polymer clay, as it can easily become stained by fingerprints and different colors.
Because some types of polymer clay can stain, an excellent tip for working with it is to use a glass cutting mat to prevent staining on your work surface. Clean your hands after each project if you don’t want the clay for the next project to be stained by the previous one.
Because some types of polymer clay can become brittle after baking, I recommend using Sculpey Premo or Fimo Professional polymer clay for this handprint ring bowl project because of their durability. These clays are less fragile than most soft polymer clays, including Sculpy III.
Fimo Pro can be more challenging to work with because it is harder to condition but becomes softer and more pliable when warm. Fimo Soft is another polymer clay option that is easier to work with but can be brittle if not baked correctly. I share a few more valuable polymer clay tips in the DIY handprint bowl tutorial below. Scroll down for supplies and instructions on this fun polymer clay craft project suitable for both kids and adults.
Handprint Ring Dish Craft Supplies:
Gather the craft supplies below to make homemade trinket dishes in the shape of handprints for rings, jewelry, and other charms.
- Colored polymer clay:

- Update 2025: We used classic Sculpy clay to make the handprint dishes in the photos nine years ago.
- Today, I recommend using Sculpey Premo or Fimo Professional Polymer Clay because they are less brittle after baking than other types of polymer clay.
- Fimo Soft is another more workable polymer clay option but is slightly less durable than Fimo Pro.
- Rolling pin or polyform Sculpey acrylic clay roller
- Precision glass cutting mat
- X-Acto Knife or clay tools (includes clay roller and precision knife)
- Cardstock (to make a handprint template)
- Pencil
- Oven-safe bowl
- Oven thermometer
- (Optional) metallic acrylic paint and a detail paintbrush or silver and gold paint pens
- (Optional) permanent marker
- (Optional) Oven-bake clay bond and glaze pack and a foam brush


Polymer Clay Handprint DIY Ring Holder Dish Video Tutorial:
Watch the DIY ring dish tutorial below to learn how to make clay ring bowls in the shape of a handprint. Then, scroll down to see the step-by-step instructions. Or try making Fingerprint Art Magnets for another fantastic DIY keepsake gift idea.
Related: Thumbprint Heart Glass Magnets
How to Make a Clay Handprint Jewelry Dish: Marbled Clay Ring Dish Step-By-Step Instructions:
Before starting this clay craft project, please read the instructions to familiarize yourself with the steps involved and what to expect. Understanding the steps before making polymer clay handprint crafts will help you create a gift-worthy keepsake.
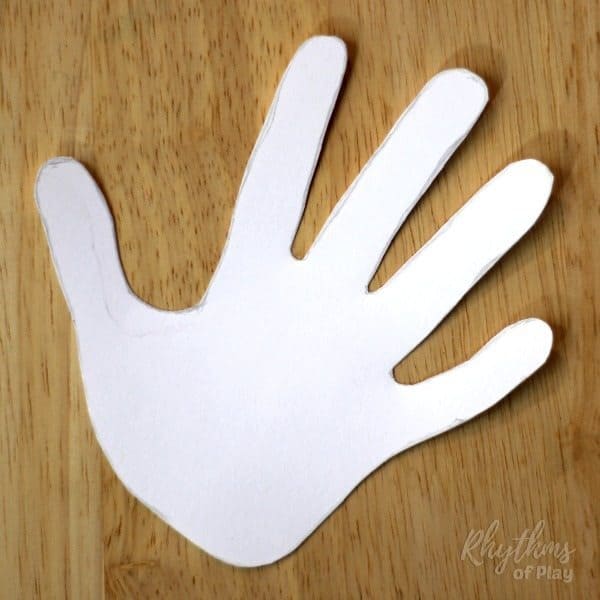
1. Make a handprint template for the ring bowl or jewelry dish:
- Use a pencil to trace your child’s hand onto heavyweight cardstock to create a template, making it easier to form clay handprint bowls, as shown in the photograph below.
- Tracing a handprint art template cut from cardstock is easier (and much safer) than tracing your child’s hand.
- Creating a handprint template allows you to make more than one ring holder dish without needing the child’s hand more than once.
- You can even use it to make other keepsake handprint crafts!
- I recommend using heavyweight cardstock to make your handprint craft template. This will create a sturdy, safe template that can be used repeatedly.
- It can be challenging to trace the hand of a toddler, preschooler, or kindergartener perfectly.
- Please use a pencil to refine the lines until you are satisfied with the shape of your handprint template, and then cut it out, as shown in the photograph below.
- Using a pencil to clean the traced lines will help you get the perfect handprint shape for your template.
- You only need to trace one hand to make a handprint art template for your ring dish. You can flip it to either side to make a left or right-handed jewelry bowl.
Related: Salt Dough Handprint and Footprint Heart
2. Mix polymer clay colors to create a marbled effect:
- Select a few colors of polymer clay and roll them into several clay snakes on a glass cutting mat to prevent stains.
- Roll the polymer clay snakes into various sizes (thin vs. thick) to vary the marbled effect, as shown in the video above and the photo tutorial below.
- Roll a small amount of black polymer clay into a thin, snake-like shape (optional).
- Adding different color textures is essential, and once mixed, black creates a lovely contrast to the other clay colors, giving this handprint craft depth and beauty.
- The black polymer clay is optional but recommended because it helps define the marbling and makes a jewelry bowl look gorgeous.
- As shown in the DIY handprint bowl video (and the photo tutorial below), twist the polymer clay snakes together, then roll them into a single ball to mix the clay colors.
- To enhance the marbling effect, roll this polymer clay ball into a snake again (optional).
- Next, fold the marbled clay snake and twist the colors together again to create a super-thin, marbled swirly look.
- Finally, roll the twisted marbled clay into a ball again before moving on to the next step.
- Tip: Reuse the polymer clay from one or more ring bowl scraps to make another ring dish. To do this, follow the steps below:
- First, roll the leftovers from each clay jewelry dish into one or more snakes.
- Then, add another polymer clay snake in a different color if needed or desired.
- Depending on the amount of clay you have left from previous marbled polymer clay handprint crafts, you may need to add more than one snake color.
- Next, twist the polymer clay snakes together.
- Finally, roll the marbled polymer clay into a ball.
 is optional but recommended because it helps define the marbling and makes a jewelry bowl look gorgeous.
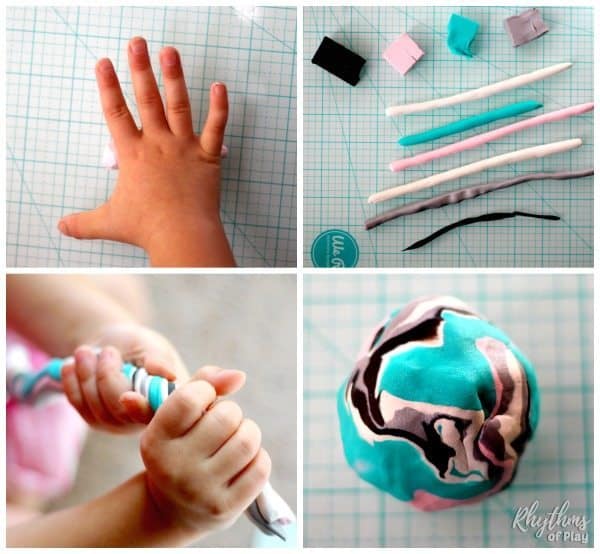
Related: Keepsake Gifts Kids Can Make
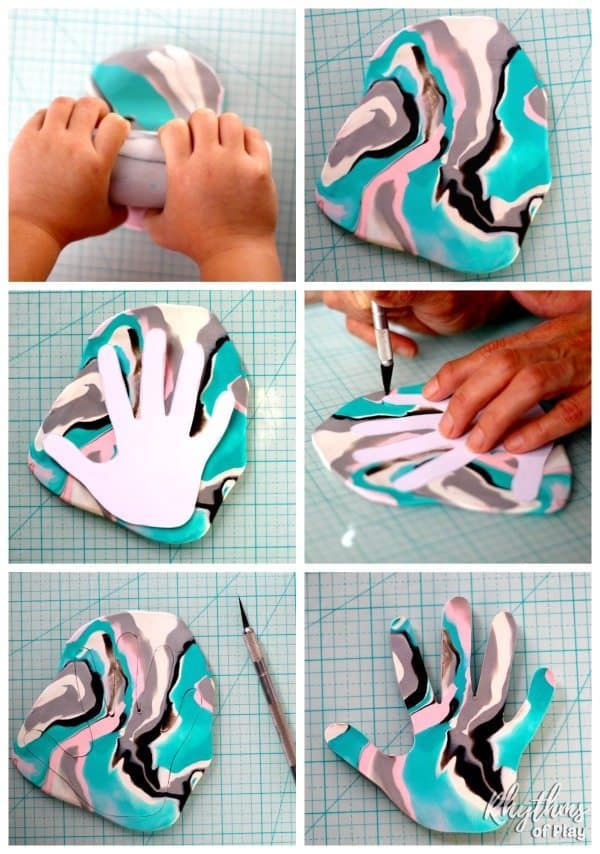
3. Use a rolling pin to flatten the marbled ball of polymer clay:
- Use a rolling pin or clay roller to flatten the ball of marbled polymer clay onto a glass cutting mat, which will protect your working surface from stains and cuts.
- Please make each DIY clay jewelry bowl as thick as you can.
- Jewelry dishes and ring bowls that are made too thin are highly fragile and can easily break, which is not ideal for a keepsake craft.
- Some types of polymer clay are brittle after baking, so I recommend using Sculpey Premo or Fimo Professional polymer clay to make handprint ring bowls. These clays are less fragile than many others, including Sculpy III.
- Fimo Soft Polymer clay is another option but can be brittle if not baked correctly.
4. Place the handprint art template on top of the flattened ball of Marbled Polymer clay and trace it with a knife:
- Place the handprint template on the flattened marbled clay, as shown in the photograph below.
- Trace it to cut it out using clay tools or an X-acto knife, as shown in the DIY clay craft project video and photo tutorial.
- An adult or older child familiar with using a sharp knife should complete this step.
- The photos below show the precision glass cutting mat my daughter and I used to roll out and cut our marbled clay hand-shaped ring dish.
- It was easy to use, protecting our tables and counters from stains and cuts.
- We also discovered that this glass mat makes a great painting palette because you can easily scrape dried acrylic paint off the glass!
- Remove the excess polymer clay around the marbled handprint and set it aside to make another ring bowl.
- You can also put it away and save it for another DIY polymer clay project.
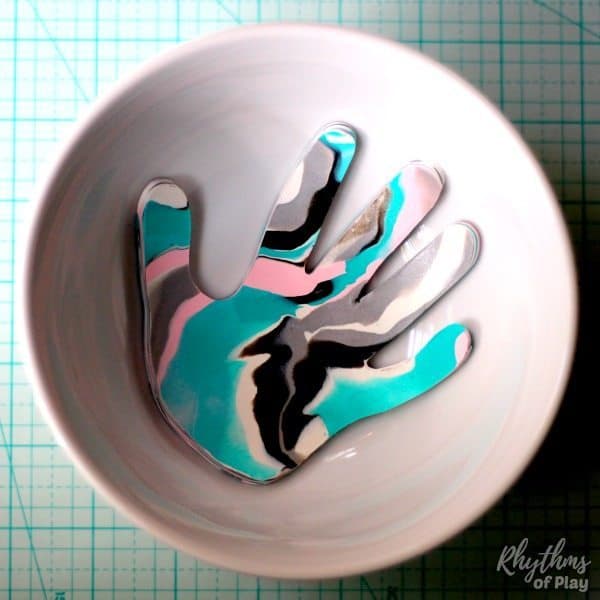
5. Bake the marbled clay handprint jewelry dish:
- Always preheat the oven before baking polymer clay.
- Cooking polymer clay in a home oven or toaster oven is safe, but never in a microwave.
- Place the marbled clay handprint art in an oven-safe bowl and bake according to the manufacturer’s directions for the polymer clay.
- I cooked the handprint jewelry bowls shown in the photographs for 15-20 minutes at 275 degrees.
- For optimal results, follow the manufacturer’s instructions for the specific type of polymer clay used to create these handprint crafts. Otherwise, the clay can become brittle and break.
- Bake polymer clay at the temperature and time recommended on the packaging.
- If you use more than one brand or type of clay, use the higher time and temperature.
- Lay a piece of aluminum foil over the top of the bowl to prevent brown spots on your clay handprint craft from temperature spikes.
- Use an oven thermometer when baking clay to ensure it cooks at the right temperature.
- Bake polymer clay at the temperature and time recommended on the packaging.
6. Allow the handprint clay jewelry dish(es) to cool:
- Allow your homemade handprint art jewelry dishes to cool completely before starting to the next step below.
7. Paint the rim of the clay handprint ring dish (Optional):
- Use a metallic silver or gold paint pen or a small paintbrush with acrylic paint to add metallic gold or silver (or another color of choice) around the rim of each handprint jewelry dish or ring bowl.
- The first time my daughter and I made these crafts, I used metallic acrylic paint and a paintbrush to add gold to the edge of our handprint jewelry bowl crafts.
- Since then, I learned that completing this step with a metallic paint pen is just as easy.
- This step is optional but recommended as it gives the handprint dish a finished look and makes it look nice.
- Keep a wet rag or wipe nearby to remove excess paint from the top and bottom of the marble clay ring dish as you work.
 or a small paintbrush with acrylic paint to add metallic gold or silver (or another color of choice) around the rim of each handprint jewelry dish or ring bowl.
8. Write a personalized message on the back of the handprint bowl (Optional):
- For an extra special custom touch, use a permanent marker (such as a Sharpie) or a paint pen to sign the keepsake craft or write a personalized message on the bottom of the handprint ring bowl for Mom, Dad, Nana, Grandma, or Grandpa.

9. Apply a glaze on the marbled clay crafts to seal and protect the handprint jewelry bowls (optional):
- Use a foam brush to apply polymer clay glaze varnish to the top and bottom of the handprint ring dish, sealing and protecting your clay creation (optional).
Related: Homemade Gifts Kids Can Make
Clay Handprint Jewelry Dish or DIY Ring Bowl Gift Idea Kids Can Make:
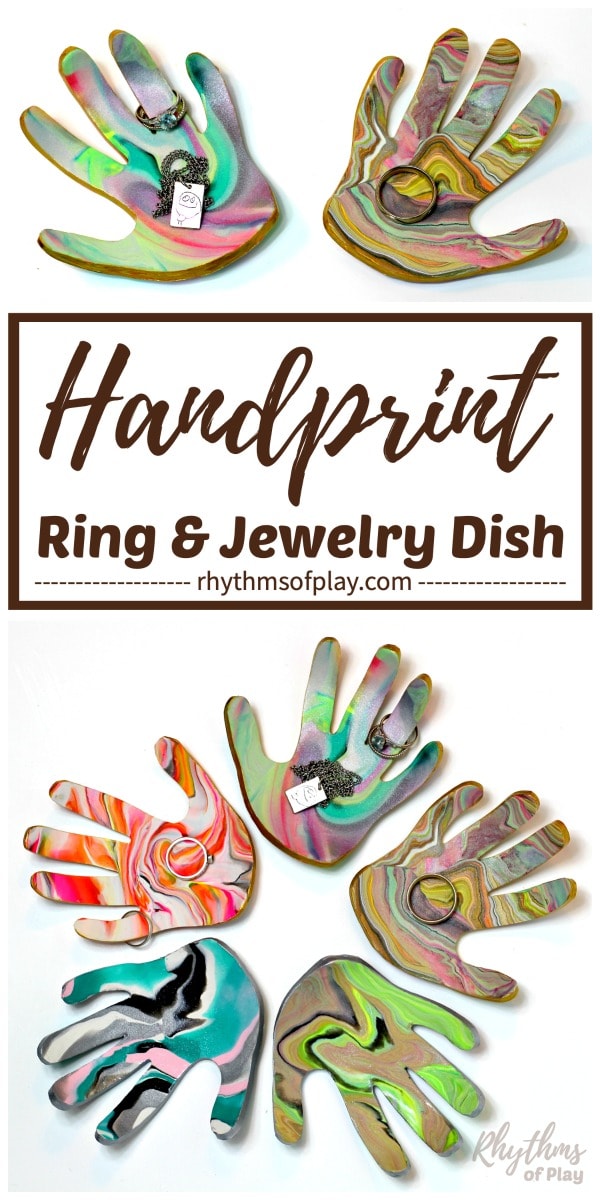
Create a beautiful ring holder dish with your children at home or in the classroom using marble polymer clay, following the step-by-step instructions and video tutorial for beginners provided above. A jewelry dish makes a lovely homemade gift idea for Mother’s Day, Father’s Day, Grandparents’ Day, Christmas, or a Birthday.
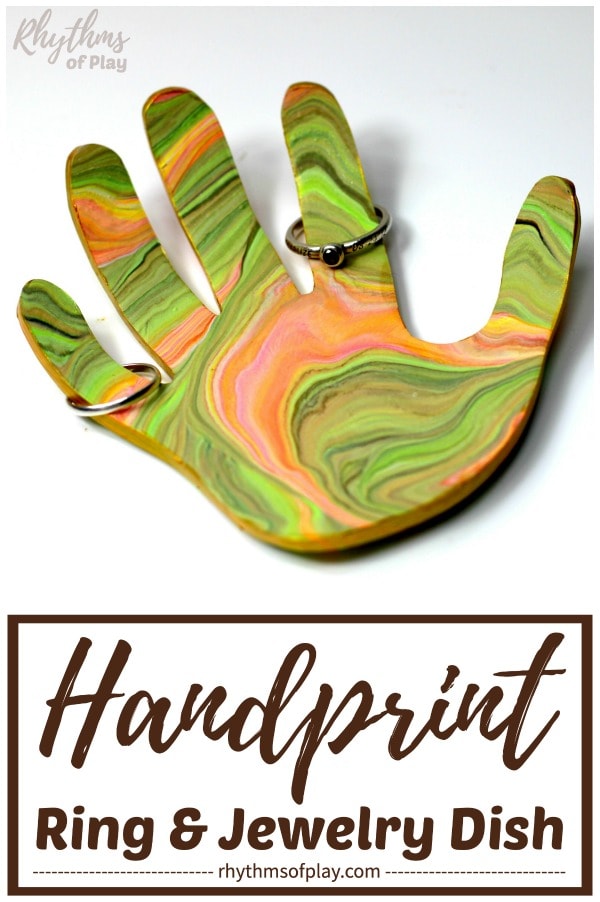
Clay handprint crafts look beautiful when displayed on dresser tops, bedside tables, and kitchen or bathroom counters. They are perfect for holding rings and other jewelry. These sweet handprint keepsake crafts also make an excellent change dish or soap holder.
A marbled clay ring holder dish makes a unique gift idea that friends and family will love. With help from a caregiver or teacher, children can make a handprint art jewelry dish or DIY ring bowl for parents and grandparents at home or in the classroom. Scroll down for a list of fun jewelry crafts you can make to complete the handprint jewelry dish or ring bowl gift. You might also enjoy these homemade gifts kids can make.
Complete the gift with any of the easy ideas below!
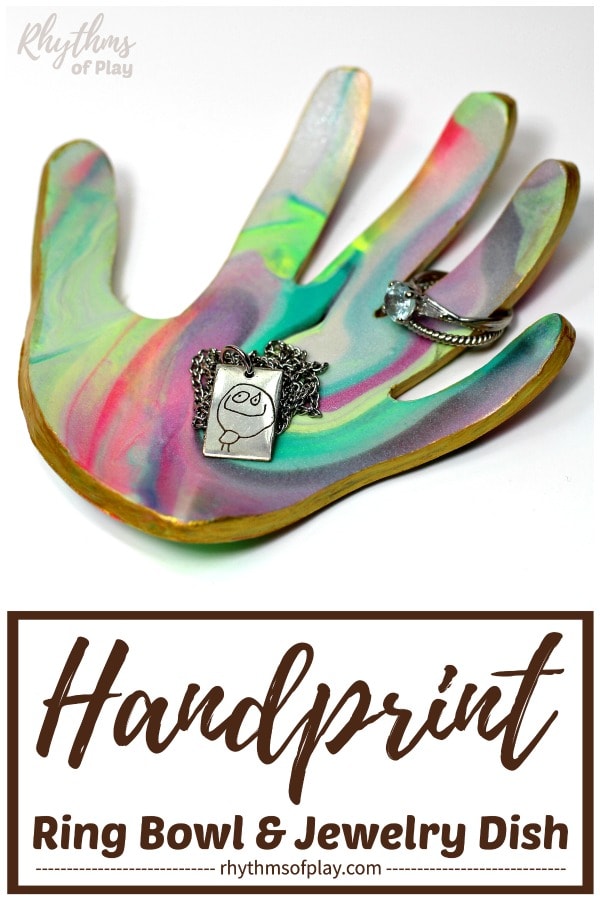
The necklace in the handprint jewelry dish in the handprint ring bowl on the left in the photograph below is a drawing of my daughters that I had made into a necklace. For more jewelry gift ideas and fun ways to complete your handprint gift, scroll through the gift ideas in the following sections:
Homemade Necklace Gift Ideas for Handprint Jewelry Bowl:
- Thumbprint Heart Necklace
- Fingerprint Flower Necklace
- DIY photo necklace
- Mom (or Mum) necklace
- Mother-daughter necklace set
- How to make a beaded necklace or bracelet
Gorgeous Jewelry gift ideas to gift with a handprint art ring dish:
- Delicate name rings
- Gemstone Stacking Mom Rings
- Disc necklace with birthstones
- Mother-Daughter Circle Pendant Necklace
- Family Name Rings Personalized Necklace
- Personalized name necklace


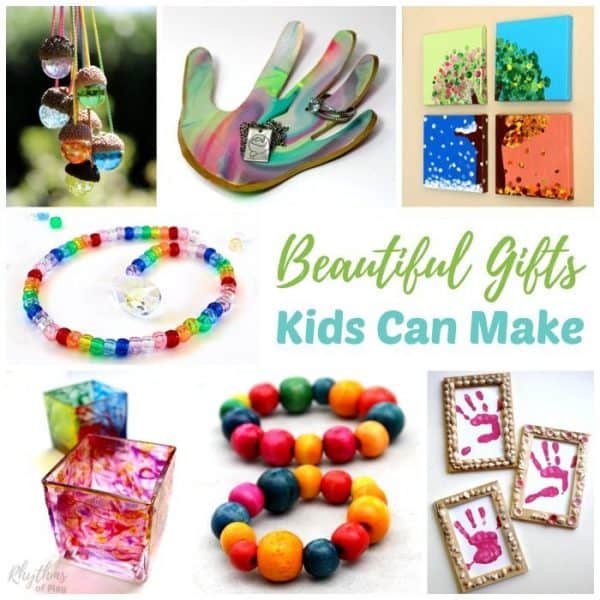
More gorgeous gift ideas that kids from toddlers, preschoolers, and kindergarteners to grade school kids and teens are on this great list of homemade gift ideas kids can make!
Learn more about Nell Regan Kartychok, author, photographer, and creator of this original craft, and Rhythms of Play HERE!
If you liked this handprint art jewelry bowl, you might also enjoy the following DIY gift ideas:
- Fingerprint Flower Glass Magnets
- Cute Keepsake Gift Ideas
- Favorite Gifts for Mom
- Four Season Handprint and Fingerprint Tree
- Fingerprint Art Glass Magnet Keepsake Craft
- Salt-Dough Handprint and Footprint Heart
- Personalized Mother’s Day Candle Holder
- Shell Frames with Handprint Art Keepsake Craft
- Homemade Gifts Kids Can Make (photo below)


How much clay does it take for each hand?
Good question Carla. You’ll need a small handful for each hand. Do you best to keep the hand at least 1/4 inch thick. If it is too thin it will easily break. I hope that helps!
I absolutely love this idea for a mother’s day project for the kiddos. I have watched multiple YouTube “how to” videos and I don’t see why the adhesive is necessary in this project. I bought the three pack glaze as suggested but I’m left thinking of how to incorporate the adhesive. Is it in case we add bling?
Yes, Adriana, the only use for it is to add bling. You don’t really need it for this project. We found it useful for making snowman ornaments to make sure the twig arms stuck and the carrot nose stayed put.
Just wondering if it is possible to write on these maybe after they are baked?
Great question, Jennifer!
Yes, You can use paint pens! Metallic silver or gold would look amazing! In fact, you can use metallic paint pens to paint the sides instead of using a paintbrush and paint. You can find our recommendations in the craft supply list above. 🙂
The clay handprint jewelry bowl was such and easy and fun keepsake to make with my 6 year old son. He picked out the colors, rolled the clay, twisted it and rolled it into a ball. I did the rest and it was very easy and they came out looking awesome! Thank you!!
That’s wonderful Rebecca!
I’m so glad that you and your 6-year-old son enjoyed making this handprint craft together and that you are happy with the result. Thank you so much for letting me know… It makes it all worth the while.
With gratitude,
Nell
Should we spray to protect the surface .
Hello Sue! I’m so sorry for the delayed response. We have been busy with the holidays! You can spray them to protect them, but it is not necessary. They are fragile, so a spray varnish just may help!
Can you use mod podge to seal them when they are done in the oven??
Great Question Brynn!
I have not tried it, so I’m not sure. The consistency of Mod Podge is a bit thin compared to the glaze made for polymer clay, but yes… I think it would work just fine. If you try it, come on back and share if it works, thanks!
Hi, just wondering If the hand (polymer) shrinks after taking out of the oven.
Thank you!
Hi Ana, great question! No, in my experience, the polymer clay does not shrink after baking the ring bowl and jewelry dish craft. The handprint hardens but can be fragile. Handle with care!
Nell
I want to make this handprint jewelry dish with some of my students. Can the dish be baked in a toaster oven?
Hi Michelle, great question! I’ve never tried it, but I don’t see why not? The smell of clay cooking isn’t great–so make sure you cook them in in a well ventilated area.
I am interested doing this as a Mother’s Day present for my students to make. There are 16 (5 year old sized hands). How much polymer clay do you think I should get?
Thanks for these amazing ideas!
Hi Sheryl, good question. You only need a small amount of a few different colors to make each handprint craft. One multi-colored pack of polymer clay should work, as long as the children you are working with don’t all want to use the same exact colors! Most polymer clay is available in multiple colors in different amounts, so a variety pack with several colors should be enough clay. There are a few types of polymer clay I recommend in the handprint ring bowl craft supplies above. Choose one of the packs with a bit more clay to be sure you have enough.