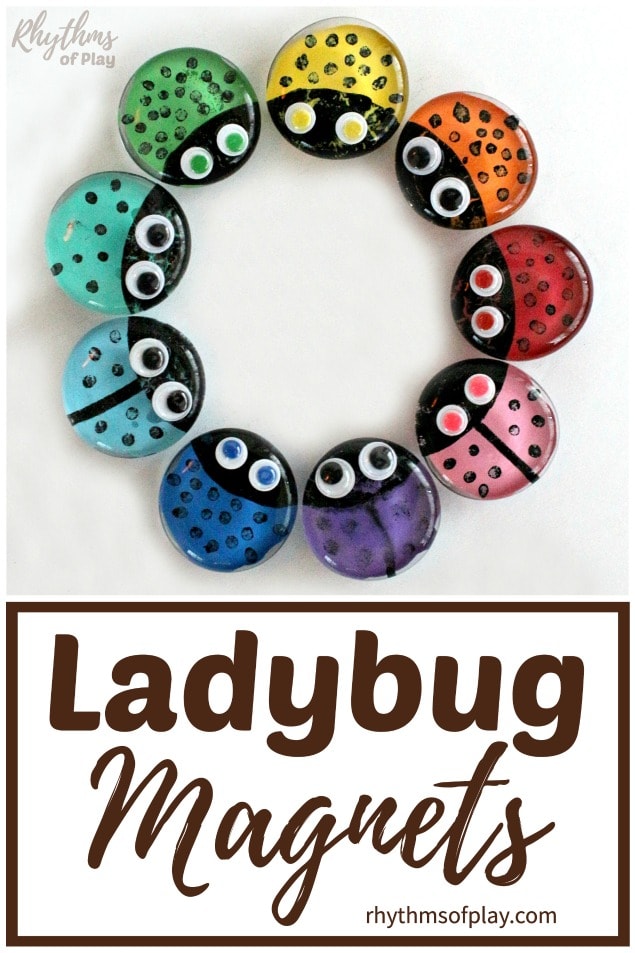
These cute ladybug magnets are a fun glass-gem refrigerator magnet craft and gift idea for kids and adults.
Making ladybug magnets with glass gems is an easy refrigerator magnet craft for kids and adults. These bright little bugs are fun to create during spring and summer and are the perfect complement to a garden, an insect-themed event such as a birthday party or shower, a lesson or study on insects, and nature study themes.
With a few basic supplies and a little creativity, you can turn smooth glass pebbles or half marbles into cheerful ladybugs perfect for decorating refrigerators, lockers, office spaces, magnetic boards, or classroom displays. If a group of ladybugs is whimsically known as a “loveliness,” Just imagine the “loveliness” of ladybugs sitting on your fridge holding important notes, events, appointments, and to-dos. You might also enjoy making fingerprint art magnets and thumbprint heart magnets with the same glass gems.

Making Ladybug DIY Glass Gem Magnets
Making colorful refrigerator magnets that look like ladybugs is a fun ladybird craft project for preschoolers, kindergarteners, grade-school kids, teens, and adults. Ladybug refrigerator magnets are an adorable decoration for any magnetic space and a sweet, handmade gift idea for parents, grandparents, extended family, friends, teachers, and more.
These ladybug crafts can take a day or two to complete due to drying time, but they require only a few 5-10 minute crafting sessions. Of course, the number of magnets you are making and the number of people helping will increase the time required to make these simple crafts. I recommend planning a few short crafting sessions as follows: 1) paint markings, 2) color the ladybug, 3) add finishing touches (with at least a few hours drying time in between), to complete this easy project quickly and easily.
First published on March 2, 2020, this ladybug craft is regularly updated and republished to improve the content. Scroll down to see the video tutorial and complete step-by-step instructions to make these cute DIY ladybug magnets. Alternatively, you can make creepy crawly spider magnet crafts for any magnetic surface with similar materials.
Why make magnets that look like ladybugs?
Ladybug manets are more than just cute and colorful decorations. They are inexpensive to make, easy to customize, and fun for nearly every age group to make and enjoy. Best of all, these easy crafts provide a lovely way to encourage creativity and strengthen fine motor skills while giving children of all ages the chance to paint, design, and personalize each ladybug to their liking.
When finished, these adorable little bugs can help you keep your most important notes and to-dos right where you are most likely to see them. Add them to refrigerators, magnetic whiteboards, lockers, filing cabinets, and any other magnetic surface you pass by often. They use them to hold artwork, grocery lists, meal plans, your weekly rhythm planner, photos, appointment reminder cards, and more.
You can also use them in classrooms to display papers or create bug-themed learning activities. They also make thoughtful homemade gifts, party favors, spring keepsakes, and garden-themed decorations. Their small size makes them perfect for selling at craft fairs, bringing home from summer camp, and they also make a fantastic homeschool or cheerful rainy-day craft project.
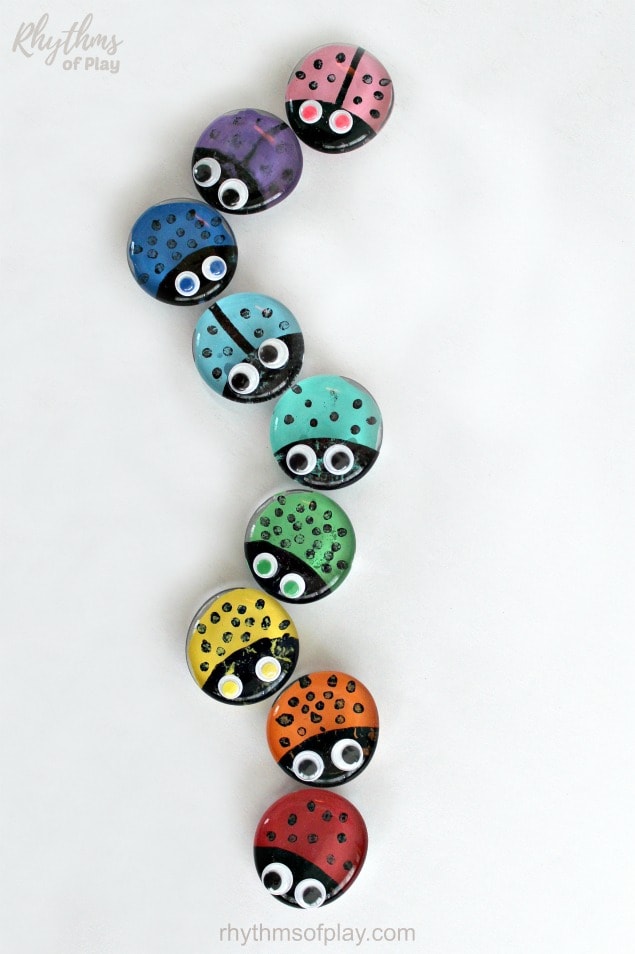
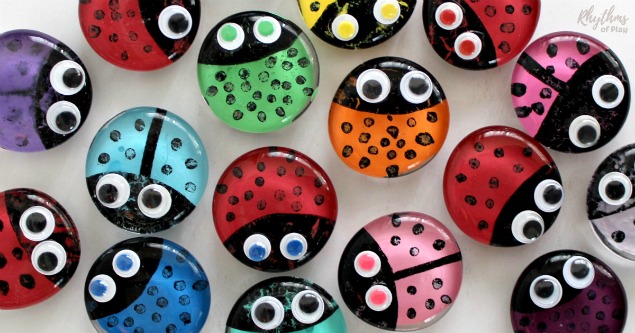
Whether you make a few for your home or a whole collection of “loveliness” to share, these tiny magnets add a playful pop of color wherever they land. (Don’t you just love puns? What can I say, I can’t help but walk through an open door, even when I write them myself. Please pardon my digression.) The step-by-step instructions below this introduction show how to make cute ladybird (ladybug) magnet crafts in a rainbow of colors, as shown in the photo below.
How to Make Ladybug Magnet Crafts:
Basic instructions are included here to give you a general overview of how to make ladybug magnets. I also share a few tips and comments about the crafting process to help you determine how you would like to proceed with this project. For the full tutorial, please scroll down to watch the video and review the complete step-by-step instructions.
These crafts are made on glass domes, so the markings and colors need to be painted upside down and backward in layers, which can be confusing at first. But it all makes perfect sense once you add the ladybug’s color to the craft and flip it over to see the markings show through to the other side on the top of the glass dome.
Create Ladybug Markings:
To create a ladybug magnet, start by painting the markings on the back or flat side of a clear glass gem. Add a head, a line down the middle if desired, and spots, or feel free to get creative with your ladybug markings by creating different types of designs. Black markings are shown in the photos, but you can substitute another color if you prefer.
Younger children can practice painting dots and simple patterns, while older children, teens, and adults can experiment with more detailed designs and creative color combinations. Whoever said ladybug crafts must have spots? Realistic ladybug artwork would, of course, be realistic; however, in the mind’s eye of a creative artist, they can also have stripes, swirls, and other designs.
No need to “Color in the lines” or make them look like real ladybugs do, unless you’d like to. This is good training for life. Intelligence is creative. Express yourself in colors, dots, swirls, stripes, names, initials, and more! To quote some common English proverbs, “The joy is in the journey, not the destination; art lies in the process, not the product; and beauty, after all, is in the eye of the beholder.”
Make your ladybugs beautiful to you and do your best to smile and appreciate the beauty of others, no matter how it appears at first glance. These are great life lessons and among the greatest reasons to create art. Allow at least several hours for the ladybug markings to dry at this point in the craft process.
Add Color of Choice:
Once the ladybug markings are dry, paint a solid color over them, such as red, pink, orange, yellow, or any other color in the rainbow, as shown in the photographs for this DIY ladybug magnet tutorial. You will also need to allow time for the paint to dry completely before moving on to the next step at this point.
Add Finishing Touches:
Glue googly eyes to the top front of the glass gem where the head is for added personality, as shown in the photographs. Or, you can paint the ladybug’s eyes onto the back of the glass gem and let them dry before painting the head and other markings.
If you would like them painted on the back of the glass gem to appear above the head, they will need to be painted in a contrasting color before painting the head and other markings, so they are visible once the craft is complete.
Alternatively, you can paint them on the top, domed side of the glass gem in the same place you would attach the googly eyes, either before or after the magnet is attached. Just ensure they are a contrasting color, such as white eyes with black markings. You can also add painted or glued-on pipe-cleaner antennae to the top of the glass gem to create the ladybug’s face and head, if desired (not pictured).
Attach the Magnet:
Once the design is dry, attach a small magnet to the bottom or back of each glass gem using strong craft glue or hot glue. Please note that hot glue dries quickly, making this step easy to complete; however, the magnet may detach from the glass gem because it does not adhere well over time. I therefore recommend using a stronger adhesive to increase durability.
DIY Ladybug Glass Magnet Step-by-Step Video Tutorial:
Watch the step-by-step ladybug glass magnet craft tutorial to see how to complete each step of this DIY ladybug project. You will notice that there are a few different ways to make ladybug magnets.
First, watch the video and read the complete tutorial directly below to help you decide which process and craft materials to use. Then choose your favorite craft supplies from the recommendations in the following section to make them at home or in th e classroom. You might also enjoy making this cute Bunny Craft. It’s so easy to make, you don’t even need glue!
Ladybug Refrigerator Magnet Craft Supplies:
There are a few different ways to paint the color and markings on ladybug magnets, so you have a choice between the craft supply options. The instructions and step-by-step video tutorial for making ladybug crafts will help you decide which method and materials to use from the recommended options below. Gather your preferred craft supplies from the list of choices below:
- 1 1/4-inch to 2-inch Extra-large, clear glass gems for the ladybug’s body. (These are also known as flat-backed marbles, chobochons, and glass buttons or domes, and are often available at craft, floral, hobby, and some dollar Tree stores.) Please ensure they are large enough to be made into ladybug magnets and that no iridescent coating has been applied to them.
- Acrylic paint to give the ladybug color.
- Black paint pens (optional). Use black paint pens or acrylic paint to create black ladybug or ladybird markings. Alternatively, you can use paint pens or acrylic paint in another color, such as white, metallic gold, or silver.
- Paintbrushes to apply acrylic paint (if needed). You can also pour it with the instructions below.
- Craft magnets to turn the ladybug crafts into magnets.
- Glue or adhesive: Using a durable, super craft glue or adhesive, such as E600, that adheres well over time is recommended over hot glue. Hot glue can help you complete these crafts more quickly, but you will still need to wait for the paint to dry after creating the markings and adding the color to the back of the glass gem.
- Black-and-white or colored googly eyes to create eyes (optional). Alternatively, you can paint them onto the ladybug crafts.
- Scissors and pipe cleaners (optional) for creating ladybug antennae, if desired (not pictured).
Related: Fingerprint Art Magnets
Ladybug Craft Supply Option Notes:
When my daughter and I tested using black paint pens vs. acrylic paint to paint ladybug or ladybird markings, we discovered that paint pens worked, but they did not create black ladybug markings as strong or as clear as acrylic paint. Because paint-pen markings on ladybird or ladybug shells can crack and peel, the ladybug’s color can show through the glass gem.
With that said, most of the ladybug magnets pictured in this post were made with black paint pens. You can see in the photographs below that the markings are not perfect, but work perfectly well enough. If you want darker, more opaque spots, paint them with acrylic paint and let them dry before layering the ladybug color on top.
To finish the magnets, you can either use craft glue or hot glue to attach them to the bottom of the ladybug craft. I recommend using craft glue because hot glue does not adhere well over time and usually pops apart. However, if you don’t have time to wait for the glue to dry, hot glue is the perfect option for these adorable ladybug magnets. Aren’t they cute? Complete step-by-step directions follow.
Step-by-Step DIY Ladybug Magnet Instructions:
Making ladybug magnets with glass gems is an easy refrigerator magnet craft for kids and adults alike. Learn how to make ladybug refrigerator magnet crafts in a rainbow of colors with this simple craft tutorial.
Please read through the simple step-by-step instructions below before making ladybug magnets, so you understand the steps involved and can make a more informed choice about the supplies you want to use and how you would like to make them from the options included.
Scroll up to watch the video tutorial or gather supplies. You might also enjoy this cute DIY hungry caterpillar craft and toy for kids.
1. Gather and prepare the supplies for the ladybug crafts:
- Gather the supplies you want to use to make ladybug magnets from the recommended craft supply list above.
- Use hot water and soap, or rubbing alcohol and a soft cloth or cotton ball, to clean the clear flat-backed marbles for this craft.
- Allow the flat-backed marbles to dry completely before beginning this ladybug craft project.
2. Paint ladybug (ladybird) markings onto the flat side of each glass gem:
- Next, use acrylic paint and a paintbrush, or a fine-tip black paint pen, to add black ladybug or ladybird markings onto the back or flat side of each glass gem that you want to turn into a ladybug magnet.
- Alternatively, substitute black for another contrasting color. For example, you can also choose metallic paint for the color of the ladybugs with white markings, or paint white ladybugs with metallic markings.
- Please paint the ladybug eyes onto the back or flat side of the glass dome before painting the head, if you want to paint them rather than attaching googly eyes in the final step (step 5), as pictured.
- Use the instructions below to add markings to the ladybug crafts:
How to Paint Ladybug Markings (Head, Spots, Dots, Lines):
Use the paint pen or a paintbrush to create spots, dots, lines, and other ladybug markings on the back or flat side of a glass gem with the instructions and tips below:
- To create the oval-like ladybug head, paint a rounded line at one end of the glass gem. It should cover 1/3 to 1/4 of the back side, as shown in the video and photographs.
- Draw a line down the middle of the ladybug’s body to separate the left and right halves and create the left and right wings.
- Alternatively, you can create dots or other designs without a line down the center if desired. Each of these ladybug marking options is shown in the video and photographs for this tutorial.
- Allow each of the painted ladybug markings to dry completely before moving to the next step in this ladybug craft project.
- If you want to paint the ladybug’s eyes on the underside so they show through on top (instead of attaching googly eyes as shown in the photographs), you will need to do this before you paint the ladybug’s head. If this is the case, paint them with a contrasting color first (such as white on black) so they are visible when the craft is complete, and the flat-backed marble is flipped over.
3. Paint (or pour) a layer of acrylic paint over the markings to add color to the ladybug craft:
- When the ladybug spots and markings are dry, add a layer of acrylic paint to cover them and add color to the ladybug.
- This color will show through to the other side once the ladybug craft is dry and flipped over, becoming the ladybug’s primary color.
- Add color to the ladybug crafts, following the instructions below:
How to Add Color to Ladybug Crafts:
- Use a paintbrush to add a layer of paint over the ladybug markings and designs on the back or flat side of the glass gem.
- Alternatively, pour acrylic paint over the markings or spots on the flat side of each glass gem, as shown in the video above.
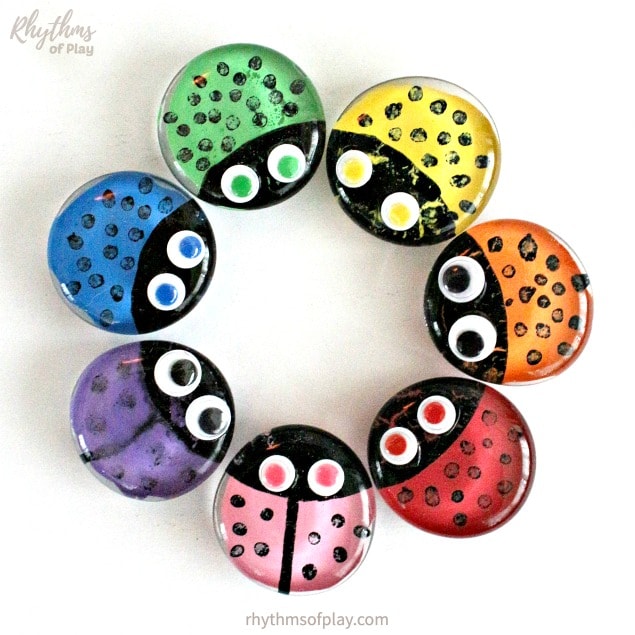
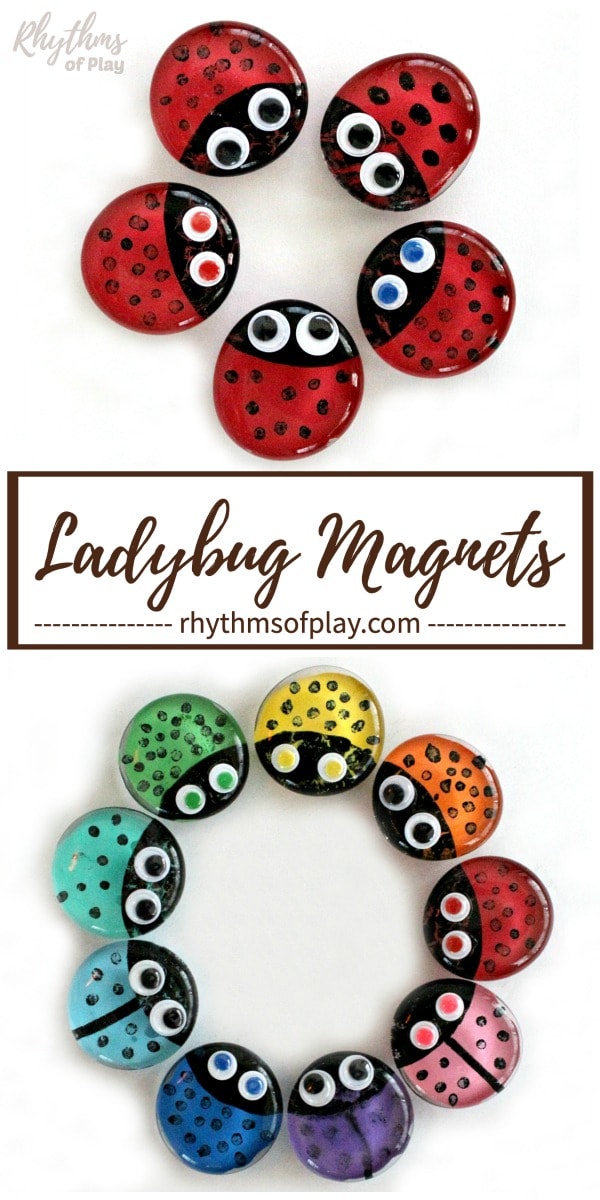
- Once you choose your favorite method and supplies, paint the ladybug crafts red, pink, orange, yellow, green, blue, purple, or any other color in the rainbow.
- In other words, paint each ladybug craft a single color, two colors, or color combinations that complement or contrast (such as team or business colors).
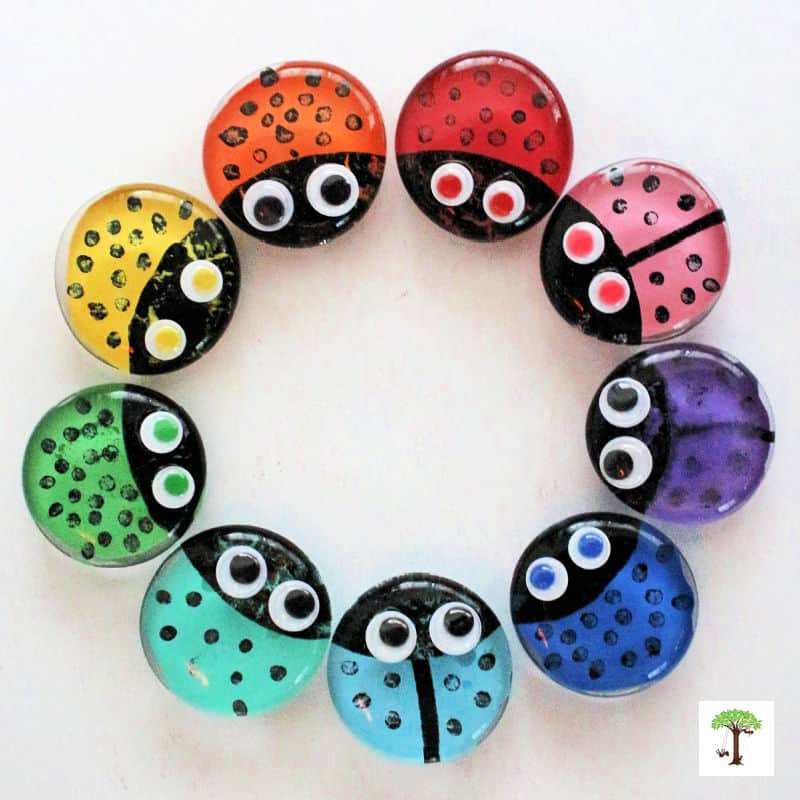
- Paint the ladybug crafts in a rainbow of colors, designs, and patterns, using your choice of materials and techniques, as demonstrated in the photographs and DIY video tutorial, and as recommended in the supplies.
- Once each ladybug is painted, allow the magnet crafts to dry before moving on to the next step. (Overnight is best.)
4. Glue a craft magnet onto each ladybug craft’s bottom (flat side):
- Attach a craft magnet to the bottom, back, or flat side, right on top of the dried acrylic paint, to make each ladybug craft magnetic.
- Although these glass gem magnet crafts can be made with hot glue, a more durable adhesive is recommended, as hot glue does not adhere well to glass over time and will often pop off. If you are in a hurry, hot glue can help you complete these crafts more quickly, but you will still need to wait for the paint to dry after creating the markings and adding the color.
5. Add optional final details to the ladybug craft:
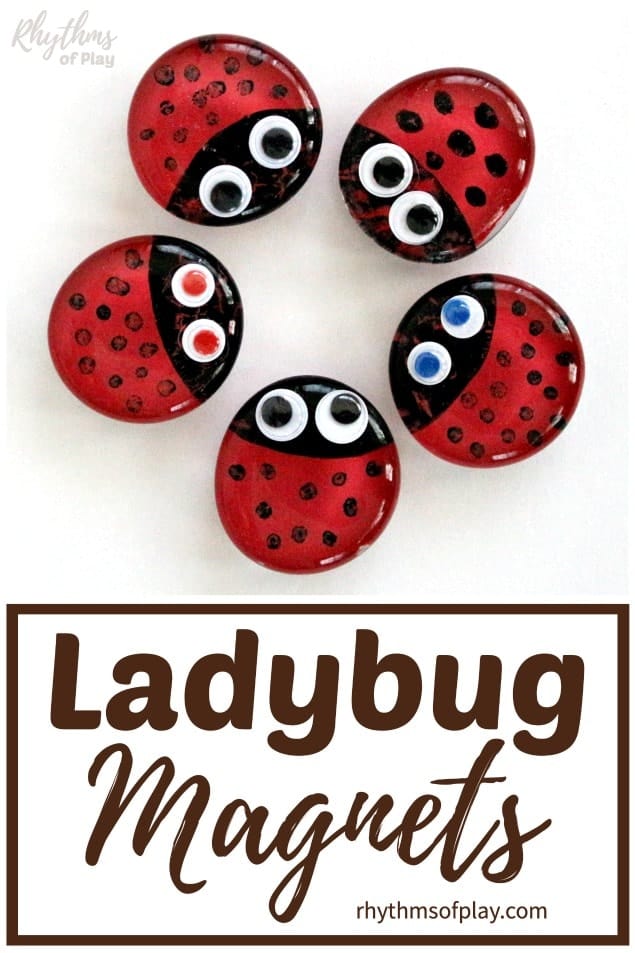
- Use glue to attach black and white or colored googly eyes onto the face on the top or rounded side of each ladybug (or ladybird) craft, as shown in the photograph below.
- Alternatively, paint the ladybug’s eyes onto the back of the glass gem and let them dry before painting the head and other markings in step one.
- Or, use a paintbrush and acrylic paint, or a paint pen, to dot them on the top, domed side of the glass gem in the same place you would attach the googly eyes during this step. Just ensure they are complementary or contrasting colors, such as white eyes with black markings.
- During this step, you can also add optional hand-painted or glued-on pipe-cleaner antennae to the top of the glass gem to detail the ladybug’s face and head, if desired (not pictured).
- To attach an antenna to the ladybug craft, cut a small section of pipe cleaner, bend it in the middle to form a “V” shape, and glue the tip to the top of the glass gem near the back of the head.
Ladybug Magnets Craft and DIY Gift Idea:
Ladybug magnets made with glass gems make an adorable craft that kids and adults alike can enjoy. These crafts are creative, relaxing, and enjoyable to make with children, friends, students, family members, or a community group. Most importantly, each ladybug becomes a small handmade treasure that can brighten any space and bring joy for years.
Because this ladybug craft is magnetic, they make it fun and easy to display pictures, children’s artwork, flyers, menus, and important reminders in a place everyone will see them daily. This makes ladybug magnets a useful decoration and gift that can complement several types of events, activities, and occasions, such as a spring, bug, or garden-themed birthday party, shower, or lesson activity.
They are fun to put on refrigerators, lockers, filing cabinets, and more to decorate, add a lovely pop of color, and post announcements. For example, I love how cute they look perched on my magnetic whiteboard planner! It’s almost as if they are my little helpers buzzing about on my calendar, ensuring that I get all my most important tasks accomplished and checked off.
Use simple materials to create colorful little bugs that decorate magnetic surfaces and hold notes and other important papers with this step-by-step tutorial. Or make them give to family, friends, and teachers for an adorable and useful homemade gift. Whether for playful home decor, classroom projects, party favors, or heartfelt gifts, these ladybug crafts provide a lovely way to celebrate creativity, nature, and the joy of handmade craftsmanship.
Learn more about Nell Regan Kartychok, author and photographer of these original ladybug magnet crafts HERE, and Rhythms of Play HERE.
DIY Refrigerator Magnet Crafts:
Use the same glass gems and magnets needed to make this ladybug craft to make the other fun refrigerator magnet crafts below!
Scroll down to see a few more fun craft ideas for kids and adults. You might also enjoy this spring bucket list of fun activities.
Spring Craft Ideas:


Leave a Comment