Here’s a craft tutorial that shares how to use a woodburning pen to draw a heart with a Celtic knot onto a wooden box or another piece of wood large enough to fit the original design.
This heart with a Celtic knot is an easy and fun craft to make for a loved one for Valentine’s Day, an anniversary, or any other special occasion. It is especially appropriate for the fifth wedding anniversary, traditionally made of wood. However, this design does not have to be carved into a box. I have provided a free printable pattern to burn onto any piece of wood that you’d like this beautiful Celtic design on.
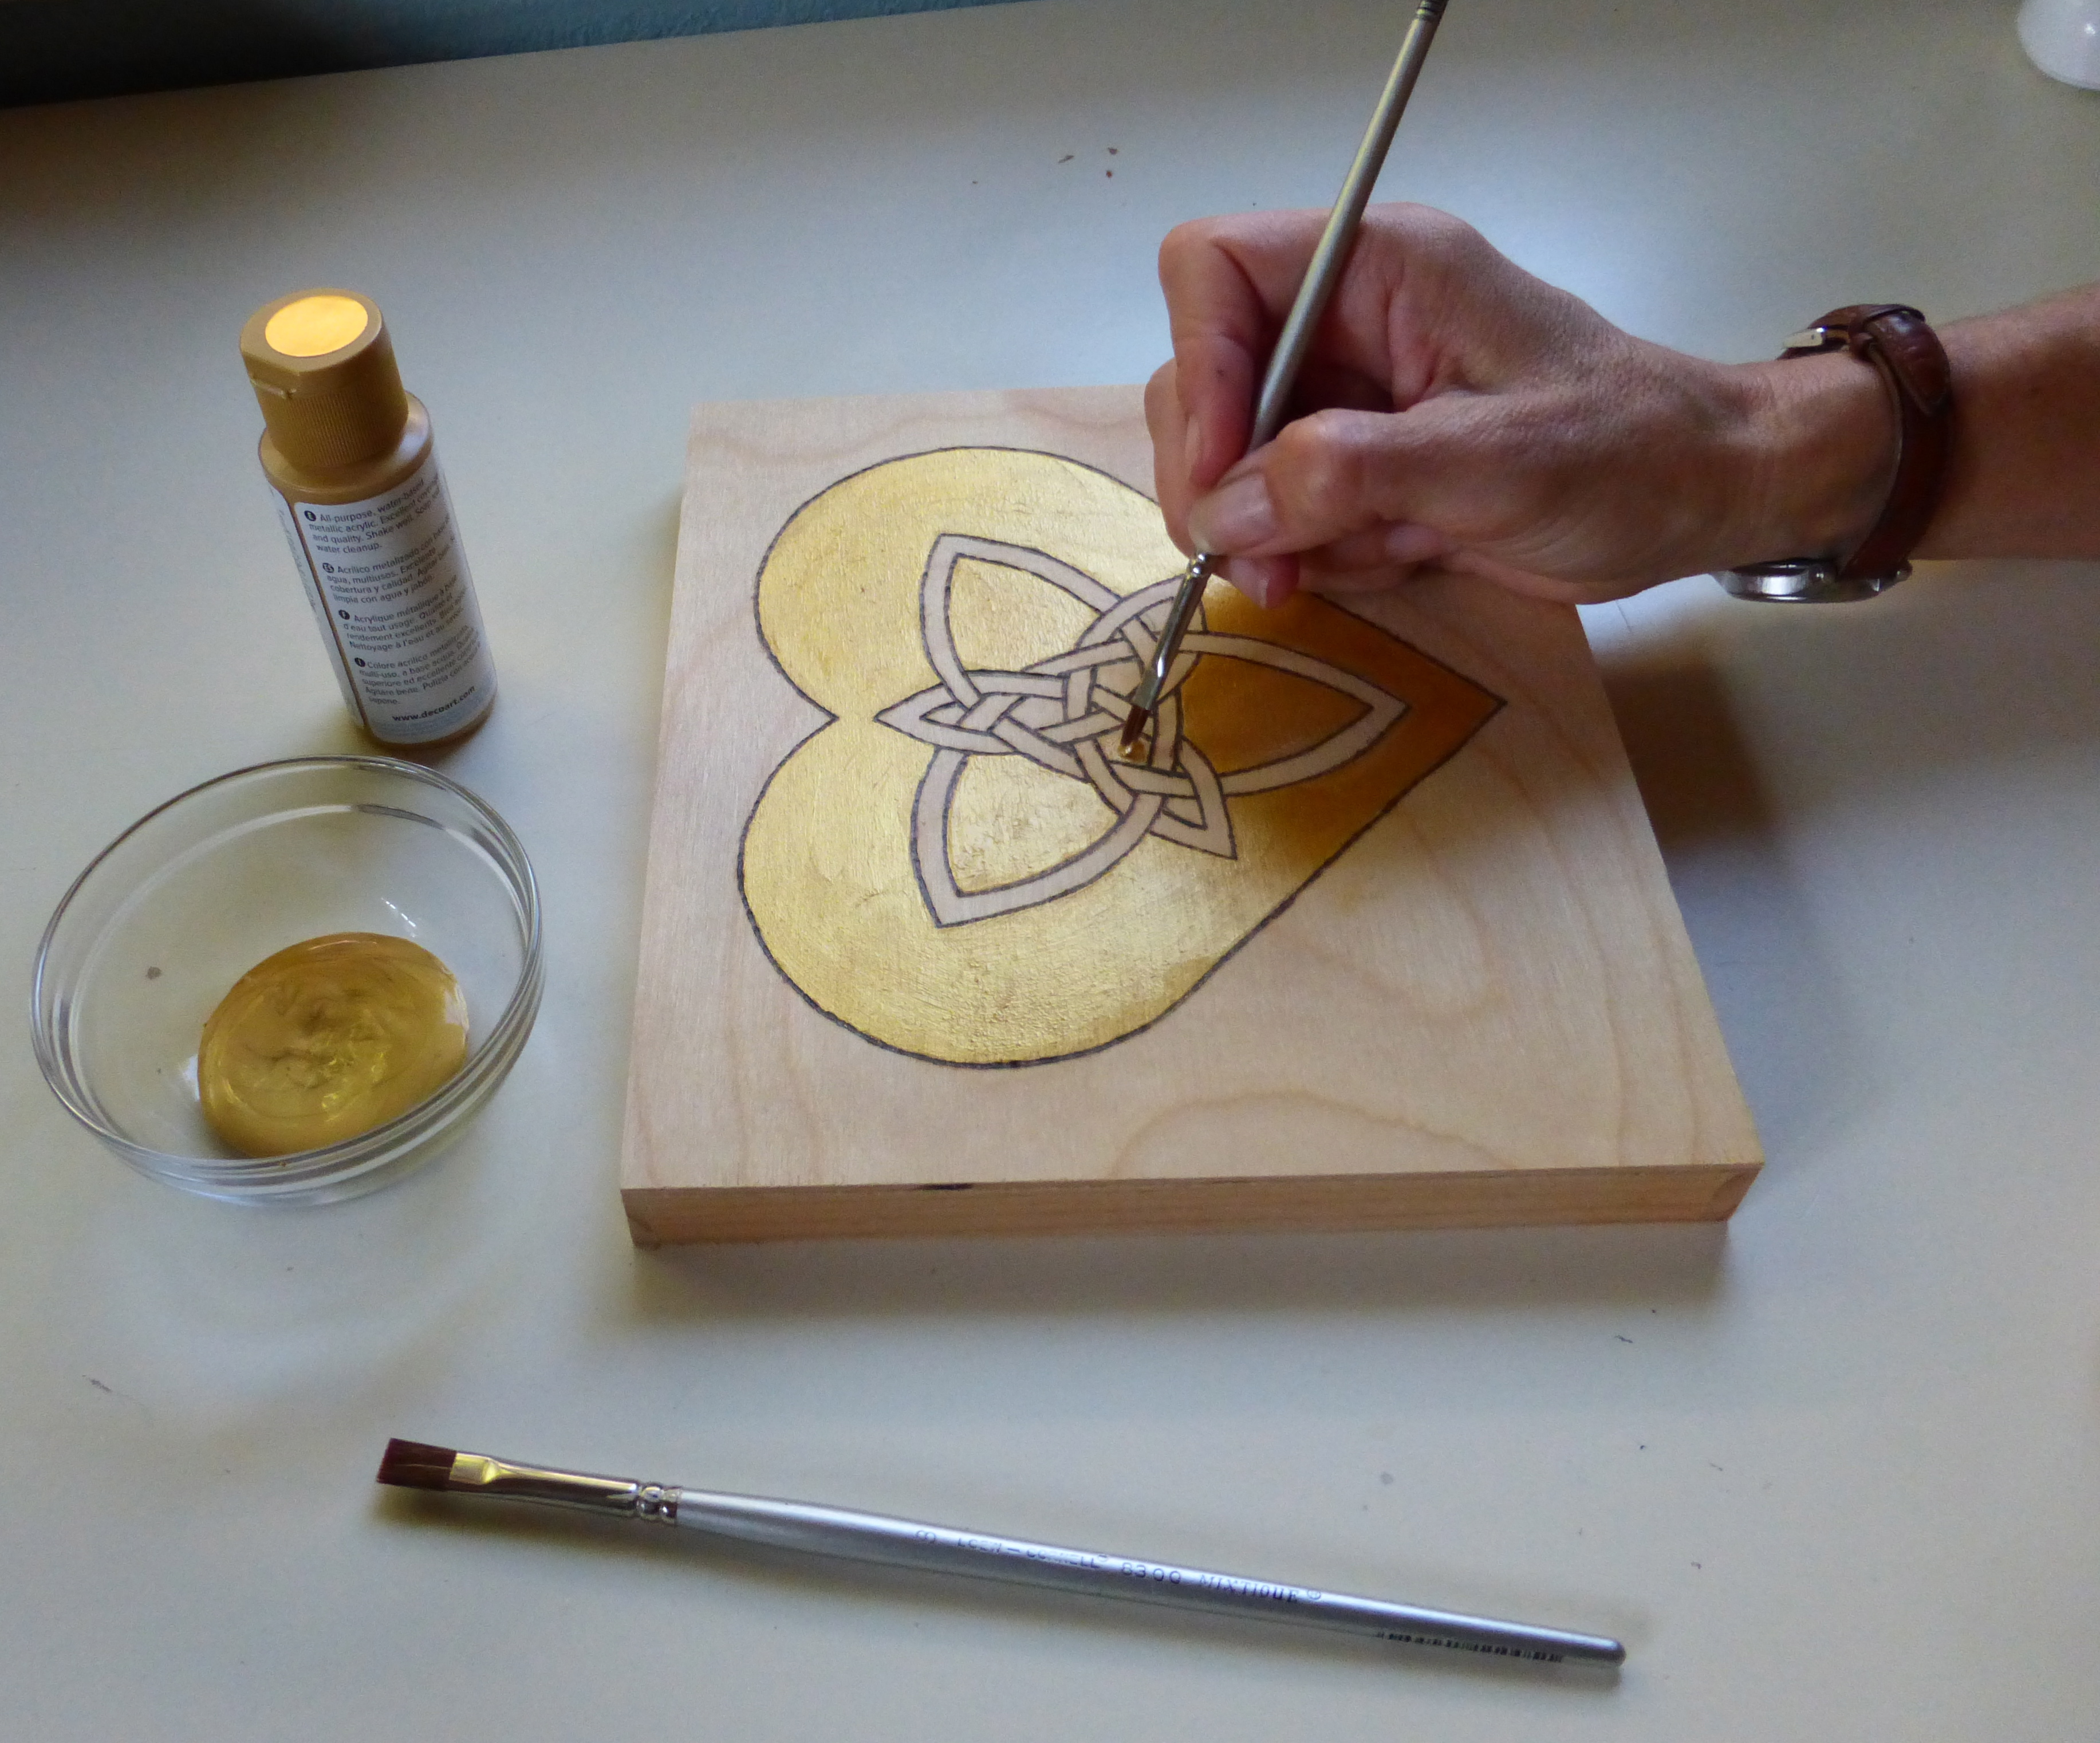
The colors you choose to use are also up to you. If you have a nice piece of wood, leaving the wood as one of the color options can be lovely. If not, pick two complementary colors that you like. I used metallic gold and red paint, but I also painted this gorgeous Celtic heart design in denim blue with a red heart, which was equally beautiful.
How to Woodburn a Heart with Celtic Knot into Wood:
Hello, thanks for visiting! You found a Valentine’s Day craft tutorial I created in January 2015 that is currently being updated. Please bookmark this post and check back later to access the printable Celtic heart knot pattern and see the updated step-by-step tutorial. Thanks for stopping by!
For more Valentine’s Day crafts and gift ideas, look at these Valentine’s Day Crafts and handmade gifts or these romantic DIY Gift Ideas for Your Sweetheart. Happy crafting!
Woodburning Craft Supplies:
- Printable Heart with Celtic Knot Design (The NEW link to this printable will be available soon. Please bookmark this page and check back later. Thanks for your patience!)
- Wood Hinged Memory Box
 (or another wooden item large enough for our original Celtic heart design)
 - Fine-grain sandpaper or sponge
- Scissors
- pencil
- Painter’s Tape
- Graphite Paper
- Woodburning Pen
- Paintbrushes
- Acrylic paint in the colors of your choice
- Mod Podge and a foam brush
Heart with Celtic Knot Step-By-Step Woodburn Tutorial Instructions:
1. Sand the wood:
Lightly sand the wood you want to Woodburn the Celtic heart design onto.
2. Print the heart with a Celtic knot printable onto printer paper.
- The new link to this printable will be available soon, please bookmark this page and check back later. Thanks for your patience!
3. Cut out the Celtic heart knot design:
- Use scissors to cut the heart with the Celtic knot design.
- Ensure that you leave 1/2 to 1 inch of paper around the design.

4. Tape graphite Paper to the Wood:
- Tape a piece of graphite paper onto the wood where you want to put the Heart with the Celtic knot design.
- Ensure the graphite paper is the same size as your printable cutout or larger.
- Use a ruler to center the design where you want it to be.
5. Tape the design over the graphite paper:
- Place the design on the wood over the graphite paper and tape it in place, as shown in the photograph below.

6. Trace the design outline onto the wood using a pencil:
- Start by tracing the outline of the heart with the Celtic knot clip art design onto the wood.
- Make sure you are pressing hard enough to cause the graphite to transfer to the wood. Make sure to trace each part of the pattern.
- Using a colored pencil makes it easier to see where you have traced and where you still need to trace to complete the design.

7. Ensure the design has transferred to the wood:
- Ensure the entire design has transferred to the wood before removing the graphite paper.
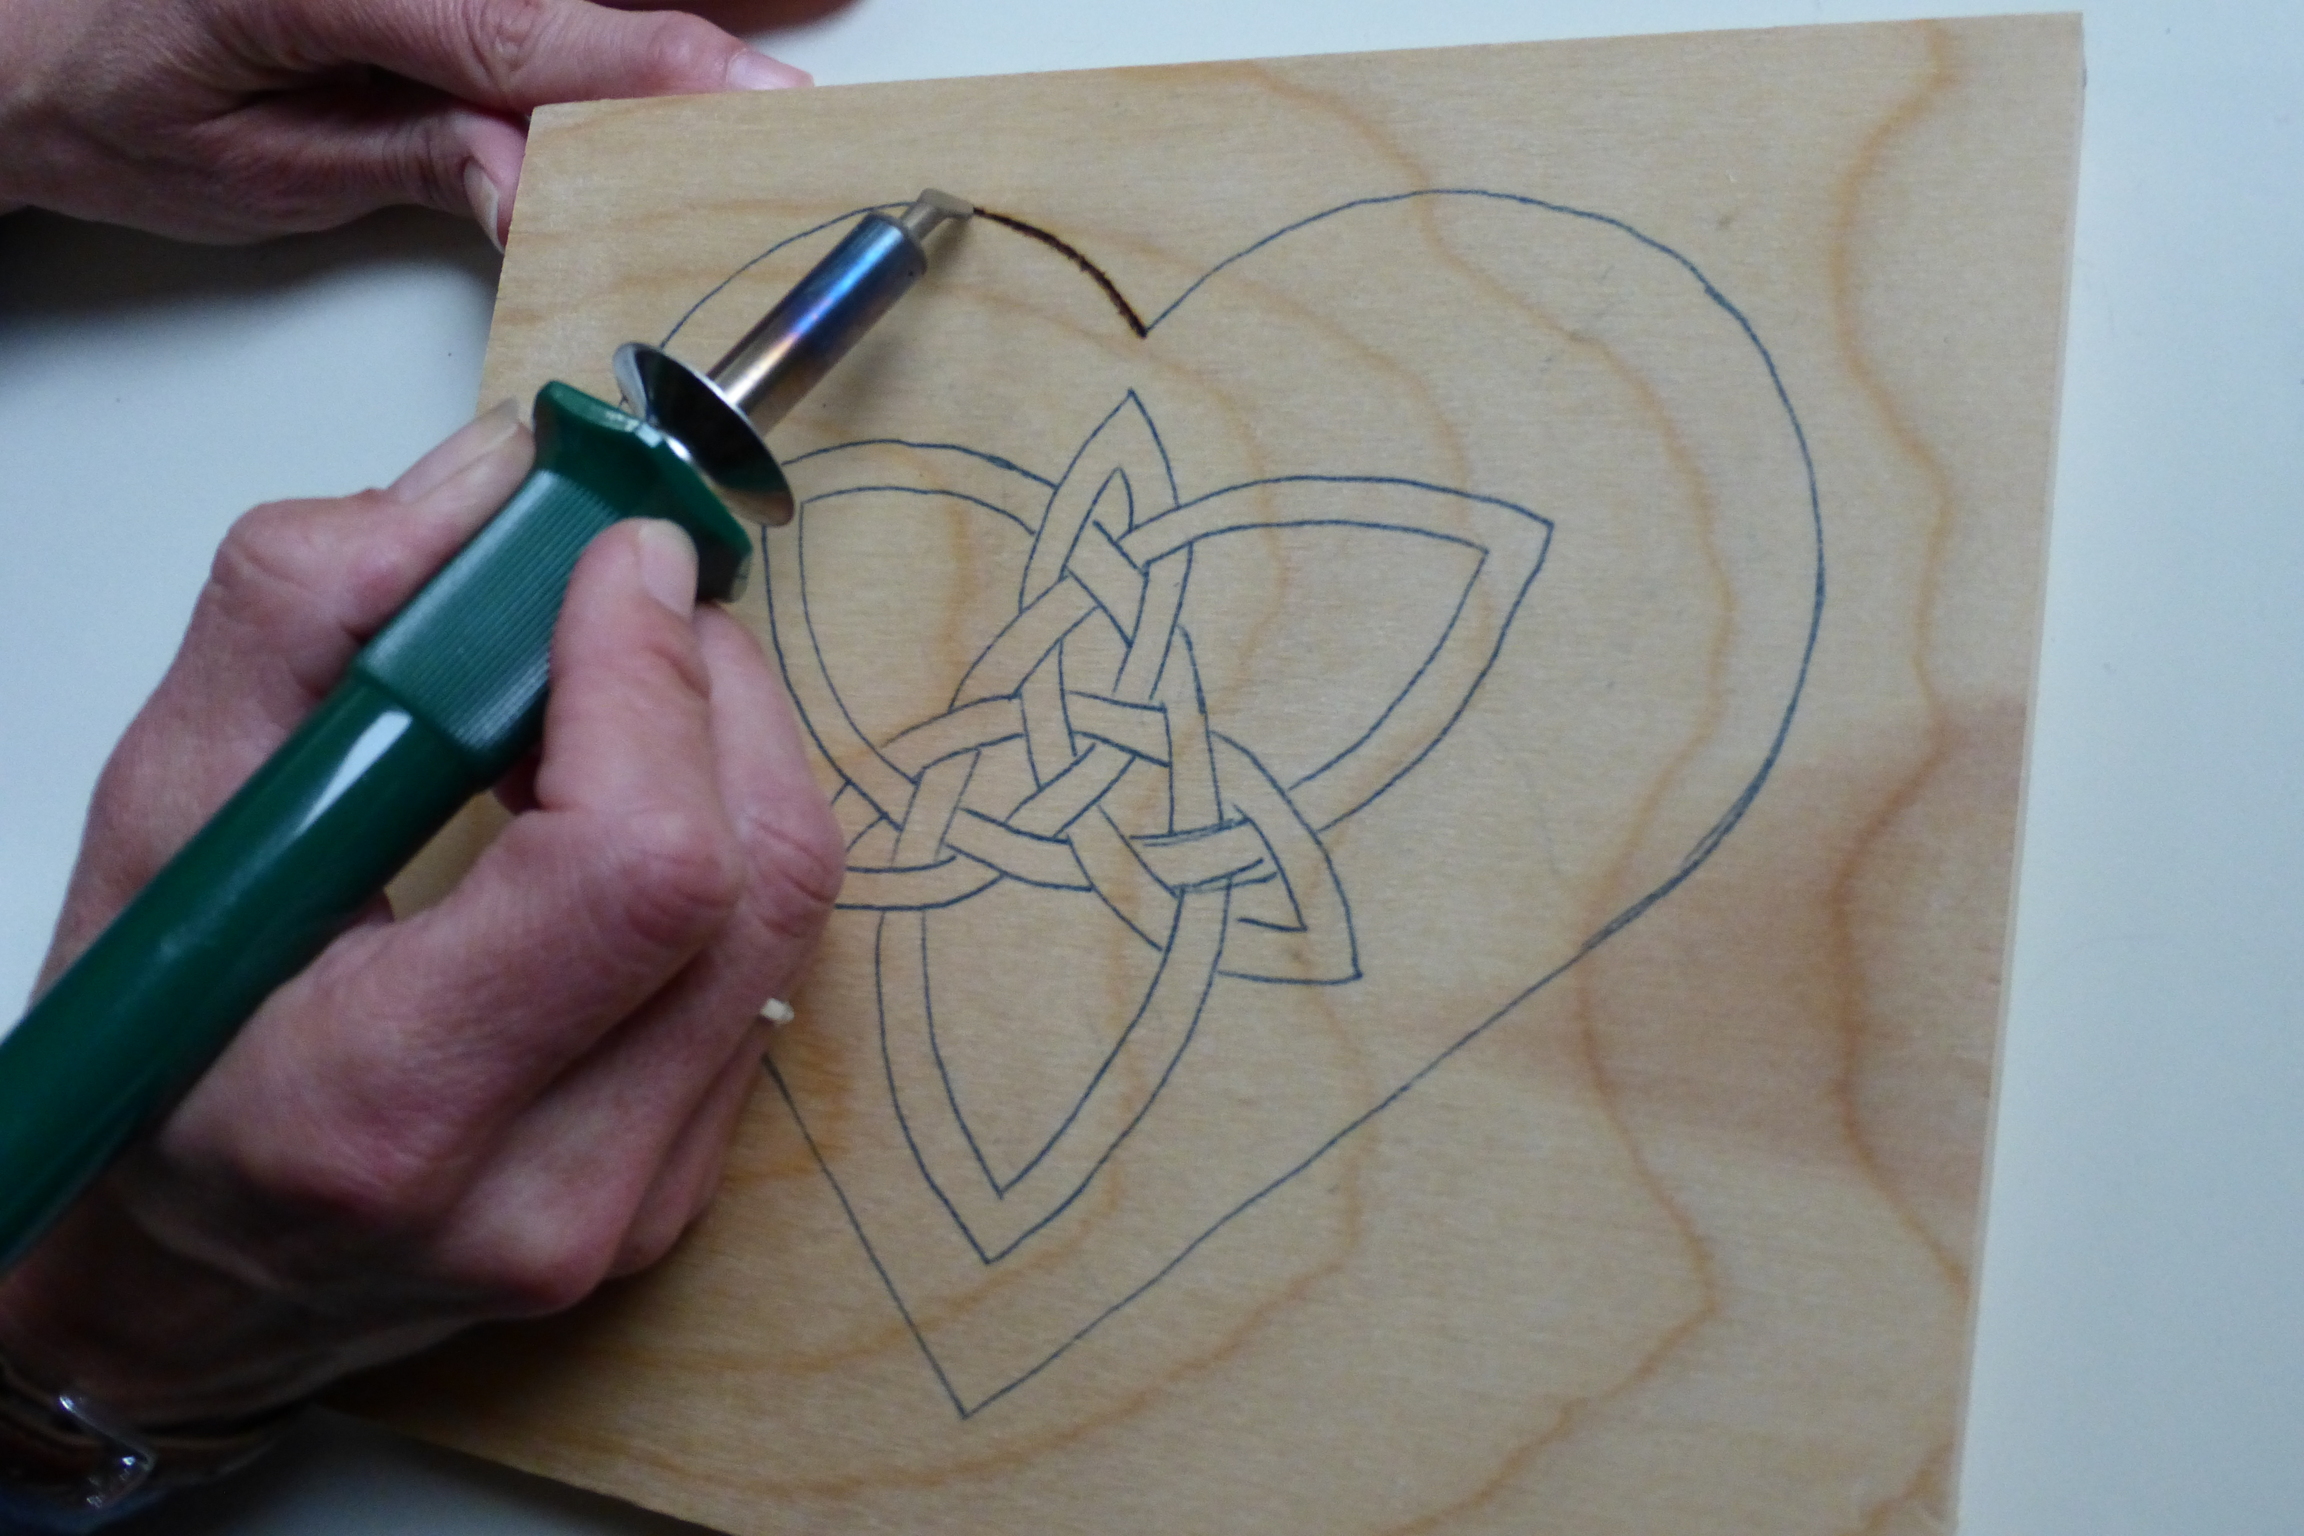
8. Use a Woodburning pen to burn the pattern into the wood:
- Trace the design with a woodburning pen to burn the heart with the Celtic knot pattern into the wood.
- Practice this step first if you’ve never used a woodburning pen.
- It’s best to practice using the same type of wood you will use to create the design.
- A wood burner is easy to use once you get the hang of it.
9. Lightly sand the wood with the design burned into it:
- Once the design is burned into the wood, lightly sand the wood to remove any rough edges in the design.
- Do not sand it too much, or the design will be removed.
10. Paint the wood with the design:
- Paint the wood with the Celtic heart knot in the colors of your choice.
- Re-burn the pattern if you make any minor mistakes.
11. Seal and protect the paint and design:
- Apply a coat of Mod Podge or another sealant using a foam brush to seal and protect the artwork and the design.
12. Give as a gift with love or keep it to enjoy for yourself:


I know this is a new blog, but I am really impressed by the quality of the content. You must have been working at it for a long time. I love how simple the directions are for this box, how well the photos illustrate the process, and how pretty the design is in the first place!
Thank you so much! I’m glad you like it! I was hoping that the directions were easy to follow. I have much more to come, stay tuned!
I adore this, a perfect craft for a teen/tween or adult. In fact I want this for me!
Thanks! I’m glad you like it! It’s always nice when you create something that others appreciate 🙂 It would be good for a tween or older child to work on. Just make sure they are well aware of how hot the tip gets and take proper precautions. If you do decide to make it come on back and share a picture when your finished.
That came out beautiful! I always admire woodburn crafts but your tutorial is the first that made it seem like something I could actually do!
Thanks! You can totally do this craft! If you can trace and color you can woodburn! It’s a lot like coloring but the finished product is a bit more elegant. 🙂
I’ve been debating investing in a wood burner – there are so many wonderful craft opportunities like this one! I love that gold tone paint mixed with the celtic knot pattern!
Wood burning is a fun craft you should give it a try! You will love it! It’s very meditative like coloring. Woodburning pens are really inexpensive. I have had the one listed above for over 10 years and it still works great!