
Use this seashell jar as a unique DIY decoration and gift to improve Feng Shui, hold cherished memories, or help children (and adults) calm down, reduce stress, focus, and even learn to meditate!
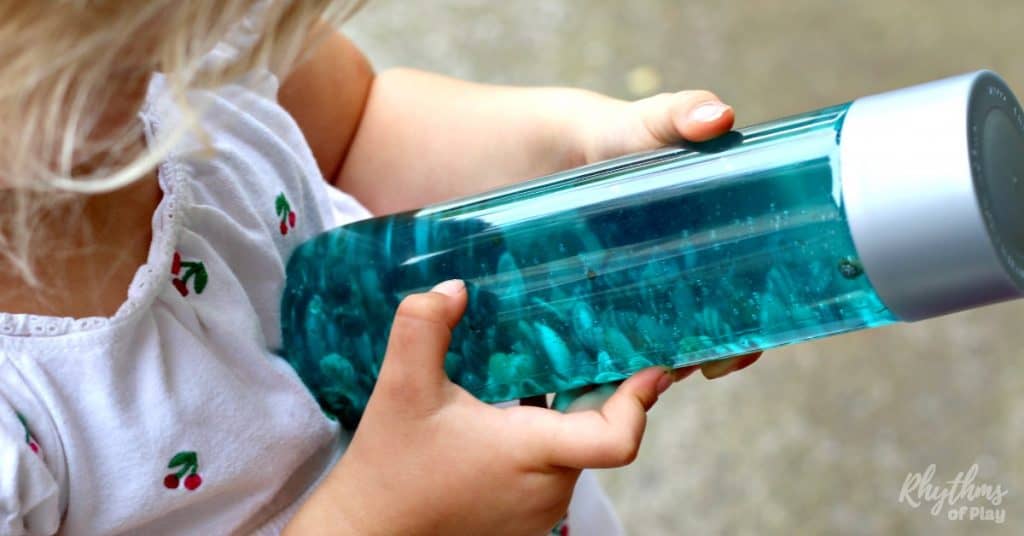
Help calm an anxious or overwhelmed child with this easy DIY seashell sensory bottle. The gentle motion of the slowly falling shells can soothe an overwhelmed child, relieve anxiety, and reduce stress. This makes a seashell discovery bottle a great homemade toy for non-messy and safe sensory play. Creating a seashell jar craft, such as this soothing seashell sensory bottle, is a simple way for babies and toddlers to explore shells without the risk of choking on them. For more information about sensory bottles and their uses, check out Calm Down Sensory Bottles 101.
These beautiful shell crafts aren’t just enjoyable sensory toys; they can also function as valuable tools and aids. This homemade calm-down jar can also help both children and adults learn to meditate as they watch the seashells swirl and float to the bottom. Moreover, a bottle or jar filled with seashells makes a lovely gift, party favor, and decoration for beach-themed celebrations and special events, such as birthdays or weddings.
You can even use shell jars as educational resources at home or in the classroom. If you’ve ever been unsure about what to do with the seashells you collect during your daily adventures or beach vacations, creating a seashell jar is an excellent option. For more creative DIY ideas using nature’s treasures, explore these nature crafts and art ideas suitable for kids and adults of all ages.
Seashell Jar Craft and Sensory Bottle Calm Down Jar for Kids (and Adults):
The step-by-step instructions below teach how to make a seashell jar with or without liquid to use as a sensory bottle or home or party decor. In other words, use the shell craft tutorial below to create a soothing sensory bottle with gorgeous seashells floating gently inside or sitting, looking naturally beautiful just as they are. A decorative bottle filled with shells makes lovely coastal-themed decor with or without water, so the method you choose will depend on how you intend to use it.
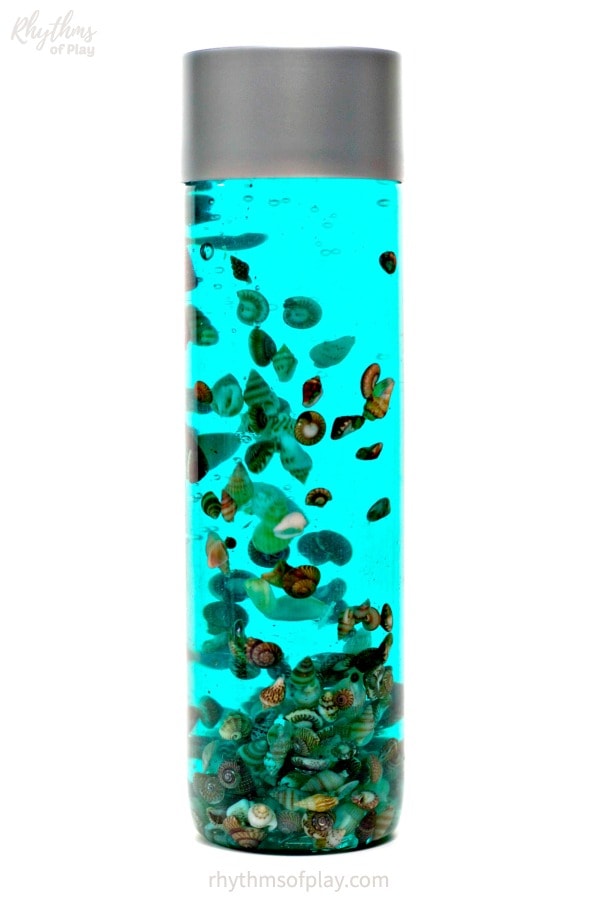
As mentioned above, adding liquid (as shown in the photograph below) transforms a simple jar filled with shells, or even empty bottles bound for the recycling bin, into a sensory play toy. Shell jars of all varieties also make lovely DIY decorations or gift ideas. First published on April 25, 2016, this seashell jar craft tutorial is regularly updated to improve the content. Today, you can use the directions in the next section to make a gorgeous variety of DIY shell jar or bottle crafts.

How to Make a Soothing Seashell Sensory Bottle:
Gather the seashell jar craft supplies listed below. Then, use the step-by-step instructions in the next section and the shells you collect on beach-combing adventures and vacations to make a soothing seashell jar. You might also enjoy making a Glittering Mermaid Tail Sensory Bottle.
Slow Falling Sea Shells DIY Calm Down Jar Supplies:
This shell craft idea shares a simple way to use the seashells you find on your daily adventures and family vacations. It also provides an easy way to store them. Alternatively, you can use the affiliate link in the craft supply list below to buy shells for crafts on Amazon. (If you click to purchase, Rhythms of Play will earn a small commission at no extra cost.)
Please read through the tips and step-by-step DIY instructions below before making seashell jar crafts, so you know what to expect and can make a more informed choice about the craft supplies you want to use.
- Mason jar, clear or colored decorative glass bottle or vase, or recycled glass (such as a wine or beer bottle), recycled plastic water bottle, etc.
- Any empty glass or plastic bottle from the recycling bin with a large enough opening to fit the seashells you are using will work as a jar to hold shells for either of these projects.
- If you want to add liquid to the seashell jar to make a calm-down jar, as shown in the photographs, please ensure the container is watertight and has a lid.
- If you are using a decorative bottle, wine bottle, or vase without liquid to create coastal-themed decor or party favors, you may need a tapered cork to prevent the shells from spilling out.
- Goo Gone.

- Seashells (choose one of the options below):
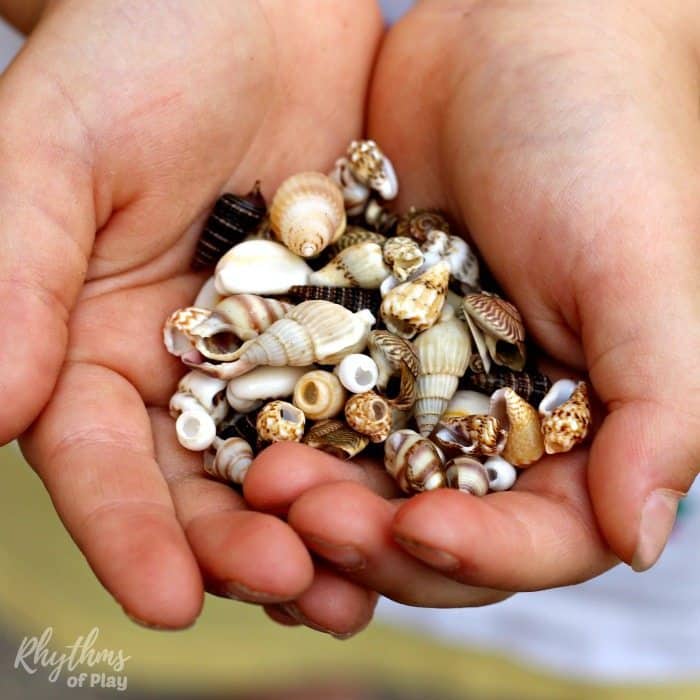
- Use the seashells you collect along the shoreline.
- Please read the note about shell collecting below if you select this option.
- Purchase shells for crafts.
- Not only can you use these shells to create the DIY seashell calm-down jar featured in the photographs, but you can also make other shell crafts, such as flowers made with shells or shell handprint keepsakes.
- Use the seashells you collect along the shoreline.
- Tap or distilled water (optional, see instructions).
- The following shell jar ingredients are not needed if you are not adding water to it:
- Aqua or blue food coloring or liquid watercolor paint
- Clear liquid hand soap or clear glue (optional, see instructions).
- Super glue
 or hot glue (optional, see instructions).
- Aqua or blue food coloring

 or liquid
Collecting Seashells:
Shells are best collected in the shallows and along the shores of fresh and saltwater bodies. However, not all shells should be collected, and many shores are best left undisturbed. It can even be illegal to collect certain types of shells or those found in specific locations. In other words, sometimes it is best to enjoy nature with our eyes, not our sticky fingers. Mother Nature appreciates keeping the majority of her resources exactly where they are found. However, shell collecting is a favorite hobby for children and adults of all ages, myself included, so I recommend reading posted signs and using prudence.
Studying or collecting seashells is known as shell collecting, or, more specifically, conchology. However, most shell collectors of all ages are often more interested in the aesthetic value of the shells than in their scientific study. However, learning about different types of shells and their origins is a fantastic science activity for both homeschoolers and students in traditional schools. Create seashell jars with various shells to help children learn more about the sea creatures that inhabit them and where they live, with the step-by-step instructions below.
Homemade Seashell Jar Discovery Bottle Step-by-Step Instructions
Follow the simple step-by-step seashell jar craft instructions to make a DIY sensory bottle, discovery jar, seashell toy, gift, or decoration with or without liquid inside. For more ideas, look through this list of Nature-Inspired Sensory Bottles.
1. Clean the Jar or Bottle:
- Clean a mason jar, a decorative glass bottle, an empty plastic water bottle, or a glass bottle from the recycling bin that would look good with shells in it.
- Peel off the sticker (if applicable) and use Goo Gone to remove any remaining sticky residue.
- Wash the mason jar, glass bottle, or recycled water bottle with dish soap and water.
 to remove any remaining sticky residue.
2. Wash the shells for the seashell sensory bottle:
- Clean, soak, and rinse 1/3 to 1/2 cup of seashells to ensure no broken shell pieces or other particles remain.
- Dirty shells make dirty seashell sensory bottles or decorations; please ensure the shells are cleaned thoroughly before using them to make a seashell jar craft.
3. Drop the seashells into the bottle, jar, or Vase:
- Place the seashells into the mason jar, vase, light aqua glass bottles, or recycled plastic bottles to make either a soothing seashell discovery bottle or a decorative shell jar.
4. Put water into the bottle or Jar with shells in it (optional):
- This step is optional and unnecessary if you want to make a seashell jar or sensory bottle without liquid. Skip down to Step 7 if you are not adding liquid to the shell jar.
- Shells sealed in a jar look lovely, whether filled with liquid or not.
- If you are adding liquid to your DIY seashell jar, read the notes about the optimal water temperature below, and pour 1/3 to 1/2 cup of distilled or tap water into the mason jar or recycled bottle.
Best Water Temperature for Mixing Sensory Bottles:
- If you want to use a combination of water and clear liquid hand soap or clear glue to slow down the motion of the shells inside the bottle, the best temperature depends on the ingredients you use to make the sensory bottle.
- More water and less glue or hand soap will cause the seashells to move faster, while less water and more glue or hand soap will cause the seashell sensory bottle to move more slowly.
- If you will be adding clear glue instead of clear liquid hand soap to slow down the contents, it is best to use warm to hot water to help the glue and water mix when you add it in the next step (Step 5).
- However, the water does not need to be boiling to mix the glue with water.
- Boiling water will melt and warp recycled plastic bottles, and can shatter glass jars that are not tempered.
- Unlike glitter glue sensory bottles, such as this winter snowstorm sensory bottle or this shimmering mermaid tail, this seashell jar does not require mixing with boiling water to keep the glitter from clumping.
Related: Slow Falling Hearts Sensory Bottle
5. Add clear liquid hand soap or glue to the DIY shell sensory bottle (optional):
- This step is optional and unnecessary if you are not adding liquid to the DIY seashell bottle craft.
- If you want to add clear liquid hand soap or glue to show the contents of the bottle, fill the calming seashell bottle up the rest of the way with the preferred ingredient.
- Add clear liquid hand soap or glue to the shell sensory bottle until the water bubbles on top (if any) and overflows.
- In other words, remove all of the air from the bottle.
6. Add color to the seashell Jar Solution (optional):
- This step is optional and unnecessary if you are not adding liquid to the DIY seashell jar, prefer the liquid to remain clear inside the bottle, or if you are using a colored glass bottle, vase, or jar for the project.
- If you want to add color to the seashell jar, put a drop or two of blue liquid watercolor paint or blue food coloring in the seashell sensory bottle and swirl it to mix the color.
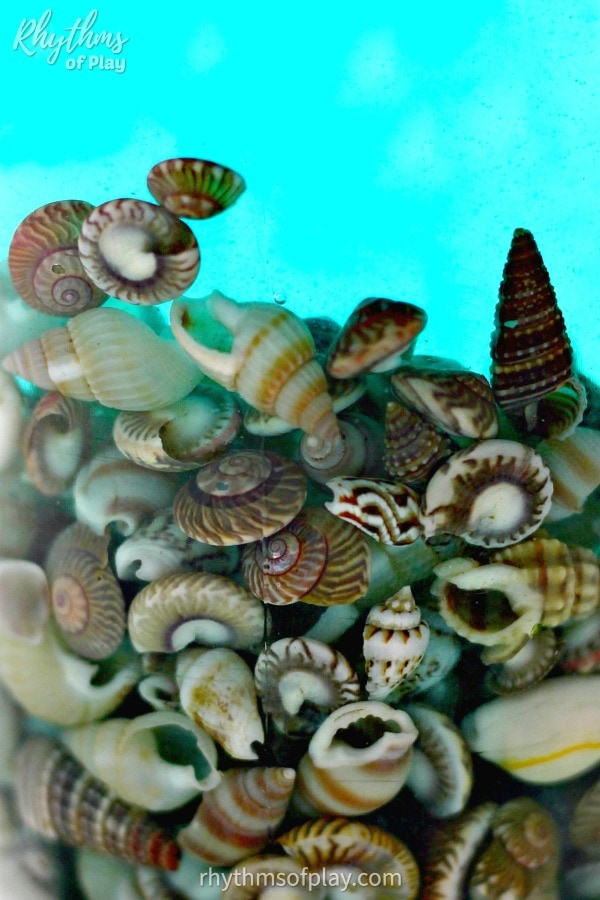
- I used aqua-blue to make the sensory bottle shown in the photographs.
- If you don’t have aqua-blue, you can also add a drop of green watercolor paint or food coloring and blue to create a seashell jar that resembles an aqua or teal color, reminiscent of a Caribbean shore, as shown in the photographs.
- I used aqua-blue to make the sensory bottle shown in the photographs.
- Add another drop (or two) if you want more color, but don’t add too much. A little liquid color goes a long way!
7. Put the Lid on or place a cork inside the bottle or jar:
- Place the lid on the DIY sensory bottle, or insert a tapered cork topper into the decorative bottle or vase to prevent the contents from spilling out.
- Wash the outside of the jar or bottle clean of any soapy residue (or glue) if needed.
- If there is liquid inside, tip the bottle from top to bottom, or give it a gentle shake to mix the ingredients.
- It may be a bit murky for a few hours until the contents mix and settle. This is especially true if you make it with hand soap.
8. Glue the seashell jar shut (optional):
- I recommend using superglue or hot glue to seal the lid or cork topper on the seashell jar or sensory bottle if young children, such as toddlers and preschoolers, will handle it.
- The contents of this sensory bottle are hazardous for young children, so it’s best to ensure that they can not open it and are supervised during play.
- However, older children and adults might prefer keeping the seashell jar unglued so they can open it to add air and remove the suction dent that will appear on the side of the bottle during storage if the bottle is made of plastic.
- Another way to avoid a pressure dent is to use a glass jar, vase, or bottle.
- If you plan to glue it shut and there is liquid inside, experiment with the seashell bottle craft for a day or two to ensure you like the speed of the seashells’ movement inside before sealing it.
- For example, if you want the shells to move a little faster, add a bit more water.
- Alternatively, if you wish to make the contents of the sensory bottle DIY move more slowly, add more clear liquid hand soap or glue to your seashell sensory bottle.
- Please read through Calm Down Sensory Bottles 101 for more DIY tips (including everything you need to know about sensory bottles).
SeaShell Discovery Bottle with Liquid DIY Troubleshooting Tips:
Please be aware that this sensory bottle might be a bit murky until the contents mix and settle. Even if you fill it all the way up with the seashell sensory bottle recipe, the soap and water can make a few bubbles when mixed. Air, soap, and water make bubbles, so shaking the bottle with air remaining inside can cause it to become a frothy mess.
Another way to avoid this is by using clear glue instead of hand soap to minimize or eliminate the appearance of froth and bubbles. Once the liquid contents of the seashell jar craft have settled, glue the lid onto your seashell discovery bottle.
Once you are happy with how your shell calm-down jar moves and flows, ensure the liquid is topped off so that no air remains inside the seashell jar. Scroll down to see the many uses of a seashell bottle. You might also enjoy making a butterfly calm-down jar or a glittering mermaid’s tail.
Related: Rainstick Musical Sensory Bottle
Shell Jar Uses:
Use shell jar crafts to enhance the decor of any space or special event, preserve memories, reduce stress, educate, inspire creativity, and promote a sense of natural beauty and harmony. Look through the list below to gather ideas.
1. Calm-Down Tool or Toy:
Primarily used as a sensory play tool or toy, known as a calm-down sensory bottle or discovery jar. Sensory bottles, such as this seashell sensory bottle, can help soothe children when they feel overwhelmed and assist them in learning to regulate their emotions. Even an anxious adult can benefit from the soothing quality of this seashell sensory bottle.
2. Mess-Free Safe Sensory Play:
Discovery bottles are also great for no-mess, safe sensory play. For example, they are the perfect way for babies and toddlers to safely investigate small objects like shells without the risk of choking on them. You might also enjoy this list of DIY Sensory Bottles.
3. Meditation Aid:
Calm-down jars are also a helpful meditation tool for children and adults. Invite kids to watch the shells move around in the bottle as a simple way to clear their minds and focus. Learn a few more simple tips to help children self-regulate HERE.
4. Natural Decorations:
Seashell jars are often used as decorative pieces in homes and offices, making lovely wedding decorations and centerpiece additions for coastal-themed decor or parties with a beach theme. Each shell’s various colors, shapes, and sizes can display nature’s beauty, bringing a touch of the coastal atmosphere indoors.
When transformed into decorative items, seashell jars become bottles full of gorgeous seashells that can instantly elevate any space with their coastal charm. They evoke memories of time spent aimlessly wandering local beaches and enjoying family seaside vacations, bringing a touch of the beach indoors.
In Feng Shui, seashells are often considered water symbols and are believed to enhance the flow of chi (energy) in a space. Placing a seashell jar or another shell craft or decoration can promote tranquility and balance, depending on the specific arrangement and the intended purpose.
5. Unique Memory Jar:
Beyond its visual appeal, a seashell jar can serve as a repository for cherished memories, holding the sentiment of shells collected from various shores. Children and adults of all ages collect seashells as souvenirs from beach trips or vacations. A seashell jar provides a way to preserve and display these memories in a meaningful way. Each shell may carry sentimental value, reminding the owner of pleasant experiences or places visited.
6. Educational Tool and Marine Science Teaching Aid:
Seashell jars also serve as valuable educational tools. Displaying a decorative glass container full of beautiful shells at home or in the classroom can facilitate discussions about marine life and ecosystems, providing a window into the fascinating world of the sea for both young and old.
Shells can be used to teach students about marine life, biodiversity, and geography. They can be categorized by species, size, color, or origin. These shell activities can facilitate discussions about ecosystems, habitats, and other essential science concepts. For more ideas, have a look at these sensory bottles.
7. Craft and DIY projects:
For craft enthusiasts, seashell jars offer endless creative possibilities, from DIY projects to personalized gifts. Shells can easily be glued onto surfaces such as wood or glass, drilled with holes and strung as beads, or arranged creatively within a decorative glass. This makes it easy to use shells to create natural homemade gifts, such as photo frames, shell art, or jewelry.
8. DIY Party Favors:
A seashell sensory bottle makes a simple, homemade party or wedding favor and decoration for an ocean, beach, or coastal-themed birthday party, as well as other under-the-sea events.
9. Homemade Gift Ideas Kids Can Make:
Seashell crafts, such as these jars filled with shells, are easy DIY gifts or decorations. Seashell jars are a simple DIY project that people of all ages can make to give someone special for their birthday or Christmas, for any of the reasons and uses mentioned above, and more. They also make a lovely Mother’s Day, Father’s Day, Grandparent’s Day, or teacher appreciation gift idea. For more DIY gift ideas, click the link!
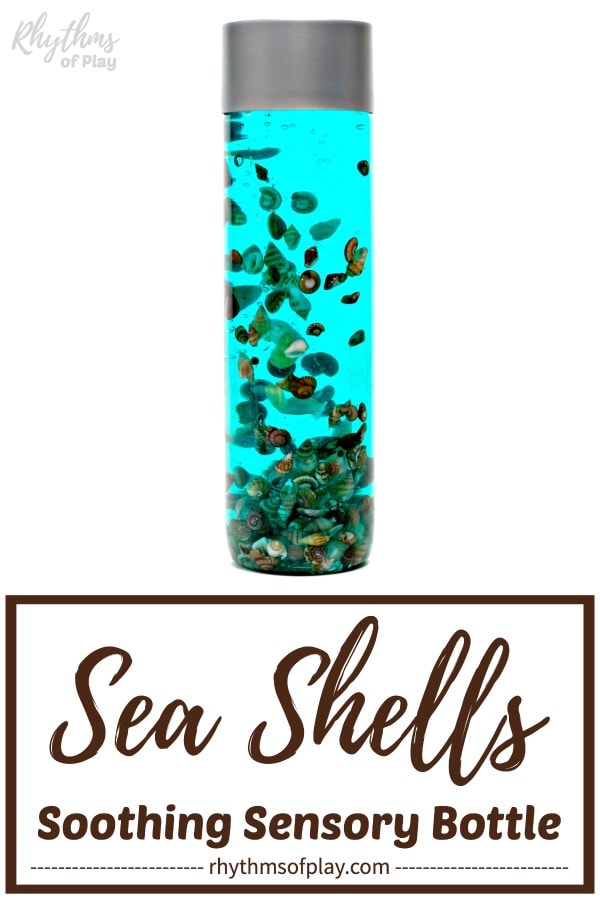
Soothing Seashell Jar Sensory Bottle DIY:
If you’ve ever been unsure about what to do with the seashells you collect during your daily adventures or beach vacations, creating a seashell jar is an excellent option. A seashell jar is a versatile item that can serve multiple purposes.
Seashell jar crafts like this DIY project make a great sensory play toy and tool, an easy homemade gift idea, simple DIY home decor, festive beach party or wedding decorations, and more! It also serves as a great way to store your seashells!
For more information about sensory bottles, including their uses, how to make them, and additional details, check out Calm Down Sensory Bottles 101. Or look through the list of sensory bottle DIYs below:
DIY Calm Down Jars:
- Best DIY Sensory Bottles for Every Holiday and Season
- Butterfly Sensory Bottle
- Rainstick Musical Sensory Bottle
- Nature-Inspired Sensory Bottles
- Red, White, and Blue Stars Sensory Bottle
- Vegetable Garden Discovery Bottle | Sunny Day Family
- Desert Flower Discovery Bottle | Preschool Inspirations
- Simple Spring Nature Sensory Bottles | Lemon Lime Adventures
- Calming Nature Sensory Bottle | Sugar Aunts
- Spring Backyard Nature Discovery Bottle | Little Bins For Little Hands
- Mermaid Tail Glitter Sensory Bottle


Why did you use hand soap in this instead of glue?
Good question Hannah! Glue is generally used in glitter bottles to help the glitter suspend and swirl. For other bottles with heavier pieces like this, you can use either clear hand soap, or clear dishwashing soap to make the water more viscous to slow the shells down. Clear hand soap is thicker so you will need to balance it with water, while dishwashing soap will need less water if any. I hope that makes sense. Feel free to use the contact button above if you need any more help 🙂
I’m thinking of doing this activity at a party that is only 3 hours long, so I don’t want this beautiful craft to be murky during the party. Can you mix the water and soap ahead of time for 10 children and then let them pour the mixture into their bottles all at once?
In my mind’s eye, it sounds possible. Just make sure you fill each bottle up to the top before you put the cap on and it just might work. Let me know how it goes!
The superglue … did I miss what its use is? Is it for sealing the lid?
Yes, JJ! The glue is for sealing the lid shut once you are satisfied with your sensory bottle DIY. I’m sorry that I did not make that clear!