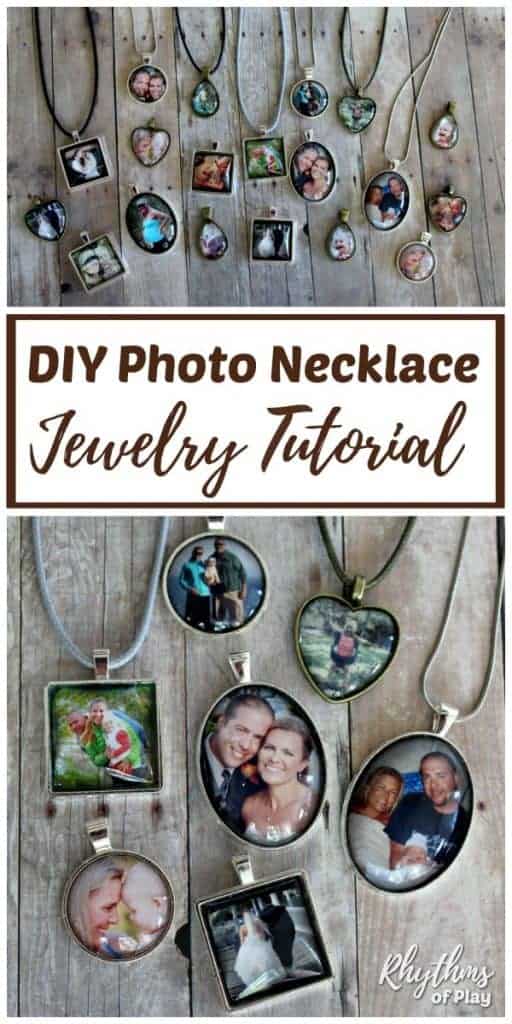
Turn your favorite photographs into personalized picture necklaces to wear or give as DIY Photo pendant gifts!
This DIY photo jewelry-making tutorial teaches how to make a personalized picture necklace. A photo necklace is a unique handmade jewelry-making craft and a great gift idea. Personalized picture necklace charms and pendants are an easy craft and homemade gift idea that kids or adults of all ages can make. With the easy step-by-step DIY instructions below, you can create one-of-a-kind picture necklaces that your loved one will treasure.
Hand-crafted photo pendants and charms make fantastic homemade gifts for friends and loved ones on Christmas, birthdays, or anniversaries. A DIY photo pendant is an excellent handmade gifts for Mom, Dad, Grandma, or Grandpa on Mother’s Day, Father’s Day, or Grandparent’s Day. They can also be made as DIY wedding favors or memorial gifts. First published on April 30, 2018, this photo craft tutorial is regularly updated and republished to improve the content and remian current. Alternatively, you can use the same craft supplies to to make backpack charms and DIY photo keychain ornaments for someone special.
DIY Picture Neclaces I Made for This Jewelry-Making Tutorial:
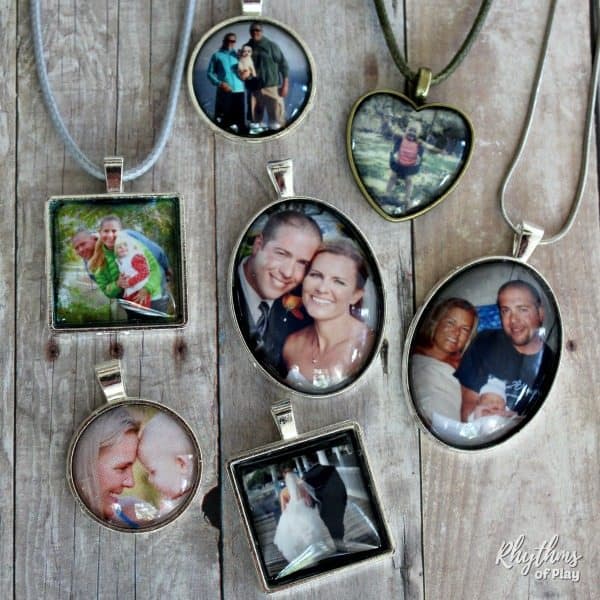
Picture pendants are keepsake crafts you can treasure forever encapsulated in a charm you can wear on a necklace or put on a key ring. The photos and video tutorial for this post show picture necklaces I made with personal photos of my family. I made some for myself to wear and others to give to relatives.
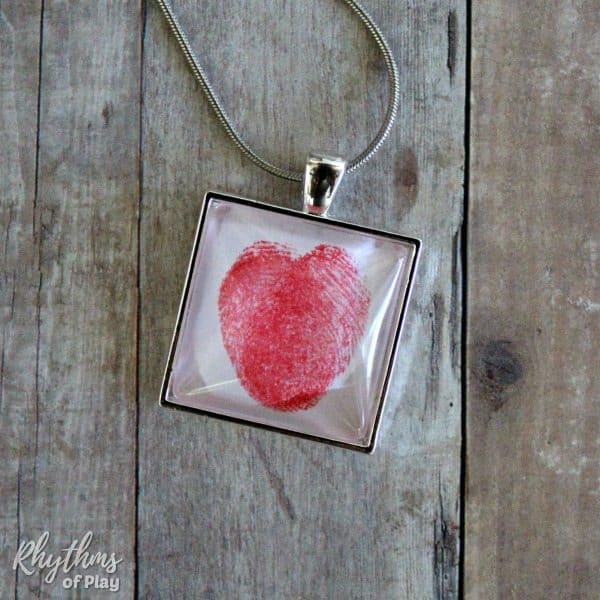
They include pictures of me pregnant, wedding photos, newborn baby photos of my daughter, my daughter as a toddler, various family photos, and photos of my husband and me with our dog before marriage. You can also use the same craft materials and my easy step-by-step craft tutorials to make DIY photo keychains, fingerprint art necklaces, or thumbprint heart necklaces.
How to Make a Photo Pendant Necklace:
Easy projects like DIY picture necklaces are easy for kids or adults to make. First, gather the photo jewelry craft supplies you would like to use from the recommended jewelry-making materials below. Then, follow the easy step-by-step instructions below the video tutorial to make a personalized picture necklace pendant or photo charm.
Related: DIY Keepsake Gifts for Him or Her
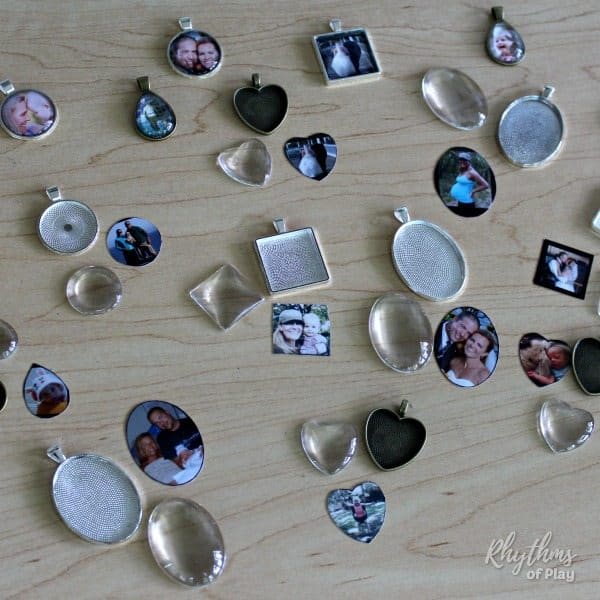
DIY Picture Necklace Photo Jewelry-Making Supplies:
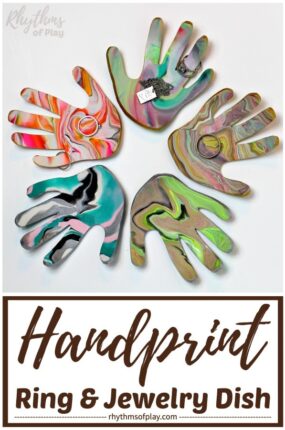
Please read the step-by-step DIY photo pendant instructions and watch the video tutorial before choosing from the recommended jewelry-making supplies and photo craft options below. Doing so will enable you to make a more informed choice about the type of craft supplies, photo necklace shapes, and pre-made necklaces you want to use to create photo jewelry from the materials list. You might also enjoy making a handprint jewelry dish.
- Small personal photographs. You will need one per picture necklace charm.
- See step-by-step instructions for photo details.
- Choose one of the following options for cutting photographs:
- Marking pen and detail craft scissors.
- X-acto blade precision knife and glass or self-healing cutting mat.
- Paper punch that matches the size and shape of pendants.
- Glue or adhesive (choose at least one of the following options):
- Diamond glaze adhesive.
- E6000 craft adhesive.
- Mod Podge or another white clear drying glue.
- Bezel pendant trays with glass cabochon photo jewelry-making options (choose at least one picture pendant option from the list below):
- 40x30mm Oval photo pendant trays and oval glass cabochons (sold seperately).
- Alternatively, you can purchase these in a jewelry-making set of oval trays and glass oval tiles with necklace chains. If you choose this option, you will not need the necklaces sold separately below.
- 25mm square picture bezel pendant charms with square glass cabochons (set).
- 25mm round bezel pendant trays and glass cabochon domes (set).
- Heart bezel photo pendant charms with round glass cabochons (set).
- Variety pack of bezel pendant trays including heart, round, square, oval, and teardrop trays with glass cabochons for picture charms.
- 40x30mm Oval photo pendant trays and oval glass cabochons (sold seperately).
- Pre-made necklaces for picture pendant charms (choose at least one from the list below or make a hand-beaded necklace):
- Sterling silver snake chain necklace (fit all photo pendant shapes).
- Silver-plated snake chain necklaces (fit all picture pendant shapes).
- Imitation leather cord necklaces (fit all photo charms).
- Multi-colored satin silk necklaces (fit into oval-shaped picture charms but not square, circle, heart, or teardrop photo jewelry pendants).
Related: DIY Mother-Daughter Necklace Set
Picture Necklace Crafts Video Tutorial:
Below this video tutorial are step-by-step directions for DIY picture necklaces. Another fun idea is to make fingerprint art necklaces. Alternatively you can create picture keychain pendants and backpack charms.
Related: Beautiful Homemade Gifts
DIY Picture Necklace Step-By-Step Photo Jewelry Making Tutorial:
DIY photo necklaces are easy to make. Follow the step-by-step instructions below to make pendants with pictures you can wear on a necklace. You may also make DIY photo keychains, fingerprint art necklaces, and thumbprint heart necklaces with the same craft materials.
1. Select a photograph (or photographs) to make into picture pendants and Print if needed:
- Select a special photo to make one personalized picture necklace or several pictures to make as many DIY photo pendants as you want.
- Use small photographs that fit inside the pendants you are using.
- Place the glass cabochons over the photographs as shown in the video tutorial above to ensure they are the right size.
- This will ensure that the images fit each personalized photo charm.
- As shown in the video, sometimes old photo cards can work, depending on the quality of the prints, the type of paper, and the glue or adhesive you use.
- You can also order or print photos on matte photo paper, cardstock, or cover weight paper with a color laser or inkjet printer.
- Color laser printers work best.
- Glossy photos from photo labs and regular printer paper will not work.
- For best results, seal photo prints with a clear matte-finish acrylic sealer, and allow it to dry before proceeding to the next step.
- Before making DIY photo pendants and charms, please ensure the prints are completely dry, before touching them or making them into photo jewelry pendants, otherwise they will smear.
- Use small photographs that fit inside the pendants you are using.
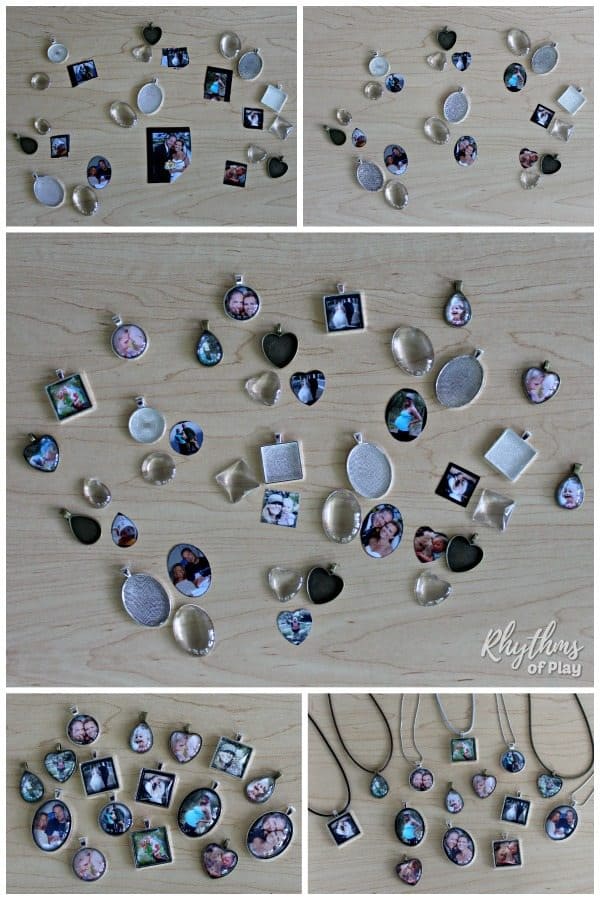
2. Trace the glass cabochon over the picture or pictures you want to make into a photo pendant or charm:
- Clean your hands and ensure photos are dry before touching them or the glass cabochons.
- For each personalized photo pendant craft, place a glass tile over each picture and trace around the edge of the glass dome with a marker or a precision knife.
- If you use a prescision cutting tool, place a self-healing or glass cutting mat under the photograph before you trace it to protect your work surface.
- Alternatively, you can skip this step by using a paper punch that matches the size of the pendant charms.
3. Cut out the photograph or photographs for each picture charm:
- Use a pair of scissors to cut out photos traced with marker.
- You can also use an X-acto blade cutting tool and cutting mat to cut out photographs or photographs of the number of picture pendant necklaces you want to make.
- Alternatively, you can cut the pictures out using a paper punch that matches the size of the bezel pendants you use to make the photo charms.
4. Glue the photograph into the Bezel Pendant Tray:
- Ensure the photo fits into the bezel tray before using adhesive. Use scissors to trim away any excess paper if needed.
- Use one of the jewelry adhesives or craft glues reccommended in the photo pendant jewelry making supplies above to glue each picture into each photo pendant charm.
- I made the photo charms in the video tutorial using diamond glaze adhesive, but the other recommendations will also work.
- Diamond glaze and E6000 craft adhesive is best, as white glue can sometimes smear photo prints.
- I don’t recommend using hot glue to make DIY picture necklaces, as it does not adhere well to glass and can yellow over time.
- I made the photo charms in the video tutorial using diamond glaze adhesive, but the other recommendations will also work.
- Use your finger, the back of a small spoon, or a butter knife to press the back of the photo into the picture pendant charm so it sits face up.
5. Glue the glass cabochon into the photo pendant charm tray:
- Apply the photo safe jewelry glue or craft adhesive of your choice to the flat side of the glass cabochon as shown in the DIY picture necklace video tutorial.
- Place the cabochon over the photograph in the pendant tray.
- Press the cabochon firmly into the pentant tray to spread the glue or adhesive evenly and remove air bubbles.
- Hold firmly for 30 to 60 seconds.
- Wipe edges clean with a damp cloth or wipe.
- Allow the photo pendant ornament to dry overnight.
6. String the picture pendant onto a necklace:
- Thread a necklace through the loop of the photo pendant to finish your picture necklace.
- Bead a DIY necklace, or use one of the premade necklace options below (These options are from the recommended photo jewelry craft supplies list above):
- Sterling silver snake chain necklace (fit all photo pendant shapes)
- Silver-plated snake chain necklaces (fit all picture pendant shapes)
- Imitation leather cord necklaces (fit all photo pendant shapes)
- Multi-colored satin silk necklaces (fit into oval-shaped picture pendants but not square, circle, heart, or teardrop photo pendants)
- Note: If you make a hand-beaded necklace, place the photo charm onto the DIY necklace when it is halfway finished. Otherwise, it may not fit over the beads to hang down in the middle.
Related: DIY and Readymade Family Gift Guide
Picture Pendant Necklace Gift Idea That Kids Can Make:
Turn your favorite pictures into one-of-a-kind picture necklaces that friends and family can treasure for years with this easy photo craft tutorial for kids and adults. DIY Picture necklaces, photo keychains, and fingerprint art necklaces are an easy gift idea for Christmas, Mother’s Day, Father’s Day, Grandparent’s Day, Valentine’s Day, an anniversary or a birthday.
DIY photo necklaces also make excellent DIY gifts for your BFF, boyfriend, girlfriend, partner, wife, or husband. You can even make them as homemade wedding favors or memorial gifts to remember loved ones who have passed away. You might also enjoy making fingerprint or thumbprint heart necklaces and thumbprint heart keychains. They are another lovely keepsake crafts and DIY gift.
And don’t forget to check out the other beautiful gift ideas kids can make or this list of DIY and ready-made gift ideas for the whole family!
Learn more about Nell Regan Kartychok, author, photographer, and creator of these photo crafts, and Rhythms of Play HERE!


An absolutely perfect gift idea. Pictures in jewelry? Simply a winner.
Thank you, Diego!!
Where is the best place to order my materials from please. Thank you for an6 help…
Hi Kathleen!
You may have noticed that the photo necklace supplies are often written in blue text. These are hyperlinks to the exact picture jewelry supplies that we found on Amazon and used to make the photo necklaces pictured. If you click to purchase, Rhythms of Play will earn a small commission at no cost to you. 🙂
Let me know if you have any other questions,
Nell
When I tried this, my pendent has what looks like water spots under it. I’m not sure what I am doing wrong
I’m sorry that you had trouble April. Usually, those spots are air bubbles where the gem has slightly come away from the glue. Do your best to press the photo back onto the gem with massage and it should go away. If not, add a dab of glue just under the photo in that spot and then press and hold it until the photo adheres to the glass gem. I hope that helps!
Nell
I had 12 of these ready to go and once I glued them, I had 2 left that were useable. I had one that part of it was dark. A lot of them bled on the sides are became. A few soaked through paper and you could see the texture of the bottom of the bezel coming through. I feel like I wasted money. Any suggestions for next time ?
Hi Lauren, I’m so sorry that your picture charms did not turn out as planned, that is never what I hope to hear. One thing I’ve noticed about making picture jewelry is that it is best to use the glue very sparingly, otherwise, it can puddle and damage the ink of the photo. So, my suggestion is to use less than you think you need.