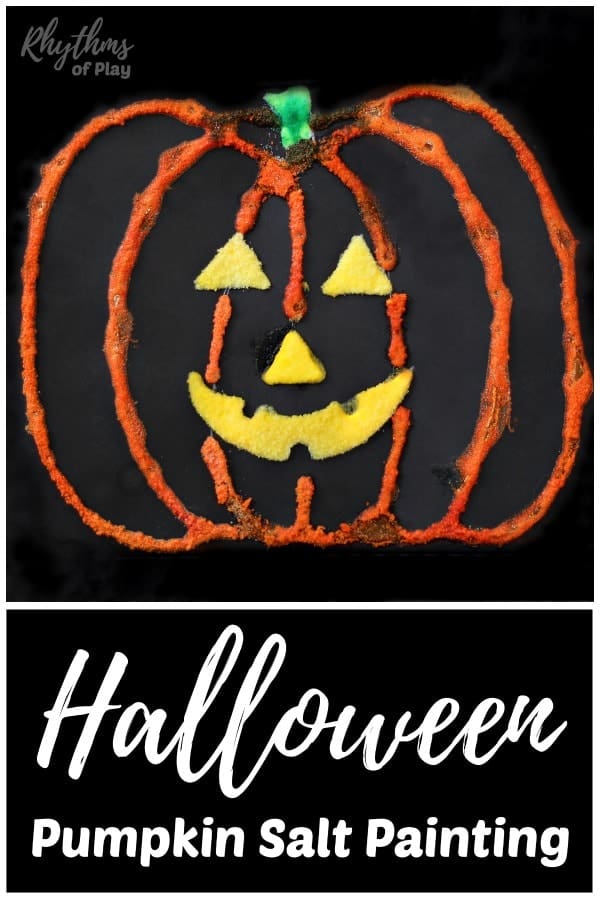
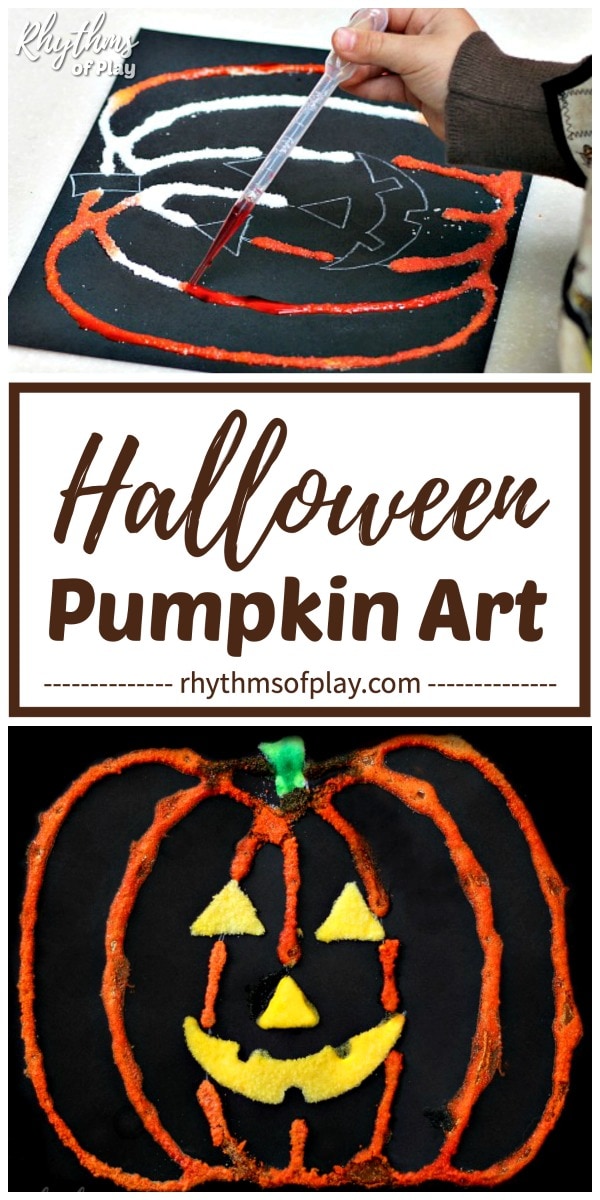
Create Halloween pumpkin art with an easy watercolor technique called “raised salt painting.” Toddlers, preschoolers, kindergarteners, and kids of all ages will enjoy the watercolor painting technique to create a raised salt art pumpkin craft.
Children and adults will enjoy painting this Halloween pumpkin art, with or without a scary or friendly Jack-o’-Lantern face, for a fun and easy Halloween art project. This fun Halloween art activity can help toddlers, preschoolers, kindergarteners, elementary-aged school children (and older adults) strengthen and develop their fine motor skills and hand-eye coordination. Use this fun watercolor painting technique to create a raised salt art Halloween pumpkin craft with added texture and dimension. Creating pumpkin salt art with children (or adults) at home, in the community center, at a Halloween party, or in the classroom is a festive fall painting idea for young and old alike! Check out these festive Halloween Art Projects for Kids for more cool Halloween ideas!
Salt painting is a fun and creative art activity that combines simple materials with a bit of science to produce vibrant, textured artwork. This watercolor technique usually involves using glue to draw a design on paper, sprinkling salt over the glue, and then gently adding liquid watercolor with a brush or dropper. Toddlers and preschoolers may need assistance creating Halloween pumpkin art using the DIY project tutorial below. At the same time, older children and teens can complete pumpkin arts and crafts, such as this salt art pumpkin craft, from start to finish independently. First published on September 26, 2016, this pumpkin painting tutorial is regularly updated to enhance the content and ensure its relevance. You might also enjoy making Halloween ghost crafts.
Halloween Pumpkin Art Project for Kids and Adults:
Get into the spirit this season with this fun Halloween pumpkin art project for kids and adults of all ages! Salt painting is a simple watercolor technique that people of all ages can enjoy and benefit from. Raised salt painting produces textured pumpkin art with added dimension, created by painting lines of glue and salt with vibrant watercolor paints. The results of this art activity are often unpredictable, making each piece of pumpkin artwork unique. You might also enjoy these fall painting ideas for kids and adults.
Salt painting doesn’t require any special skills or expensive materials, making it an accessible art activity for use at home, in schools, or during art therapy sessions. You can use pipettes or paintbrushes to paint the Halloween pumpkin salt art with liquid watercolors. Alternatively, you can use a solid watercolor palette with a cup of water for rinsing the paintbrush. These watercolor painting options can help children develop their fine motor skills and improve their hand-eye coordination.
Squeezing glue bottles and using droppers or brushes to apply color is also beneficial for older adults. The elderly can use art projects like this simple pumpkin painting to keep their minds and hands active in their later years. Maintaining hand dexterity is much easier than trying to recover it. You might also enjoy learning how to start and finish a beaded necklace or bracelet.
More art supply options will make completing this fall art project activity easier for people of all ages and artistic abilities. Use the materials you have on hand, or try a new art technique, such as painting with a pipette, to help children learn how to hold a paintbrush more like a pencil. See the directions below for more information. For an alternative pumpkin painting idea, try painting Harvest Pumpkin Art.
Pumpkin Salt Painting Craft Supplies:
- Black cardstock or white cardstock (construction paper is too thin to handle the weight of this project)
- White-colored pencil or orange-colored pencil
- White glue
- Table salt

- Liquid watercolors or a solid watercolor palette
- Paintbrush or pipette
- Cookie tray or baking sheet (optional but recommended)
- Recycled container for reusing salt in other raised salt art projects (optional but recommended).
- Recycled cottage cheese, cream cheese, sour cream, ricotta, and yogurt work great for this purpose.

Halloween Pumpkin Salt Painting Project Video Tutorial:
My daughter made her Halloween pumpkin art on our DIY outdoor art table and mud kitchen. Click the link to learn how to make one for your yard or patio!
Related: Gorgeous Glowing Halloween Lanterns
Halloween Pumpkin Salt Art Step-by-Step Craft Directions:
As mentioned above, there are several methods for creating Halloween salt art. Please read through each step of the pumpkin art project instructions before starting this raised salt art pumpkin craft. Doing so will make it easier to make a more informed choice about the craft supplies and art materials you will use. Refer to the salt art projects listed below for additional tips on salt painting. Each of the raised salt art project activities below utilizes the same salt and watercolor painting technique to achieve different results. Aren’t these salt painting projects beautiful!?
- Harvest Pumpkin Art Project
- Heart Art Salt Painting
- Rainbow Shamrock Art Salt Painting
- Saint Patrick’s Day Raised Salt Shamrock Art Project
1. Draw a Halloween pumpkin outline onto White or black cardstock using a white or Orange colored pencil:
- Invite children to draw a pumpkin with or without a Jack-o’-Lantern face.
- Toddlers, preschoolers, and kindergarteners may need a parent, teacher, or caregiver to help them with this step, while older children can be encouraged to draw pumpkin art independently.
- Use the step-by-step instructions below to learn how to draw a pumpkin for this painting activity:
How to Draw a Pumpkin Outline for this Halloween Pumpkin Craft:
- It’s easy to sketch a pumpkin for this art activity. It doesn’t need to be perfect because you will be covering it with lines of glue and salt.
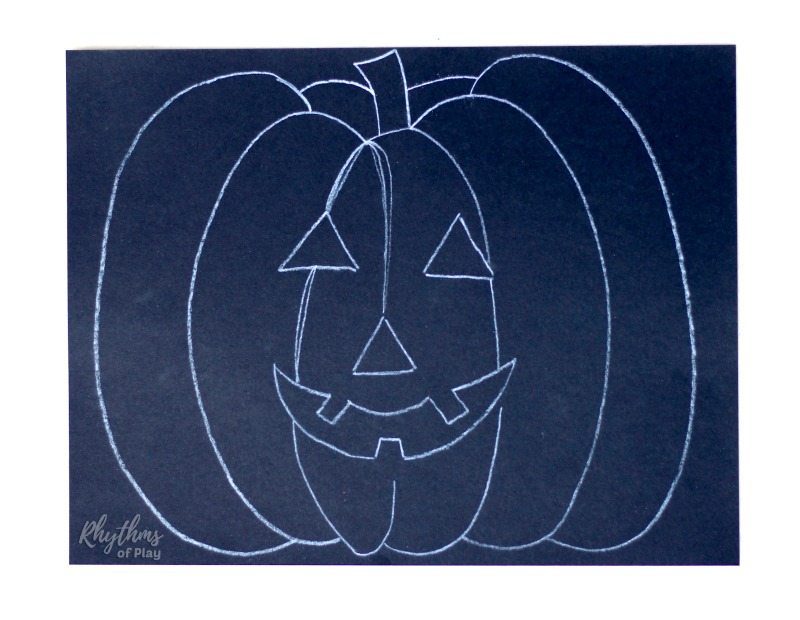
- Do your best to copy the pumpkin art template pictured below with a white colored pencil on black paper.
- I used black cardstock to draw the pumpkin in the photo below. Although you can draw a pumpkin on black construction paper, it is not recommended for this art activity because it is not strong enough to withstand the weight.
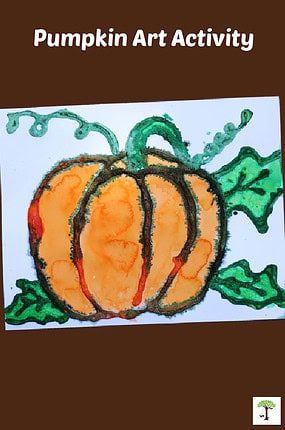
- Alternatively, you can draw a pumpkin with or without a scary or friendly Jack-o-Lantern face on white paper (cardstock or watercolor paper is best) with an orange-colored pencil, like this harvest pumpkin painting.
- Draw each pumpkin section by sketching tall and skinny forwards and backward Cs.
- As shown in the photograph below, the forward-facing and backward-facing Cs should be taller outside than in the middle of the gourd.
- Creating a Halloween Jack-o’-Lantern face, as shown in the white-colored pencil drawing on black paper in the photograph below, on your pumpkin art is optional.
2. Trace the Halloween pumpkin outline with white glue:
- Use white glue to trace the outline of your pumpkin art.
- If you put a Jack-o-Lantern face in the middle of your pumpkin drawing, you can trace the Halloween pumpkin’s outline or fill the eyes and mouth with white glue. (This salt painting project idea shows the latter option.)
- Young children may need help with this step.
- Do not wait for the glue to dry before moving on to the next step.
- Please note: The colors will bleed into each other if the glue and salt lines touch. To prevent the colors from running and bleeding into each other, as seen in this harvest pumpkin raised salt art painting without a Jack-o-Lantern face, keep the glue and salt lines for the face and stem separate from the pumpkin art.
Related: Halloween Handouts: Healthy Alternatives and Non-Candy Halloween Treats
3. Sprinkle table salt over the pumpkin art glue lines:
- Put the paper with the pumpkin outline drawn in glue onto a cookie sheet or baking tray.
- Sprinkle salt on the pumpkin art to cover the white glue completely.
- Once again, do not wait for the glue to dry before moving on to the next step.
4. Shake the excess salt off the Halloween pumpkin outline:
- Shake off the excess table salt immediately after sprinkling it over the top of the glue.
- Shake it onto the cookie tray and then pour it into a container to re-use for your next raised salt art project, such as this heart salt painting.
- Please do not wait for the glue to dry before covering it with salt, nor wait for the glue and salt lines to dry before painting them. If you do, the raised salt watercolor painting method used to create this Halloween art project may not work.
- Please watch the Halloween salt painting video tutorial posted above these instructions to see this step in action.
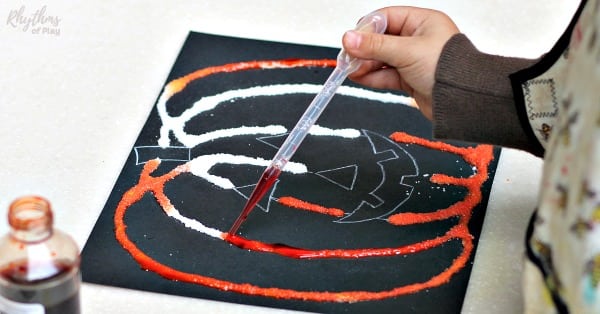
5. Paint the Halloween pumpkin salt art with watercolors:
- Use a pipette or paintbrush to apply liquid watercolor paint to the salt stuck to the glue lines.
- If you use a watercolor palette instead of liquid watercolor paints, apply the paint with a paintbrush instead of a pipette.
- Please remember to have a cup of water on hand to rinse the paintbrush while painting your Halloween pumpkin art.
- Begin by painting the outline of the pumpkin art before moving on to the Jack-o-Lantern face (if any).
- This will decrease the probability that the orange watercolor paint will run into the yellow eyes of the Halloween pumpkin as the child paints.
- Remember, the colors will bleed into each other if the lines of the pumpkin art touch. To prevent colors from running and bleeding into each other, keep the lines for the face and stem separate from the pumpkin’s glue and salt lines.
- Apply the green paint sparingly to prevent it from running into the pumpkin’s orange lines and blending to a blackish color.
- The photograph shows a mix of orange and green where the stem and pumpkin meet in the Halloween salt painting. The top of the pumpkin is blackened, where the orange and green watercolor paint is mixed.
 or paintbrush
 to apply liquid watercolor paint
 to the salt stuck to the glue lines.
  instead of a pipette.
Halloween Pumpkin Salt Painting Tips for Toddlers and Preschoolers:
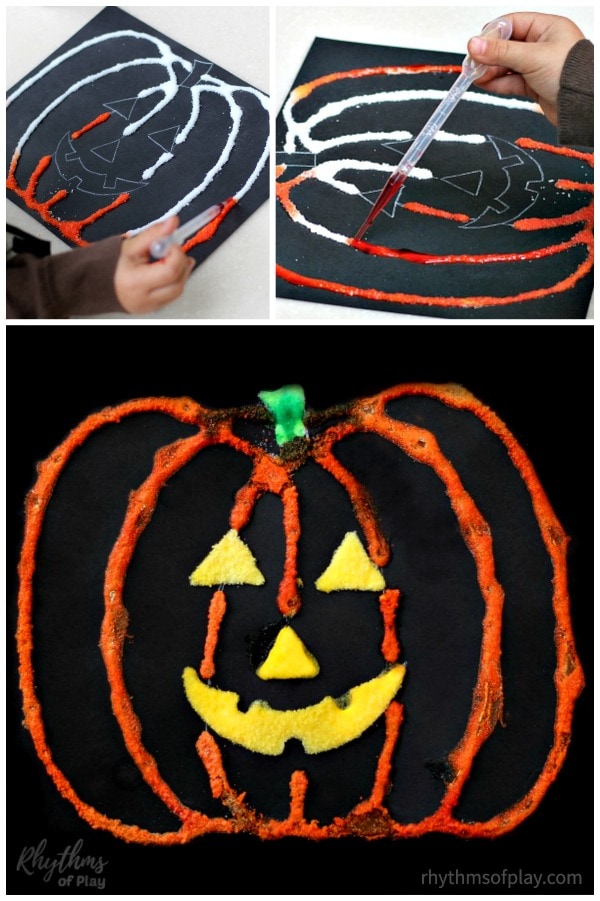
In the photos above and below, you can see that we decided to trace the Halloween pumpkin and paint it first, which is slightly different from the step-by-step instructions above. After my daughter painted the pumpkin, she traced the stem and face with glue, added salt, shook it off, and then painted the Jack-o-Lantern face.
Completing the pumpkin art activity in this way will help artists focus on one step at a time. Choose the easiest and best method for you or the artists you work with. Notice that the orange and yellow stayed separate because the glue and salt lines did not touch. This is also because we invited the toddler to paint the outline of the pumpkin craft with orange first. You might also enjoy these Halloween Art Project Ideas.

Related: Fall Leaves Watercolor Art
Best Halloween Pumpkin Art Idea:
Creating Halloween pumpkin art salt painting is an easy art project for kids that only takes minutes to set up. Kids of all ages will enjoy the easy craft technique used to create this watercolor raised salt craft. Try it today!
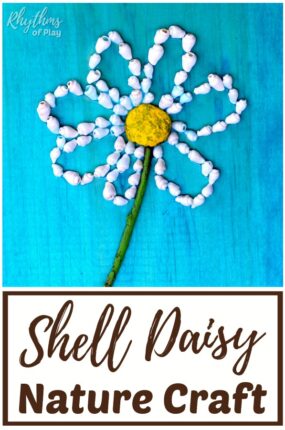
More Salt Painting Art Project Ideas for Kids:
For more salt painting ideas that use the same watercolor painting techniques, check out these other fun salt art projects for kids:
More Halloween Ideas for Kids:
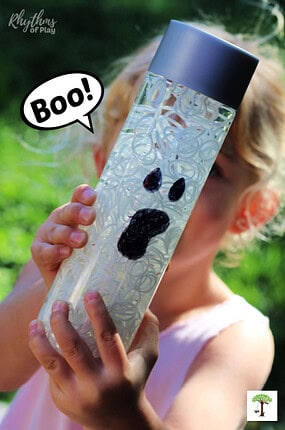
For more Halloween fun, check out these glowing pumpkin and ghost calm-down sensory bottle DIYs. They each make a fantastic, calm-down DIY Halloween toy and decoration perfect for kids who get a little anxious and overwhelmed with all the friendly frights found on Halloween night.
You may also like this incredible collection of Halloween art projects that kids love! It’s filled with several fun Halloween art projects you can try with the kids at home or in the classroom. And don’t forget to check out our fall bucket list of fun fall activities for the best autumn ever!
Learn more about Nell Regan Kartychok, author, photographer, and creator of this original pumpkin art activity HERE, and Rhythms of Play HERE!

More Seasonal and Halloween Ideas:
- Pumpkin Patch Field Trip Ideas (Includes our favorite pumpkin books!)
- Top 10 DIY Halloween Lanterns
- Tissue Paper Ghost Craft
- 13 Healthy Treats and Fun Alternatives for Halloween
- Top 10 Fall Nature Crafts (Contains pumpkin carving and other Jack O’ Lantern ideas)
- Spider Egg Sac Decoration
- Giant Stick Spider Web Halloween Decoration
- Spider Craft for Kids


I do not understand what you mean about not letting the glue and salt touch. Is there one line or two? Also does the paint go on the glue or just the salt?
I’m sorry I did not make it clear Sharon. The glue and salt have to touch, just make sure the orange lines of the pumpkin do not touch the lines that will be green or yellow if you do not want the colors to run. You will paint the salt AND the glue. You will need to pour salt on the glue, shake off the excess, and then paint the salt that is now stuck to the glue. I hope that makes sense.
Yes that makes sense. Thanks for responding back. It looks like a cute project for my grandson!!
You’re welcom Sharon! I’m sure your grandson will love this project, my daughter sure did! I just published another post today with a similar process that will help it make more sense. You can find it here: https://rhythmsofplay.com/harvest-pumpkin-watercolor-art-project/
This is great! It’s crazy how the paint flows into the salt glue.
I’m so glad that you enjoyed this pumpkin art project, Ben. I’m always amazed by how much liquid watercolor paint the salt and glue lines can absorb when creating a salt painting. Salt paintings are always fun to make!