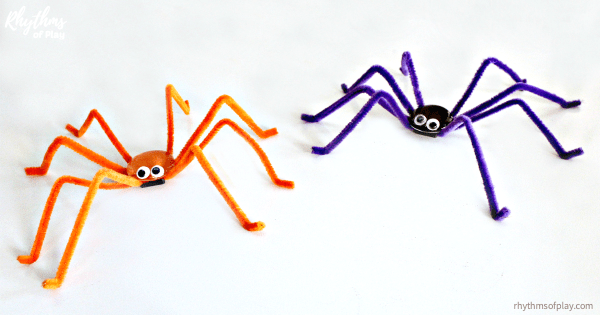
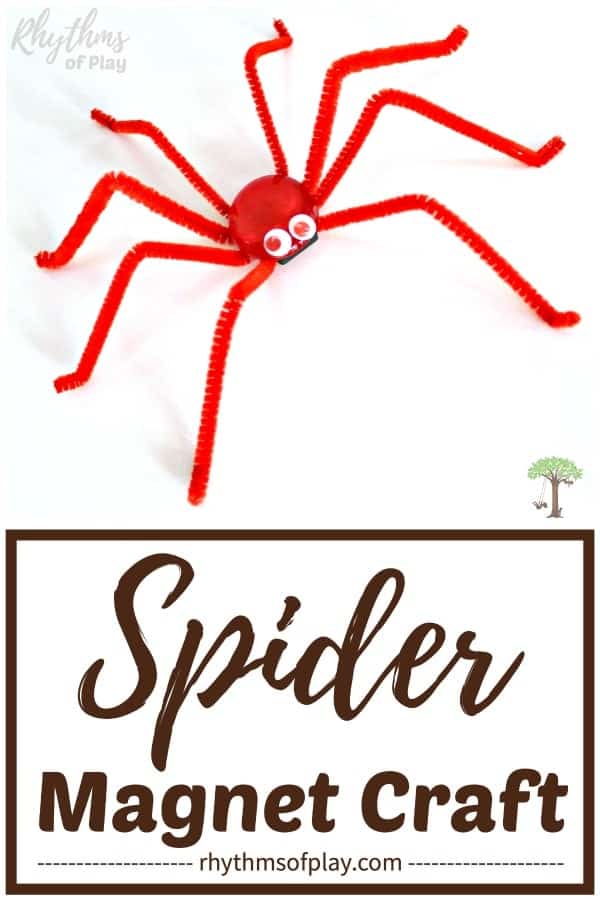
These adorable, creepy, crawly spiders are an easy Halloween spider craft that kids and adults can make with or without a magnet.
Spider crafts are simple DIY Halloween decorations that kids and adults can enjoy making. These spider crafts can be used for several different purposes, including as a friendly spider toy for young children or to create a variety of creepy-crawly DIY Halloween spider decorations. Best of all, you can make these easy spiders using pipe cleaners for the spider’s legs and pom-poms or glass gems for the body, either with or without a magnet, depending on your preference and needs. These fun spider crafts can be made in black or in several different colors or color combinations if you opt to use a different color for the spider’s legs and the spider’s body.
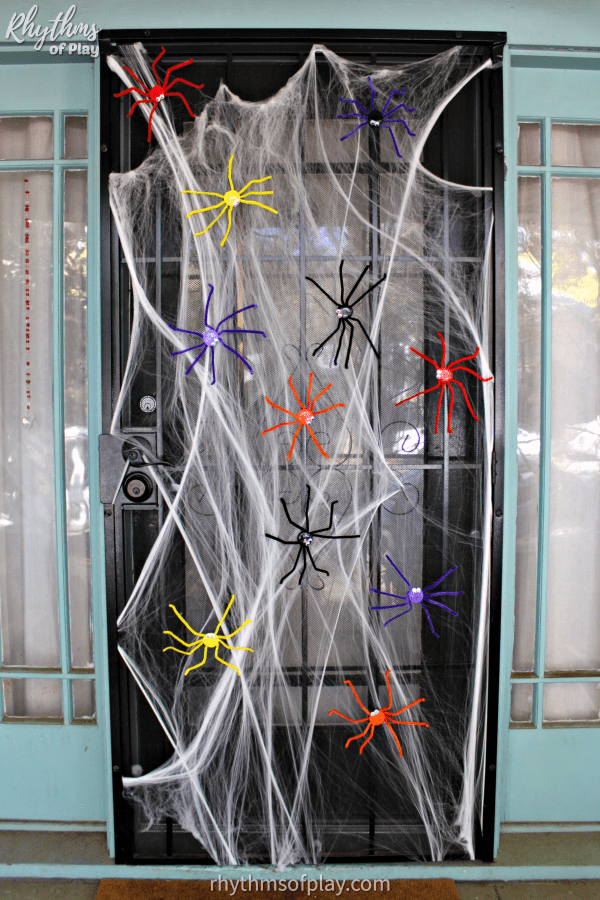
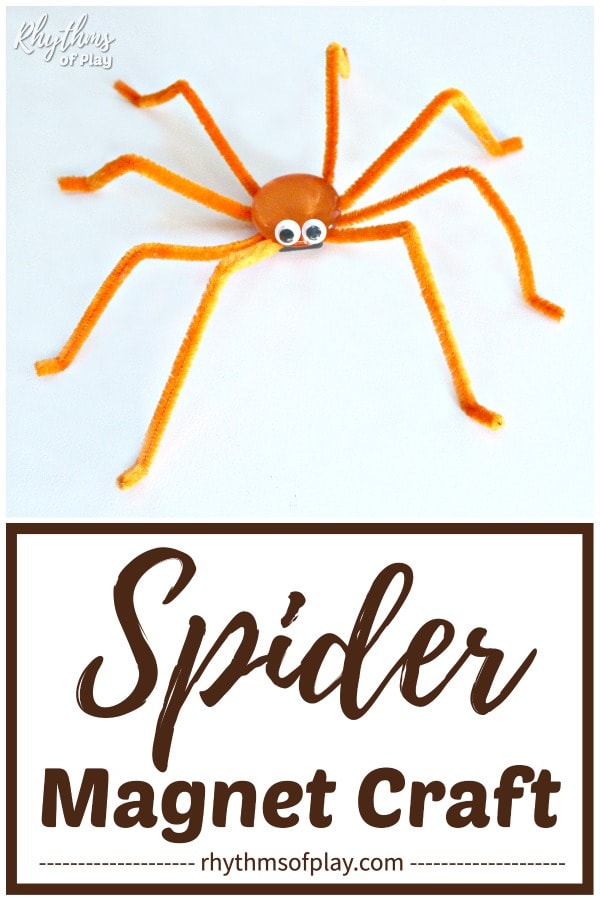
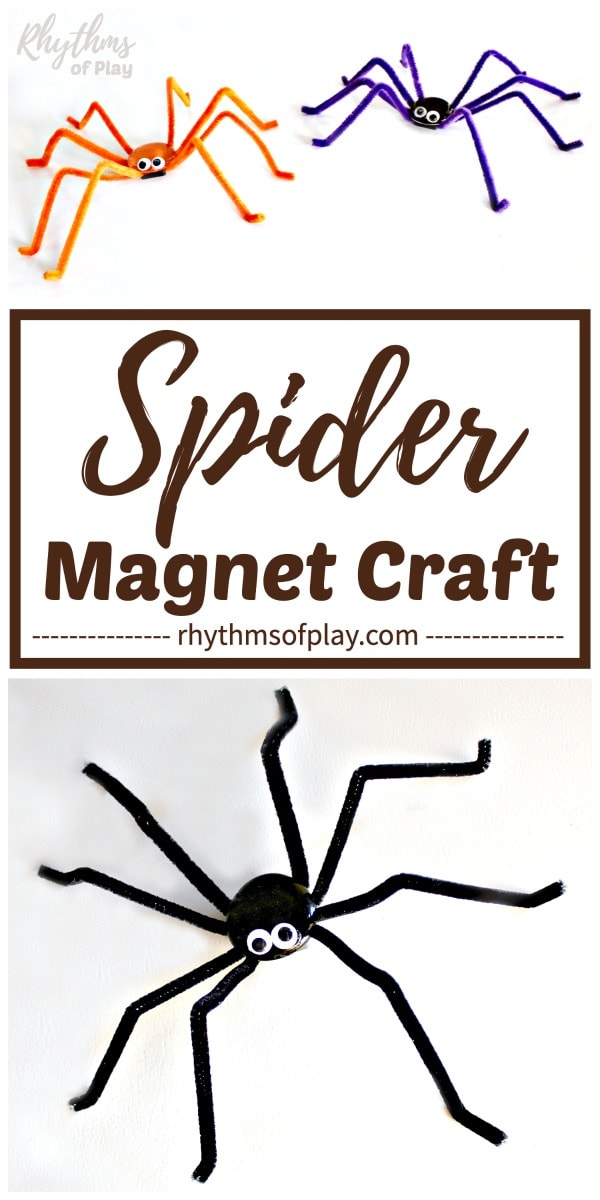
As you can see in the photographs and step-by-step DIY video tutorial, my daughter and I made poseable spider crafts in several different colors: black, red, orange, yellow, and purple. The vibrant colors really popped when we used the spider magnet crafts to create Halloween door decor on our black metal security door. However, you can make these easy spider crafts in any colors you prefer, including basic black. These fun little creepy crawlies look amazing in spider webs, on the kitchen or staff room refrigerator, on a magnetic wall calendar
 , and on filing cabinets
 , and are the perfect spider craft for DIY Halloween door decor on metal security doors.
First published October 21, 2019; this post has been updated and republished to improve the content. Today, it includes improved step-by-step instructions for making poseable spider crafts with various types of simple materials. This makes it easy to choose the craft supply options that best suit your needs. Create adorable Halloween spider crafts with your kids at home or in the classroom. They make fantastic homemade spider decorations for a Halloween party, to adorn your home or classroom, or to impress neighbors and trick-or-treaters on Halloween night. You might also like this list of Halloween art projects for kids.

Halloween Spider Crafts and Decorations:
Spider crafts are fun for kids to make at any time of the year, but children especially love to make spider crafts for Halloween. They also make a fun prop, puppet, or toy when singing the Itsy Bitsy Spider song with young children, such as toddlers, preschoolers, and kindergartners. Assembling them with children is an excellent way to help kids improve their fine motor skills and hand-eye coordination.
I recommend reading through the step-by-step directions and watching the accompanying video tutorial below the written instructions before inviting kids to create these cute Halloween spiders. I have made several updates to the instructions and recommended craft supplies based on my experience with making these Halloween spider crafts over the years. The updates make it easy to design the craft to suit your needs, or the age group you are working with, whether you are making them for a Halloween party, to decorate your home, or as a classroom project. You might also enjoy creating a giant spider web Halloween decoration and spider egg sacs to complement these cute Halloween spider crafts.
Spider Halloween Craft Options:
There are several craft supply options available to create spider crafts. This makes it easy to choose the materials you prefer based on the supplies you have available, the age group of the crafters who will be making them, the time you have available, the desired appearance, and how you intend to use them.
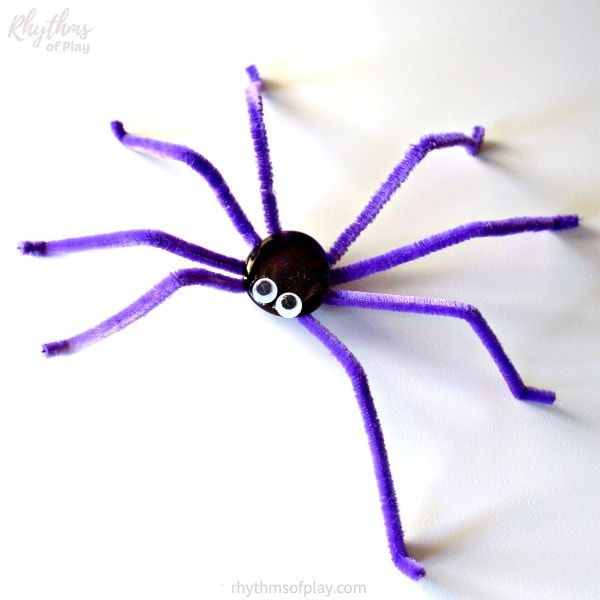
For example, you can make spider Halloween crafts using pom-poms, pipe cleaners, and hot glue (or glue tape) to craft fluffy, hairy spiders in just a few minutes. In contrast, the combination of shiny glass gems and bendable pipe cleaners gives the spiders a sleek, eerie elegance. Both types of materials can be easily customized to the color you prefer, from basic black to bright orange.
Spider Craft Supplies:
Gather the Halloween craft supplies listed below before making your spider crafts.
- Choose one of the following craft materials for the spider’s body:
- Large pom poms (black or assorted colors).
- Clear glass gems and acrylic paint.
 Black gems (doesn’t require acrylic paint).
- Paintbrush (if using acrylic paint).
- Pipe cleaners or chenille stems (black or assorted colors)
- 1-inch round disc magnets (optional for making magnetic spider crafts)
- Googly eyes (self-adhesive)
- Choose one of the following to glue the spider crafts together (read the update below for information about which type of glue to use):


 (self-adhesive)
 Choose one of the following to glue the spider crafts together (read the update below for information about which type of glue to use):

Spider craft materials update 2025: As you can see in the video tutorial below the written instructions, my daughter and I initially used glass gems, pipe cleaners, and hot glue to create the spider crafts featured in the photographs. Unfortunately, hot glue does not adhere well to glass over time, and many of our spider legs detached from the glass gems or lost their googly eyes several weeks after they were made. However, they were easy to fix and reattach with the craft glue recommended in the spider craft supplies above.
To remedy this problem, you can use large 1-3-inch pom poms instead of flat-backed glass gems to make hairy spider crafts. Alternatively, if you prefer to use glass gems, you can still attach them with hot glue; however, I recommend using the craft glue or glue tape mentioned above for easy assembly, as hot glue does not adhere well to glass over time, and the spider crafts may come apart. Using craft glue increases the time it takes to make these easy crafts, as it does not dry as quickly as hot glue; however, glue tape works just as quickly. Scroll down for the step-by-step written directions. The tutorial includes instructions on how to create spider decorations using pom-poms (or glass gems) and pipe cleaners, with or without a magnet attached.
Related: Halloween Porch Decor: Skeleton and Spider Web
Each spider craft needs:
Related: Fingerprint Art Magnets
- One of the following materials:
- Acrylic paint color if using clear glass gems to make colored spider crafts.
- Four pipe cleaners or chenille stems (black or assorted colors)
- Use the same color or contrasting and complementary colors.
- One ceramic magnet (optional)
- Two googly eyes
- Hot glue, glue tape, or craft glue


 or chenille stems (
 Hot glue,
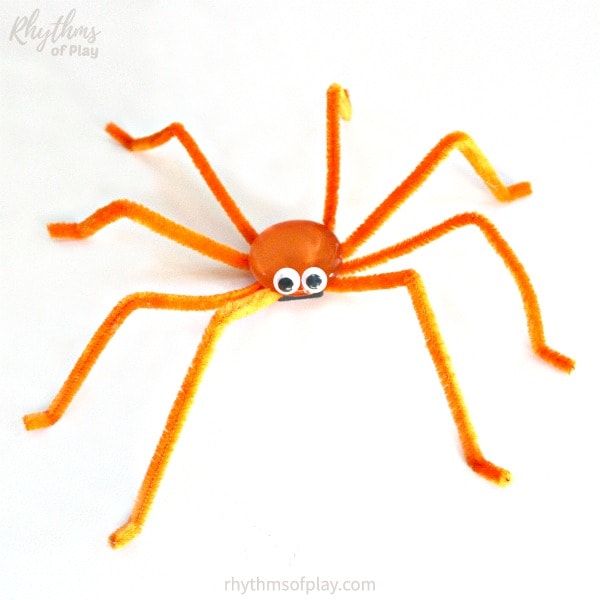
Spider Halloween Crafts Step-by-Step Instructions:
Learn how to make spiders with pipe cleaners and glass gems or pom poms with the step-by-step instructions below. Using hot glue or glue tape makes these spider crafts quicker and easier to create, but each option has its pros and cons. Glue tape is an excellent option for young kids. You might also enjoy making these pipe cleaner bunny crafts, which don’t even need glue!
1. (Optional) Paint the back of the glass gem or cabochon for each spider craft:
- Skip to the next step if you are using a pom-pom or a black glass gem to make these Halloween spider crafts and decorations.
- Using these materials makes these spider crafts quicker and easier to make.
- As shown in the Halloween spider craft video above, there is more than one way to paint or color the glass gems to make spider magnets. Try either of the methods described below:
- Pour the paint: Shake a bottle of acrylic paint well, then place a drop of paint onto the flat side of a glass gem or cabochon. Tilt it and continue to move the drop of paint slowly around the back of the glass dome to cover the entire flat surface with paint.
- Please be aware that the viscosity of each acrylic paint can cause colors to move at different rates, and some may not flow at all.
- Paint pouring is a skill that requires finger dexterity, hand-eye coordination, patience, and practice. Please be gentle with yourself and your children. Mistakes are how we learn.
- This paint pouring technique is also demonstrated in these ladybug magnet crafts.
- Paint them: Use a paintbrush to paint the back of each glass gem.
- If you choose to use a paintbrush, you will likely need to apply a second coat of acrylic paint to create an opaque look for each Halloween spider craft.
- Pour the paint: Shake a bottle of acrylic paint well, then place a drop of paint onto the flat side of a glass gem or cabochon. Tilt it and continue to move the drop of paint slowly around the back of the glass dome to cover the entire flat surface with paint.
- Allow the acrylic paint to dry completely before proceeding to the next step.
- Spider Craft Tip: Spend one day painting the backs of the glass gems, and the next, assemble the magnetic spiders.
2. Glue four pipe cleaners to the bottom of the Spider’s Body to make eight spider legs:
- Gather four pipe cleaners in both hands and bend them slightly to find the center, as shown in the spider craft video tutorial above.
- When glued in the middle, the four pipe cleaners will create the spider’s eight legs.
- Apply a large dollop of glue, or strips of glue tape, to a pom pom or the flat side of the glass gem.
- Alternatively, you can roll the glue tape in strips directly onto the middle of each pipe cleaner, one by one, then attach each one to the pom-pom or glass gem.
- As a reminder, my daughter and I used glass gems and hot glue to create these crafts in the video tutorial. Today, I recommend using pom-poms for the spider’s body instead of a glass gem or using craft glue or glue tape to glue the spider’s legs to the glass gem body. If you use craft glue, the glue will take longer to dry.
- Press the center of all four pipe cleaners into the glue to create the spider’s eight legs.
- If you are making the spider crafts with glass gems and craft glue, you might want to place a book on top of the legs on both sides of the glass gem and a magnet or the spider’s body (glue side up), to ensure the glue and pipe cleaners remain in place and adhere well to the glass gem.
- Spider Craft Tip: Work in pairs, as my daughter and I did in the video tutorial, to make these cute magnetic spider crafts quickly and easily. I added the glue, while my daughter manipulated the craft supplies to assemble the spider magnets. Depending on the craft supplies you choose, this tip may no longer be necessary.
3. (Optional) Glue a magnet onto the pipe cleaners on the bottom of the spider’s body to make Magnetic Spider Crafts:
- Add a large dollop of glue or apply glue tape to the top of the pipe cleaners where you would like to place the magnet, and then press the magnet into the adhesive to secure it to the back of the spider magnet craft.
- If you don’t want to add a magnet, add a little more glue on top of the pipe cleaners that will become the spider’s legs to ensure they remain securely in place, if needed. Allow the glue to dry completely before proceeding to the next step.
- As you can see in the video tutorial below, I reused some old 1-inch by 3/4-inch rectangular ceramic magnets that I had in my craft supply collection, but 1-inch circular magnets work just as well.
- You can also use the same round disc magnets to make fingerprint magnets.
- Do not use neodymium magnets to make spider magnets; they are too strong for this simple craft.
 that I had in my craft supply collection, but 1-inch
  work just as well.
4. Flip the spider Craft over and fan out each pipe cleaner spider leg:
- Once the glue is completely dry, turn the Halloween spider craft over so that it is right side up, and fan out each pipe cleaner that will become the spider’s legs.
5. Glue googly eyes onto the Spider to create its face:
- Lay the spider down on its belly with its legs (and optional magnet) underneath.
- Attach the googly eyes to the pom-pom, or on top of the glass gem, between the front two pipe cleaner legs, as shown in the photographs and video tutorial.
- The googly eyes recommended above and in the craft supplies are self-adhesive. However, you can add more glue tape or craft glue to ensure they remain securely attached to the spider’s face.
- As noted above, the googly eyes can pop off the glass gem when hot glue is used to attach them, because it does not adhere well to glass over time.
6. Bend pipe cleaners to make the legs of the spider Halloween crafts:
- Bend each pipe cleaner to create creepy-crawly spider legs as follows:
- Create two opposing bends in each spider leg as shown in the step-by-step video tutorial and photograph below to make a knee and a foot for each Halloween spider decoration.
- Not that spiders have knees and feet, but you get the idea!
How to Make Spider Magnets: Step-by-Step Video Tutorial:
Watch the video below to see how to make these cute spider craft ideas with a clear glass gem, pipe cleaners, and optional acrylic paint and magnet. In contrast to clear glass floral stones, using black glass gems and black pipe cleaners eliminates the need for acrylic paint. Please substitute a large, fluffy pom-pom for the glass gem to create hairy spider crafts, if desired.
The step-by-step instructions above outline how to make each of these Halloween spider craft ideas. As a reminder, my daughter and I used hot glue to make them with glass gems, which you can still do. However, I recommend using pom-poms in place of glass gems with hot glue. If you would prefer to use glass gems, I recommend using the craft glue to ensure the spider crafts stay together for more than a few weeks.
Spider Magnet Craft Video Tutorial:
Spider Craft Tip: You can work in pairs, as my daughter and I demonstrate in the video tutorial, to make these cute magnetic spider crafts. I glued them while my daughter assembled the spider magnets. Using teamwork can make it easy to create spider crafts, whether with or without a magnet. Depending on the updated craft supplies you choose to use for the spiders, this tip may no longer be necessary.
Spider Halloween Decoration Ideas:
These adorable posable spiders are a fun and easy Halloween craft and decoration idea for kids and adults, with or without a magnet attached to the bottom. DIY spider crafts are not only festive but also incredibly versatile.
Ideas for Spider Crafts Without a Magnet:
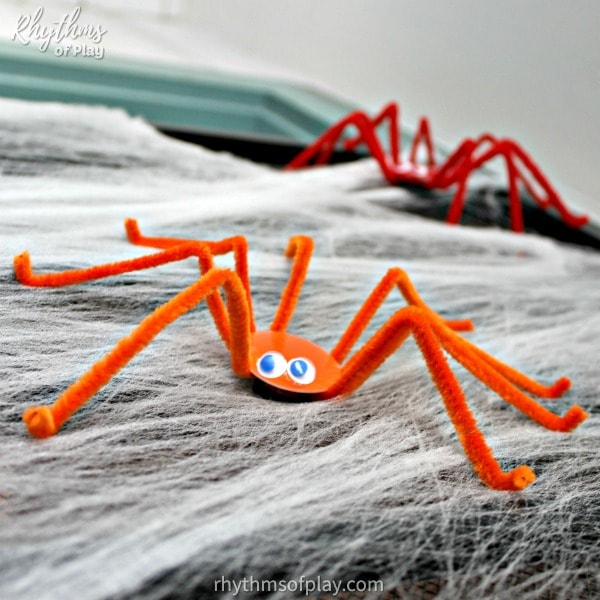
Without a magnet, these spiders have many uses. Spider crafts make fantastic decor ideal for Halloween-themed parties, whether at home, the office, or school. Place them on doorframes or tabletops, scatter them across shelves, mantles, or windowsills, tuck them into faux cobwebs, or perch them on a DIY spiderweb indoors or outdoors.
Glue spiders onto clothespins, string, or cardboard bases to create banners, garlands, or wall decorations. They can also be used to decorate candy bowls, create Halloween wreaths, embellish treat bags and Halloween costumes, or even add to centerpieces for parties.
For even more spooktacular fun, hang spiders from the ceiling on an invisible thread (fishing line) to make them look like they are floating or traveling down a thin line of webbing, just like real spiders do. Or hang them from tree branches, a porch overhang, or patio cabana to decorate your outdoor space for Halloween.
These simple crafts also make an excellent Itsy Bitsy Spider puppet for toddlers, preschoolers, and kindergarteners. They can also be easily incorporated into hands-on art or storytelling activities at home or in the classroom all year. When used as a spider toy, they can be enjoyed throughout the year, not just during Halloween.
Spider Magnet Craft Decoration Ideas:
The instructions above include the option to glue a small magnet to the bottom of the spider. Attaching a small magnet to the underside of the spider turns these simple spider crafts into magnets. Magnetic spiders can easily stick to any magnetic surface.
Magnetic spider crafts make decorating metal surfaces of all kinds easy. They can be used to decorate refrigerators, metal doors, filing cabinets, or magnetic boards, which makes spider magnets perfect for adding a subtle Halloween touch to kitchens, classrooms, or offices.
For example, my family used these spider magnet crafts to create DIY Halloween door decor that also helped keep the stretchy spider webs in place on our front door. Check out the creepy-crawly Halloween spider door decorations we made with them in the photo below!
Spider Craft Ideas for Kids and Adults:
Spider Halloween crafts are a simple yet eye-catching way to create friendly or spooky decorations for the season, depending on your personal preference. Whether you’re crafting with children or decorating for a Halloween party, spider crafts add a creepy-crawly charm that perfectly fits the holiday’s theme.
Pipe cleaner crafts, such as these spiders, can be made with various simple materials, depending on the supplies available, your needs, and the intended use. Create them with the supplies you prefer to suit your needs. For example, you can use them as a spooky Halloween decoration or a friendly Itsy Bitsy Spider toy for young children.
Whether magnetic or not, spider crafts bring a handmade, personal touch to any Halloween decor. You might also enjoy this round-up of Halloween Arts and Crafts for Kids. Ideas include a handprint spider, spider webs, and more spider arts and crafts for kids (and adults).
Learn more about Nell Regan Kartychok, author, photographer, and creator of this original Halloween spider craft HERE, and Rhythms of Play HERE!
DIY Halloween Crafts and Decoration Ideas:
- Easy Halloween Ghost Craft
- Halloween Pumpkin Salt Painting
- Giant Spider Web Decoration
- Halloween Porch Decor
- Best Halloween Art Projects, Crafts, and Painting Ideas
- Halloween Spider Door Decorations
- Glowing Ghost Sensory Bottle
- Pumpkin Sensory Bottle
- Gorgeous Glowing Halloween Lanterns
Halloween Activities and Ideas
- Pumpkin Patch Field Trip Activities
- Host a Corn Maze Race!
- Healthy Halloween Handout Ideas and Non-Candy Alternatives
- Samhain Celebration Ideas
Magnet Crafts for Kids


Leave a Comment