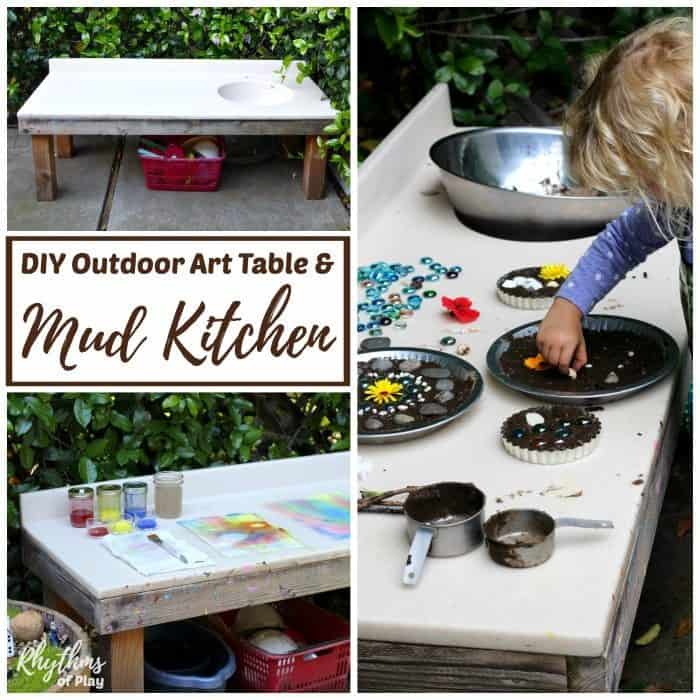
This simple DIY project tutorial teaches you how to create a DIY Outdoor Art Table and Mud Kitchen, a perfect addition to any backyard play area. Your kids can enjoy using this multipurpose table for art, projects, STEAM activities, homeschool extension work, nature play, Montessori activities, and more!
When I owned and operated a home daycare many years ago, my husband and mother made this DIY outdoor mud kitchen that doubles as a fantastic art table. Yes, you read that right, my mom. I wanted to make a mud kitchen using a single slab countertop that my daughter could also use as an outdoor art station, but I had no idea how to make it work. Mom to the rescue!
At age 70, she is the handiest person I know. She’s even better at building most things than my husband, and he’s pretty handy. There is nothing she can’t figure out how to do on her own. (Update 2025: Although my mother is no longer living (she passed away at 77), her handiwork lives on in the form of several projects she helped me create, including this mud kitchen art table and our DIY fairy garden.)
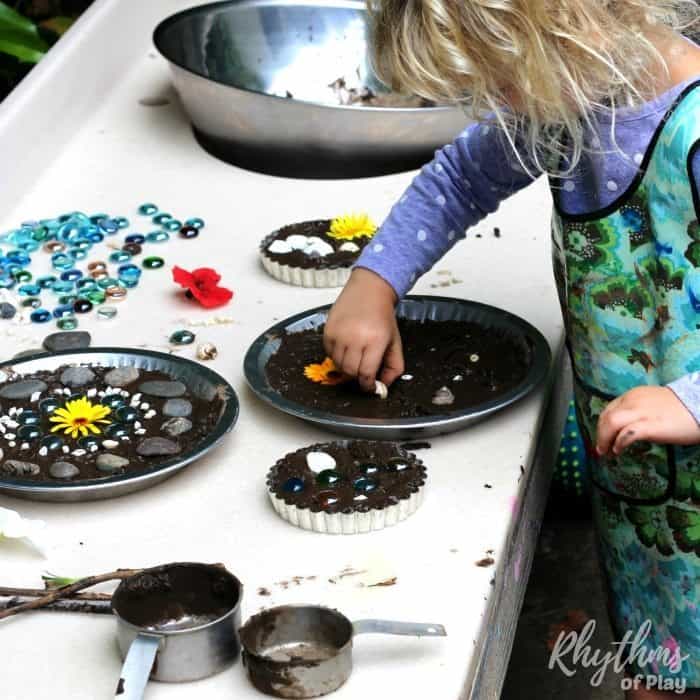
We use this outdoor art table and mud kitchen to make arts and crafts, play with mud pies, engage in fun sensory activities, pot plants for our yard and home, complete STEAM challenges, enjoy nature study, and even create flower arrangements!

Related: DIY Outdoor Chalkboard
How to Make an Outdoor Mud Kitchen and Art Table:
I don’t have the exact step-by-step tutorial photos I usually include for this backyard DIY project because this website didn’t exist when we created this DIY outdoor art table and mud kitchen.
Instead, you can find directions for how we made it, a few old photos I dug up to show what we did as best as possible, and how we have used this multipurpose outdoor table with a sink since it was first made in 2013.
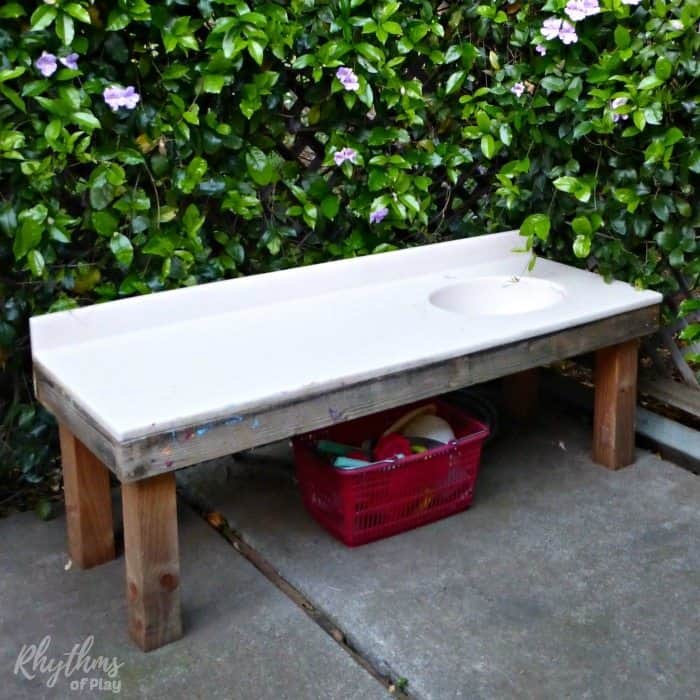
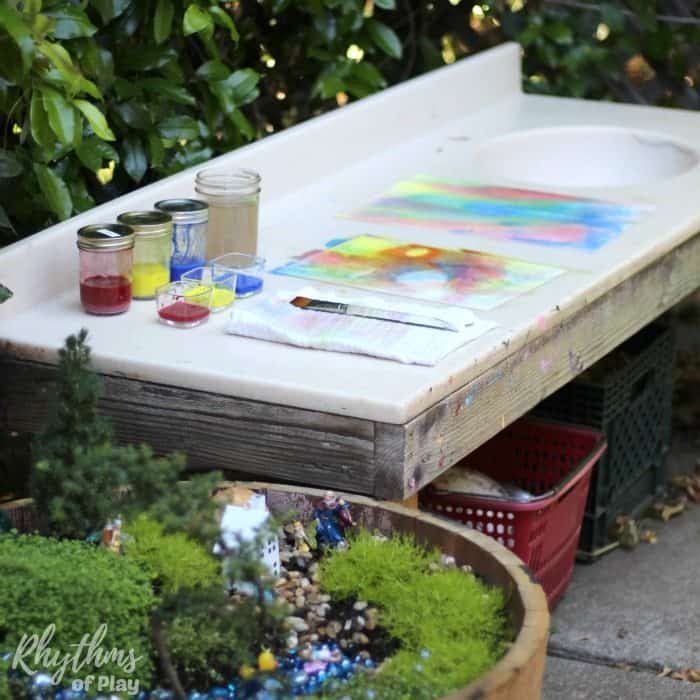
First published in May 2016, this DIY project tutorial is regularly updated and occasionally republished. Please scroll down to view the supply list and step-by-step instructions for creating a mud kitchen and art table similar to the one we made, as shown in the photograph below.
Related: How to Make a Fairy Garden
DIY Outdoor Mud Kitchen Art Table Supplies:
- Bathroom or kitchen countertop:
- We found the one we used at Restore by Habitat for Humanity (I am not affiliated with them).
- You can also look for one you like at your local home improvement store.
- Tape measure.
- Carpenters square.
- Skill saw or chop saw.
- Drill.
- 3-inch wood screws.
- Hammer.
- 4-inch nails.
- Construction adhesive.
- Eight foot 4″x4″ (or longer depending on desired table leg length)
- Six to twelve foot long, 2″x4″:
- The length you need depends on the size (perimeter) of the counter or tabletop you will use to build the Mud Kitchen Art Table.
- Outdoor stain wood protector (optional but recommended).
- Drop cloth (optional but recommended).
- Paintbrush for weather-protecting stain (optional but recommended).
Related: Backyard Sandboxes Kids LOVE!
DIY Outdoor Art Table and Mud Kitchen Step-by-Step Tutorial:
Read through the step-by-step instructions below to understand the process and what to expect before you begin creating a mud kitchen, an outdoor play space suitable for kids of all ages.
1. Select a countertop for your DIY mud kitchen art table:
- Begin by selecting a single slab bathroom or kitchen countertop to create the top of your mud kitchen and art table.
- We used a single slab countertop without seams, which we found at Restore in gently used condition.
- Alternatively, you can look for one at your local home improvement store.
- The bathroom countertop we used had a sink. However, you can also make a mud kitchen with a single slab kitchen counter without a sink.
- If you choose a countertop without a sink, you can put dishwashing bins or large bowls on the table for water.
2. Measure the dimensions of the countertop and determine the height of the table:
- If you don’t know the dimensions of the countertop, measure them so you know how much wood you will need to purchase and cut to complete the next few steps.
- Determine how tall you want the mud kitchen art table to sit.
3. Purchase the wood you need to make the frame and legs for the art table and mud kitchen:
- To create a sturdy frame and legs for the mud kitchen art table, I recommend using four-by-fours (4″x4″s) to make the table’s legs and two-by-fours (2″x4″s) to make the frame for the tabletop, to which the countertop will be glued.
- If your table will be exposed to the elements outdoors, consider buying weather-treated wood to extend its life.
- The wood you need will depend on the countertop’s dimensions and the desired table height.
- In other words, you must do some math to determine the length and amount of 4″x4″s and 2″x4″s you need.
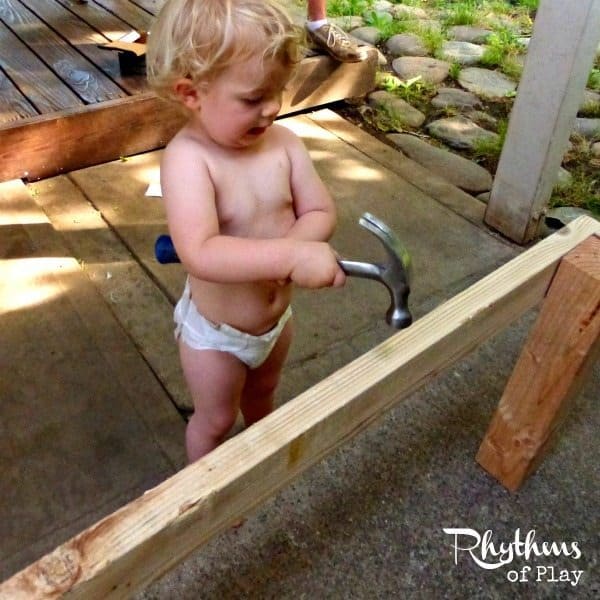
- If you have older children, enlist their help to help you do the math.
- In other words, you must do some math to determine the length and amount of 4″x4″s and 2″x4″s you need.
- Read the following steps for more tips about the size and height you need to make your mud kitchen art table.
4. Cut wood to make the frame for the countertop (mud kitchen) to sit on:
- Use a skill or chop saw to cut the 2x4s to the required size and dimensions to create the frame on which the DIY mud kitchen countertop will sit.
- Don’t forget to consider the four inches you will not need on either side of the frame.
- For example, if the countertop is two feet by six feet (2’x 6′), cut two 20-inch sections and two 6-foot sections.
- Alternatively, cut two 2-foot sections (24 inches) and two 5-foot-8-inch (5’8″-inch) pieces of wood to construct the frame for the countertop to sit on.
- Set aside these cut pieces of wood for the frame while you cut the legs for the table in the next step.
5. Cut legs to the length needed for the DIY Outdoor art table and mud kitchen height:
- The table legs in the photographs are each 20 inches long.
- Now that the counter is glued to the top of the frame, our table is twenty-one inches high.
- We wanted it to be a good-standing size for toddlers and preschoolers.
- Alternatively, you can cut an eight-foot 4″x4″ into four equal sections of two feet each to make the legs two feet high, which is also an excellent height for toddlers and preschoolers.
- Remember that when the countertop is glued on top of the frame, it will be slightly taller, which may be a bit high for some toddlers, but they will grow into it.
- If you want to make an even taller table for older children, purchase a ten-foot or longer four-by-four or an additional 4-inch by 4-inch, depending on the size they are cut to at the lumberyard you buy from.
- For example, if you want the table to be slightly taller than three feet high, you will need four three-foot 4-inch x 4-inch posts.
6. Build the frame for the DIY outdoor mud kitchen art table:
- Assemble the 2′ x 4 ‘cut in step four to make the frame for your DIY mud kitchen.
- Before screwing it together, ensure the countertop fits properly.
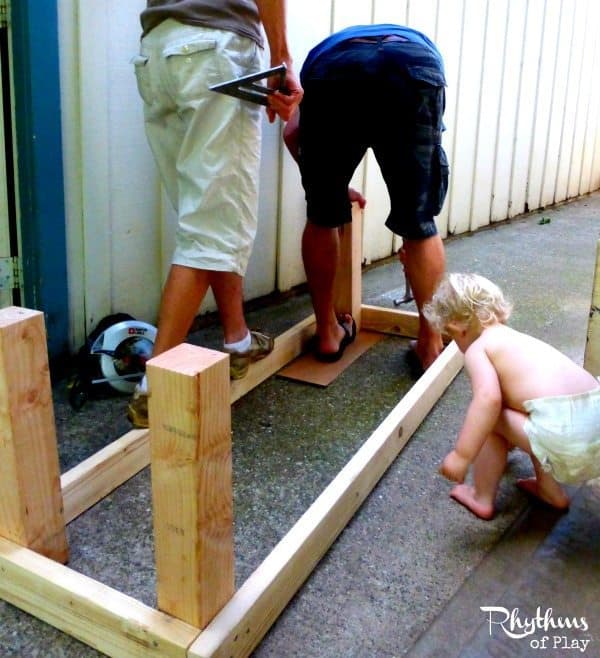
- Assemble the frame with two large screws per corner so that two of the sides of the frame sit inside the other two pieces to match the dimensions of the countertop, as shown in the photograph below.
- Use a carpenter’s square to ensure your corners are 90-degree angles before screwing the pieces of wood together.
- Drill the screws into the bottom of one 2″x4″ and the top of the other 2’X” at a 90-degree angle, as shown in the photo below.
7. Put the DIY mud kitchen frame upside down and attach the legs using a hammer and nails:
- Before attaching the table legs, ensure that each corner of the frame is constructed at a 90-degree angle.
- As my husband demonstrates in the photo above, use a hammer and nails to attach each 4″x 4″ table leg to the inside of each corner of the table frame.
8. Paint the DIY Art TAble and mud kitchen frame with outdoor stain and allow it to dry (optional but recommended):
- We did not use severe weather-treated wood to build the mud kitchen art table in the photos, but I wish we had, as the frame and legs have become slightly warped.
- To protect the wood frame of your DIY outdoor art table and mud kitchen, place the frame upright on a drop cloth and use an eco-friendly stain.
9. Attach the countertop to the frame to complete the DIY mud kitchen and art table:
- First, place the counter on top of the DIY mud kitchen frame to ensure it is the correct size.
- Ensure the countertop is securely attached to the outdoor art table frame using construction adhesive.
- Then, remove the mud kitchen counter from the DIY art table before proceeding to the next step.
- Next, apply construction adhesive in a thick bead along the top edge of the DIY Mud Kitchen frame.
- Finally, place the countertop on the DIY outdoor mud kitchen frame and allow the adhesive to dry according to the manufacturer’s directions.
DIY Mud Kitchen Art Table Accessories and Storage Options:
We store all our supplies in baskets
 and tubs underneath our DIY Outdoor Art Table and Mud Kitchen. We also have a sink plug
 that fits in the sink to hold water for projects like making mud pies or painting. Want running water? Hook up a bathroom faucet
 and attach it to your plumbing!
DIY Outdoor Art Table and Mud Kitchen Project Ideas:
Our DIY Outdoor Mud Kitchen is probably the most used piece of furniture we own inside and outside our home. My daughter and I have completed many projects on this DIY art table. A few can be found below. The art and craft tutorials below show pictures of it in use:
- Mud Pie Nature Art
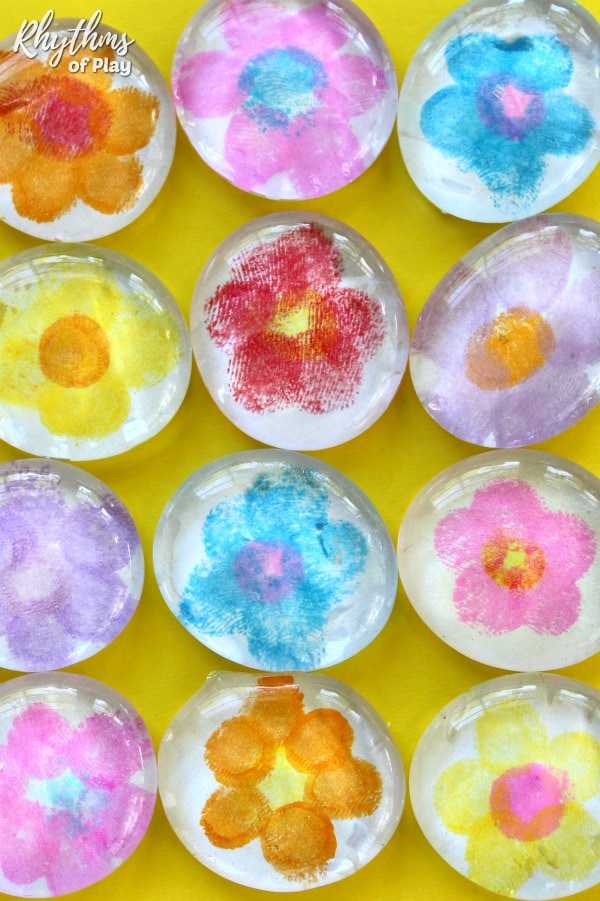
- All Season Hand and Fingerprint Tree
- Shell Frames with Handprint Keepsake Gift
- Single Color Wet-on-Wet Watercolor Painting
- Two Color Wet-on-Wet Watercolor Painting
- Painting with Foam Blocks
- Shell Daisy Nature Craft
- Flower Arranging
- Citrus Printing Process Art
More Outdoor Play Areas for Kids:
Every backyard should have at least one outdoor play space for kids. Below are several more great options to buy or DIY!
- Sand and Water Tables Kids Love!
- DIY Outdoor Chalkboard
- Best Sandboxes for Kids
- How to Make a Fairy Garden
- How to Grow a Sunflower Fort
DIY Outdoor Art Table and Mud Kitchen for Backyards and Patios:
Our DIY outdoor art table and mud kitchen are a blessing for our family. We’d be lost without it! My daughter uses it for a wide range of projects, including arts and crafts, making mud pies, gardening, STEAM projects, nature study, sensory activities, and even flower arranging.
Make an outdoor mud kitchen for your backyard today! We hope you enjoy spending time with the kids and getting creative in the backyard as much as we do!
Learn more about Nell Regan Kartychok, author, photographer (and co-creator) of this original mud kitchen and art table, and Rhythms of Play HERE!


Really great idea of art table and mud kitchen. Kids can learn natural way. It inspires kids creativeness. thanks for sharing this idea. I like it.
Thanks, Rosa! It’s amazing how useful this table is and how much creative exploration is possible using it. So glad you like it!
I can’t even say enough how much I love this!! Unfortunately, we live in a condo right now with our 14 month old son, and can’t have things like this 🙁 First on the to-do list though when we get a house!!
So glad you like it Chelsie, and sad that you can’t make one yet. Crossing my fingers that you will be in a house sooner than later 🙂
Amazing! such a cute idea. I just back my childhood.
Thanks, Marria! I’m so glad you like it!
Great idea!!! I made one for my almost 5 year old daughter and she loves it! I got the bathroom vanity top from Habitat gor $10! I was very excited. I used deck screws and pressure treated wood.
I’m so glad you made a mud kitchen and art table for your daughter and she loves it! I just love Habitat for Humanity, just like a thrift store, there are always great finds you can turn into treasures like this one. Well done, Alicia!