Here’s an easy spider egg DIY Halloween decoration and spider craft that kids and adults can make.
Both children and adults will enjoy creating this simple yet slightly creepy spider egg sac Halloween craft and DIY decoration. You can even make a giant spider web to hang with the spider egg crafts to add to your spooktacular homemade Halloween porch decor. Alternatively, you can hang them indoors or outdoors, wherever you like. Decorate your Halloween party with spider eggs hanging from the ceiling indoors, or hang them outside on the front porch to surprise trick-or-treaters on Halloween night.
Make hanging DIY spider decorations for Halloween this year with the do-it-yourself decorations below. First published on September 10, 2018, the step-by-step instructions sharing how to make a spider egg sac craft have been updated to enhance the content. You might also enjoy making ghost crafts and these adorable creepy crawly spider crafts with each DIY Halloween craft tutorial.
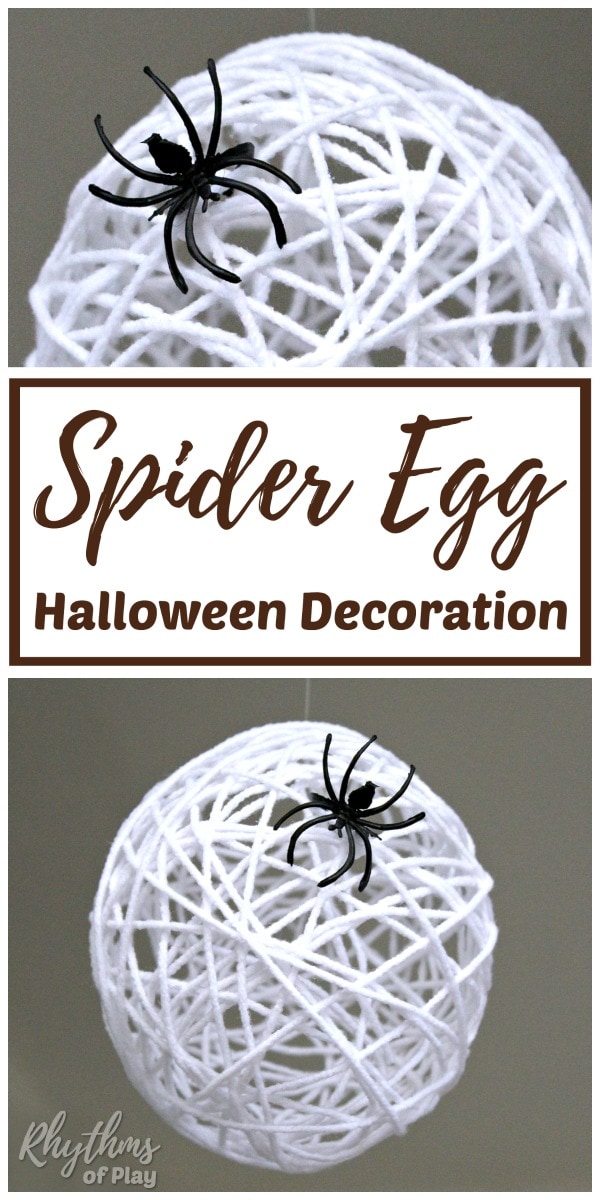
Spider Egg Halloween Crafts for Kids and Adults
Prepare to spin a web of creativity this Halloween with an arachnid-inspired DIY project that will send shivers down your spine with these easy spider egg sac crafts! These eerie yet eye-catching Halloween decorations are a fantastic addition to your spooky season setup. The step-by-step instructions in this easy tutorial include the DIY details you need to make this creepy Halloween spider craft.
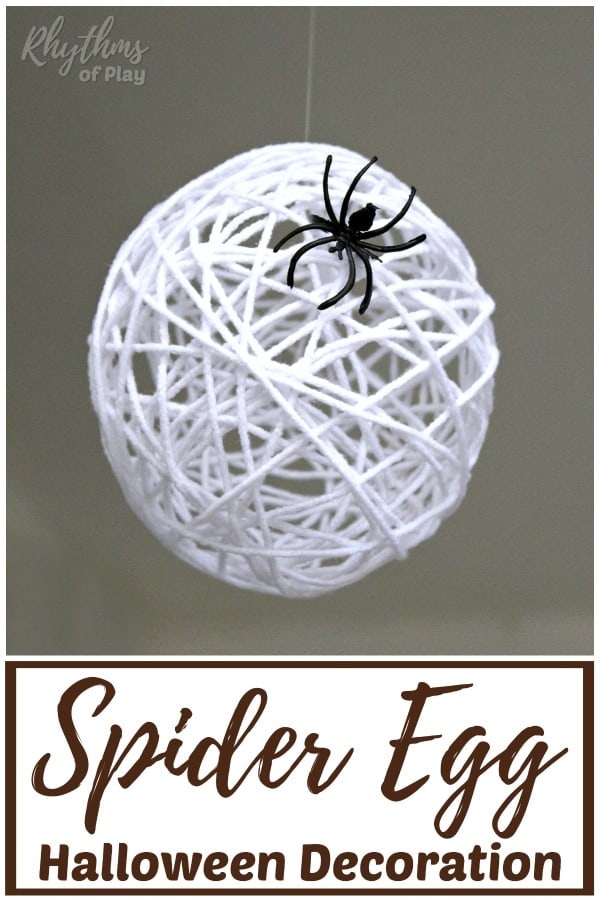
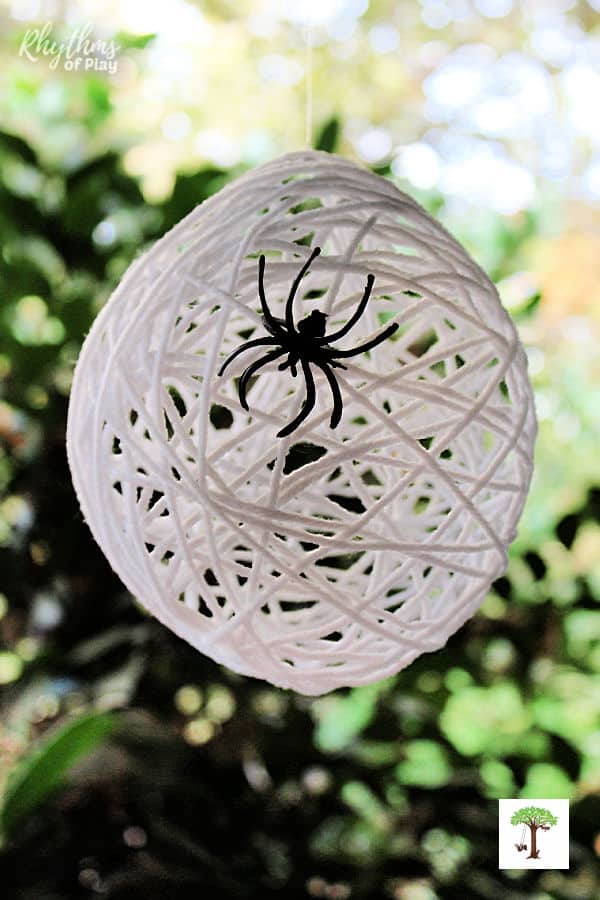
This spider egg sac is a fun craft to make with kids at home or in the classroom for Halloween. Crafted with yarn and white glue, these faux spider egg sacs look scarily authentic. Drape them in dark corners, hang them from ceilings, or scatter them on tabletops for an instant infusion of Halloween decor.
Create some spider eggs to decorate the classroom for a classroom Halloween party, school dance, or your home on Halloween night. With a dash of imagination and patience, you can craft these creepy-crawly egg sacs and transform your home into a hauntingly stylish Halloween house. Your party guests and trick-or-treaters are sure to love them!
First, put on your crafting apron and grab your supplies to make these creative Halloween crafts. Then, prepare to give party guests and neighborhood trick-or-treaters the heebie-jeebies with your DIY spider egg sac decorations this Halloween! You might also enjoy this list of Halloween Art Projects and Painting Ideas.
Spider Egg Sac DIY Halloween Decoration Supplies:
- White yarn

- Small balloons or large balloons
- White glue
- Water
- Mixing bowl (Glass bowls are best for mixing the glue solution because they are easy to clean with steel wool if the glue hardens.)
- Monofilament line (fishing string to hang spider egg decorations).
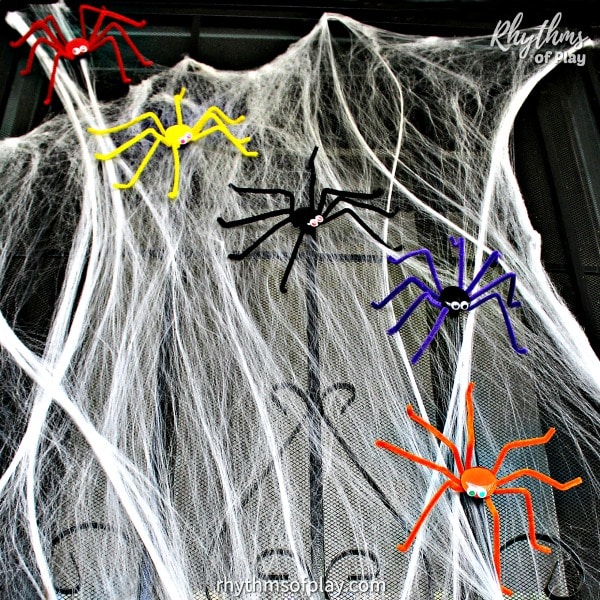
- Tiny plastic spiders, toy spider rings, or make these spider crafts with or without the magnet on the bottom.


Related: Halloween Pumpkin Salt Painting Art Project for Kids
How to Make a Spider Egg Sac Halloween Decoration: Step-by-Step Tutorial
Read through these step-by-step directions before making your own spider egg sac DIY Halloween decorations, so you know the steps involved and what to expect. A photo craft tutorial follows the directions to make it easy to see how to make spider egg sac crafts with yarn and white glue.
Related: Jack O’Lantern Glowing Halloween Pumpkin Sensory Bottle
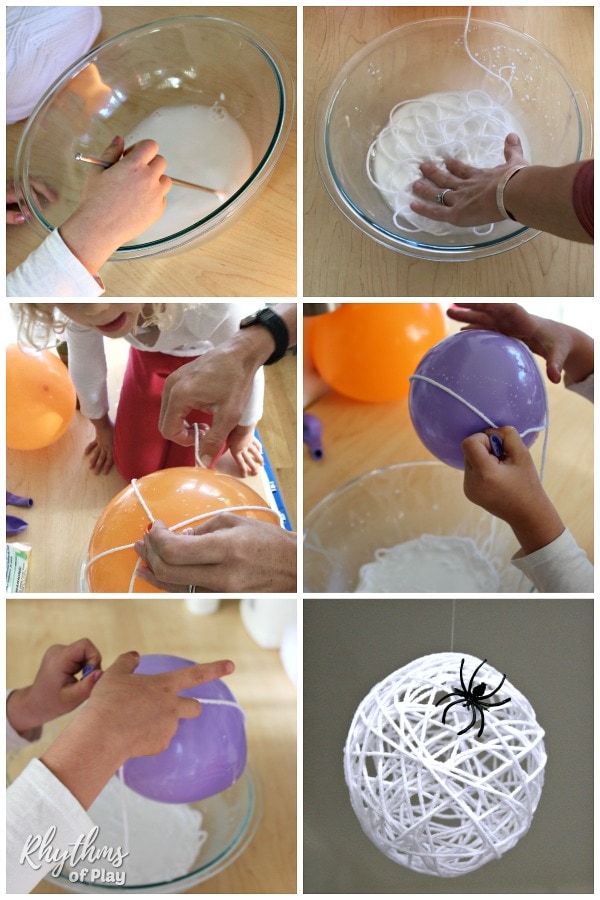
1. Blow up balloons to make spider eggs:
- Grab some small balloons or regular-sized balloons and blow a few up to get started on this fun Halloween spider craft.
- Use small balloons to make smaller spider egg sac crafts and regular-sized balloons to make larger spider egg sac decorations.
- If you are decorating an ample indoor or outdoor space, consider making them in different sizes by blowing up the balloons with more or less air.
 or regular-sized
  and blow a few up to get started on this fun Halloween spider craft.
2. Mix white glue with Water:
- Mix equal parts white glue and water to create a diluted glue solution for the yarn.
3. Put white yarn into the glue solution:
- Carefully place the white yarn into the glue solution to soak.
- Leave a length of yarn on the side of the bowl so it’s easy to find when making spider egg sacs.
 into the glue solution to soak.
 4. Wrap the balloons with yarn:
- Next, wrap each balloon with white yarn to make spider eggs.
- Please do your best to wind the yarn and wrap it around and around in several directions to create a spider egg.
 with white yarn to make spider eggs.
 5. Allow the Spider Egg Halloween Decoration to Dry:
- Tie a dry piece of yarn around the balloon knot and hang it to dry for at least 24 hours.
- The yarn will harden and become stiff when the glue is dry.
6. Pop balloons and remove them from the spider egg craft:
- Use a sewing needle, scissors, or a sharp knife to pop the balloon inside each spider egg.
- Gently remove the popped balloons from the inside of the spider crafts.
- Work carefully so the spider egg sac does not collapse, break, or come apart.
 ,
,  , or a sharp knife to pop the balloon inside each spider egg.
7. Tie a section of monofilament line or fishing string to the spider egg sac Halloween craft:
- Cut off a section of monofilament line about 12 to 36 inches long, depending on where you plan to hang your Halloween decoration.

8. Hang spider egg sac decoration:
- Decorate your home or school with these fun, spooky spider eggs for Halloween parties and trick-or-treaters on Halloween night!
- Hang them from the ceiling, exposed beams, tree branches, porch overhangs, and anywhere else you think spider egg sac decorations would look spooktacular!
9. Decorate Egg Sacs with plastic spiders or spider crafts:

- Use plastic spiders to decorate the egg sacs.
- Both children and adults love to hang and decorate simple Halloween crafts like these spider eggs. Children love to help with Halloween decorations!

 to decorate the egg sacs.
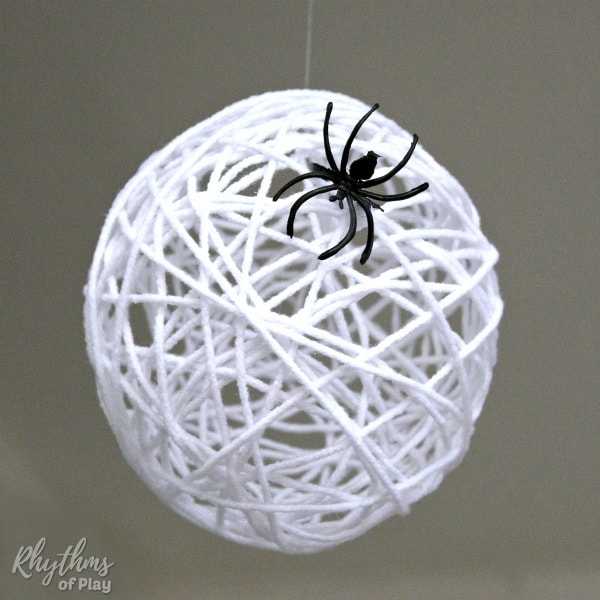
Related: Halloween Art Projects Kids LOVE!
Spider Egg Craft Photo Tutorial:
It became a challenge to take pictures when my daughter and I made spider egg sacs because the glue was all over our hands! However, the photo tutorial below for the spider egg sac provides a basic demonstration of how to wrap each balloon with yarn.
In her excitement about popping the balloons when our spider eggs were dry, my daughter forgot to allow Mommy to take pictures of them hanging. Fortunately, these directions and the step-by-step photo craft tutorial below will suffice. The best way to dry spider egg sac crafts is to tie a piece of yarn to the knot of the balloon. Then, hang the spider egg craft somewhere to dry for about 24 hours. When finished, hang your spider crafts and add spider toys to complete the decorations!
Related: Glowing Ghost Halloween Sensory Bottle
Spider Egg Halloween Decoration for Kids and Adults
My daughter and I enjoyed making this spider egg Halloween craft together. We hope you enjoy making some creepy spider eggs for Halloween as much as we do!
Learn more about Nell Regan Kartychok, author, photographer, and creator of this original spider egg sac Halloween craft HERE, and Rhythms of Play HERE!
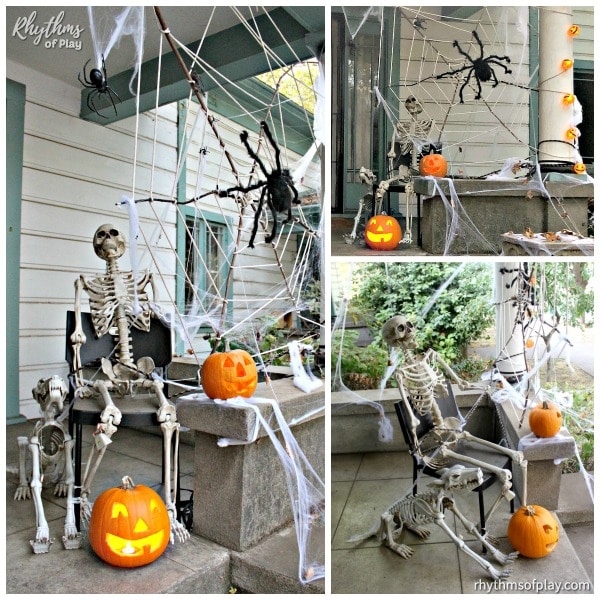
We like to hang our spider egg decorations as Halloween porch decor near this giant stick spider web Halloween decoration! Click on the link or the photo of one of the large outdoor spider webs my family made below to learn how easy it is to make your own.

More Fun Halloween Ideas:
If you are looking for pumpkin carving ideas (and no-carve pumpkin decorating ideas), look at pumpkin patch family field trips and fall nature crafts. Additionally, I have included some great Halloween ideas in both posts.
- Spider Magnet Crafts
- Healthy Halloween Handouts and Non-Candy Alternatives
- Halloween Spider Door Decor (photo below)
Halloween Art and Craft Activity Ideas:
- Cute and Creepy Halloween Art Projects
- Ghost Crafts and Halloween Decorations
- Halloween Pumpkin Salt Painting for Kids
- Glowing Ghost Sensory Bottle
- Jack O’Lantern Glowing Sensory Bottle
- Gorgeous Glowing Halloween Lanterns
- Halloween Porch Decor Ideas (photo below)


Leave a Comment