This Monarch butterfly craft doubles as an easy homemade wooden toy and gift idea for children. (First published on May 28, 2015; this post is regularly updated and republished to improve the content.)
Here’s an easy butterfly craft made to look like Monarch butterflies that makes an easy homemade toy for kids. Embark on a captivating journey into the enchanting world of Monarch butterflies with the delightful craft of making Monarch butterfly peg dolls. These tiny winged wonders will ignite creativity and bring a touch of magic to your crafting table. You might also enjoy making rainbow peg dolls with the same wooden dolls.
The beauty of these cute butterfly crafts lies not only in their visual charm but also in the educational aspect they offer. While crafting at home with children or in the classroom with students, you can share fascinating facts about Monarch butterflies, their incredible migration, and their crucial role in the ecosystem. Make this simple DIY toy for kids with wooden peg dolls today!
Monarch butterfly peg dolls make perfect gifts, charming decorations, or even learning tools for children to spark their curiosity about the wonders of nature. My daughter loves to fly her monarch butterfly dolls around the house and bring them outside to pollinate the flowers. So, spread your wings and let your imagination take flight as you delve into the mesmerizing world of Monarch butterfly peg doll crafts! You might also enjoy making this DIY Butterfly Tree or a Butterfly Sensory Bottle.

Related: Butterfly Sensory Bottle
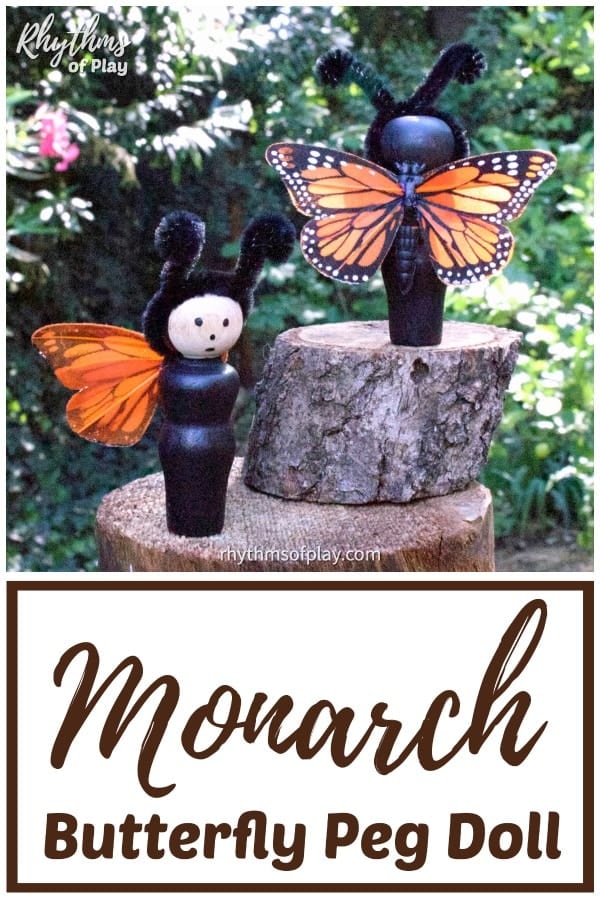
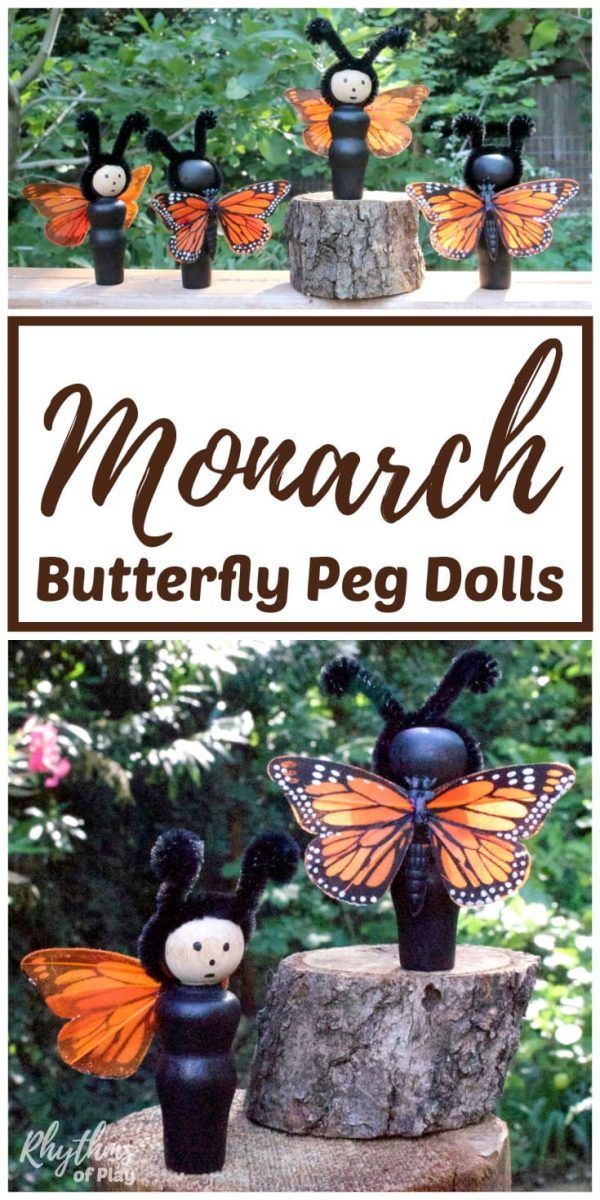
Monarch Butterfly Dolls for Children
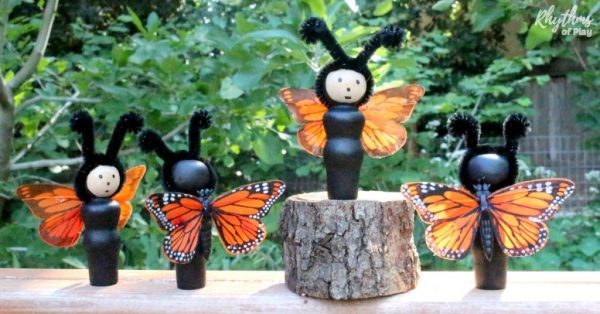
Butterfly dolls are cute DIY toys for kids made with wooden peg dolls. Wooden butterfly peg dolls are open-ended toys for pretend or imaginative play that also make lovely DIY home decor. Monarch butterfly peg dolls add a lovely summer element to shelves and windowsills and are perfect for displaying on summer nature tables.
These DIY Monarch butterfly dolls are surprisingly easy to make. All you need is a few inexpensive butterfly craft materials and a free afternoon. And you can use any leftover wooden peg dolls you have to make other fun peg doll crafts such as these beautiful Angel or Elf Ornaments or these peg dolls painted in a rainbow of colors.
My 2.5-year-old daughter helped me paint the bodies of the butterfly dolls shown in the photographs, while I did the rest of the detailed work. But older children and teens will be able to make this butterfly craft from start to finish on their own.
Monarch Butterfly Craft Supply List
- Wooden peg dolls
- Orange Monarch butterflies or multi-colored Monarch butterflies
- Black pipe cleaners
- Black acrylic craft paint
- Paintbrush
- Incredible nib or extra-fine point black paint pen
 (optional)
 - Craft glue or glue gun with glue sticks
- Scissors
 (optional)
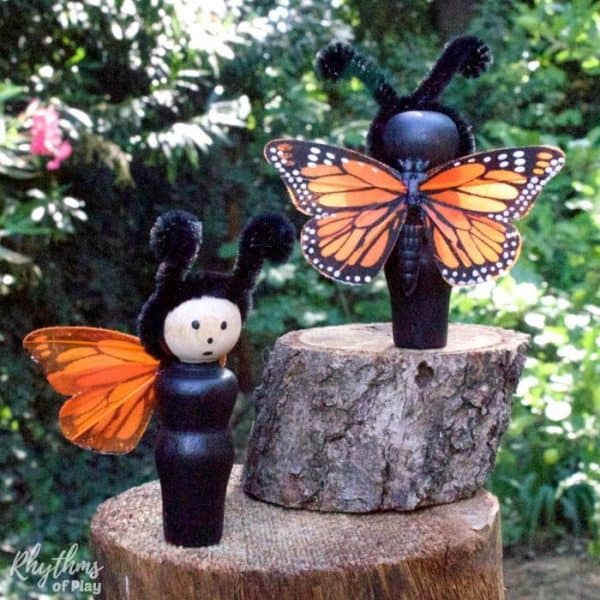
Related: DIY Rainbow Peg Dolls
Monarch Butterfly Craft Step-by-Step Tutorial with Pictures
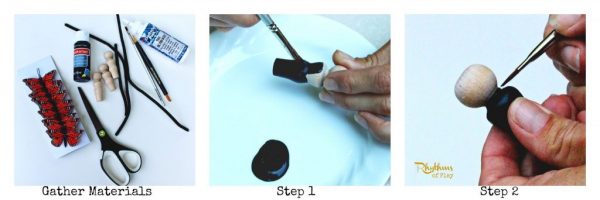
To begin, gather the butterfly craft supplies listed above to make these majestic insects. Next, read through the step-by-step butterfly craft tutorial below to learn how to make Monarch butterfly dolls for children before getting started so you know the steps involved and what to expect.
1. Paint the wooden peg doll bodies to start this butterfly craft.
- First, paint the wooden peg doll body of each butterfly craft. Don’t paint the neck or head just yet, we will get to that next.
- Painting Tip: If you have a young child assisting you, put painter’s tape around the butterfly doll’s head. That way you can invite children to help paint the butterfly peg doll bodies.
- Look at this Elf Peg Doll Ornaments Tutorial to see photos of this step.
 around the butterfly doll’s head. That way you can invite children to help paint the butterfly peg doll bodies.
2. Paint the neck of each butterfly doll.
- Next, paint the neck of each butterfly doll.
- First I had my daughter paint all the wooden peg doll bodies for this butterfly craft. Next, I took off the painter’s tape and then painted the neck of each butterfly craft as shown in the photo tutorial below.
3. Paint the head of each Monarch butterfly doll.
- Look at the head to determine which part you would like to be the face of the butterfly craft.
- Use a paintbrush to paint a line right in the middle of the head from one shoulder of the wooden peg doll to the other shoulder. Don’t worry about how messy the line is at first. Look at the photo tutorial below to see how to paint the head. This step is shown in photos a & b in the photo tutorial below.)
- Paint the back of the head of the butterfly craft (photo c).
- Narrow the butterfly face and clean up your line to make it nice (photo d).

4. Paint the face of each butterfly craft.
- The photo tutorial below shows how to paint a simple face onto each butterfly doll.
- Originally, I used a painting tool called the incredible nib to do the details on each butterfly doll’s face. It’s an old-school paint pen you can dip in any paint color you like in order to create a simple face on a wooden peg doll toy for kids.
- Paint pens today are magnificent craft tools. If I were to make this butterfly craft again, I would use an extra fine-point black paint pen to make a simple face for each butterfly peg doll. Or, use a regular paintbrush if you prefer.
 to make a simple face for each butterfly peg doll. Or, use a regular paintbrush if you prefer.
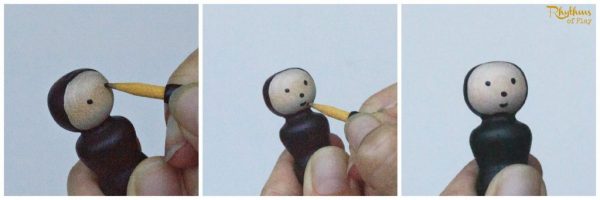
5. Make and attach antennas to each Monarch butterfly doll craft.
- Follow the step-by-step instructions below to make an antenna for each butterfly doll.
How to make antennas for each butterfly craft:
- Use craft scissors to cut black pipe cleaners in half. (You will need one-half of a black pipe cleaner for each butterfly peg doll craft.)
- Overlap pipe cleaner so the circle is large enough to fit around each butterfly doll’s head (photo a).
- Tie half of the pipe cleaner once around (photos b & c).
- Use the base of a paintbrush to curl the tips of each antenna (photo d).
- Place the antenna on the butterfly head (photo e).
- Glue butterfly antenna in place (optional).
 to cut
  in half. (You will need one-half of a black pipe cleaner for each butterfly peg doll craft.)
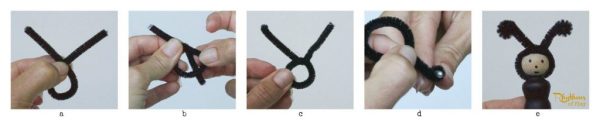
6. Apply Monarch butterfly wings to each wooden peg doll craft.
- Attach one butterfly to the back of each peg doll to complete the Monarch butterfly craft.
- To do this, first, cut the wire and antenna off of each monarch butterfly.
- Next, glue the butterfly to the back of the wooden peg doll and allow it to dry if needed.
- To do this, first, cut the wire and antenna off of each monarch butterfly
- The photograph below shows how these wooden peg doll crafts should look when finished.
 .
. 
Related: Best Flower Art Projects for Kids
More Peg Doll Crafts and DIY Toys for Kids
Butterfly Craft and DIY Toy for Kids
Monarch butterfly peg dolls are a wonderful butterfly craft and DIY toy for kids. They are wonderful wooden toys for pretend or imaginative play. You might also enjoy making these cute wooden bead bunny crafts.
Butterfly dolls also add a lovely summer element to your home decor and are perfect for displaying on nature tables. Our daughter loves to fly them around the house and right out the door to help pollinate the flowers in our yard.
Don’t forget to have a look at our spring or summer activity list with a printable bucket list for more fun seasonal ideas and activities for kids.
Learn more about Rhythms of Play HERE.
If you Liked DIY Butterfly Peg Dolls You May Also Like:
- Wooden Bead Bunny Craft
- How to Start Your Own Fairy Garden
- DIY Butterfly Tree
- All Season Hand and Fingerprint Tree
- Butterfly Sensory Bottle


Leave a Comment