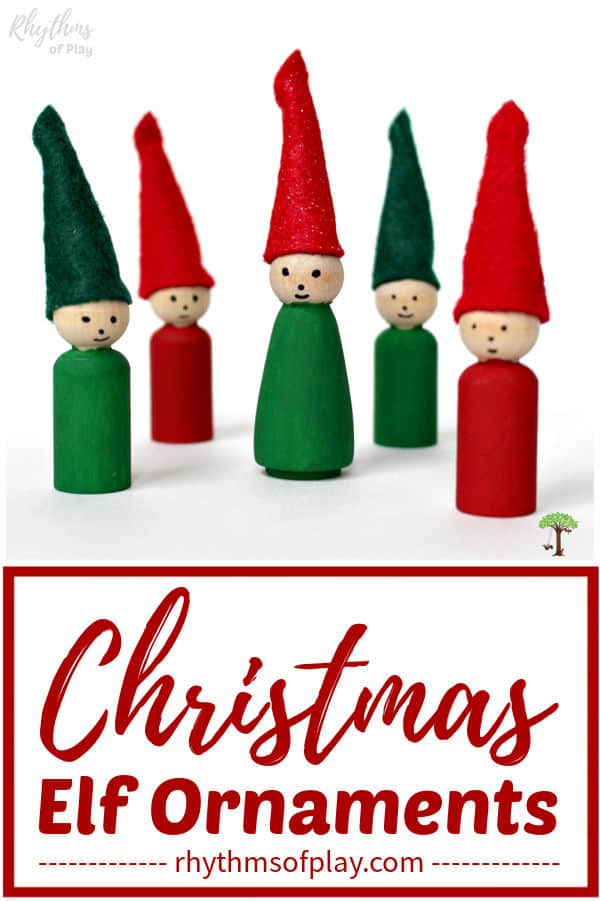
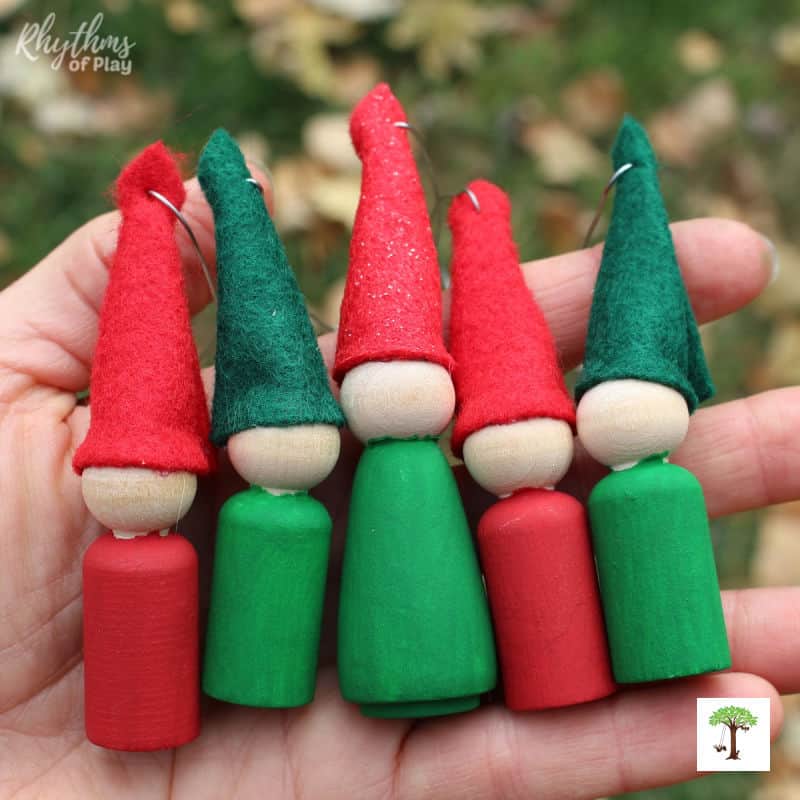
Here’s a cute collection of Christmas eleves to adorn your Christmas tree, or add to your holiday home decor this season!
Use these step-by-step craft instructions to make these adorable homemade Elf ornaments–and then use them to decorate your Christmas tree. Elf Christmas Ornaments as cute as these miniature red and green elves with pointed felt caps are fun for kids and adults to make. Grab everything you need from the craft supply list and follow the instructions below to get started!
Related: Angel Christmas Ornament
Related: 10 Reasons to Choose the Kindness Elves Over the Elf on the Shelf
Elf Christmas Ornaments
My daughter and I made the Elf decorations pictured here with wooden peg dolls, and tall felt caps. Our Christmas tree looks spectacular with them hanging alongside the other unique handmade Christmas ornaments that we have made over the years.
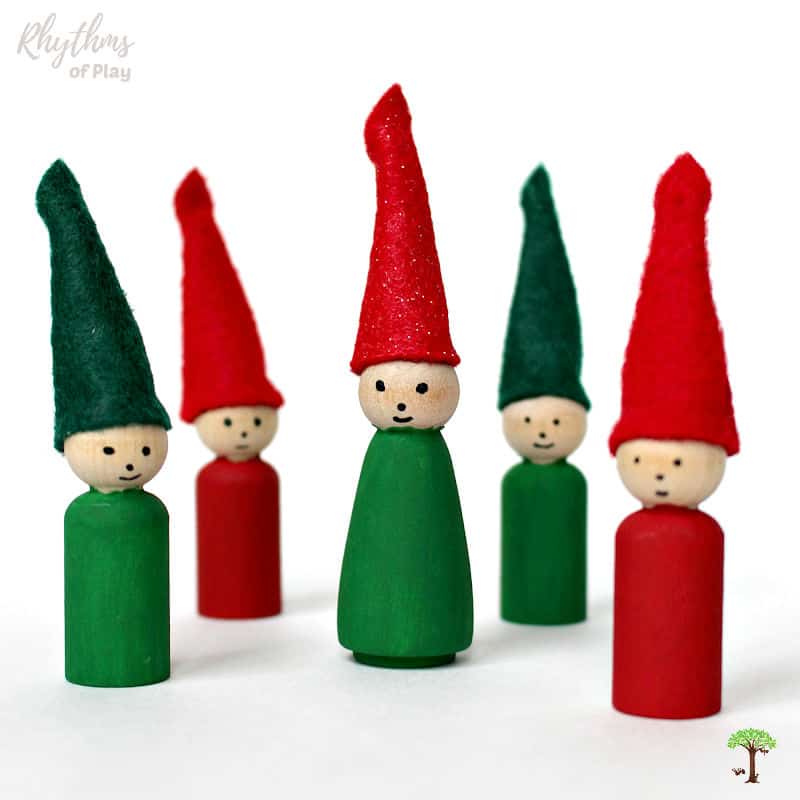
Inspired by the book “The Christmas Wish,” these cute little wooden peg doll elf ornaments make lovely decorations. In the book, a little girl–named Anja–dreams of becoming one of Santa’s elves for Christmas. So we made the green elf ornament with the red felt cap to represent her on our Christmas tree.
“A long time ago, a little girl named Anja dreamed of one day becoming one of Santa’s elves. She leaves a note for her family and sets out on a Christmas adventure, with many interesting winter animals assisting her in her journey to Santa.”
The Christmas Wish
Use the elf ornament craft supplies and the step-by-step instructions below to make Christmas elves with the colors and peg doll shapes you like, or copy what we have done to achieve a similar look.
Related: Homemade Gifts Kids Can Make
Elf Ornament Craft Supplies
- Wooden peg dolls (This set contains enough for this project and others listed at the bottom of this post.)
- Painter’s tape
- Round doll pin stands (optional – we used these to help paint and dry peg dolls.)
- Christmas green and red acrylic paint
- Multicolor felt set or red glitter felt
 and green glitter felt
 - Glue Gun with Glue Sticks
- Paint Brush Set
- Scissors
- Christmas twine and a sewing needle or ornament hooks
- Mod podge (optional)
Related: Christmas Ornaments Kids Can Make
How to Make Elf Ornaments
There are several different ways to make DIY elf ornaments with wooden peg dolls and felt caps. Please read through each step of the instructions below to decide which methods, and materials, you will use before starting this Christmas craft project. You may even choose to change the order of the steps depending on how you choose to make your Christmas elf ornaments.
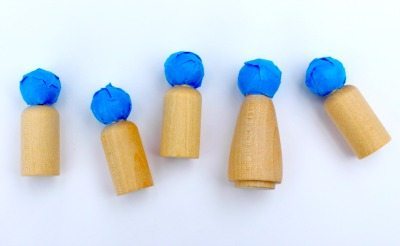
Step 1 – Paint the Peg Dolls
- (Optional) Wrap the heads of the peg dolls in painters tape if children are helping you paint elf ornaments. This step makes it really easy for your child to paint the wooden bodies of the dolls without getting paint on their heads.
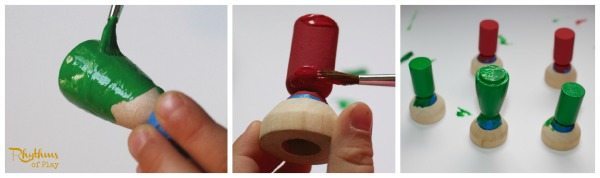
- Paint the bodies of the peg dolls red or green–or any other color that you want to make your elf ornaments. Elves don’t need to be Christmas colors to be festive!
- Place taped peg doll heads into the round doll pin stands listed in the craft supply section to make it easy for preschoolers and kindergardeners to hold onto as they paint, and provide an easy way to set them down to dry. (optional)
- Because kids work best in short segments, we worked for 5 – 10 minutes at a time. I encouraged my daughter to find something else to do between each step to allow time for the paint to dry, and to give her the break most children need.
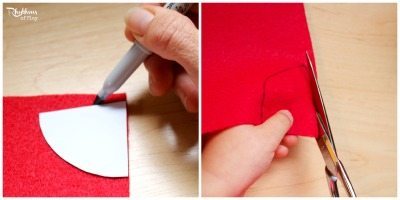
Step 2 – Cut Felt for Christmas Elf Caps
- First draw a circle, approximately 10 centimeters in diameter, onto heavyweight cardstock. Alternatively you can use a piece of flexible cardbord like that of a cereal or cracker box from the recycle bin.
- Next, cut the circle in half, and then cut it in half again so that you have a quarter circle left. This craft template will make one elf cap.
- Trace as many felt caps as you need in the colors of your choice. We used red and green felt to make 2 green caps, 2 red caps, and 1 red glitter cap for Anja. Alternatively, you can trace the entire circle template and cut the felt circle into quarters–depending on the number of felt elf caps you would like to make. We only needed a few, so we opted to use a quarter circle for our template.
- Please note: I recommend using sewing scissors to cut felt–other scissors just won’t make the cut–literally. And, please make sure that you are confident in your child’s scissor skills, and they are under your direct supervision, if you will be inviting them to help you cut the felt.
Step 3 – Finish Felt Caps and Attach One to the Head of each Wooden Peg Doll
After cutting several quarter circles of felt, make them into elf caps.
- First, fold one side of the quarter circle of felt into the middle to make a long cone shape for the hat. Apply glue to one long end of one side of the felt and attach it to the other end to form the shape of the cap. Another option is to sew the caps together by hand, and add some embroidered elements to make them look even more adorable.
- Please make sure your children are under direct supervision and know how to safely handle a glue gun before inviting them to use one. They are very hot and dangerous tools–even when you use a model with a low temperature setting.
Step 4 – Paint Simple Faces on Elf Christmas ornaments (Optional)
Faces are cute but completely optional. Many Waldorf crafts don’t require a face, and these elves don’t either. Just look how cute they are without faces!
If you want to paint faces on your elf ornaments, use a paint pen or an incredible nib and black paint to dot a simple face with neutral features onto each elf peg doll ornament. If you need to learn how to paint a face on a peg doll, pop over to see the tutorial in DIY Rainbow Peg Dolls or Peg Doll Boat Craft.
Step 5 – Seal and Protect Elf Ornaments
- I recommend doing sealing and protecting your elf ornaments so they last for years to come–but you don’t have to.
- If you are going to make faces on the dolls, I would suggest doing this step last. It’s best to dot the faces on after the caps are in place.
- If you are not going to make faces on the dolls, I would suggest doing this right before placing the caps on the heads (step 3) to give them some extra sticking power.
Step 6 – Sew or Attach Hangers for Elf Ornaments
Hangers for these elf ornaments are in two ways. Choose the method you would like to use–metal ornament hooks or bakers twine–and follow the directions to make a hanger for each of your homemade elf Christmas ornaments.
Christmas bakers twine:
- Use a large eye sewing needle and Christmas baker’s twine to create an attractive ornament hanger for your elf Christmas tree ornaments.
Metal Ornament Hooks:
- Carefully poke one end of the metal ornament hook through the felt cap of each elf about 1 centimeter from the tip.
Related: DIY Rainbow Peg Dolls
Elf Peg Doll Ornaments for the Christmas Tree
These elf peg doll ornaments inspired by “The Christmas Wish![]() ” are fun and easy to make with your kids. I recommend working in short segments and taking breaks if you have a young child.
” are fun and easy to make with your kids. I recommend working in short segments and taking breaks if you have a young child.
You might also enjoy this list of Christmas Traditions filled with fun arts, crafts, and activities that make memories that last a lifetime. The traditional things we do with our families, such as making homemade ornaments for the Christmas tree, make the holidays a meaningful time of year.
More Christmas Ideas
- Christmas Ornaments Kids Can Make
- Fun Christmas Art Projects and Painting Ideas
- Fingerprint Lights Christmas Tree Cards
- 33 Christmas Traditions for a Magical Holiday
Book Inspired Christmas Ornaments Kids Can Make
This post was originally published on November 30, 2015, as a part of the 10 Days of Kid-Made Ornaments Inspired by Books Blog Hop. Click on the link to see all of the fantastic book-inspired kid-made ornaments by over 70 participating bloggers and their children!


These are adorable Nell!!
Thank you! I’m so glad you like them 🙂
Oh these are just so adorable and look great hanging too
Thank you! They look wonderful on our tree!
Your Elf Peg Dolls are just so attractive and sweet. I think we need a tribe of them in our home.
I’m so glad you like them! We just trimmed our tree this evening and I have to say that they look lovely with the rest of our wooden ornaments.
This is too cute. I seriously want to make it with or without my toddler!
You should! My daughter loved making these with me. I’m lucky that she loves to paint and craft. 🙂
Such detail plans and infirmation! These will be easy to replicate with the clever tips you shared. Pinned tweeted, and G+ thank you!
They are a lot easier to make than they look. I’m so glad you like them!
Love these! I’m going to have to search for that book 🙂
My kids are going to love these! Thanks for the tutorial!
You’re so very welcome! I’m so glad you like them and will be making some with your kids. You are right, they are going to love them. Ours looked great on our tree until they disappeared… into my daughters purse because she loves them so much. I don’t blame her, she did make them. 🙂
Beautiful! – – Love this paint tip (masking tape the heads!!!)
These are adorable! I love simple holiday crafts like this. So cute, and so meaningful! Thanks for sharing.
I’m so glad you like them! Thank you for the kind words. It makes this all worth the while. Happy Holidays! 🙂