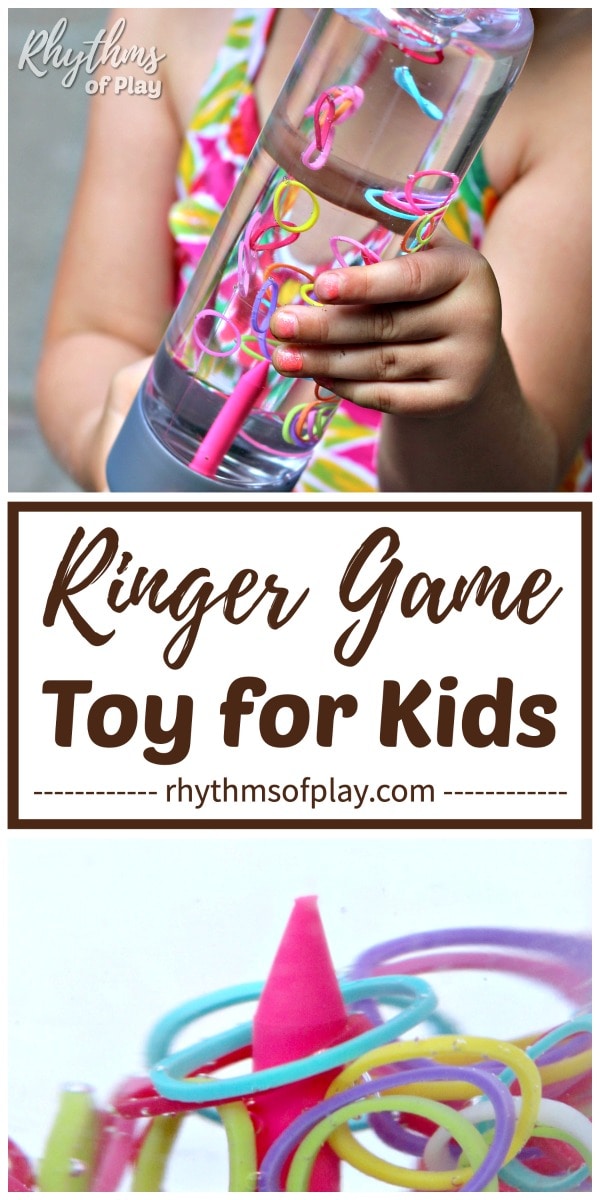
Ringer Game DIY Sensory Bottle – Make this rainbow loom band DIY toy to help children develop concentration and focus, and, learn to self-regulate as they play.
This easy DIY Toy for kids is a fun ringer game that children can play to help them calm down, focus, and learn to self-regulate. DIY sensory bottles, like this ringer game, are a wonderful tool for calming an overwhelmed or anxious child and are also a great way for babies and toddlers to play with small items without the risk of choking on them. For more information about DIY sensory bottles and their uses check out Calm Down Sensory Bottles 101.
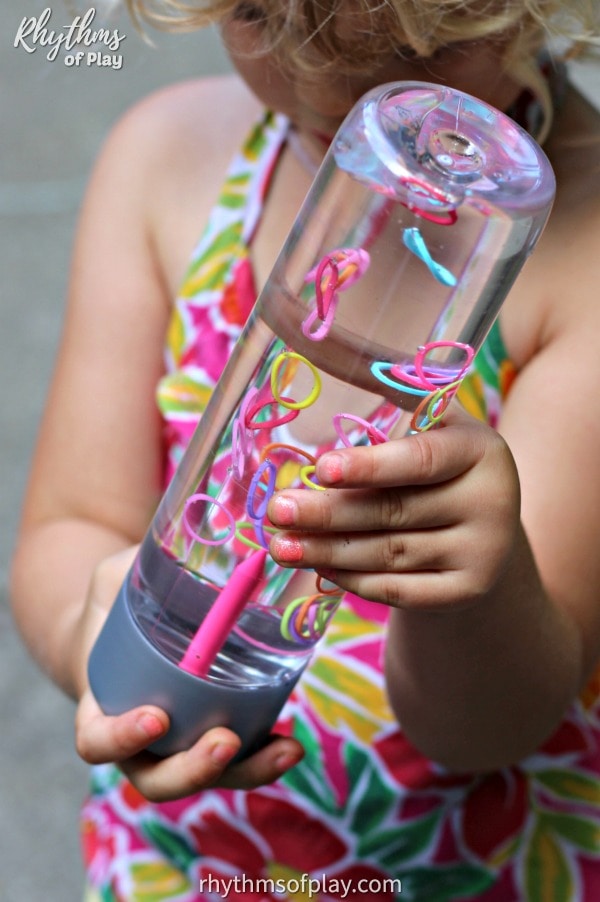
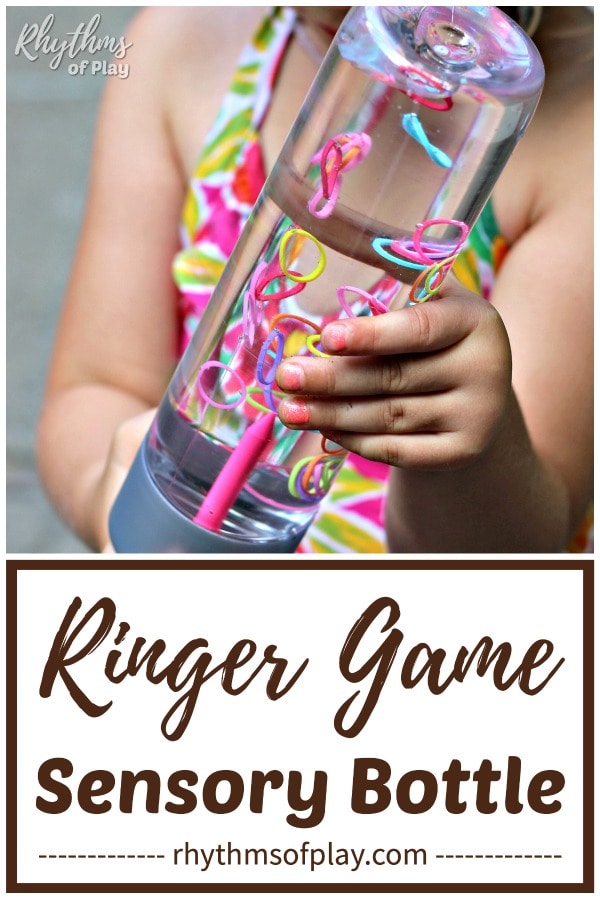
Calm-down jars and discovery bottles are excellent tools for children from toddlers to teens with many uses there are ways to make them. Even adults love to play with sensory bottles, myself included, and this DIY ringer game is one young and old alike enjoy. It has miraculously survived the thrashings that our family and friends have given it, it still works, and remains a favorite in our home since its creation. We had one craft fail that helped us learn how not to make it before we succeeded in July of 2016 with the rainbow loom band ringer game shown here. You can see my daughter playing with it that summer in the photographs below.
Related: DIY Rainbow Peg Dolls
DIY Ringer Game Sensory Bottle Toy for Kids
When I was a kid my brother had a portable ringer game we all enjoyed. I had a lot of extra loom bands around, and thought it would be fun to make a ringer game similar to what I remembered–and it worked!
It’s so much fun, my daughter and I are always stealing it away from each other. So, we made another one! We have another DIY ringer game made with glow-in-the-dark loom bands, and now we have two of them to play with–so we don’t fight over it anymore.
I recommend doing the same if you have more than one child. Make them with different colors so each of your children knows who’s is who’s at first glance, so there’s no reason to argue over them.
Ringer Game DIY Materials
- Recycled water bottle or tall mason jar

- Goo Gone (optional)
- Rainbow loom bands
- Martini Golf Tee’s
- E6000 Glue
- Water
- Small nail


How to Make a Ringer Game Sensory Bottle Step-by-Step Directions
Related: Glittering Mermaid Tail Sensory Bottle
Step 1 – Find a bottle to use to make a ringer game
Grab a bottle from the recycle bin that will work to make a ringer game, or use a tall mason jar . If you are using a recycled bottle, peel off the sticker and use Goo Gone
 to remove any remaining sticky residue.
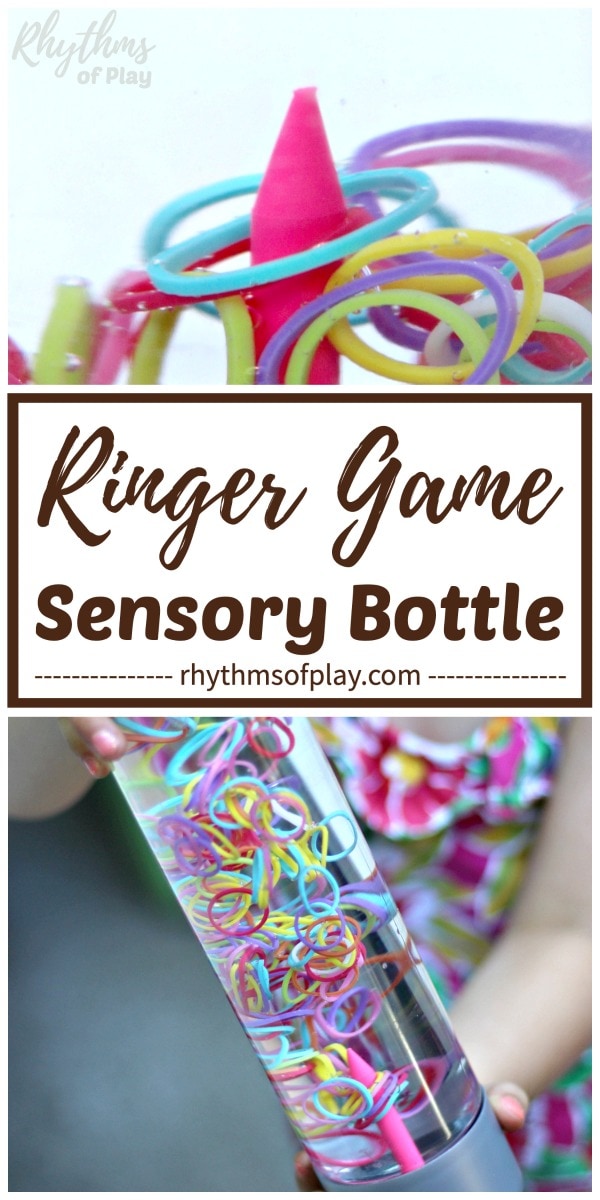
Step 2 – Glue the golf tee to the lid.
The first ringer game that we made failed in less than 12 hours! Make sure you follow the directions below to make a ringer game that will last!
- Remove the lid liner, if any.
- Use a nail or other sharp object to score the top of the golf tee and the inside of the lid. This will help the glue bond with the slick plastic surface.
- Fill the top (martini glass) of the golf tee with E6000 glue and attach it to the inside of the lid. Use it outside, or, in a well-ventilated area away from children, the fumes of this bonding glue are extremely toxic!
- Carefully place a small amount of glue around the perimeter of the golf tee to give it extra strength and bonding power. Not too much or you won’t be able to put the lid on the bottle.
- Allow the glue to dry AT LEAST 72 hours before placing it in water. E6000 glue takes several days to cure and bond.
 and attach it to the inside of the lid. Use it outside, or, in a well-ventilated area away from children, the fumes of this bonding glue are extremely toxic!
Update: We still have both of our ringer game DIY sensory bottles. They are currently 3 years old, and neither golf tee has detached! They are both still intact and are as fun to play with as ever!

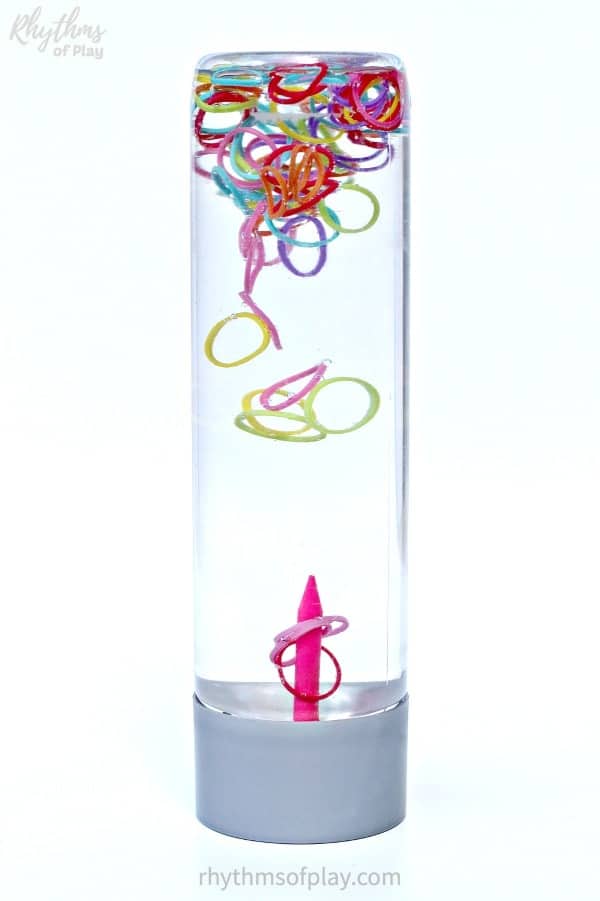
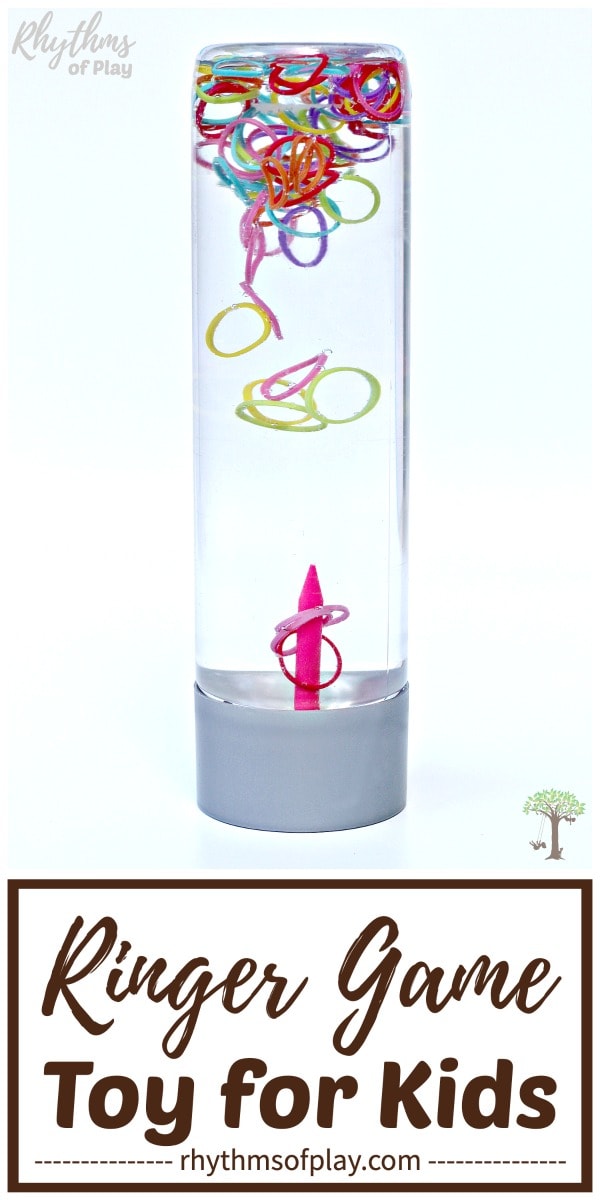
Step 3 – Place the rainbow loom bands in the game bottle
Drop about 20 – 30 rainbow-colored loom bands into the sensory bottle. We used too many at first and ended up taking some out. Fewer loom bands make the game more challenging and fun!
Note: Use the solid-colored rainbow loom bands . The jelly loom bands tend to float instead of sink.
Step 4 – Fill the bottle with water.
Fill the bottle up the rest of the way with water. You want to fill it all the way to the top so there is no air in it.
Step 7 – Place the lid on the bottle
Place the lid on the bottle and enjoy trying to get a ringer!
Related: Rainbow Arts & Crafts for Kids
Ringer Game Toy Trouble Shooting Tips
Loom bands are wacky because sometimes they float. My daughter moves the bottle around so much when she plays it doesn’t seem to matter. She still gets ringers and is overjoyed every single time!
Play with your loom band ringer game sensory bottle for a few days before you glue the lid on. That way you can add more loom bands or take some out.
You can even take the bands that end up floating out of the bottle after a day or so if you like. Or, you can test them beforehand in water as a type of science experiment like we did.
Once you are happy with your DIY ringer game, glue on the lid and hand it over to your kids. Unless you’re keeping it for yourself of course. 😉
For more troubleshooting tips, and ideas beyond sensory bottles, have a look at Calm Down Sensory Bottles 101.
Ringer Game DIY Toy for Kids
A DIY rainbow loom band ringer game sensory bottle is a super fun way to help children (and adults) calm down while they play.
Discovery jars and DIY sensory bottles like this ringer game are also an easy way for babies and toddlers to play games with small items without the risk of choking on them.
To learn more about sensory bottles, their uses, how to make them, and troubleshooting tips check out Calm Down Sensory Bottles 101.
We also made a ringer game toy using glow-in-the-dark loom bands. Click the link to have a look at it.
Learn more about Rhythms of Play HERE!
More DIY Sensory Bottle Ideas
- Frozen-Inspired Snowstorm Sensory Bottle
- Rainbow Galaxy Sensory Bottle
- Slow Falling Hearts Sensory Bottle
- Butterfly Sensory Bottle
- Sea Shells Sensory Bottle
More DIY Toy Ideas for Kids
- DIY Rainbow Peg Dolls
- Best DIY Building Blocks for Kids
- DIY Rainbow Colored Wooden Blocks
- Geometric 3-D DIY Puzzle
- Popsicle Stick Peg Doll Boat
- Tetris-Inspired Puzzle Cube


The only boss bottles I can find have painted on labels. Is there a way to get that off? ☹️
Hmmm… really? I’ve never run into that problem. If you live outside of the US that may be the reason. I don’t know if there is any way to get that off, but you can use any bottle out of the recycle bin that you can remove the label. Canning jars work too, but they are glass so there is that.
I’m making my first sensory bottle and it’s not going well!
I added glitter to the rainbow loom bands and the glitter seems to all be sticking to the bands instead of moving around the jar. And all the bands are clumping together. Any advice?
I’m so sorry that you are having trouble, Sarah.
While it sounds fun to add glitter to a loom band bottle, unfortunately, you have discovered that it will not work. Loom bands, glitter, and glue do not mix!! I would recommend making either a loom band sensory bottle, or a glitter sensory bottle, but not combining them into one bottle.
If you are looking for a few fun glitter sensory bottles, try our galaxy, mermaid tail, or Frozen-Inspired Snowstorm sensory bottles! You can find them using the search bar at the top of the page. I hope that helps!
I have made this a few times too, and find the rings stick together, and also they fall too fast. The kids get frustrated 🙁 Have you tried any additives to slow them down or keep the rings from sticking together?
Hi Belinda! Try dumping out a bit of water and adding liquid hand soap. It may turn murky after the first shake, but it will clear and settle if you fill the bottle all the way to the top before putting the lid on.
I loved this idea – unfortunately all my loom bands seem to float at the top and are not falling…. do you think another brand/type will change that? I used just water, was that the problem?
Thank you again,
Yvonne
Hi Yvonne!
We only used water, and yes, it may be the quality of the loom band that you are using? It does seem strange though, I have used many different types and they always sink to the bottom in the water!
Nell
Hello! Thank you for sharing this fun DIY! Does it have to be a martini style tee?
You might be able to use another tee, but for this project plastic is best to submerse in water over time unfortunately, and Martini tee’s are plastic.