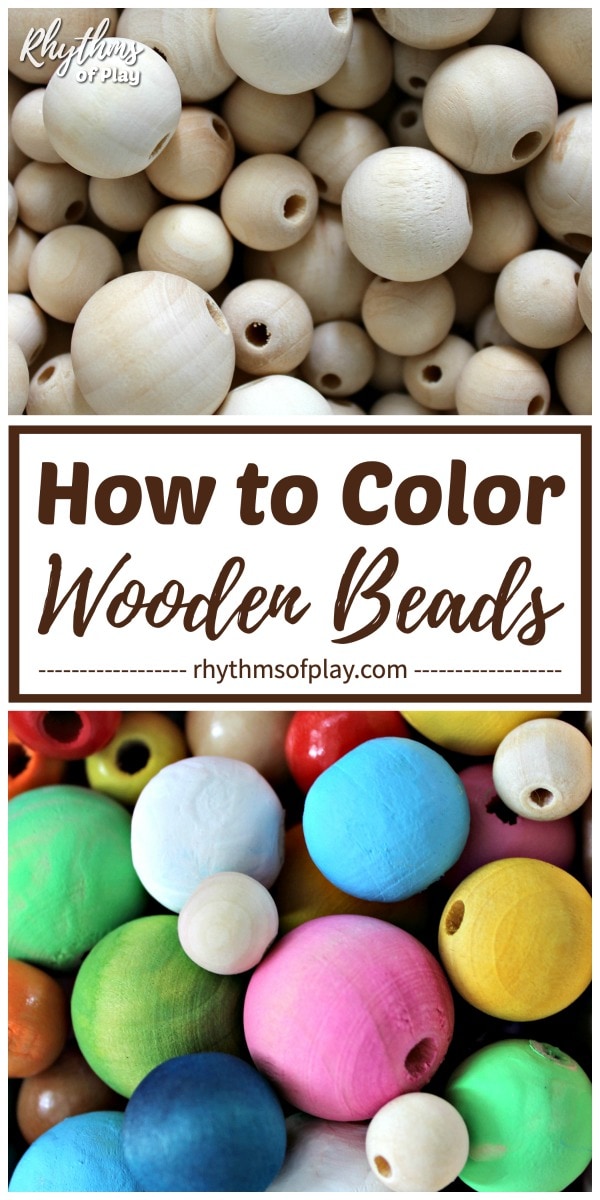
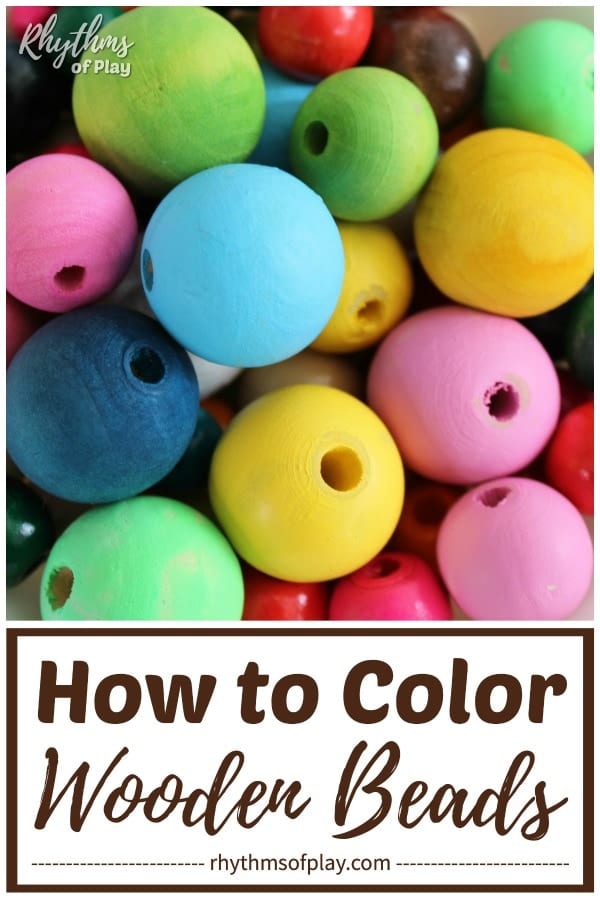
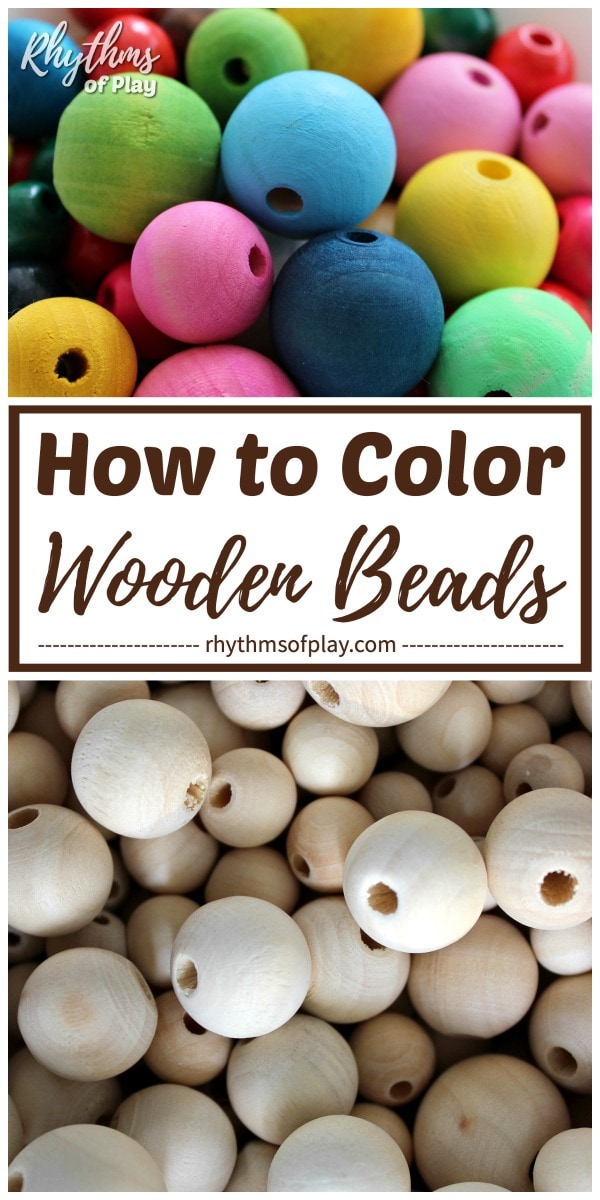
Learn how to color wooden beads for crafts, jewelry-making, and other DIY projects using these easy techniques or methods.
There are several methods for coloring wooden beads. The technique you choose to color wooden beads will depend on the supplies you have available, the type of DIY project or craft you are working on, the number of beads you want to color, and the look or effect you are trying to achieve with the colored beads. You might also enjoy learning how to color wooden building blocks.
Looking to add a personal touch to your crafts, jewelry, and other DIY projects? Scroll down for the step-by-step instructions to learn three different methods to color or dye unfinished wooden beads. Hand-dyed, painted, and colored wooden beads are an excellent craft supply for jewelry-making and DIY projects, including homemade garlands, beaded necklaces, and wooden bead bracelets.
How to Color Unfinished Wooden Beads:
Coloring your own beads is a creative way to customize colors, match themes, and bring your unique vision to life. This tutorial teaches three primary methods for coloring unfinished wooden beads: dyeing, painting, and creating eye-catching designs with paint pens. In other words, you can dye, paint, or color wooden beads with paint pens to achieve the desired look, texture, and finish for your project.
- Dyeing gives the beads a more natural, semi-transparent look that allows the wood grain to show through. This bead coloring method is excellent for achieving earthy, rustic, or boho styles.
- Painting is ideal if you’re going for bold, opaque colors. It allows you to add solid colors, patterns, metallic finishes, or glossy effects.
- Paint pens enable a diverse range of patterns, custom designs, and painting effects on wooden beads that are not as readily achieved by beginning artists with a paintbrush alone.
Dyeing beads offers a more natural, toned-down effect that will never peel or chip, while painting them allows for greater control over color, style, and design, especially when using paint pens. If you want your beads to have a rich, handmade feel, dyeing is often the better option. If you’re looking for bold opaque hues, painting is the ideal choice. For creating fine details with precision, paint pens provide the best option. For the best of both worlds, you can dye or paint the beads first, then add hand-painted accents once they’re dry using paint pens or a fine detail paintbrush and acrylic paint.
Materials for Coloring Unfinished Wooden Beads:
Each bead coloring technique encompasses a range of methods and various supplies to choose from. These bead coloring options depend on the coloring medium used, such as dye, paint, or a paint pen, so a supply list is provided above the instructions for each method. This setup makes it easy to select the materials you need for each technique, providing you with the flexibility to transform plain beads into beautiful baubles with vibrant colors and unique designs using the method of your choice.
First, choose the method you would like to use to color, dye, or paint wooden beads from the three techniques described in detail below. Then, gather the necessary supplies from the wooden bead coloring options provided in the instructions. You will also notice that a few video tutorials are available below the step-by-step written instructions for two of the bead coloring methods, making it even easier to learn how to color wooden beads. You might also enjoy making beaded sea glass DIY wind chimes.
Coloring Unfinished Wooden Beads:
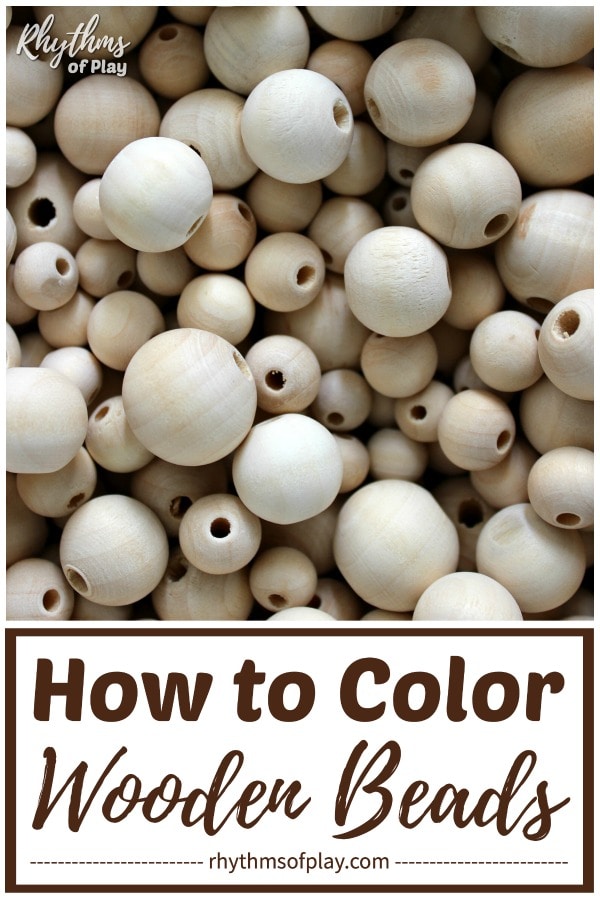
There are multiple sizes (and shapes) of unfinished wooden beads available. Sizes typically range from as small as 6 to 8mm to as large as 20, 25, and 30mm. Here are a few unfinished wooden bead size options:
- Multiple sizes of wooden beads (6mm, 8mm, 10mm, 12mm, 14mm, 16mm, 20mm)

- 6mm unfinished wooden beads
- 8mm unfinished wooden beads
- 10mm unfinished wooden beads
- 12mm unfinished wooden beads
- 18mm unfinished wooden beads
- 20mm unfinished wooden beads
- 25mm unfinished wooden beads
- 30mm unfinished wooden beads


Three Easy Methods to Color Wooden Beads:
There are several methods you can use to dye, paint, and color wooden beads. This DIY tutorial includes three main tutorials, each with a couple of variations for that particular wood bead coloring technique. The most effective method for coloring beads depends on the desired outcome. Scroll down to explore each bead coloring option. You might also enjoy learning how to use colored wooden beads to create a hand-beaded necklace or bracelet, or these super cute bead bunny crafts.
1. Dyeing Wooden Beads:
Using liquid watercolors or food coloring
 to dye wooden beads is the easiest way to color them. All you need to do is put a few drops of color into a plastic bag, canning jar, or another container, and add a wooden bead (or several beads) to color them. Of course, you will need a large container and more than a few drops of color and water added into the mix if you plan to color wooden beads in bulk.
Beads can be dyed separately or when strung onto a piece of string or cord that you don’t mind dyeing along with the beads. In other words, you can dye a string of beads or an entire garland the same color simply by placing it into a large bag, bucket, bin, or another container filled with a dyeing agent, such as liquid watercolor paint or food coloring, with or without water, depending on the depth of color, the volume of the container and number of beads.
You can also dye unfinished wooden beads with fabric dye, such as Rit dye. However, it requires utensils that don’t come into contact with food and a large heat-safe container, as well as a few extra steps, including boiling water, adding vinegar to the mixture, and rinsing. If you would like to see how good liquid watercolors look on wood dyed with it, hop over to have a look at these bead bunny crafts, or these rainbow-colored wooden blocks, to see all the beautiful colors!
Please note: Dyed wooden beads can bleed or lose their color if they become wet, even when sealed and protected. Please avoid showering with dyed beads on necklaces or leaving them outdoors. Keeping them out of water and the elements will help them maintain their color.
Materials for Dyeing Wooden Beads:
- Unfinished wooden beads.
- Fine-grit sandpaper.
- Choose one of the following dyes:
- Liquid watercolor paints + water if desired.
- Food coloring + warm water.
- Rit dye + hot water and vinegar (and a heat-safe container).
- Liquid watercolor paints + water if desired.
- Choose one of the following supply options to dye beads with:
- Tongs.
- Colander (optional).
- Rubber gloves.
- Tray.
- Paper towels.
- (Optional) Food-safe sealant or varnish.


How to Dye Wooden Beads with Liquid Watercolors or Food Coloring:
- Use a piece of fine-grit sandpaper to sand the beads and remove any dust.
- Place a few drops (to several cups) of liquid watercolor paint or food coloring (depending on the size of the container and the number of beads you are dyeing) in a canning jar, plastic bag, bucket, or another container. (Add more than one color to create new colors.)
- Add a few drops to several cups of water to dilute the color or dye. Adjust the amount based on the size of the container and the number of beads you are dyeing. (Skip this step if you want the deepest or most vibrant color possible.)
- Place a wooden bead or several wooden beads into the canning jar, recycled bottle, bag, bin, or bucket.
- Put the lid on the canning jar or recycled bottle (or seal the bag), and give it a gentle shake and a spin (or massage the beads in the plastic bag), to color the wooden beads. Alternatively, stir wooden beads in a larger bin or bucket to dye them.
- Allow to soak for 5 to 10 minutes for a deeper, more penetrating color.
- Once they are colored, place the dyed wooden beads in a single layer on a tray covered with a paper towel and allow them to dry. Take the beads out of the dye bath with tongs, or pour them into a colander over the sink to drain and rinse. If the beads are threaded onto a string, you can use tongs to remove them and hang them to dry in a place where they will not come into contact with anything.
- Repeat as needed with more beads and/or using more colors and color combinations. (Don’t forget to wash your canning jar, large bowl, bucket, baggie, or other container between each color — unless you plan to mix them.)
- Once dyed wooden beads are dry, finish them with a food-safe sealant or spray them with varnish to seal and protect the color (optional).
 or food coloring
 (depending on the size of the container and the number of beads you are dyeing) in a canning jar, plastic bag, bucket, or another container. (Add more than one color to create new colors.)
  over the sink to drain and rinse. If the beads are threaded onto a string, you can use tongs to remove them and hang them to dry in a place where they will not come into contact with anything.
How to Dye Wooden Beads with Liquid Watercolors Step-by-Step Video Tutorial:
Watch the video tutorial below to learn how to dye wooden beads using this easy coloring process! Then use colored wooden beads to make stretchy beaded bracelets and bead bunny crafts.
2. Paint Wooden Beads:
There are a few different ways you can paint wooden beads  with acrylic paints
 . Acrylic paint can cover wood more effectively and produce a deeper, more opaque finish than tempera paint, making acrylics a better choice for coloring wooden beads. The best way to paint wood beads depends on the number of beads you want to color and the desired finish.
For quick and simple coverage, use a bag or a container with a lid, add paint, and massage or shake the beads until they are fully coated. They lay them on a tray to dry. If you choose this bead painting method, be mindful not to paint inside the holes unless you’re okay with cleaning or re-drilling them afterward.
For a more precise or detailed world, string the beads onto a wire or skewer and apply a light, even coat of paint with a paintbrush, turning them to cover all sides before the paint dries. Another method of painting wooden beads requires a small bowl and a toothpick. You can even do a crazy variation of both — as my daughter did! You can see her painting a wooden bead in the colored wooden bead video tutorial, which is located below the written instructions.
The best way to paint wooden beads depends on the desired finish, the available supplies, and personal preference. Please read the instructions for three excellent bead painting technique options before determining the supplies you will use to paint unfinished wooden beads from the list of recommended options below.
Materials for Painting Wooden Beads
- Unfinished wooden beads.
- Fine-grit sandpaper.
- Acrylic paint.
- Choose at least one material option based on your preferred coloring method:
- A small shatterproof bowl and a paintbrush.
- Paintbrush and extra-long toothpicks, a thin wooden dowel or skewer, or a wire
- A zip-lock bag or baggie.
- Foam block, recycled cardboard box, upside-down colander (optional).
- Wax paper (optional).
- Tray (optional).


How to Paint Wooden Beads with a Thin Wooden Dowel, Skewer, Toothpick, or Wire:
- To prepare the beads, lightly sand any rough spots with fine-grit sandpaper, then wipe them clean with a dry cloth to remove dust.
- Thread a wooden bead or beads onto a toothpick, thin wooden dowel, skewer, or piece of wire for easy handling.
- Use a paintbrush to paint the wooden bead with the acrylic paint color or colors of your choice from the top of the wooden bead down.
- Flip the toothpick or wooden dowel over to paint the other side of the wooden bead using the same technique.
- To create clean modern designs, use painter’s tape for color blocking.
- Allow each coat of acrylic paint to dry completely before adding another. Usually, 1-2 coats are enough for solid coverage.
- Place the toothpick, dowel, skewer, or piece of wire into a foam block, cardboard box, or an upside-down colander to hold it steady while drying. Alternatively, slide the wooden bead off the wooden dowel or toothpick and onto a piece of waxed paper, and allow the colored wooden bead to dry. If drying on waxed paper, roll the bead around with a toothpick a few times before it dries, so it does not stick.
- Keep the beads on the sewers in a well-ventilated area until they are completely dry, which typically takes 1-2 hours, depending on the paint thickness and humidity levels.
- Once dry, you can apply a food-safe sealant or a spray varnish to protect the paint and enhance the finish.
 onto a toothpick, thin wooden dowel, skewer, or piece of wire for easy handling.
  to paint the wooden bead with the acrylic paint color or colors of your choice from the top of the wooden bead down.
How to Paint Wooden Beads in a Bowl:
- Lightly sand any rough spots and remove dust from the beads if needed.
- Place wooden beads or beads in a small bowl.
- Roll the wooden beads around with a paintbrush, toothpick, or skewer to cover the entire bead with color.
- Insert a toothpick or skewer into the bead hole to lift it, then stick the toothpick or skewer into a foam block, cardboard box, or an upside-down colander to hold it steady while drying. Alternatively, place it on waxed paper to allow it to dry.
- When drying on waxed paper, roll the colored wooden beads around a few times before they dry to prevent them from sticking to the paper.
- Once the painted wooden beads are dry, use a food-safe sealant or spray them with a varnish to seal and protect.
- Use a food-safe sealant if babies or young children, such as toddlers and preschoolers, will handle the colored wooden beads.
 around with a paintbrush
 , toothpick, or skewer
 to cover the entire bead with color.
Paint Wooden Beads In a Bag or a Baggie:
- Lightly sand the beads to smooth out rough spots, and clean away any dust as needed.
- Put the unfinished wooden beads into a bag or a plastic bag.
- Pour acrylic paint (or liquid watercolor paint or food coloring and water) into the bag with the wooden beads.
- Zip or seal the bag so the paint does not escape.
- Massage the beads in the bag to mix the paint through the bag and color the wooden beads.
- Then, pour the wooden beads painted with acrylic paint out onto a tray covered with plastic or wax paper, ensuring they are in a single layer and not touching to prevent sticking together.
- Make sure to roll the painted wooden beads around every so often to prevent them from sticking, but be careful not to rub the paint off.
- You may also need to poke the bead holes with a toothpick to ensure the paint does not dry inside them, rendering the bead holes useless. This is more likely to happen with acrylic paint. It’s not easy to string beads that have the holes painted shut. Bead holes with paint in them often require re-drilling.
- Or, place the beads painted with liquid watercolors or food coloring and water on a tray lined with paper towels to dry.
How to Paint Wooden Beads Step-By-Step Video Tutorial:
The painted wooden bead video shows two of the colored wooden bead methods listed above in action!
3. Color Wooden Beads with Paint Pens:
Another fun and easy way to color wooden beads is with paint pens. Paint pens make it easy to create a wide variety of colorful designs on wooden beads, and are often quicker and easier to use than acrylic paints and a paintbrush, depending on the pattern or design.
Materials for Coloring Beads with Paint Pens:
- Unfinished wooden beads.
- Fine-grit sandpaper.
- Extra fine tip paint pens.
- Metallic duel tip brush and dot acrylic paint pens.
- (Optional) Food-safe wood sealer or varnish.
- Foam block, cardboard box, or an upside-down colander.
- Food-safe sealant or spray varnish

How to Color Beads with Paint Pens:
- Lightly sand the wooden beads to remove any rough spots and clean dust as needed.
- Place them on long toothpicks or skewers to make them easier to handle and dry if desired.
- Use paint pens to create simple or intricate designs and patterns on the wooden beads.
- The extra-fine tip and brush-tip paint pens make it easy to apply color to beads in a multitude of different ways.
- When finished, place the skewers in a foam block, cardboard box, or an upside-down colander to dry.
- Once dry, seal with a food-safe sealant or spray varnish.
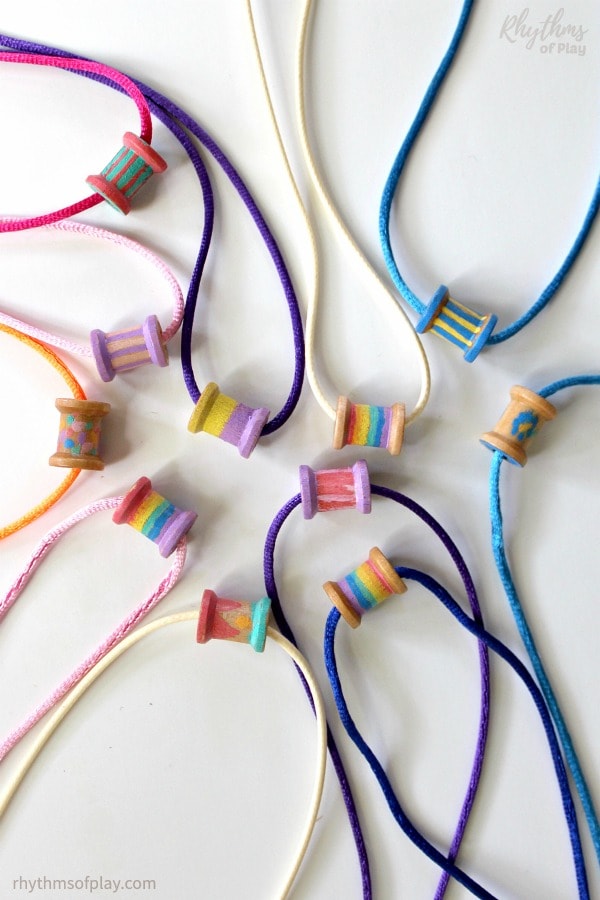
Look at how cool these painted wooden spools turned out! My daughter and I used metallic brush pens to decorate the wooden beads in this photograph…
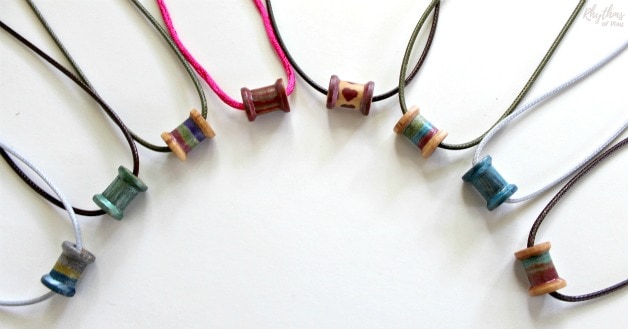
You can also use paint pens to paint the wooden spool beads, similar to those in the photograph below.
Once the colored wooden beads are dry, you can spray them with a varnish to seal and protect the color. (optional)
Related: Rainbow Bead Lucky Necklace
Colored Wooden Beads for Jewelry Making and Craft Projects
Coloring wooden beads for crafts, jewelry making, and DIY projects is both fun and easy. You can also purchase colored wooden beads. However, if you need to match a specific color, dyeing wooden beads yourself is the way to go!
Now that you’ve learned several simple ways to dye or color beads, you have the tools and the know-how to create custom pieces tailored to match your style. From subtle stains to vibrant hues and complex designs, each method offers unique possibilities for utilizing the materials you have available to create the desired look.
Don’t be afraid to experiment–blend techniques, try new color mixes, and make each project truly your own. With a bit of creativity, your hand-painted beads can become the highlight of your next craft jewelry project.
Use colored wooden beads to make wooden bead bracelets, beaded necklaces, bead bunnies, and other fun crafts and DIY projects!
Learn more about Nell Regan Kartychok, author and photographer of these wooden bead painting techniques HERE, and Rhythms of Play HERE!
If You Liked This Colored Wooden Bead Craft Tutorial, You May Also Like
- How to Start and Finish a Beaded Necklace or Bracelet
- Best Homemade Gift Ideas
- How to Paint and Decorate Wooden Eggs
- DIY Mother-Daughter Necklace Set
- How to Color Wooden Blocks


Hello I wanted to share – I put beads in ziploc bag and squirted color I wanted them to be and shook bag up worked so slick – I spread them on plastic on table and let them dry. This was to have them all same color tho
Hi Melissa! Thank you for sharing. Yes, you can also mix beads that you want to be the same color in a baggie and many other containers, and we have updated this DIY tutorial to reflect that. However, we like using glass best because it’s a more sustainable, reusable natural resource, and of course recommend that others do the same. However, for some DIY bead projects, using a bag to color or paint wooden beads can be easier. So, of course, you are welcome to use the supplies you prefer or whatever you have available. Happy bead crafting!