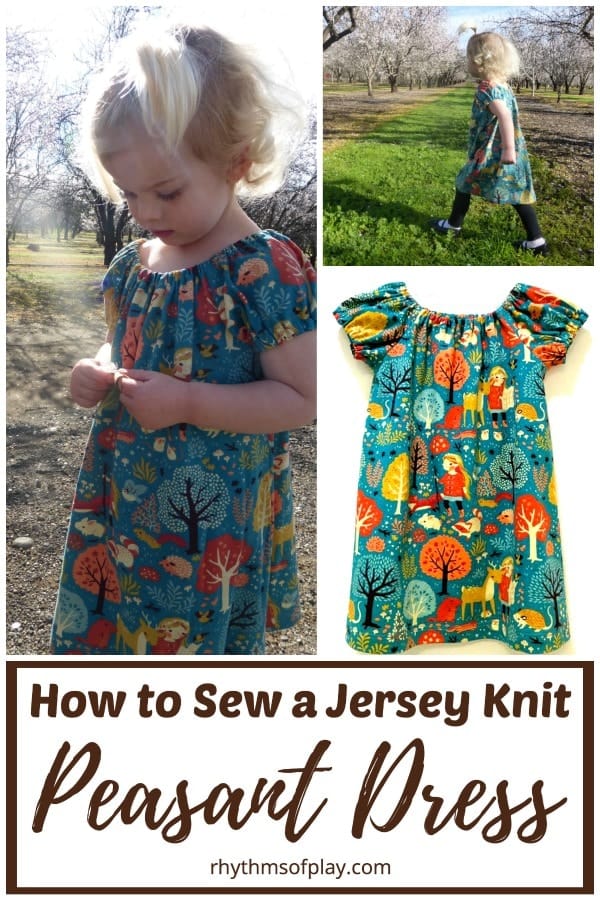
Learn how to sew a dress in knit fabric rather than woven fabric, using a conventional sewing machine instead of a serger. This peasant dress sewing tutorial also includes easy tips for using printed fabric so the fabric design and the dress pattern enhance each other.
Sewing a jersey knit dress on a standard sewing machine is easier than most people think. While sergers are often recommended for stretchy knit fabrics. They are not required to make beautiful, comfortable clothing in a snap. With the right needle, stitch settings, and a few simple techniques, you can sew a soft, stylish jersey knit dress on the sewing machine you already own.
This step-by-step tutorial will show you how to work with jersey knit fabric, prevent stretching and puckering, and create strong, flexible seams without special equipment. You might also enjoy learning how to sew a mouse toy for a child or a cat.
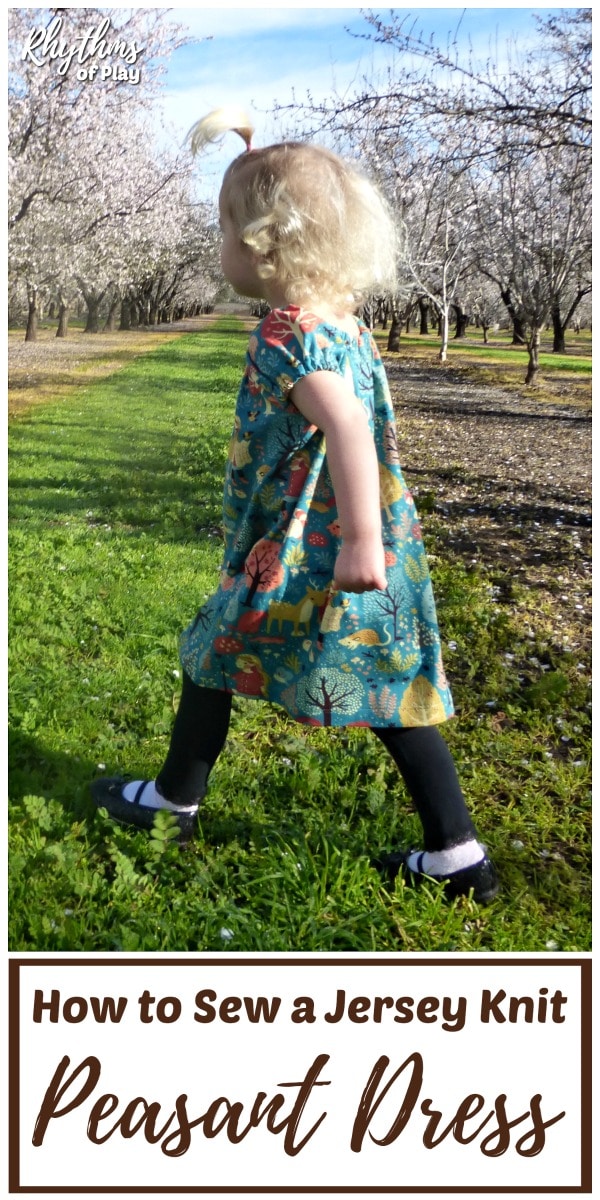
Whether you’re a complete beginner learning to sew with knit fabrics, or an experienced seamstress seeking a serger-free sewing method. This easy jersey-knit dress sewing tutorial will help you create a beautiful handmade garment like the dress my daughter is wearing in the photograph below.
Jersey Knit Dress Sewing Tutorial:
This is a guest post by my amazing stepmother, Harriette. Whenever I have a question about sewing or need help with a project, she’s the person I always turn to. She is my go-to for anything and everything related to sewing.
My daughter (shown in the photos wearing one of her grandmother’s many beautiful dresses) receives compliments everywhere we go on the hand-sewn dresses she has made for her over the years. I asked her grandmother to share how she does it here, so you can use her sewing wisdom to sew a beautiful dress as well as she can.
Her excellent dress-sewing tutorial also includes a few things she has learned about using printed fabric so that the fabric design and the dress pattern enhance each other.
She is a master of all kinds of fabric crafts. I love how she always presents each item she sews as a work of art. I can’t tell you how many times someone has asked, “Where did you get that?” about her many amazing hand-sewn gifts.
Many people ask her how she does it, and now she is revealing her best sewing secrets to you! You might also enjoy teaching children how to sew with burlap and yarn.
How to Sew a Dress for a Child:
Jersey-knit dresses made from stretchy knit fabrics, with a comfortable silhouette that allows for easy movement and growth, not only provide unmatched comfort, but can last for several years in a growing child’s wardrobe. Best of all, the simple dress tutorial below teaches how to make a peasant dress that can be converted into a tunic and later worn as a t-shirt as children continue to grow.
Sewing a Simple Peasant Dress That Lasts for Years:
My stepmother, Harriette, has sewn over 20 of these peasant dresses for my daughter. They are cute, functional, can be worn with most anything from leggings and sneakers or boots to bare legs with sandals, and they can last for several years in a quickly growing child’s wardrobe.
The first jersey knit dresses Harriette originally made for my daughter have become tunics and shirts as my daughter has grown, and Harriette has continued to sew them for her in different sizes over the years. In our experience so far, one of these dresses can last for about 5 to 6 years before it is completely outgrown.
To make them last, we replace the elastic in the neck and arms to accommodate my daughter’s growing, changing neck and arm sizes. These beautiful garments look just as fantastic when worn as a tunic or a t-shirt with leggings or jeans when they get too short to be a dress.
Learn how to sew a dress in stretchy jersey knit fabric with this easy, step-by-step sewing project tutorial by Harriette Regan, my late father’s wife of 42 years (May he rest in peace). Harriette took the photographs for the step-by-step jersey-knit sewing tutorial, while I, Nell Regan Kartychok, took pictures of my daughter, Charlize, wearing the dress her grandmother made for her, as shown below.
The remainder of this tutorial is written by Harriette Regan for Rhythms of Play:
How to Sew a Peasant Dress Made with Jersey Knit Fabric
I started sewing when I was very young, using commercial sewing patterns and fabrics that needed ironing. For this peasant dress, I downloaded a FREE template for the dress pattern from Scattered Thoughts of a Crafty Mom and used a jersey knit fabric
 .
.
Many seamstresses have assembled these types of dresses and written confusing tutorials to go along with them. However, once I boiled the whole thing down to the following order: sleeves–>side seams–> casings–> hem. I found it much easier to assemble and sew the dress.
I have broken the project down into four basic steps that make it simple to put together:
Basic Formula for Assembling a Jersey Knit Dress:
- SLEEVES – attach to the Front
- SLEEVES – attach to the Back
- SIDE / UNDER ARM SEAMS
- CASING – for neck
- CASINGS – for sleeves
- HEM
The tutorial includes several other helpful tips, products, and techniques I have found online for sewing this dress without a serger. You might also enjoy learning how to sew a button with this fun Apple Tree sewing project my stepdaughter Nell created for children or adults. Happy sewing!
Jersey Knit Peasant Dress Materials:
- Standard sewing machine (not a serger)
- Cotton jersey fabric
- Tracing paper (for pattern making and cutting)
- Clear gridded ruler
- Fabric marking tools
- Fabric scissors
- Thread & bobbin
- Universal sewing machine needle (size 90)
- 1/4″ wide elastic
- Fusible bias or knit tape (straighten curly fabric edges, interface hem edge)
- Personalized cloth name tag or clothing label (optional)
Peasant Dress Pattern:
- Visit Scattered Thoughts of a Crafty Mom to access the FREE Peasant Dress Sewing Pattern.
- Print the pattern
- Tape pages together
- Trace the size you need (Sizes 12 Months to 14 years are available)
The shape of the sleeve pattern is confusing, so here is a close-up of my notes showing what’s what.
Working with Jersey Knit Fabric:
To sew the jersey dress my granddaughter is wearing in the photographs, I used an organic cotton jersey called ‘Nature Hike‘ from Honey be Good (not affiliated). You can use another jersey-knit fabric with a pattern of your choice.
The design in the photos for this sewing tutorial shows two alternating scenes: the little girl gathering with her woodland friends, then taking them on a hike. I decided to use the hiking vignette for the center front of the dress.
The fabric pattern shown in the photographs for this step-by-step dressmaking tutorial, like many other jersey knit patterns, is one-way, meaning it has a right-side-up and an upside-down orientation. When you lay out the pattern on such fabric, make sure the top of the fabric’s design is at the neckline of the dress.
* All fabric–both knit and woven–has a length and a width. The length (called ‘straight of grain’) is stronger; the width is stretchier.
PRESHRINK THE FABRIC before cutting out the garment
- Washing and drying the fabric the same way the garment will be laundered ensures that any inevitable shrinkage occurs without affecting the fit.
- Some knits curl along their cut edges when laundered; if this happens, you either have to trim the curled edge or flatten it to avoid losing valuable fabric.
- I used fusible tape in the photo below to flatten the fabric edges.
- Some knits curl along their cut edges when laundered; if this happens, you either have to trim the curled edge or flatten it to avoid losing valuable fabric. I used fusible tape to flatten the edge of the jersey knit fabric in the photo below.
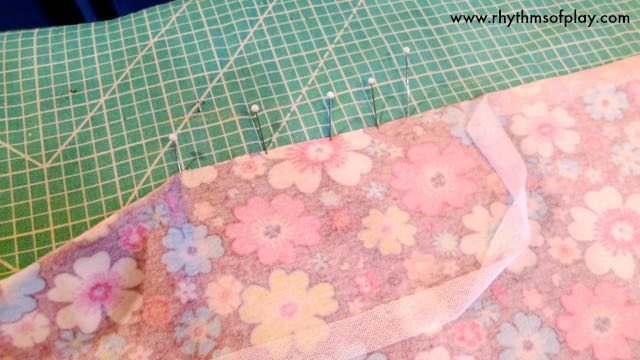
NOTE: Place fusible products glue side against the fabric being interfaced, or expect a sticky sole plate.
Cutting the Fabric:
- Fold the fabric lengthwise on the grain, right sides together.
- Place the fold line marked on the pattern on the fabric fold.
- Cut around the pattern piece, holding it down with pattern weights (pinning the pattern to the fabric can distort the shape), or draw around it and then cut along the line.
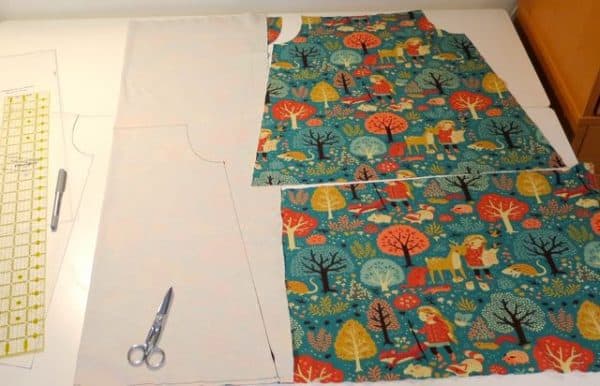
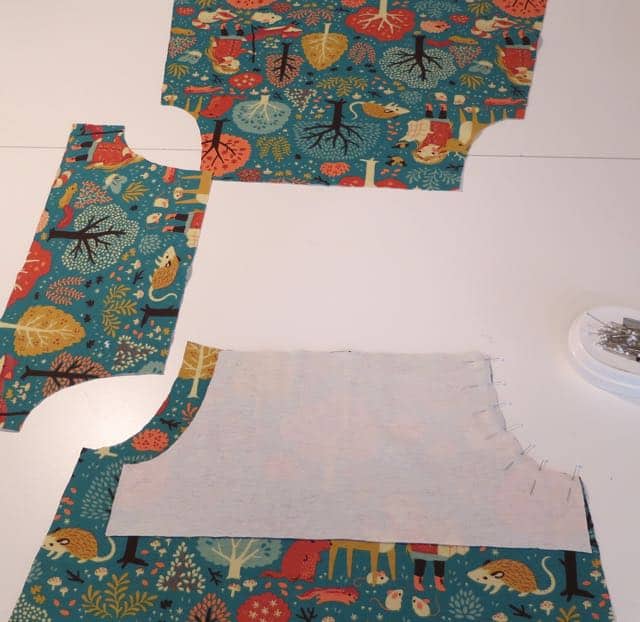
- If your fabric design is uni-directional, the pattern pieces for the Front and Back can be placed on the fabric side by side, top to bottom, as shown in the photo below, with nothing destined to be upside down. (This can help conserve fabric.)
- In the case of this size 3T version, you will need only a 22” length for the front and back. You need another 1/4 yd for the sleeves; you can use a contrasting fabric if desired.
Marking Note:
Mark the center of the Back at the hem for placement of the name tag or label, on the inside of the fabric; placing the name tag at the hem prevents any irritation it might cause if placed at the neck. Mark the center back at the neck also.
Related: Love Birds Softie Beginning Sewing Tutorial with FREE printable pattern
How to Sew a Jersey Knit Peasant Dress (Step by Step Assembly Instructions):
Follow the beginner sewing tips and step-by-step instructions below to sew a jersey-knit dress using a standard sewing machine:
Order of Assembly:
- SLEEVES (attach to the front and attach to the back)
- SIDE / UNDER ARM SEAMS
- CASINGS (for neck and for sleeves)
- HEM . . . (and label)
1. Sew the SLEEVES (1/4 inch seam allowance):
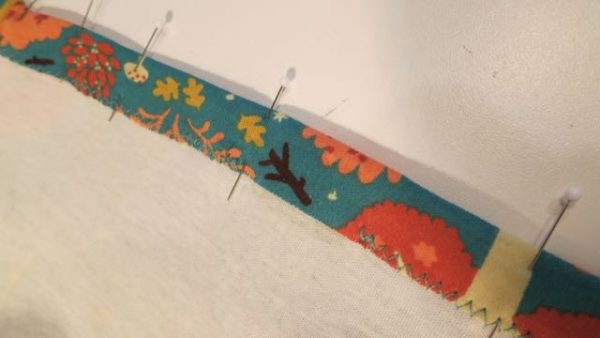
- PIN the SLEEVES in place, sleeve to dress Front along Armhole curve, right sides together; stitch 1/4” seam.
- Because knit fabric stretches but regular sewing machine stitches do not, stitches can break unless a stretchy stitch is used.
- My favorite stretchy stitch for working with jersey knit fabric is a zigzag stitch, 3.0mm long and 0.5 mm wide. (This stitch is nearly straight, and thankfully, I have not heard of any seams I’ve sewn with it coming apart.)
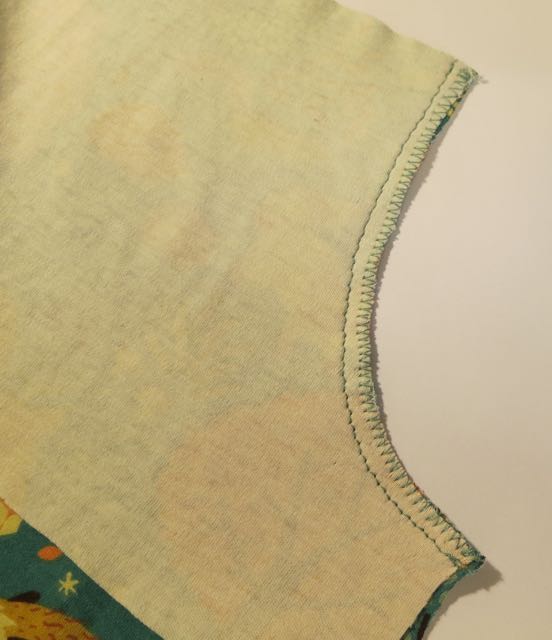
- Press this seam, and finish it by binding the edges together with an overcasting stitch.
- Do not tug on the fabric.
- Help it move under the presser foot — you could push it along with a small awl.
- Press out any ripples in the seam resulting from the overcasting.
- I’ve used contrasting thread to show these stitches in the photo below.
- Repeat the procedure outlined above to attach the sleeves to the back of the dress.
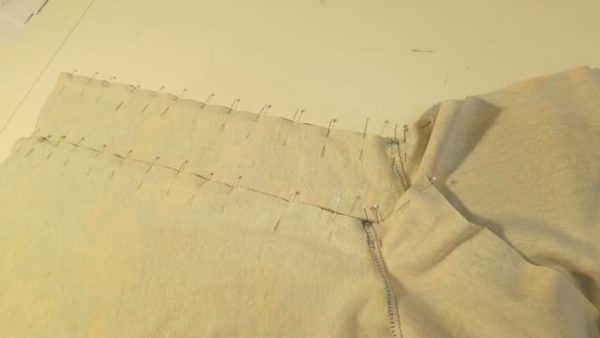
2. Sew the SIDE SEAMS / UNDER ARM SEAMS (1/4” seam allowance):
- With the dress Front and back right sides together, PIN and STITCH the SIDE and UNDER ARM SEAMS.
- Seam width is 1/4”; stitch from the hem to the end of the sleeve. This is conventional sewing wisdom: in general, sew from the part of the garment at the outside of the body toward the center. Doing so counteracts the seams’ tendency to stretch as you sew.
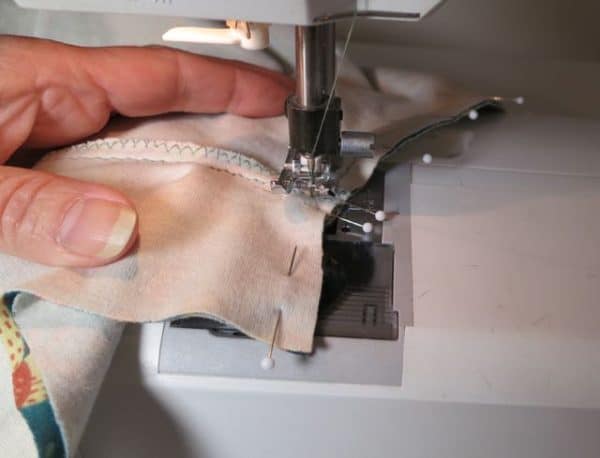
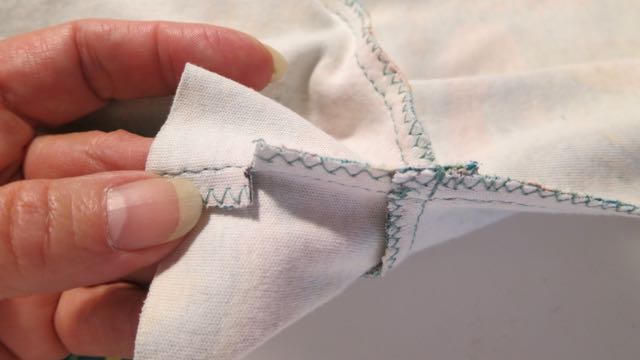
- To reduce bulk where the side seam meets the underarm seam, finger-press the seam allowances in opposite directions—fold the seam allowances at the bottom of the work out of the way to one side; fold the seam allowances at the top in the opposite direction.
- In stitching the side seam, sink the needle into the spot where the side seam meets the underarm seam.
- At this point, you need to pivot the stitching line to accommodate the sleeve’s angle.
- With the needle in the fabric, raise the presser foot and pull the fabric straight.
- Continue stitching, sewing the underarm seam.
- Overcast these seams also; press out any ripples.
3. Sew the NECKLINE and SLEEVE CASING:
- Fold the neck edge to the inside 3/4” in from the raw edge; PIN.

- SEW this casing down close to the raw edge with a zigzag stitch, leaving 1 1/2” free at the back of the neck for inserting elastic.
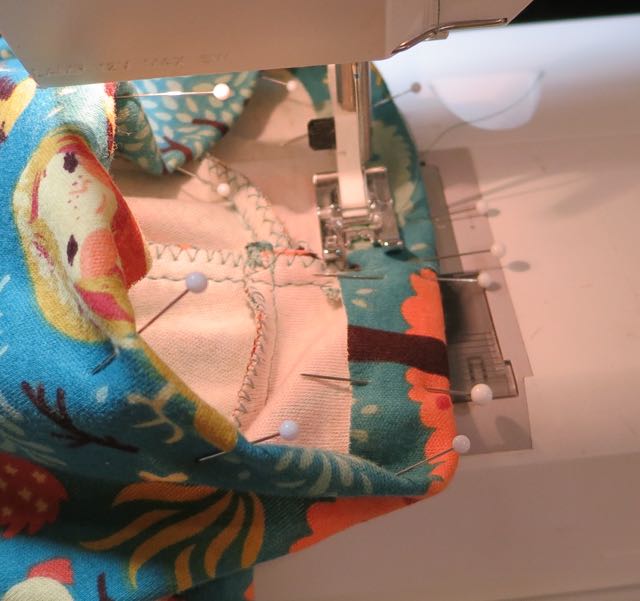
- FOLD the sleeve edge in and pin as above (for the neck edge). SEW the sleeve casings down, leaving 1 1/2” free in the back portion of the sleeve just past the underarm seam, for the insertion of elastic.
- For the sleeve casings, clip the underarm seam allowance along the casing fold line, and press the seam allowance toward the front of the dress to reduce bulk.
- This little sleeve will not fit over the free arm of my sewing machine, so I pinned the casings in place with the dress inside out, but sewed the sleeve casings from inside, with the sleeve right side out on the flatbed:
- For both neck and sleeves, INSERT THE ELASTICS in the casings using a safety-pin, passing the safety-pin carefully where seam allowances come together.
- Sew the elastic ends together using a zigzag stitch.
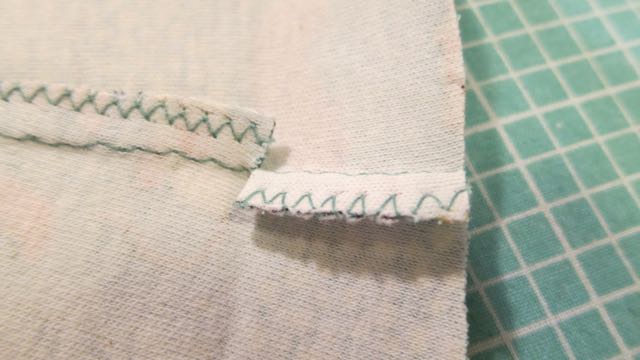
- STITCH DOWN the 1 1/2” portions of the casings that you left open — using a different color top thread, stitch from the inside of the garment. (These stitches will be easy to find and remove if the elastic needs to be replaced in the future with a longer piece.)
- PRESS.
4. Sew the HEM and NAME TAG or LABEL (1″ hem allowance):
- The side seams will end in a point unless you trim the bottom of the dress to make a smooth curve.
- TRIM off a sliver of the hem 1/2″ at the side seams, curving the new bottom edge to blend in with the bottom edge at the center front and back, 5 1/2″ in from the side seams.
- You can apply this change to the pattern, eliminating the need for future trimming.
- CLIP the side seam allowance to the stitching at the hem fold line.
- PRESS the portion of the side seam allowance within the hem allowance toward the front of the garment, and PRESS the rest of the side seam allowance toward the back.
- PRESS up the hem at the center back to help position the NAME TAG.
- CENTER the NAME TAG in the hem allowance; position it so the lettering is right side up.
- To find the center of the label, fold it end-to-end and finger-crease the fold in the middle between the ends.
- Align this crease with the mark indicating center which was made on the dress back when it was cut out (see p. 3).

- To make an attractive hem that does not pucker, it is helpful to stiffen the hem’s raw edge on the wrong side of the fabric with fusible tape.
- TURN UP the entire HEM, PIN, and PRESS.
- Apply the fusible tape; re-pin the hem; stitch the hem from the outside of the garment.(I used a double row of zigzag stitching 3.0mm l x .5mm w.)

Now You Can Sew a Jersey Knit with a Standard Sewing Machine, Too!
Sewing a jersey-knit dress without a serger is a practical and rewarding way to expand your sewing skills and your handmade wardrobe. With a standard sewing machine and a few knit-friendly techniques, you can create comfortable, professional-looking garments that hold up well to everyday wear.
Once you become familiar with sewing stretchy fabrics using the simple techniques described by Harriette in the step-by-step tutorial above, you’ll find that knit projects are often quicker and more forgiving than woven garments.
Whether you’re making a casual everyday dress, a comfortable play dress for a child, or another custom-made sewn gift, jersey knit fabric offers endless possibilities.
Harriette and I hope this tutorial gives you the confidence to sew with knits and inspires you to create even more cozy handmade clothing on your sewing machine in the comfort of your own home.
You may also like to try this love bird softie sewing tutorial with a free printable pattern or this cute little pocket pet mouse.
Learn more about Nell Regan Kartychok, author and creator of Rhythms of Play HERE and HERE!
If You Liked How to Sew a Dress, You May Also Like
- How to Raise a Helper
- Forest School: Nature Activities for Kids
- Kids Books About Emotions and Feelings
- DIY Leave-In Hair Conditioner and Detangling Spray
- All Season Hand and Fingerprint Tree


I absolutely love this post! Thanks so much for putting it together Nell and Harriet! I am bookmarking, pinning, and marking as a favourite! Thanks Thanks!
You are very welcome! We had fun collaborating together — your enjoyment makes it all worthwhile 🙂
This is very pretty! You are talented!
Thanks Melissa I agree… she is very talented. That’s why I had to share 🙂
LOVE this! I’m so going to make this, thanks for sharing! And I really really like the fabric you used!
Thanks Ann! I’m so glad you like it 🙂
I love that woodland print. Very cute.
Were do you find the Jersey Knit fabric?
Hi Wanda! I just noticed that the link I had in this post to the jersey knit fabric my step-mother used has expired. I would recommend purchasing 100% cotton jersey knit, which you can find by the yard at this Amazon affiliate link: https://amzn.to/2pklr1W. You can also find cotton jersey knit fabric at fabric sewing, and quilting stores. Good luck!