

Add a rustic touch to your Christmas home decor with a natural advent calendar. This easy homemade Christmas countdown calendar uses stones, rocks, or gemstones to count down to Christmas.
Countdown to Christmas with this easy DIY advent calendar! A Stone Advent Calendar with a festive seasonal display, such as a Nativity Scene or winter woodland display, is an interactive DIY Christmas decoration the whole family can enjoy together. Add rustic whimsy to your holiday decorations with this simple Christmas project.
Use the DIY Christmas craft tutorial below to make a stone Christmas countdown calendar with or without a religious Christmas display. Choose stones, rocks, gemstones, acorns, or wood slices to create your countdown. No sugary treats, candy, or gifts are necessary, unless you want to include them, of course!
This tutorial includes directions for making this stone countdown calendar with a nature-based winter or religious Christmas focus, along with photographs of each type, as shown below. Arrange your counting objects in a line or winding path, or explore our Advent Spiral tutorial for a spiral arrangement. You might also enjoy these fun family Christmas Traditions.

Stone Advent Calendar Tutorial Jump Links
Explore the ideas below, or jump straight to the supplies and instructions to get started. Choose a Nativity scene, a nature-themed display, or optional candle ideas to make the countdown your own.
- Supplies and Materials
- Project at a Glance
- Step-by-Step Instructions
- Nativity Scene Advent Calendar
- Continue the Wise Men’s Journey to Epiphany
- Nature-Themed Advent Calendar
- Add an Optional Candle
DIY Advent Calendar Christmas Countdown
Creating a Christmas countdown with stones and rocks is a simple, nature-inspired way to celebrate the holiday season. The word Advent comes from the Latin word for “coming.” For Christians, it is a season of preparation for celebrating Jesus’ birth at Christmas.
This homemade Advent calendar makes counting down to Christmas fun. Every day, starting December 1st (or any day thereafter), remove one stone to count down the days until Christmas. Alternatively, you can create a nature-themed countdown calendar. This Christmas activity adds a creative touch to your holiday decor and is a tangible way to build anticipation for Christmas Day.
First, gather 24 stones or rocks of various sizes. If you have toddlers at home, make sure the stones are big enough that they can’t put them in their mouths. Each stone represents a day from December 1 to 24.
You can paint or write numbers on each stone, add festive designs like snowflakes, stars, or Christmas trees, or leave them natural, as shown in the photographs. Next, arrange the stones or painted rocks in a special area of your home, such as on a nature table, mantel, windowsill, counter, or side table. Display it anywhere your family can enjoy the daily countdown.

Our Stone Advent Christmas Countdown Calendar
My daughter has always been obsessed with rocks. So, our fall nature table was always littered with them. When I saw this advent nature table by Explore and Express over 10 years ago, I knew it was perfect for my daughter and our home. She loved it!
Since then, my daughter and I have used stones to create Christmas countdown displays in many different ways. This post shares photographs of several of our many winter countdown calendar creations over the years.
The first year I made a stone countdown calendar, I made a homemade popsicle-stick nativity stable to go with it. Then, my daughter and I set up a simple Nativity Scene with a wooden Holy Family, which you can make to go with this stone DIY Advent calendar if you wish, but it’s not necessary.
You can use a Nativity set you already have. This simple Willow Tree Nativity Set is one of my favorites, but I also love the simple look you can create with wooden peg dolls , as shown in some of the photographs for this tutorial. If you are curious about how to set one up, explore our step-by-step tutorial: How to Set Up a Christmas Nativity Display.
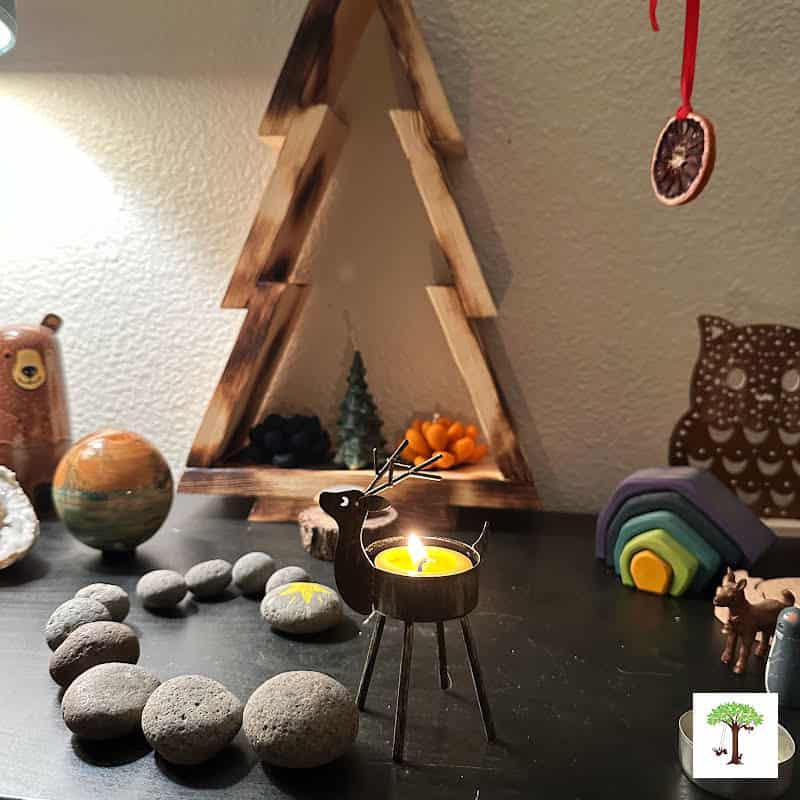
My daughter and I have also used stones, rocks, and gemstones to create Christmas countdowns with a nature-based woodland theme. We’ve decorated the stone countdown calendar with woodland animals, winter fairies, other seasonal figurines, and more, as shown in the photo below.

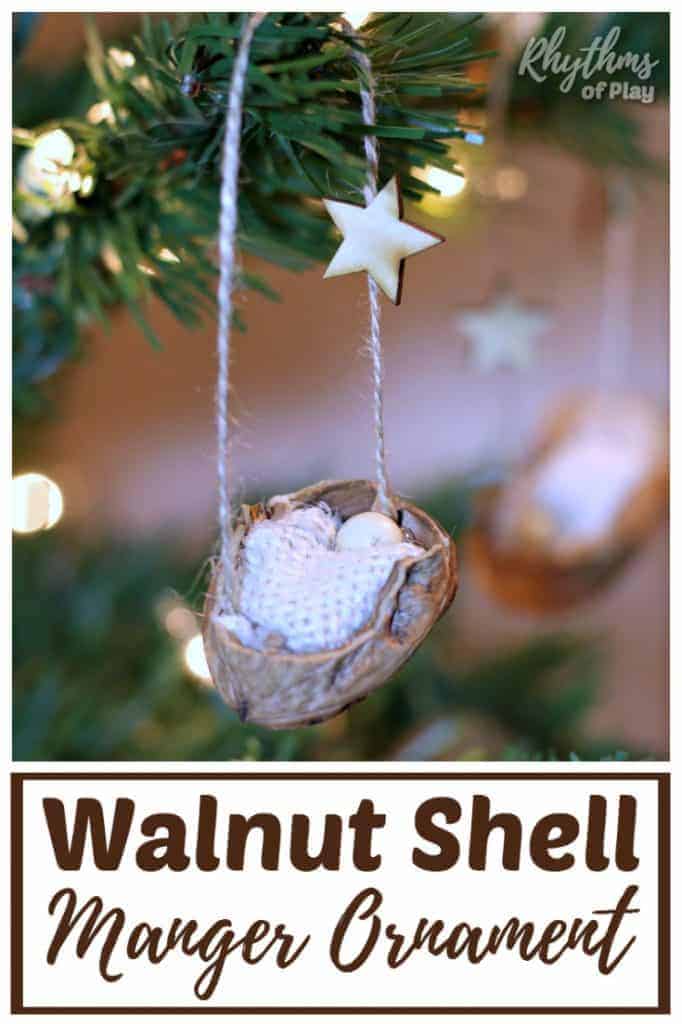
Related: Rustic Walnut Shell Manger Christmas Ornament
Christmas Advent Countdown Calendar Supplies
Use the following supplies and materials to create a stone Christmas advent countdown calendar:
Christmas Countdown Calendar Materials:
- 24 stones, rocks, or alternative items: One for each day from December 1 to 24.
- The section below includes several other alternatives you can use to count down to Christmas or another winter holiday.
- Optional thematic elements and Christmas or winter decor, such as:
- Nativity stable with the Holy Family (Mary, Joseph, and baby Jesus) and a nativity scene with nativity animals such as a goat, sheep, and donkey, an angel, stars, and the three wise men or magi. (The Nativity Advent instructions include more options you can purchase or make.)
- Woodland animals, winter fairy dolls, evergreen tree crafts, and other DIY decor.
- Optional Candles: Use battery-operated LED tealights or beeswax tealights. Place a candle at the end of the countdown path or use one in place of a stone or other item removed each day. A unique Christmas candle can mark Christmas Eve or Christmas Day, depending on your arrangement.
Go on a nature hunt to gather stones, rocks, or other natural treasures where permitted. Smooth, flat stones or pebbles work great as long as your children are no longer putting things in their mouths. Alternatively, visit your local landscaping or gardening store to buy a few stones, rocks, or pebbles.
Related: Baby Jesus Christmas Ornament

Gemstones and Other Countdown Calendar Options:
Use one type of counting object or mix several to create your own Christmas countdown calendar.
- Other natural objects, such as raw gemstones, shells
 , pinecones, acorns, acorn caps, and wood slices can replace stones. Choose gemstones for a colorful variation on the same daily countdown.
- Flat-backed gems or colorful sea glass pieces offer another decorative option.
- You can also use rainbow blocks, LEGO bricks, or even toy cars.
- Any wrapped food item unlikely to perish before Christmas will also work for this Christmas countdown craft. For example, use tiny, individually wrapped pieces of chocolate, like Hershey’s Holiday Kisses, or milk chocolate novelty Christmas figures to give your children a treat each night. Choose treats appropriate for your children’s ages and dietary needs.
 , pinecones
 , acorns, acorn caps, and
 , or even toy cars
 .
If you have toddlers or other children who still put things in their mouths, use only items that are too big to fit in their mouths.
Related: Angel Christmas Ornaments

Related: Ultimate Family Gift Guide with DIY and ready-made options!
How to Count Down to Christmas with a Stone Advent Calendar (Project at a Glance)
Here’s a quick summary of how to make and use a stone advent calendar. For complete step-by-step DIY instructions, see the full post for further details on how to make and use this Christmas countdown.
- Place one counting object for each day of your countdown, 24 for December 1-24, in a straight or curved line across a table, shelf, or windowsill, or arrange them in a spiral.
- Add optional thematic elements and seasonal DIY decor. Place a nativity stable with the Holy Family and the nativity scene at one end of the path, or create a nature-themed display with woodland animals and winter decorations.
- Use the stones to count down to Christmas or another winter holiday, such as the winter solstice,
- Starting December 1, or any day thereafter, remove one rock or object daily until you remove the last stone on Christmas Eve.
- Optional: Place a candle at the final location of your countdown, use a candle in place of the stone or other item removed each day, or both.
- Optional: Follow the Christmas countdown calendar with three wise men peg dolls or a reindeer candle holder, moving the figures or candle holder along the path as you remove each stone.
You can also adapt the number of counting objects to finish on Christmas Day or another holiday, such as the winter solstice.

Related: Christmas Gifts Kids Can Make Your Family Will Love!
DIY Stone Advent Calendar Step-by-Step Instructions
The step-by-step DIY project tutorial below explains how to make a simple Christmas countdown calendar.
Related: Christmas Ornaments Kids Can Make
1. Arrange the Stones to Create Your Christmas Countdown Calendar
Place 24-25 stones, rocks, gemstones, acorns, or other objects or ornaments in a straight line, curved line, wandering path, or a spiral across a table, shelf, mantle, or windowsill. Remove one item each day from December 1 through December 24, finishing on Christmas Eve. If you prefer to remove the last item on Christmas Day, use 25 items and continue through December 25.
If starting your countdown after the first of December, use one item for each day from your starting date through your chosen final day, including both dates. For example, a countdown beginning December 10 and ending December 24 needs 15 stones.
A few creative examples of different ways you can place the rocks or stones are shown in the photographs for this DIY tutorial. For more guidance on a spiral arrangement, explore our DIY Advent spiral countdown calendar tutorial.
The photos below show two different examples you can try.


2. Add an Optional Seasonal Display
Choose a Nativity scene, a nature-themed display, or a combination of decorations that feels meaningful to your family. The options below include ideas for both themes, along with traveling figures or a candle to accompany your countdown. You can also leave the stones undecorated for a simple display.
Nativity Scene Advent Calendar
Make or buy a complete nativity set with a stable, or use a simple Holy Family to set up a nativity scene with the homemade stone advent calendar. You can make this easy popsicle-stick nativity stable craft tutorial and a simple peg doll Holy Family, as shown in the photo below, or purchase this lovely nativity stable and these simple nativity figures.
Place Mary, Joseph, and Baby Jesus into the nativity stable at the end of the stone Christmas countdown. Add optional nativity scene animal figures such as a goat, sheep, and a donkey. You can also add a homemade angel figurine holding a star, or purchase an angel and a star decoration.
Another option is to add Baby Jesus to the Nativity Scene on Christmas Eve (December 24) if you prefer. You can make Baby Jesus in a half-walnut shell, or purchase Baby Jesus in one of the sets included above. Explore: Learn how to set up a Nativity Scene for several more options.

Place three Wise Men (or three wooden peg dolls to represent the Magi) behind the first stone you will remove, ready to follow the path toward the Nativity scene as your countdown progresses, as shown in the photo below. Or, if you prefer, add them to the nativity scene.

Continue the Wise Men’s Journey to Epiphany
If you choose to have the Wise Men follow the last stone, you can also continue their journey after Christmas. Their arrival is traditionally celebrated on Epiphany, January 6.
One way to do this is to leave the Nativity Scene up after Christmas by adding another twelve stones to the countdown on Christmas Day (December 25). Remove one stone each day from December 26 through January 6, moving the Wise Men along the path toward the Nativity scene.

Nature-Themed Advent Calendar
Arrange woodland animals and evergreen tree crafts around your stone countdown calendar to create a nature-themed display. Painted pinecones make great evergreen trees. You can also add winter fairy dolls, wooden stars, homemade angel ornaments, snowflakes, crystals, or other seasonal decorations, as shown in our woodland photographs.
Stones, rocks, or gemstones can form a path through your miniature woodland. Use decorations you already have, or make new ones using the linked DIY tutorials above and invite your children to help choose and arrange their favorites.
You can also place a reindeer tealight candle holder, or another symbolic object, behind the stone you will remove first, ready to travel along the woodland path as your countdown progresses, as shown in the photo below.
For my family, the reindeer symbolizes the Deer Mother, who carries the sun’s returning light in her antlers in contemporary winter solstice tellings. With a candle, your reindeer can represent her carrying light through the darkness and into the new year—a lovely image of hope and renewal to share during your daily countdown. Read more about the Deer Mother in our winter solstice celebration guide.
Add an Optional Candle
Place a candle at the final location of your countdown path, or use one in place of the stone or other counting item removed each day. You can move a single candle along the path or add a candle for each item removed.
Use battery-operated LED tealights or beeswax tealights. Choose LED candles for displays where the lights sit close to wooden figures, greenery, or other decorations. For real candles, use stable, heat-resistant holders, keep them away from anything that can burn, and have an adult present whenever they are lit.
3. Remove One Stone or Other Counting Item Each Day
Remove one stone from the Advent calendar each day. For a countdown beginning December 1, remove one of your 24 stones daily through Christmas Eve. If you chose 25 stones, continue through Christmas Day.
If you included traveling figures, move them into the space left by the removed stone so they gradually follow the path toward your seasonal display.
Feel free to light a candle in place of the removed stone, add a candle for each stone removed, or keep it simple. If you placed a candle at the end of the path, you might light it during your daily countdown or save it for the final day.
Use battery-operated LED candles wherever lights sit close to greenery, wooden figures, or other decorations. If using real candles, keep them in stable, heat-resistant holders away from anything that can burn, supervise children, and extinguish the flames before leaving the display.
4. Make it your own:
Turn each time you remove a stone (or other object from the DIY countdown calendar display) into a moment of connection—read a winter or Christmas story, light a candle, recite a simple prayer, poem, or verse, share your gratitude, or encourage children to commit a small act of kindness.
Choose whatever feels meaningful to your family. Some evenings, simply removing a stone together may be enough.
Related: Fingerprint Christmas Tree Cards
DIY Advent Calendar Kids Can Make
That’s it! Setting up this Christmas countdown calendar is quick and easy. Whether your family chooses a Nativity scene, a woodland display, or a simple path of stones, you can bring it out year after year and arrange it differently each time.
You can make a handmade nativity stable to accompany your homemade countdown calendar, or use these lovely stables or nativity sets. Learn how to set up a Christmas Nativity Scene HERE.
Look at these fun family Christmas traditions for even more great holiday ideas! You might also want to explore our winter bucket list with a free printable bucket list for more ways to play, create, and connect throughout the season.
Learn more about Rhythms of Play on our About page, or meet the creator and author, Nell Regan Kartychok.

More Christmas Ideas:
- Best Christmas Art Projects
- Angel Christmas Ornaments
- How to Make Beaded Snowflake Ornaments
- Christmas Handprint, Footprint, and Fingerprint Crafts for Cards
- Ultimate Family Gift Guide
- Walnut Shell Manger Christmas Ornament






Hi Nell, I love this post! So glad that you have been able to use this idea, and thank you for linking back to Explore and Express.
Hi Sheila!
I fell in love with your idea the minute I saw it and knew it would be perfect for my daughter. I love the idea of the stones symbolizing the journey of the wise man. Not many advent calendars these days can bring the meaning of Christmas to life quite like this one can. Thank you for the inspiration to create such a beautiful nativity scene on our Nature table this year.