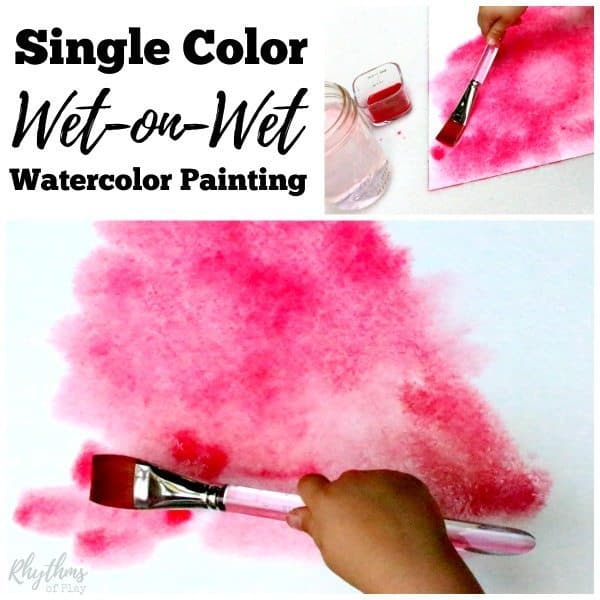
Waldor wet-on-wet watercolor painting is a process art technique that can help kids learn about and experience color.
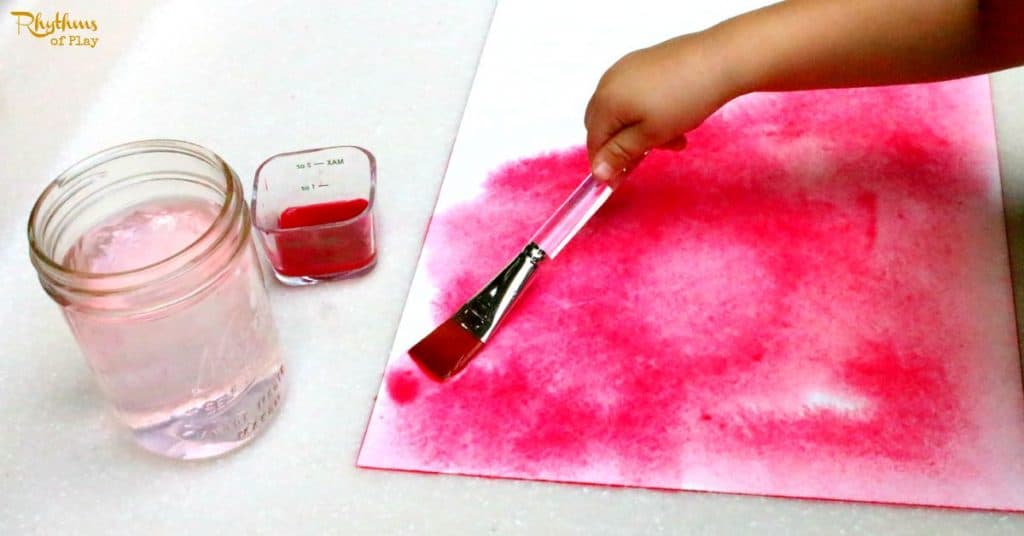
Wet-on-wet watercolor painting is a process art technique practiced by artists and taught in Waldorf schools worldwide. Wet-on-wet (also known as wet-in-wet) is a watercolor technique in which wet paint is applied on a wet surface, such as a damp, water-soaked piece of paper. Since both the surface and the pigment are wet, the color spreads softly, blends naturally, and creates smooth, flowing transitions instead of hard edges.
Because this watercolor technique requires applying wet paint to wet paper, the heavyweight watercolor paper is soaked, sprayed, or brushed with water before painting. Scroll down to learn more about the hows and whys of wet-on-wet watercolor painting with children at home or in the classroom. You might also enjoy printmaking or salt painting.

What is Wet-on-Wet Watercolor painting?
Wet-on-wet is a watercolor painting technique used by artists and Waldorf students everywhere to create gorgeous watercolor art. Because these watercolor paintings are made by applying wet watercolor paint to wet paper, they are called wet-on-wet or wet-in-wet.
Using the wet-on-wet watercolor technique with a wet wash can help the paint flow, allowing colors to blend into colorful bursts and blooms, rather than dry techniques that create rigid forms on dry paper. Using the wet-on-wet technique makes it easy to develop ombre watercolor washes and other flowy, formless watercolor effects.
Painting with watercolors using the wet-on-wet technique is an excellent way for preschoolers, kindergarteners, and elementary-aged kids to experience and learn about color and color mixing. Wet-on-wet is the primary watercolor painting technique taught to young children in Kindergarten and the lower grades in Steiner and Waldorf schools and homeschools worldwide.
Waldorf Wet-On-Wet Watercolor Painting:
At Waldorf schools and in Waldorf homeschools, children are taught to paint with watercolors, one color at a time, using the wet-on-wet technique.
To make things even more interesting (and educational), only the primary colors — red, yellow, and blue — are used to create these wet-on-wet watercolor paintings.
In other words, children learn to paint with watercolors by working with each color individually before adding a second and a third.
Why Paint with Only One Color At a Time?
In Waldorf education, children learn to paint using the wet-on-wet watercolor technique with one color at a time. There are many reasons for this. First, they get to experience the quality and distinct effects of each color on its own, and how the watercolors become fluid as they mix and flow with the water on the paper, creating beautiful blooms with different color gradients.
This makes adding a second color an educational experience for children, as they get to see firsthand how colors mix to create a new color. Because when a second or third color is finally introduced, magic happens right before their eyes. Color mixing magic.
Knowing that yellow and red make orange versus the experience of watching red and yellow mix to become orange can’t be compared. Color mixing is understood on a whole new level when children paint in this way.
If all three primary colors are added or layered into a young child’s watercolor paintings too soon, they will often become dingy and muted instead of bursting with color. They might even be turned completely brown or gray. This is why it is vital to begin learning to paint with each primary color — one at a time, as described here, then two at a time, and finally three at a time.
Like a seed pushing forth through the earth, children need time to experience each color before the flowers of their creations can bloom into paintings with multiple colors and forms.
Wet-on-Wet Watercolor Painting Supplies:
In Waldorf education, only the highest-quality art supplies are used. Click on the link to learn the reasons for this.
- 140-weight white watercolor paper
- Sink, tub, or tray large enough to soak the watercolor paper. Or a watercolor spray bottle filled with water.
- A flat, waterproof surface or a paintboard to work on.
- 1 to 1 1/2 inch flat wash watercolor paintbrush.
- Red, Yellow, or Blue Watercolor Paint (Stockmar Paints are recommended for children, but high-quality watercolor tubes work just as well. Use Carmine Red, Lemon Yellow, and Ultramarine Blue. Follow the directions below to learn how to mix concentrated watercolor paints with water before painting.)
- 16 oz mason jar for clean water (recycled glass jars with a wide mouth also work well.)
- 8-oz canning jar for mixing and storing paints.
- Small 2-6 oz jar for paint (recycled store-bought or homemade baby food jars work great—we used these glass jars). You can also use 4-oz canning jars or this lovely set of Waldorf paint jars. You will only need one for this art project. Save the rest for two and three-color wet-on-wet watercolor.)
- Two sponges – or one cut in half. (One clean to wipe paper of excess water, and one to clean the board or surface once finished. Trust me, you don’t want watercolor stains on the sponge that wipes the paper before painting.)
- A rag or paper towel
- Apron or painting smock.
- Chopstick
How to Mix Concentrated Watercolor Paints for the Wet-on-Wet Technique:
Follow the instructions below to learn how to mix concentrated watercolor paints from watercolor tubes and Stockmar paints (or even liquid watercolors) with water for use before painting.
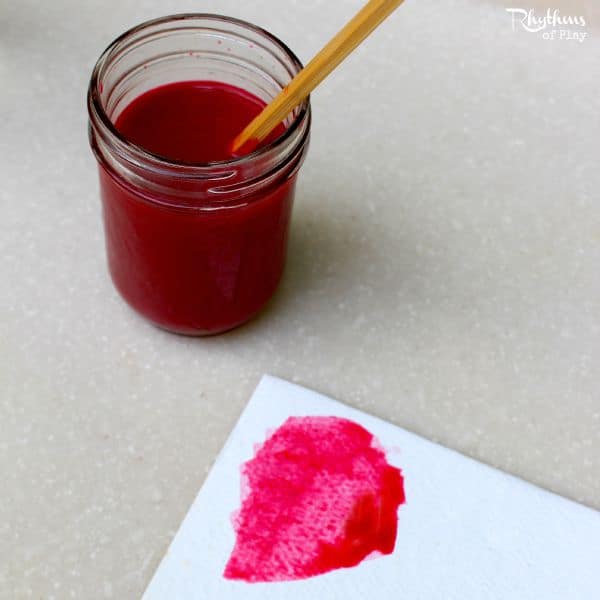
- Place 1tsp to 1 tbsp of paint into an 8-oz canning jar.
- Start small, and add more if needed.
- Add 1/2 to 3/4 cup of water to the concentrated paint, then mix well with a chopstick.
- Use a small piece of watercolor paper to test the vibrancy of your paint mixture. If the solution is a bit pale, mix in more concentrated watercolor until you reach the hue or color gradient you desire. If the paint is too dark, add a bit more water.
- Pour a small amount of this mixture into a smaller 2-6 oz painting jar to use now, if desired.
- Put a lid on the remaining paint and store it in a cool, dark place, such as the refrigerator.
- After storing, stir with a chopstick to mix well, then pour a small amount into a smaller painting jar for use.
How to Paint Wet-on-Wet Watercolor Paintings
Follow the steps below to help children learn the wet-on-wet watercolor painting method. Read through the instructions before starting, and ensure you have a batch of mixed paint ready before offering this painting activity to kids. For more information about using this watercolor painting technique with children, see the instructions for two-color and three-color wet-on-wet watercolor painting.
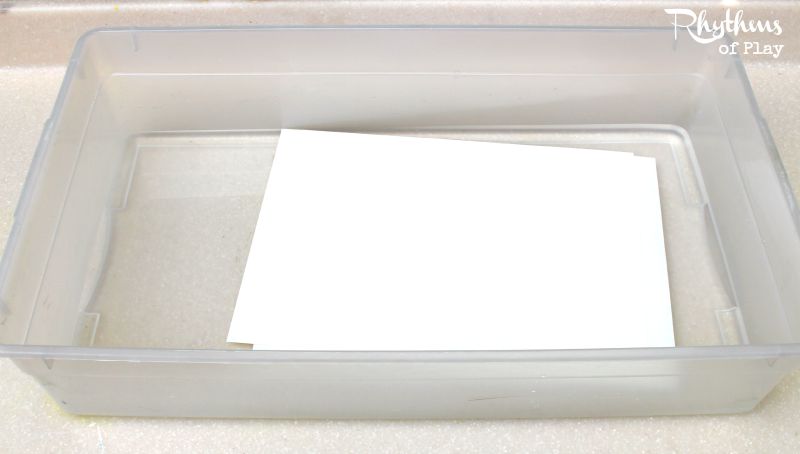
1. Soak or Spray the Watercolor Paper:
- First, fill a sink, tub, tray, or large bin with water, as shown in the photo below.
- Next, place the watercolor paper in the water and let it soak for about 10-20 minutes. The idea is to get the paper nice and wet to help the paint flow.
- Green Tip: Water your plants with the leftover water when you are finished!
- Alternatively, you can use a spray bottle to wet the paper, or brush it on with a soft paintbrush, and let it soak for at least 5 minutes before painting.
2. Mix Watercolor Paint:
- Stockmar paints and watercolor paint tubes are concentrated, so each hue must be mixed with water before use. If you don’t already have some paint mixed and stored, mix it while the paper is soaking.
- Follow the step-by-step instructions in the supply section to learn how to mix watercolor paints for the wet-on-wet watercolor painting method.
- The good news is that once the concentrated paints are mixed with water, the mixtures can be stored, so you can continue to reuse the watercolor paint until it’s time to make a new batch.
- Watercolor paints can be stored in a cool, dark place or in the refrigerator.
- Use a chopstick to stir them before reusing, then pour a small amount of the stored paint into a smaller paint jar for watercolor painting.
3. Prepare to Paint:
- Invite children to put on an apron or art smock.
- Place the jar of paint and a glass of water for rinsing the paintbrush near the work surface.
- Lay the pre-soaked, damp paper on a paintboard or waterproof surface. (My daughter paints outside on her Art Table.) Tape it down if desired.
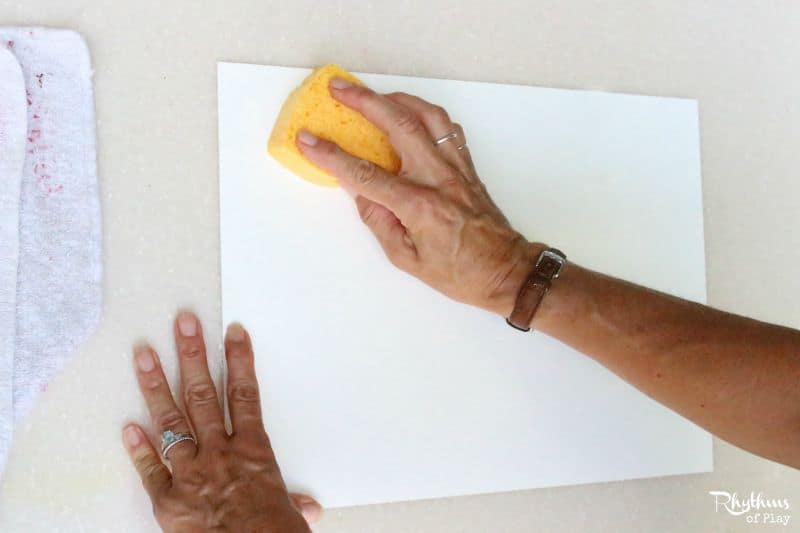
- Each piece of watercolor paper has a rough side and a smooth side. Make sure you place it rough or texture side up.
- Use a clean sponge to wipe off excess moisture and smooth out any air bubbles on the paper. Less water is better than too much water. The paper should look shiny, but not have puddles.
- Lay the paintbrush on a rag or towel next to the wet watercolor paper.
4. Share a Story, tale, Image, or Lesson Before Painting (optional):
- In Waldorf education, a color story, folktale, fairy tale, poem, verse, or lesson in the early elementary grades is often told before a child works with a particular color or pigment.
- Paintbrushes are frequently named. In our home, we call our watercolor paintbrush Tippy to subtly remind our daughter not to leave it in the jar, or it might tip over — lol.
- In our homeschool, Tippy likes to rest on her bed, which is the rag or towel that sits next to the painting and the paints on the table.
How to tell a color story:
The story and colors often have a seasonal element, such as something the child may be experiencing in the outside world. The story I told my daughter before she did the painting below went something like this:
“One morning Tippy woke up and noticed the red appearing on the Japanese Maple outside her front door. She said, “Hello Red! Do you want to play with me today?” As she started to run out the door her mother told her, “Don’t forget to wash your feet before you play Tippy.” So she dipped her feet in her bathtub (paintbrush in the water jar) and sung happily, “Red, Red, I get to play with Red today. Red, Red, I get to play with Red.” Then she wiped her feet off (brush paintbrush on rag or towel) and ran outside to greet Red (dip brush in red paint). “Hello Red! Do you want to dance and play? So they danced and they played (painting red on paper) and they danced and they played.”
You get the idea. Please don’t feel you have to tell the story as I did. There are as many ways to tell a color story as there are colors in the world. Make it something you feel comfortable sharing and a story your child can relate to.
Related Post: Benefits of Reading Fairy Tales for Kids
5. Demonstrate How to Paint with Watercolors Using the Wet-on-Wet Watercolor Painting Technique:
- Young children, such as preschoolers and kindergarteners, learn best by imitating others. So, if this is the first time your child has ever tried wet-on-wet watercolor painting, demonstrate how to paint with watercolors using a flat wash watercolor brush before inviting them to try painting with the wet-on-wet technique.
- Children need to see an adult or older child paint, so they know what to expect, what is expected of them, and how to use a paintbrush properly. And these details can all be shared within the color story, through your example, and with a bit of guidance.
- This demonstration is often done while telling an extended color story and using a flat wash watercolor paintbrush to show children how to use a paintbrush properly. Children need to see others using watercolor techniques before they are given a paintbrush, so they know what to do.
- Show children that long, unidirectional brush strokes and gentle taps of color are beautiful ways to put color onto the paper.
- Once they have a pretty good idea of how best to apply paint to the wet paper, let them experiment with watercolor painting.
6. Lightly Tap and Brush the Paint onto the Wet Paper:
- Load the paintbrush with paint and touch it to the wet paper.
- The color will spread and bloom organically.
- Avoid brushing too much; let the paint flow and mix naturally.
- Let the water do the work; overbrushing breaks the painting’s softness.
7. Control the Flow:
- As children gain experience painting with one color, show them how to guide the paint with the following techniques if desired:
- Tilt the paper slightly to help the paint flow.
- Add more water to the painting to push the color.
- Use thicker paint to create darker areas.
- If the paint spreads too far, clean the brush, dry it slightly, and use it to lift the excess pigment.
8. Allow the Painting to Dry Naturally:
- Wet-on-wet effects appear best when they’re allowed to form naturally.
- Stop painting while the paper is still wet.
- Do not keep fixing it, as this often causes muddy colors and uneven textures.
- Allow the painting to dry flat or hang it to dry.
Wet-on-Wet Watercolor Painting for Children
Wet-on-wet watercolor painting is a technique taught in Waldorf schools and enjoyed by artists and homeschoolers worldwide.
Creating art with this watercolor painting method is a fun and easy process art activity for kids. All you need is a few simple supplies and a willing participant.
And once your we-on-wet watercolour paintings are dry, your beautiful creations can be made into cards (such as these) and crafts (like these).
Once your child becomes competent at working with single colors, you can offer Two-Color wet-on-wet watercolor painting and Three-Color wet-on-wet watercolor painting.
More Information About Waldorf Painting Techniques for Kids
- Painting and Drawing in Waldorf Schools: Classes 1-8
- Painting in Waldorf Education
- Wet on Wet: The Waldorf School Method of Painting and Color
- Painting With Children


I love the stories to go along with the painting – and the watercolors looks awesome!
I was a little resistant to the color story’s at first, but they really work for my daughter. It really helps her use the proper techniques when combined with my demonstration. No teaching necessary-love it!
Looks so much fun! My little girl can’t wait to do this today! <3 Thanks!
You’re welcome Ashleigh! I’m sure your daughter will enjoy it. Mine sure does. She asks to do it daily so we are almost ready to offer two colors – stay tuned 🙂
This is great.step by step along with supplies , story, and instructions.
I have longed believed that we should be teaching kids how to paint. I am a decorative artist and have taught kids and my grandkids how to paint brush strokes in acrylics and how to create with them. I hope to see more from you on teaching kids.
Anyone who wishes ,can paint if they learn the brush strokes. It is a learned method.
Thank you.
Martha
Thanks, Martha! I’m so glad you appreciate my instruction. Yes, I plan to continue posting about painting techniques for kids. Thank you for the recommendation to cover brush strokes. I’ll see what I can do!
Hi, this is just amazing! But I’ve got a question….in mainstream they seem love very much the watercolor finger painting instead. Is there any particular reason why it is not used in Waldorf kindergarten?
Hi Ele!!
That is a great question, but I have no idea exactly why. I will look into it and find out!