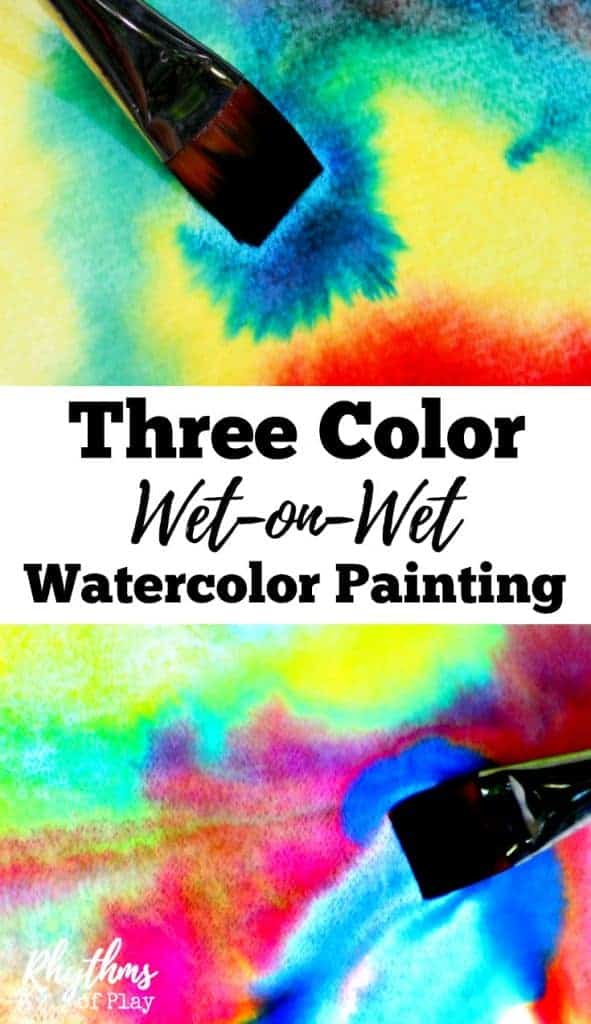
Paint with the three primary colors using the wet-on-wet watercolor technique to allow the secondary colors to appear with this Waldorf watercolor art lesson for kids.
Three-color wet-on-wet watercolor painting is a process art technique taught to children in Waldorf elementary schools worldwide, especially in Kindergarten and the early elementary grades, but only after working with each of the primary colors individually and then in pairs. However, artists of all ages and abilities can create beautiful watercolor paintings with natural blends that are hard to replicate dry using this art technique. It is ofen used by artists to create skies, water, blooming flowers, skin tones, fog and other backgrounds.
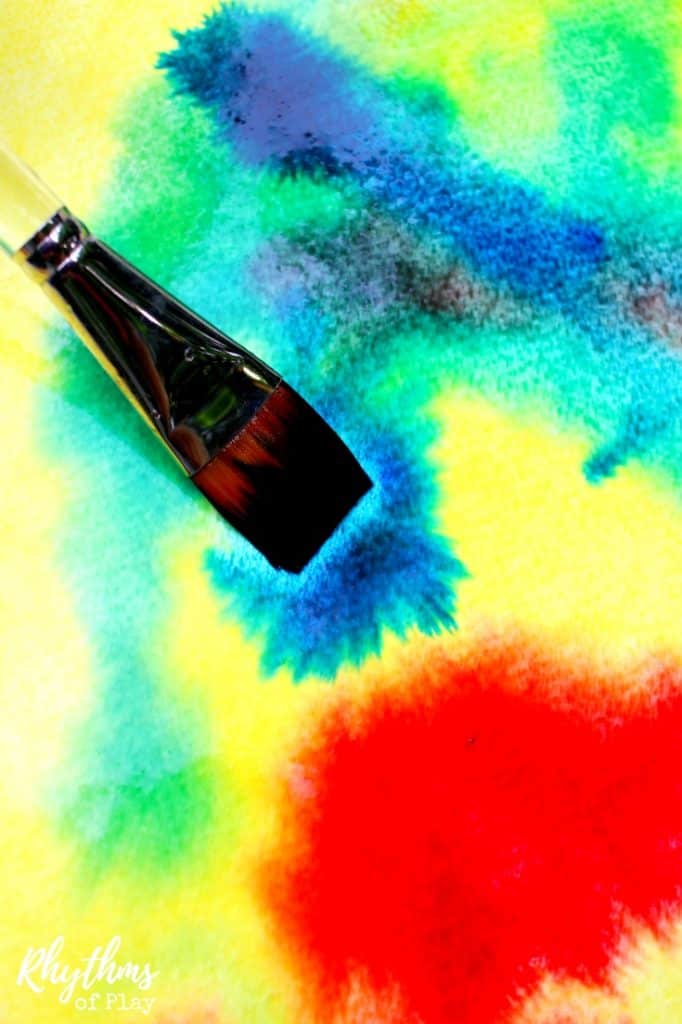
Wet-on-wet means applying wet paint onto wet or moistened watercolor paper, or onto a damp layer of paint. Because both the paints and paper are wet, the watercolor pigments flow, blend, and spread naturally on the surface. When more than one color is used, the colors mix and blend. Various color blends of the secondary colors, green, purple, and orange, appear on the page to create flowing, rainbow-colored watercolor paintings.
Wet-on-wet Watercolor Painting Lessons for Children:
The wet-on-wet watercolor painting method is a unique artistic practice used in Waldorf education, especially in the early and elementary grades. When children begin painting in the Waldorf kindergarten, they are invited to start with a single primary color, then two, and finally three.
Instead of focusing on precise shapes or realistic accuracy. This process art method highlights the experience, mood, and inner feelings that each color inspires within each artist. Children are encouraged to see each color as alive and expressive, and allow it to move and interact freely on the paper. Like other process art activities, the goal is not to “paint a specific product” but to fully experience the qualities of each color.
After the child spends some time working with each of the primary colors separately. First painting with one color, then two, and finally adding the third. This allows the child to experience each color individually and then in pairs before combining all three into one painting.
Once the third color is added, an infinite number of colors will begin to appear on the page. This is magic to a young child’s eyes, and an excellent, hands-on way to teach color mixing. However, it is best to start slowly when using this watercolor painting method.
If a child is given three colors to work with before they are ready, the painting will take on a brownish or grayish color. This “muddy” effect does not support the child’s learning. This is one of the many reasons the colors are introduced individually to children before they are asked to paint with two or three of the primary colors.
How to Paint with Three Colors Using the Wet-on-Wet Watercolor Painting Technique:
For this art lesson, three-color wet-on-wet watercolor, only the primary colors, red, yellow, and blue, are used to paint with. These will eventually allow secondary and sometimes even tertiary colors to appear upon the wet watercolor paper. Please try painting with one and then two colors before attempting Three-Color Wet-on-Wet Watercolor Painting with young children.
Waldorf teachers demonstrate careful, rhythmic preparation, showing students how to mix the paints, set up their workstations, and wet the paper from edge to edge. This demonstration not only shows children what to do, but sets the tone before any color is applied to the paper. Of course, these wet-on-wet demonstrations change and evolve as children gain experience painting with watercolors using this technique and move up through the grades.
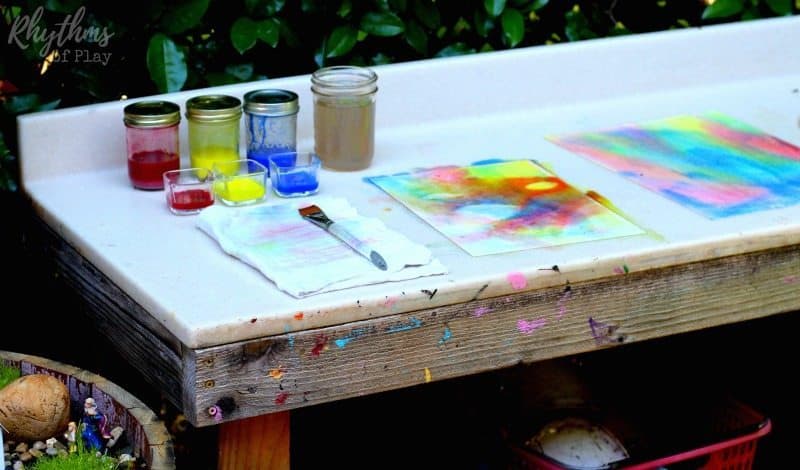
As each new primary paint color is introduced, teachers and students mix up enough paint to last a few months. The mixed paint can be stored in a canning jar in the refrigerator for several months. One to three children can usually paint for several months using the original mix before needing to make another batch. In comparison, an entire classroom full of kids may need to mix up a new batch of paint more frequently, depending on how often they paint. Please read the tutorial on working with each paint color individually for more information.
Add Paint to the Paper Once it is Wet:
Once the paper is wet, teachers show children how to add the diluted watercolor paints to it. In Waldorf education, these are typically high-quality, concentrated, transparent paints made from natural pigments. It is believed that these types of high-quality art materials resonate more deeply with the child’s sensory nature and are better suited to the wet-on-wet painting method.
Using just red, yellow, and blue to paint is called a limited or primary palette. Painting with only these three colors using the wet-on-wet watercolor technique is a practice in observation, balance, and restraint for young children. Every other color is a mix of these three. Instead of choosing from dozens of colors, beginning artists can focus on value (light versus dark), temperature (warm versus cool), and water control. Because each color comes from the same sources, the painting is unified and cohesive.
This art method teaches control through restraint rather than precision. Using only the three primary colors encourages each painter to slow down and pay close attention to how each color interacts on the damp surface and influences the others when they meet. Since the paper is wet, the colors will naturally flow and interact in interesting ways, resulting in soft transitions and unexpected blends. With fewer pigments interacting, colors stay cleaner.
This helps children develop a better understanding of color and how it mixes, blends, and influences other colors. Painting with the primary color palette can also help beginning artists learn how warm versus cool versions of the primaries behave. Gather the supplies below, and use the step-by-step instructions in the following section to try this art technique with children at home or in the classroom. Alternatively, use the tutorial to enjoy this watercolor art technique yourself! You might also enjoy these heart art painting ideas.
Three Color Wet-on-Wet Watercolor Painting for Kids: Materials
- 140-weight watercolor paper.
- Sink, tub, or tray large enough to soak the paper, or a spray bottle.
- A flat, waterproof painting surface, such as an art table or a paintboard, to work on.
- 1 to 1.5-inch flat wash watercolor brush.
- Red, yellow, and blue watercolor paint (choose from the following options:)
- Stockmar concentrated watercolor paints (recommended).
- High-quality watercolor tubes.
- Liquid watercolors.
- Cup for water (canning jars and recycled glass jars with wide mouths work well).
- 8-oz canning or mason jar for mixing and storing paints.
- Small 2-6 oz jar for paints while in use.
- Recycled baby food jars are perfect for this.
- The photos show the glass jars I used to store my daughter’s homemade baby food when she was an infant, but we use them today as reusable paint jars.
- You can also use 4-oz jelly jars or this lovely set of watercolor paint jars.
- Two natural sponges, or one cut in half.
- One sponge is to wipe the paper of excess water, and the other is to clean the painting board or work surface once finished.
- A rag or small towel.
- Apron or painting smock (optional but recommended.
- Chopsticks for mixing paints.

Step-by-step Instructions for Wet-on-Wet Watercolor Painting with all Three Primary Colors:
This watercolor art tutorial shares how to paint with a limited palette using all three primary colors. As mentioned in the how-to above, using only three colors encourages the painter to slow down and pay close attention to how each color interacts on the damp surface and influences the others when they meet.
If you are trying wet-on-wet watercolor painting with kids for the first time, please visit this introductory wet-on-wet art tutorial. It includes detailed step-by-step instructions for mixing the paint, soaking the paper, and preparing the work surface for those just getting started with wet-on-wet watercolor painting.
1. Prepare paint colors (if needed):
- As a reminder, paints can be mixed in advance and stored in the refrigerator for several months.
- Mix up a new batch of paint using the instructions here if any of the three colors are needed.
- Pour a little of each color (from your stored mixed paint) into three smaller separate jars for painting, as shown in the photo above.
2. Guide the painting experience:
- Share a simple story (such as a color story), lesson, image or create a general mood to guide the artists as they paint rather than give explicit instructions.
- For example encourage artists to explore the warmth of yellow, the calm depths of blue, or the gentle meeting of blue and yellow to make green.
- Demonstrate how to paint with three colors so your children or students can “see” how the work is done. Young children learn best by watching others.
3. Wet the paper:
- Soak or spray the watercolor paper with clean water.
- Alternatively, you can wet the paper by dipping the flat wash watercolor brush into water and painting it side to side, from edge to edge, and top to bottom.
- This alternative paper-soaking method is challenging for beginners and young children, so Waldorf teachers often soak all the paper in a plastic bin at once to get it wet for each student in the class.
- Wipe the paper with a soft sponge so it is evenly damp.
- Ensure there are no dry spots or puddles.
- This will create a receptive surface for the paint to flow.
- Preparing the paper in this way helps the paint flow and blend smoothly, and allows for wet-on-wet effects.
- The paper should have a gentle sheen to show it’s ready to absorb color.
4. Load paintbrush with color:
- Dip your paintbrush into a glass of water to rinse it, or wet it.
- Next, dip the paintbrush into the pigment of choice to load it up with paint.
- Use more water than you would use on dry paper.
5. Touch the paint to the wet paper:
- Lightly apply the first color in one area of the page..
- Gently touch the tip of the paintbrush to the paper and let the pigment spread on its own. Because the paint is diluted with water it will spread smoothly across the wet surface of the paper.
- Avoid over-brushing and overworking the paint.
- Encourage artists to notice how the color blooms and fades at the edges.
6. Add the second color:
- Introduce the second color in a different area on the page.
- Notice how it moves toward or blends with the other first color.
- Where the two colors meet, a new color may emerge naturally.
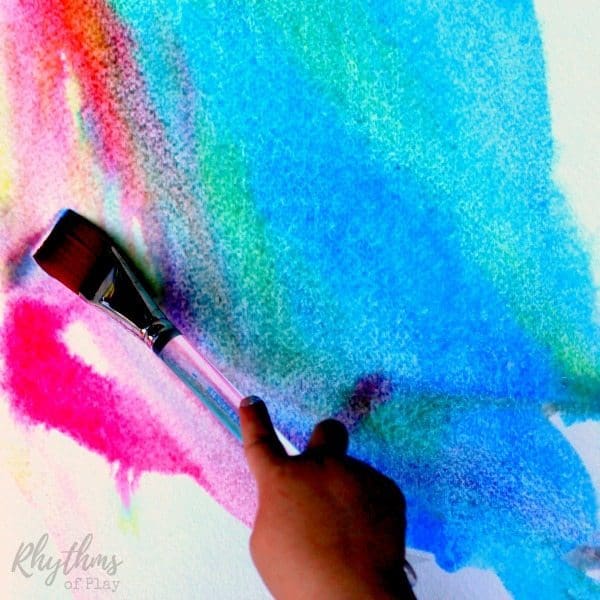
7. Add the third color slowly while the paper is still wet:
- Finally, add the third and final color into the mix.
- This color may bridge the other two, or remain distant.
- Again encourage children to work slowly and observe what happens with each tap and brush of paint.
- Allow the paint to spread, blend, and meet the other colors naturally.
- Resist the urge to brush repeatedly or force blending, instead allow gravity, moisture, and pigment to do most of the work.
- By limiting movement and trusting the process, the colors remain clear and harmonious rather than becomming brown and muddy.
8. Allow three color watercolor painting to dry:
- Lay paper flat or hang it to dry to let the colors settle and show their final character.
- Once the wtercolor painting is dry, it can be hung, made into other arts, crafts, and DIY projects such as Christmas tree cards, and mixed media nature art, or stored away to enjoy another day.
Three Color Wet-on-Wet Watercolor Painting Process:
When working with three colors, begin by pouring a little of each color (from your stored mixed paint) into separate jars. Next, guide the painting experience by telling a simple story, verse or poem, sharing an image or another work of art, or setting the mood with music and lighting rather than giving the students explicit instructions. Please visit this intoductory Wet-on-Wet watercolor painting lesson to learn more about sharing a color story before painting.
As an example, you can demonstrate how to rinse the paintbrush by dipping it in the glass of water before changing colors. As you demonstrate this action you could say something like, “After dancing and playing with blue, Tippy (the name of the paintbrush) decided she wanted to play with red. So she jumped into a puddle (jar with water) and then wiped her feet (on the rag), making sure there was no blue on her feet (tip of the paintbrush) before she went to play with red.”
Thoughout the entire process the focus remains on the experience of painting rather than the final result. No two paintings are ever expected to look the same. Finished works of art are always treated with respect and reverence, no matter how they look. Once the paintings are dry teachers help students mount them in books or they are put on display without judgment or comparison.
This watercolor painting method supports the Waldorf educational goal or nurturing the whole child–head, heart, and hands–through meaningful artistic experiences. Through repeated practice of wet-on-wet watercolor painting, Waldorf students develop fine motor skills, color awareness, emotional expression, and an inner sense of harmony.

Color Mixing with the Three Primary Colors:
When you begin to work with three colors after working with two, a child will be delighted to discover what happens when all of the primary colors are used at once. Shhh… don’t tell them about it. Do your best to refrain from teaching anything. Allow the child to experience the colors as they appear while painting. These observations foster a sense of wonder and respect for natural process. By limiting movement and trusting the process, the colors remain bright, clear, and harmonious rather than muddy.
In other words, when children begin using two and three watercolors, they will experience color rather than be bombarded by intellectual understanding of it. Learning that red and blue make purple while painting with watercolors provides children with a direct experience of that knowledge as opposed to only an intellectual understanding of it.
It is difficult to forget something you have directly experienced. In other words, children who learn to mix yellow and blue to make green through hands-on experience are more likely to understand and remember what they have learned.
Painting with three colors using the wet-on-wet technique teaches patience and attentiveness while helping the painter understand how color, water, and timing work together to create a unified and expressive image full of color. This not only helps the artist master color mixing but also builds a strong foundation for future watercolor painting.
Secondary Color Mixes:
- Yellow + Red = Orange
- Red + Blue = Purple
- Blue + Yellow = Green
Adjusting and Neutralizing Colors:
Adjust the colors with water not white. To make watercolor paints lighter, add water to the pigment not white paint. If a color is too bright, neutralize it with complements. In other words add a touch of it’s opposite color. For example, neutralize green with red.
Painting with Three Colors using the Wet-on-Wet Watercolor Technique with Children:
Three-color wet-on-wet watercolor painting is an easy way for young children to experience color. It is a process art technique in which the emphasis is on the experience of color rather than the form that the painting takes. Painting with watercolors in this way will allow children to experience the colors on the page as they appear while painting.
Once finished, you child’s art can be made into cards and all sorts of various creations, such as Watercolor and Fall Leaves Art.
Recommended Art Books with More Information About Waldorf Painting Techniques:
- Painting and Drawing in Waldorf Schools: Classes 1-8
- Painting in Waldorf Education
- Wet on Wet: The Waldorf School Method of Painting and Color
- Painting With Children


Color exploration is so interesting – and watercolors are such a wonderful medium!
I completely agree Julie! Children love working with them and can learn so much about color as they work!