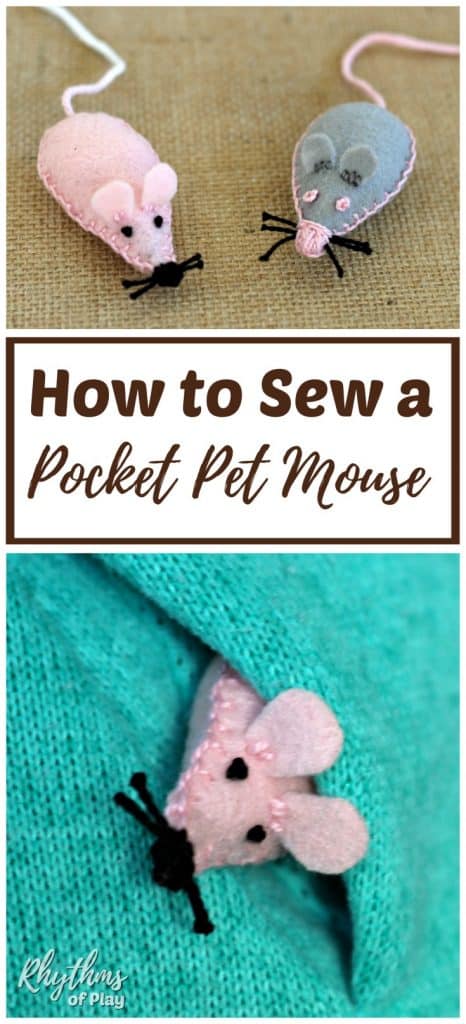
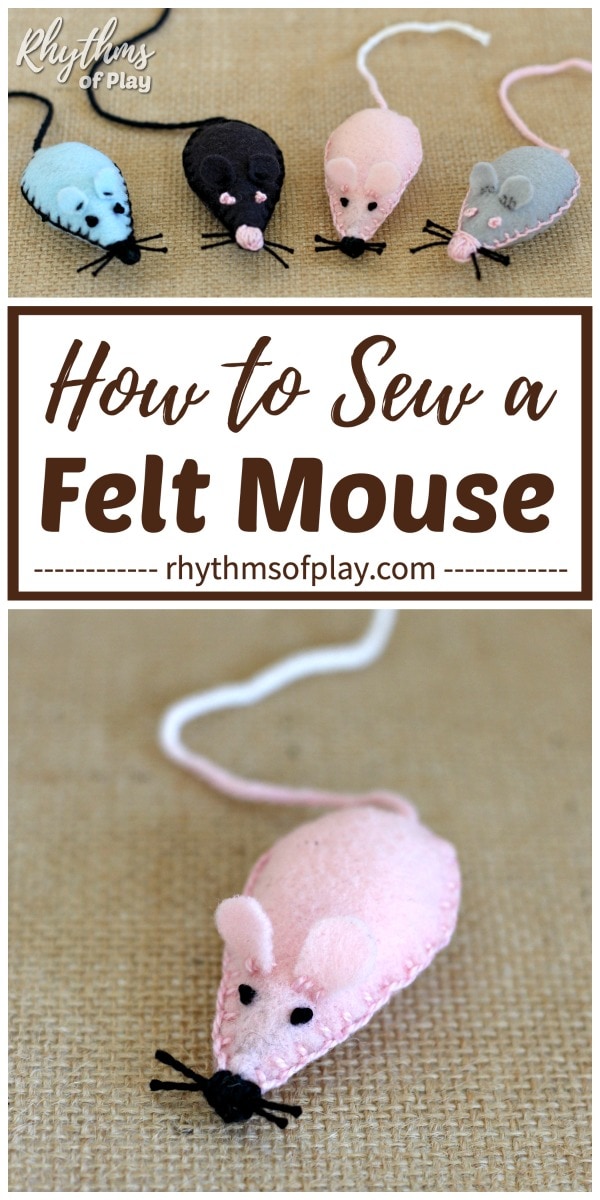
Learn how to sew a felt mouse toy for a child or a cat with this beginner sewing project for kids and adults!
This fun, step-by-step, beginning sewing project teaches children how to sew a felt mouse plush toy! A pocket pet mouse softie makes a great lovey or comfort object that kids can easily carry around in their pocket. Adults and advanced sewers will also enjoy this easy sewing project, especially if they have grandchildren or pet cats for whom they want to make mouse toys. Cats love to play with a felt mouse toy, too. Fill your mice with catnip and watch your furry friends go crazy with joy!
Learn how to sew a pocket pet mouse plush toy with this fun beginning sewing project for kids (or adults). This sewing project is an excellent way to introduce children to the joys of handmade crafting with a needle and thread. It’s fun to sew pet mice with children kindergarten age and up. Even teens and adults will enjoy sewing mouse toys with the step-by-step instructions below.
Fun sewing projects like this cute felt mouse, a pair of lovebirds, or a narwhal make it easy to join “Sew a Softie,” an initiative encouraging children to learn to sew with a needle and thread. Share your love of sewing with your child, learn to sew with your child, or have your child act as an ambassador to other children learning to sew with “Sew a Softie” this year! Learn more about it HERE!
Mouse Softie Sewing Project for Kids (and Adults!):
Sewing a plush toy offers several benefits for kids and adults. Hand sewing helps children develop fine motor skills, hand-eye coordination, and patience. It also sparks creativity and imagination. It’s an excellent way to encourage them to engage in a tactile, hands-on activity that will give them a sense of accomplishment. If your children or students have never tried sewing, you might want to show them How to Sew with Burlap and Yarn before starting this mouse sewing activity.
For adults, sewing is a relaxing hobby, a fantastic way to relieve stress and keep hands supple and strong well into old age. Sewing is a simple way for children and adults to exercise the fine motor muscles in their hands, which are necessary for writing and other forms of handwork, such as knitting or modeling.
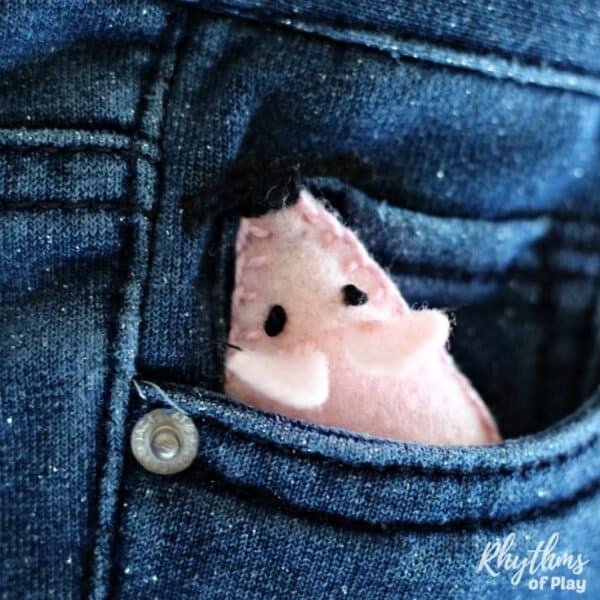
Sew pocket pet mice with your children, and send them off to daycare, camp, or back to school with a little bit of the love and safety of home right in their pocket. A felt mouse toy that you can put in your pocket makes a great lovey or comfort object that kids can easily carry around in their pocket or backpack.
You can also use this felt mouse toy pattern to make a fun DIY mouse cat toy. Fill a few felt mice with catnip , and watch your furry friend go crazy with joy! So, gather the sewing materials on the list below, grab your free mouse pattern, and dive into this fun, creative project that you and your little ones (or furry friends!) will cherish.
Related: Easy Heart Sewing Projects for Beginners
Sewing a Mouse Toy:
Sewing mouse toys is a rewarding and creative way for children and adults to create something unique with their hands. Whether you’re making a soft felt mouse with your children or students, sewing one for a child, or crafting a playful toy for your pet cat, this DIY sewing project activity makes it easy to sew a pet mouse.
Sewing a toy by hand provides a sense of personal achievement and the joy of creating something from scratch for all ages. With just a few basic materials, such as felt or another fabric of your choice, and a simple mouse pattern (which is free!), you can create a charming mouse perfect for playtime.
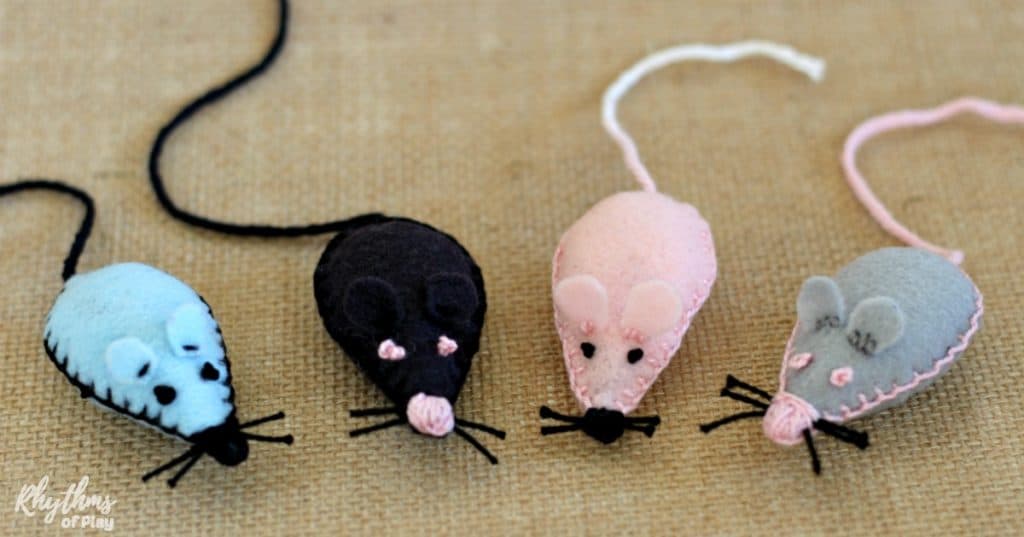
These soft, handmade toys can be customized with different colors, making them unique to each person or pet. Whether you’re making it for a child to cuddle with or a cat to bat around, the effort and love you put into the project will shine through in the final result.
How to Sew a Felt Mouse Plush Toy:
The step-by-step beginner sewing project instructions below teach children how to hand-sew a pocket pet mouse with felt or an alternative fabric. Felt recommended for beginning sewers because it is thicker and stiffer. Working on creative projects with children is a great way to spend quality time with them. Make a felt mouse pocket pal with the sewing tutorial below today!
Even adults and advanced sewers will enjoy this easy sewing project, especially if they have grandchildren or pet cats for whom they want to make mouse toys. Felt pets like these cute little felt mice make great loveys or comfort objects for children, a handmade gift that kids can make, or a cat toy that you can fill with catnip !
!
Please read through the step-by-step fabric mouse sewing tutorial below before starting this project so you know the steps involved and what to expect. This will make it much easier to choose the sewing supplies you want to use and assist children with this sewing project. You might also enjoy sewing lovebirds or narwhals.
Mouse Sewing Supplies:
The sewing supplies recommended for this felt mouse plush toy sewing project for beginning to advanced sewers are listed below. Read through the instructions before gathering your preferred supplies from the recommendations below. If you are an experienced seamstress, you can substitute your favorite fabric and sewing supplies if desired.
- FREE Mouse Sewing Pattern.
- Heavyweight cardstock (for making the mouse sewing template).
- Craft felt, wool blend felt, 100% wool felt, or another fabric (fabric scraps work great).
- Embroidery floss or a high-quality 50-weight cotton thread.
 Wool or cotton yarn.
- Organic cotton stuffing, cotton balls, wool filling, or catnip filler.
- Sewing scissors for cutting felt or fabric.
- High-quality sewing scissors make it easy to cut felt, but don’t let children cut paper with them, or they can become dull.
- Fabric marking tools.
- Large eye hand-sewing needles (or embroidery needles) and a blunt darning needle.


Our favorite sewing supplies for kids can be found HERE!
Mouse Sewing Project Step-by-Step Tutorial:
Related: How to Teach Children to Sew Running Stitch
1. Download and print the free mouse sewing pattern:
- Download and print the FREE mouse sewing pattern out onto heavyweight cardstock.
- Alternatively, you can sketch a mouse sewing pattern onto cardstock to use as a template to make felt mouse toys for children or cats.
- Cardstock makes a thick template that makes it easy to trace each time you want to cut out the mouse sewing pattern.
2. Trace the felt mouse sewing pattern onto felt (or another fabric) and cut out the Felt pieces:
- Use a disappearing ink pen, a sewing pencil, or Taylor’s chalk to trace the mouse sewing pattern onto a piece of felt or fabric.
- Each mouse needs two ears and two body pieces.
- Before proceeding to the next step, use high-quality sewing scissors to cut the mouse pieces out of the felt.
- Note: After stuffing it, my daughter and I sewed the eyes on the mouse toy. Another option is to sew them onto the top half of the mouse before sewing the mouse plush toy together in the following step. In other words, stitch a small bead or a French knot into the felt before or after sewing your pocket pet mouse together and stuffing it using the directions in step six.
3. Sew the body of the felt mouse plush toy:
- As shown in the photo tutorial below, use a sewing pin to join the top and bottom mouse body pieces.
- Thread a large eye sewing needle with embroidery thread (or floss) or heavyweight cotton thread.
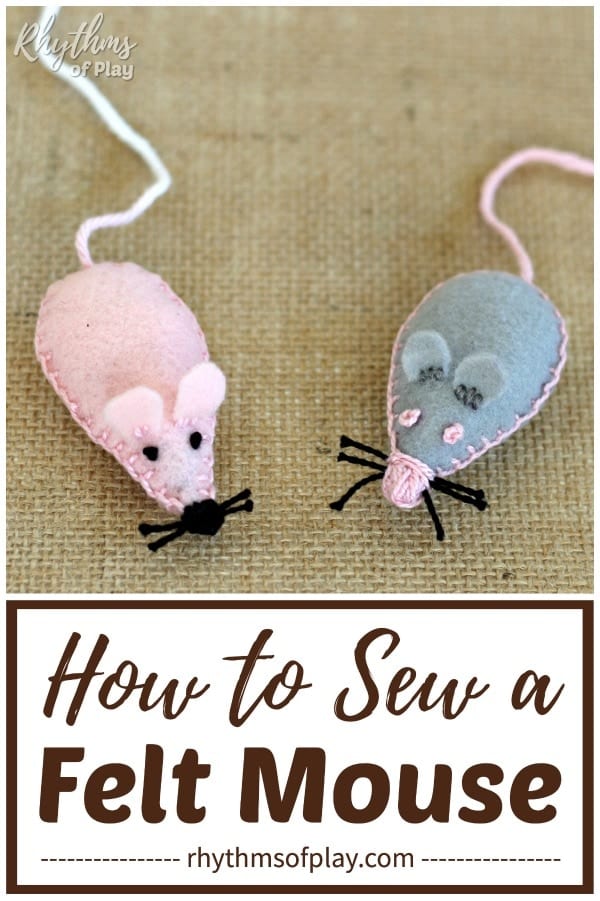
- Use the same color as the felt or contrasting or complementary colors.
- Several mouse body and thread color options are shown in the photographs in this sewing tutorial.
- Start with an anchor stitch or tie a knot to secure the thread.
- Sew the top and bottom of the felt mouse body together with a blanket, whip, or running stitch.
- The photo collage below and each mouse toy pictured show a blanket stitch, but another type of sewing stitch will work just as well.
- Learn how to sew these simple stitches; visit Red Ted Art! Maggy has put together a fantastic post with video tutorials of the basic sewing stitches that make it easy to sew a plush animal together.
4. Add a tail to the felt mouse softie before stuffing and sewing it shut:
- Stop sewing the felt mouse’s body together when you have about an inch or two left to add a tail to the felt mouse toy, as shown in the photo tutorial below.
- Thread a darning needle with yarn to make the mouse tail.
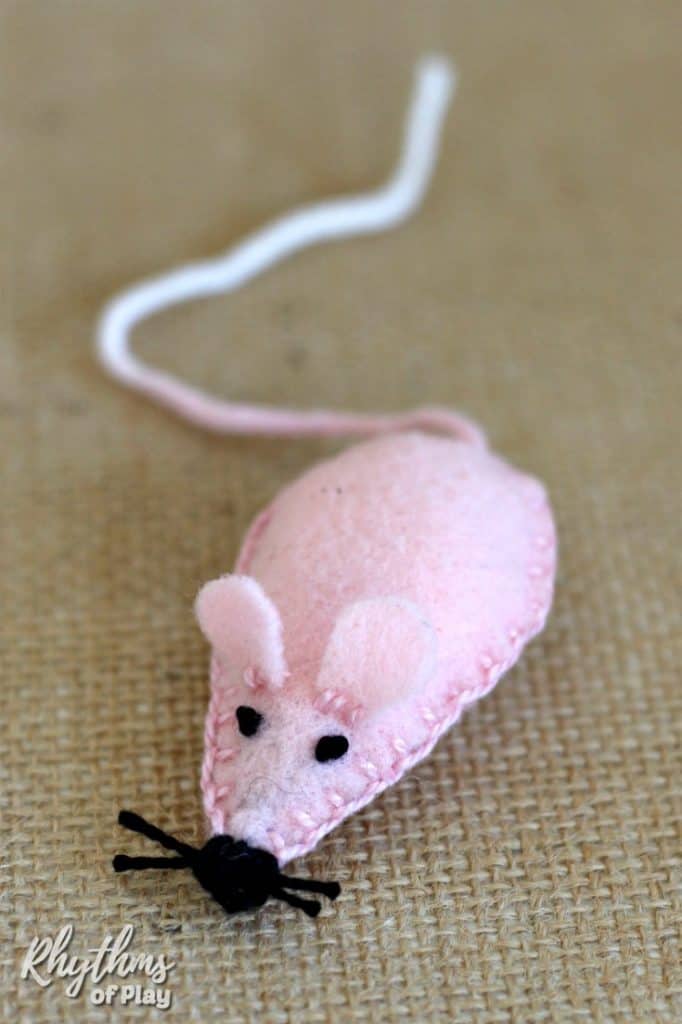
- Use the same color, a contrasting color, a complementary color, or a variegated yarn to create an ombre mouse tail as shown in the photograph of the pink mouse above!
- Look at the tail of each mouse in the photographs to see several fun color options.
- Tie a HUGE knot on one end of the yarn to ensure it won’t pull through the stitches along the body.
- Once you stuff the mouse in step five below, the knot at the base of the tail inside the felt mouse toy will be invisible.
- Insert the needle into the mouse’s body and bring it out between two stitches at the bottom to create a simple mouse tail, as shown in the photo tutorial below.
- Pull off the needle and trim the mouse’s tail to the desired length.
- If you have a toddler or cat who is likely to pull the tail out, use a piece of thread to sew it in place to make it more secure.
- Sew through the knot, wrap the thread around the stitches on either side of the tail, and hide the extra thread inside the mouse’s body.
5. Stuff the felt mouse and finish sewing it together:
- After adding a mouse tail, stuff the mouse body with organic cotton, wool filling, scraps of wool, cotton balls, Poly-Fil, or recycled stuffing as shown in the photo tutorial below.
- Old, unloved, or well-used plush animals make great donors to new softies!
- Add catnip if you make a mouse cat toy for a furry friend.
- Complete sewing the mouse’s body with the same hand-sewing stitch with which you began sewing your mouse to finish the side seams.
- Again, the photograph tutorial below shows a blanket stitch, but a whip or running stitch works just as well to sew the mouse’s body together.
 , wool filling,
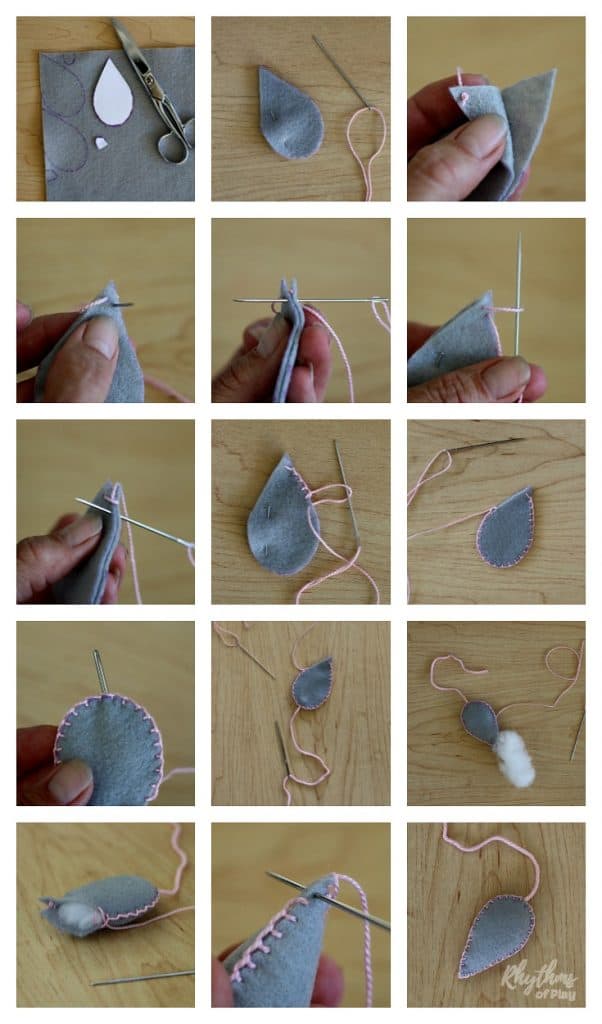
6. Sew the eyes and a nose onto the felt mouse plush toy face:
I sewed the eyes on the mouse after stuffing it. Another option is to sew them onto the top half of the mouse before sewing the mouse plush toy together.
- Use a disappearing ink pen or fabric marking tool to mark where you will put each eye.
- Thread embroidery floss in the color of choice onto a large eye sewing needle.
- Enter between stitches on the side seam of the felt mouse softie body and come out through one eye.
- Start by sewing one French knot and coming out through the other eye, as shown in the photo tutorial below.
- Look at the sewing tutorial photo collage below if you need help learning how to sew a French knot.
- Sew another French knot for the second eye and come through the tip of the mouse’s nose or the side seam.
- Alternatively, you can sew tiny black beads (or an alternative color) onto the mouse’s face to make the eyes.
- Put a small bead in the color of your choice on the needle instead of sewing a French knot using the exact directions and mouse photo tutorial below.
- Use a satin stitch to sew the nose.
- I tried this in many different ways, and of course, the felt mouse softie I photographed for this tutorial looks more like a pink duckbill than a mouse’s nose, but at least this makes it easy to see the sewing stitches. Overlap them more and make smaller stitches to make the mouse’s nose smaller.
- Tie it off on your last few stitches, come through the stitches in the side seam, cut the thread, and voila- a pocket pet mouse’s nose!
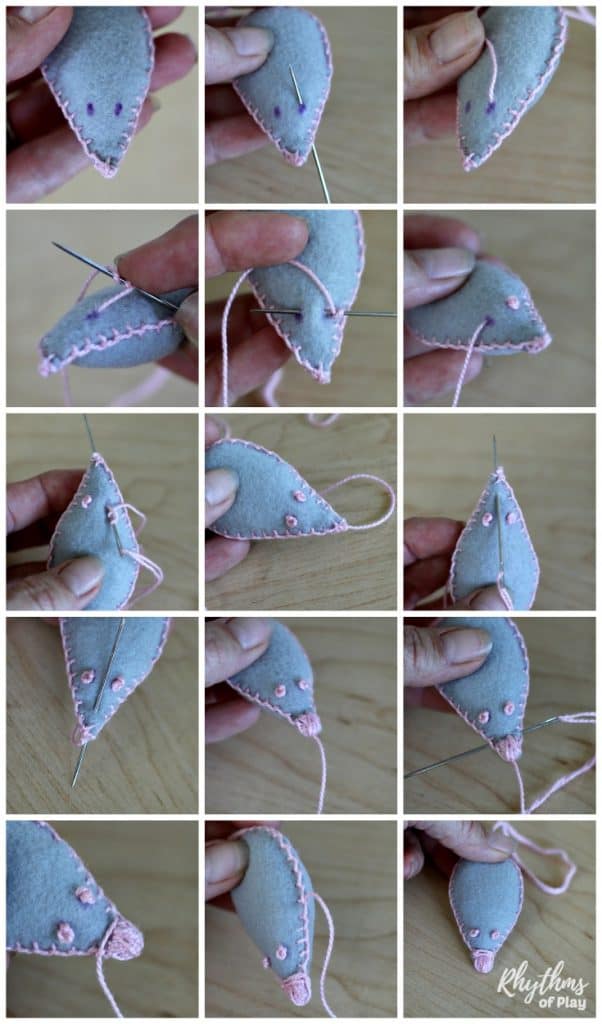
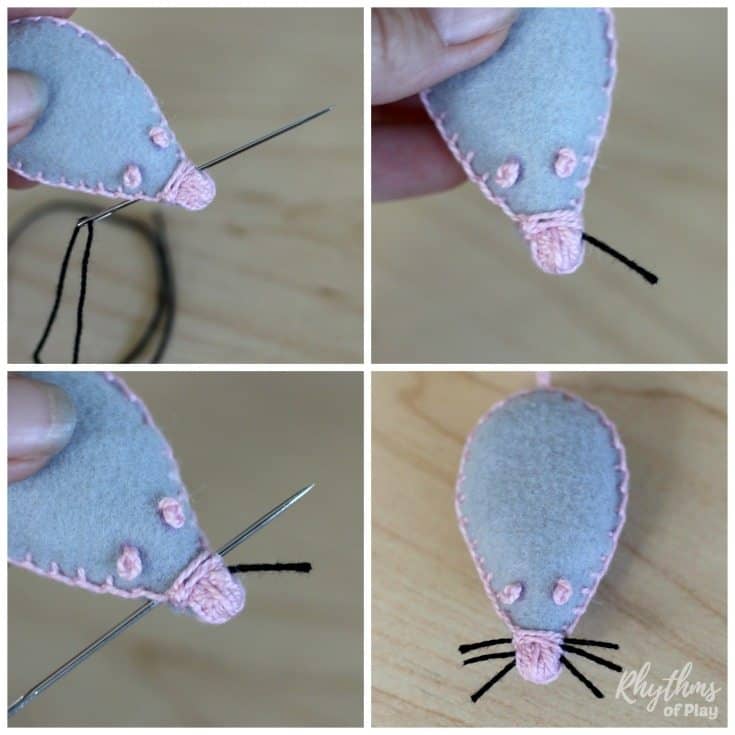
7. Sew the whiskers onto the mouse plush toy:
If you make more than one pocket pet mouse, I recommend simultaneously sewing all of the mice’s whiskers on to make it easy. Start with a nice long piece of thread and follow the directions below so you only have to thread the needle once!
- Thread an embroidery needle with embroidery floss or cotton thread.
- Tie a knot on one end of the thread and enter through the mouse’s side seam stitches.
- Bring the needle through the nose and out where you want the whisker to point on your felt mouse softie.
- Trim the strands of embroidery floss to make the mouse’s whiskers the desired length.
- The pet toys’ mouse whiskers should be 1-2 cm or 3/4 to 1 inch long, as shown in the sewing photo tutorial below.
- Repeat steps 2 through 4 until you have 2 or 3 whiskers on each side of the felt mouse’s nose. Of course, the mouse I photographed for the tutorial has my least favorite face! But it sure does help you see the sewing stitches in the mouse photo tutorial for this step below.
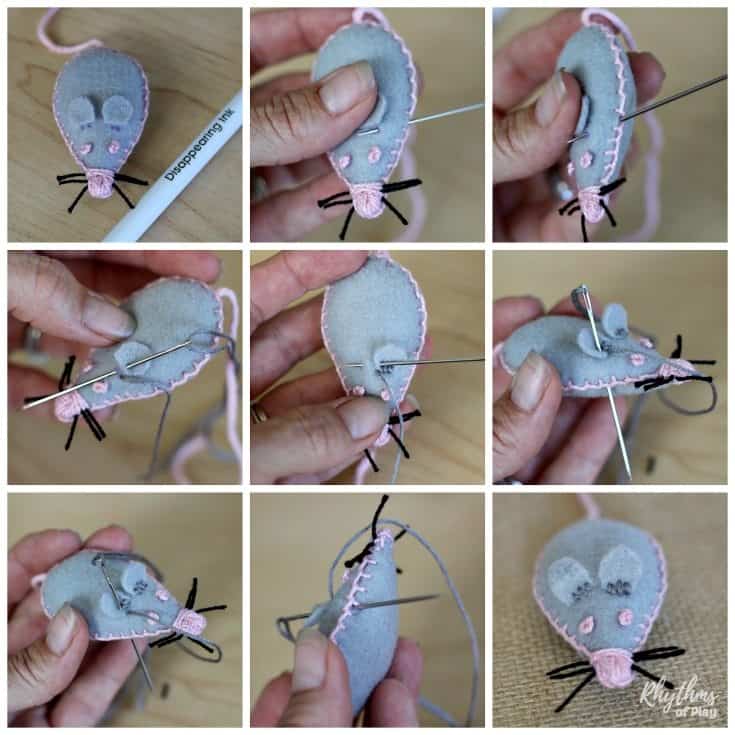
8. Sew the ears on the felt mouse toy (can be done before or after whiskers):
Like sewing French knots for the eyes, this step can also be completed after step 2 before beginning to sew the felt mouse plush toy together—it’s up to you!
- Use a fabric marking tool to mark where you want to put the ears on your felt mouse softie.
- Thread a large eye sewing needle with embroidery floss or cotton thread.
- Tie a knot on one end of the thread, enter through side stitches, and come up where you will place the ear of your pocket pet mouse.
- Use a running or whip stitch to attach the ears.
- Tie it off.
- If you sew the ears on after sewing the mouse together, they come out through the side stitches, and the trim thread disappears into the body of the felt mouse softie, as shown in the sewing photo collage below.
- The photograph below shows how to sew the mouse’s ears onto the felt mouse.
Related: How to Sew a Button Apple Tree
Pocket Pet Felt Mouse Toy Sewing Project for Kids and Adults of All Ages
Sew a pocket pet mouse or a plush animal friend with the kids as a beginning sewing project! This mouse toy sewing project makes an excellent handmade gift idea, a lovey for kids, or a cat toy. You may also like homemade gift ideas kids can make!
Learn more about Rhythms of Play HERE!
More Fun Sewing Projects
- Teach Kids to Sew Using Burlap and Yarn
- Fall Leaf Lacing Beginning Sewing Project for Kids
- Heart Sewing Projects for Beginners
- Lovebirds Sewing Project with Printable Pattern
- Narwhal Sewing Project with Printable Pattern
- Hand Sewn Button Apple Tree
You may also like
- How to Start and Finish a Beaded Necklace or Bracelet
- Kids’ Books That Teach Important Life Lessons
- How to Make an Alphabet Necklace
- How to Raise a Helper


ADORE these mice! Will pin now!
Yay! So glad you like them. The little one and I had so much fun sewing them together 🙂
Nell I love your pocket mice!! And the way you’ve photographed all the steps is great and so clear 🙂
Thanks to you and your daughter for joining into Sew a Softie 🙂
Thanks, Trixi! I’m so glad that you are as thrilled about them as we are! We loved joining sew a softie and look forward to the next one. My daughter is excited to bring one with her on her first day of kindergarten in 3 weeks 🙂
Thank you so much!!! These were an absolute hit with all my friends whom I gifted them to! Thanks!
That’s wonderful to hear! I’m so glad to hear that the felt mouse softies that you made were well received. Thank you for sharing that with me. 🙂
Beautiful product
Thank you Mary! I appreciate your vote of approval. I hope you enjoy sewing mouse crafts!