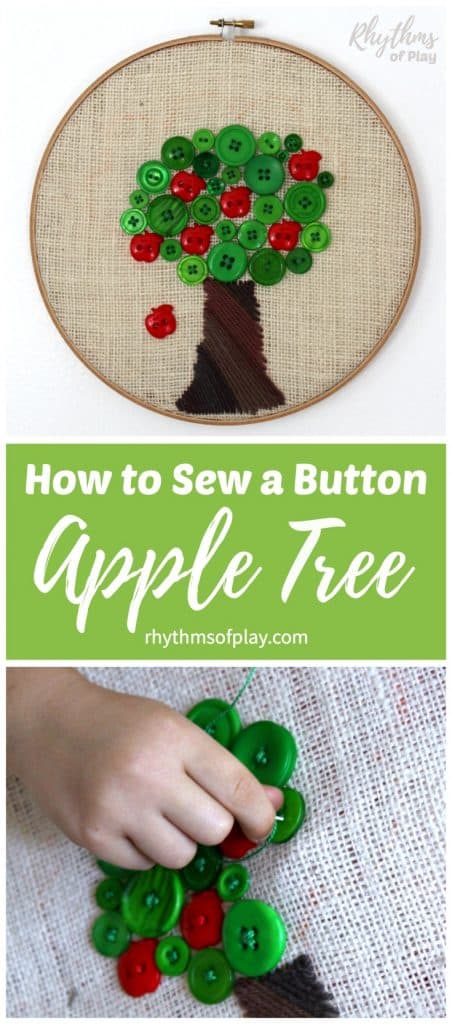
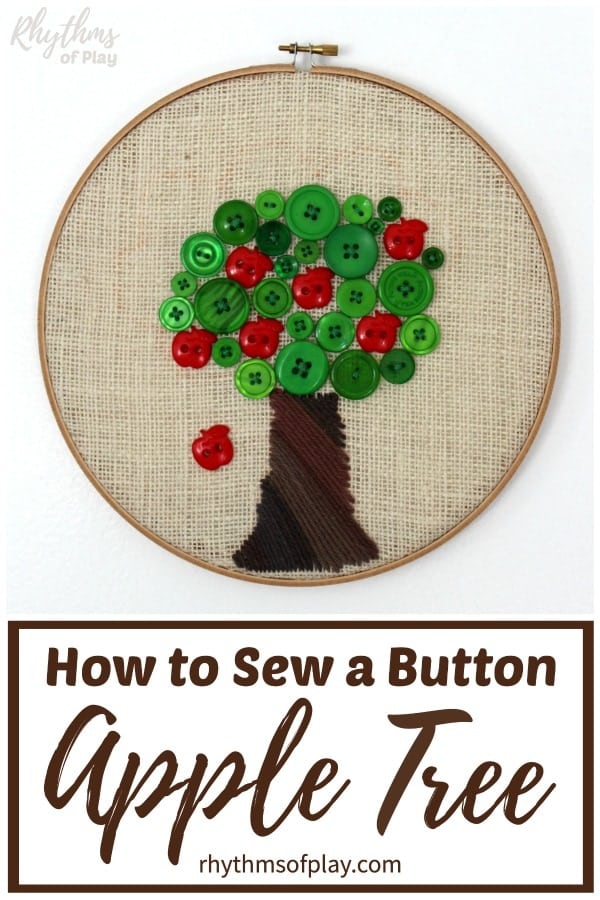
Teach children how to sew a button with this fun apple tree sewing project made of buttons. (First published October 26, 2017; this post is updated and republished to improve the content)
Teaching kids to sew a button can be a wonderfully creative and educational experience, and one delightful way to do it is by crafting an apple button tree. Help kids learn how to sew a button with this simple button apple tree sewing project for children (and adults) kindergarten age and up! Learning how to sew a button is a valuable home-life skill for children to learn. If your child has never tried sewing, get started with simple hand-sewing projects, such as learning to sew with burlap and yarn, before trying to sew a button tree.
This hands-on activity is a great way to introduce kids to the basics of sewing and encourage their artistic flair. As they carefully thread their needles and attach vibrant buttons to a piece of fabric, they learn practical life skills and develop patience and concentration as they improve fine motor skills. The result is a charming apple tree adorned with a colorful array of buttons, a visual reminder of their accomplishment and a lasting symbol of their budding sewing prowess.
Plus, this activity transforms sewing from a chore into an exciting and imaginative adventure, making it an ideal way to ignite a lifelong passion for crafting and creativity in children of all ages. Fall leaf lacing is another easy beginning sewing project for children and another fun autumn-themed sewing activity that helps kids develop fine motor skills. If your children or students aren’t quite ready to sew a button, make this apple tree craft with the same buttons at home or in the classroom.
Related: Lovebird Felt Softie Beginning Sewing Project
Apple Tree Sewing Project for Kids
My daughter and I started this beginning sewing project a few years prior to actually finishing it. When we began, I sewed the apple tree trunk for her and was ready to teach her how to sew a button when we discovered that the large, safe blunt darning needle we were using would not fit through all the buttonholes–bummer!
I did not feel that my 3-year-old was ready to handle a smaller and sharper needle at that time, so we put our button apple tree away for a later date. At five (when she had a little more experience with sewing), I decided to dig the apple tree out of our sewing project box to finish it.
We worked on this apple button tree sewing project for a short time each day we got it out. She sewed about 4-6 buttons each time we worked on it. I held the embroidery hoop on my lap and guided her through the process as she worked. Before we started, I invited her to tell me when she was finished for the day to ensure she would not learn to hate sewing buttons.
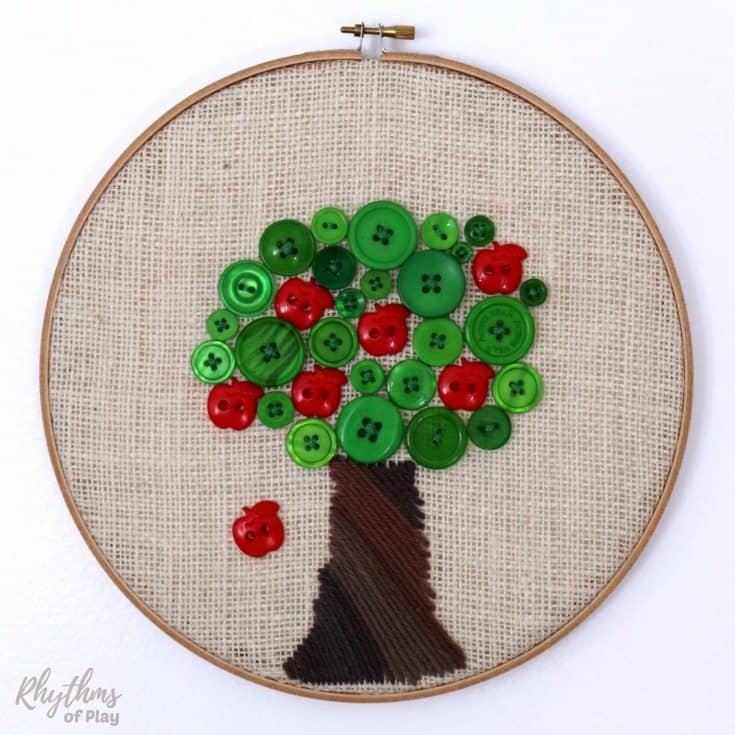
By the time she had sewn her first five to ten buttons, she no longer needed my guidance, but she still wanted me to hold the sewing project and support her as she worked. After she finished sewing this apple button tree, she was a pro at the basics of sewing buttons. And today, we have a beautiful hand-sewn piece of art on our wall. For us, it’s an illustration of the fact that the apple doesn’t fall far from the tree in our family–lol! But an apple button tree is also a great gift for Teacher Appreciation Day.
Related: Fall Leaf Lacing Beginning Sewing Project for Kids
Button Tree Sewing Supplies:
- Wooden embroidery hoop (We used a 10-inch hoop for the apple tree shown in the photographs.)

- Light or dark burlap
- Brown or brown variegated yarn or embroidery thread
- Green and red cotton embroidery thread or floss
- Darning needle for sewing yarn (optional)
- Large eye sewing needles for embroidery thread (not all darning needles can fit through all buttonholes)
- Assorted green button try THESE or THESE.
- Apple buttons (choose at least one of the following):
- Red apple buttons
- Multi-colored apple buttons
- Wooden apple buttons
- Disappearing ink pen, sewing chalk, or a marker
- Embroidery scissors
- Glue gun with glue sticks


 for sewing yarn (optional)
 for embroidery thread
 (not all darning needles can fit through all buttonholes)


How to Sew a Button
Before starting this apple tree sewing project, teach children how to sew a button. If they have never tried sewing before, first invite them to try sewing with burlap and yarn or fall leaf lacing to teach them how to sew–so they can learn a few hand-sewing basics before learning how to sew a button.
Next, invite children to watch the video before asking them to sew a button apple tree. The large sewing practice button the instructor uses and clear directions make it easy for children to understand how to sew a button.
For this apple button tree sewing project for kids–it is unnecessary to add a shank or tie it off after each button as the video suggests (unless you’d like to). Instead, this beginning sewing project makes it possible to sew several buttons with the same embroidery thread before tying it off in the back and starting with a new thread.
IN
Related: How to Sew a Pocket Pet Mouse
How to Sew a Button Tree Step-by-Step Directions
Read through the step-by-step instructions to sew an apple button tree before getting started so you know the steps involved and what to expect.
Related: Teach Kids How to Sew a Line: Easy Running Stitch Lesson
1. Cut a square of burlap.
- Measure the diameter of the embroidery hoop you will use to make your button tree.
- Cut a square of burlap at least two inches larger than the diameter of the embroidery hoop.
- In other words, ensure the burlap is large enough to fit inside the hoop with at least 1-2 inches of overhang.
- We used an embroidery hoop 10 inches in diameter and cut a 12-inch square of burlap for the apple button tree in the photos for this post.
2. Draw a tree trunk onto the burlap.
- Draw a tree on the square of burlap to use as a sewing outline. (See update below.)
- The apple tree’s trunk only needs to be about 2-3 inches long or high to ensure there is enough room to sew a crown of buttons above it. (The tree trunk in the photographs is 3 inches high.)
- You only need to draw the apple tree’s trunk, but you can draw more as a guideline.
- Update: If I were to do this project again, I would draw the trunk on the front with a disappearing ink pen. (Yes, they really work!) Originally, I drew the tree onto the back of the sewing project with a marker because I did not have a disappearing ink pen or sewing chalk.
3. Secure the square of burlap in an embroidery hoop.
- Place the burlap with the hand-drawn outline of a tree trunk into an embroidery hoop.
- If you use a disappearing ink pen or sewing chalk, place the drawing face up or down; if not, place it into the embroidery hoop face down, as shown in the photographs below.
- Tighten the rings to secure the project in place.
- If you use a disappearing ink pen to draw the outline of the tree, start the next step (sewing the trunk of the tree) right away. Otherwise, the tree outline will disappear!
4. Sew the trunk of the apple button tree onto the burlap.
- Thread a large eye sewing needle with brown yarn to sew the apple tree trunk.
- Start by sewing an anchor stitch or tie a large knot that will not pull through the burlap.
- Next, hand-sew a combination of satin and a running stitch in a diagonal pattern to create a wood-like texture.
- Start at the bottom corner of the tree trunk. When stitches grow larger and longer, use a satin stitch to create the trunk on the front and a running stitch to save yarn on the back, as shown in the photo tutorial below.
- Use an anchor stitch or tie the yarn off in the back when the apple tree trunk is complete.
 with brown yarn to sew the apple tree trunk.
Related: Four Season Hand and Fingerprint Tree Keepsake and Gift
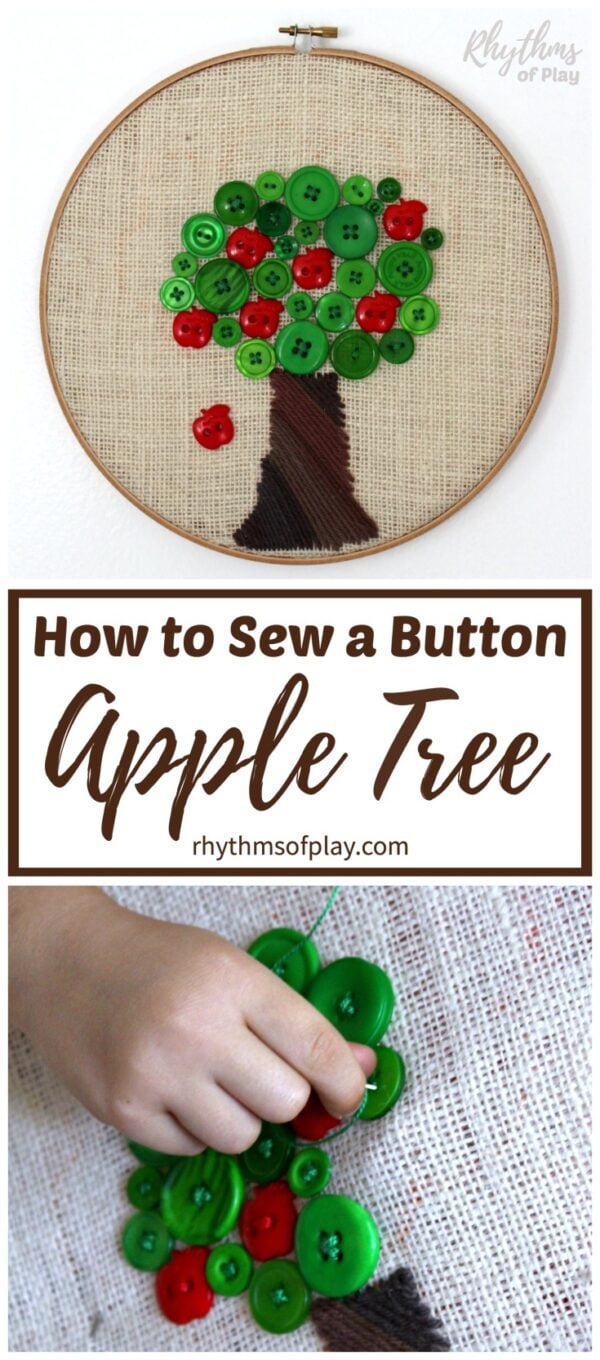
5. Sew buttons above the trunk to make the crown of the button apple tree.
- Invite children to sew a creative smattering of apple buttons and assorted green buttons to act as leaves above the trunk to make the button apple tree crown.
- If this is the first time your children or students have sewn buttons. Invite them to watch the video posted above this tutorial before getting started. (It’s also recommended to demonstrate how to sew a button onto the burlap before asking kids to try it.)
- We recommend using two needles at a time to make it easy to switch between sewing the red and green buttons onto the apple tree.
- Thread one sewing needle with green embroidery thread and the other with red embroidery thread.
- Do your best to keep the needles and thread separated if you try this method.
- Secure the needle and thread not used to the back of the button tree project.
- Thread one sewing needle
- Sew an anchor stitch with each needle and thread (red and green) to get started, or tie a large enough knot on the back so it can not be pulled through the burlap.
- Next, use the needles and embroidery thread to sew buttons onto the burlap above the trunk to create the tree’s crown, as shown in the photo tutorial below.
- Assist children as needed.
- Once you are happy with the apple tree’s appearance, sew an anchor stitch to lock it in place or tie the remaining strands of embroidery thread off in the back.
 and assorted
  to act as leaves above the trunk to make the button apple tree crown.
 with green

 .
. 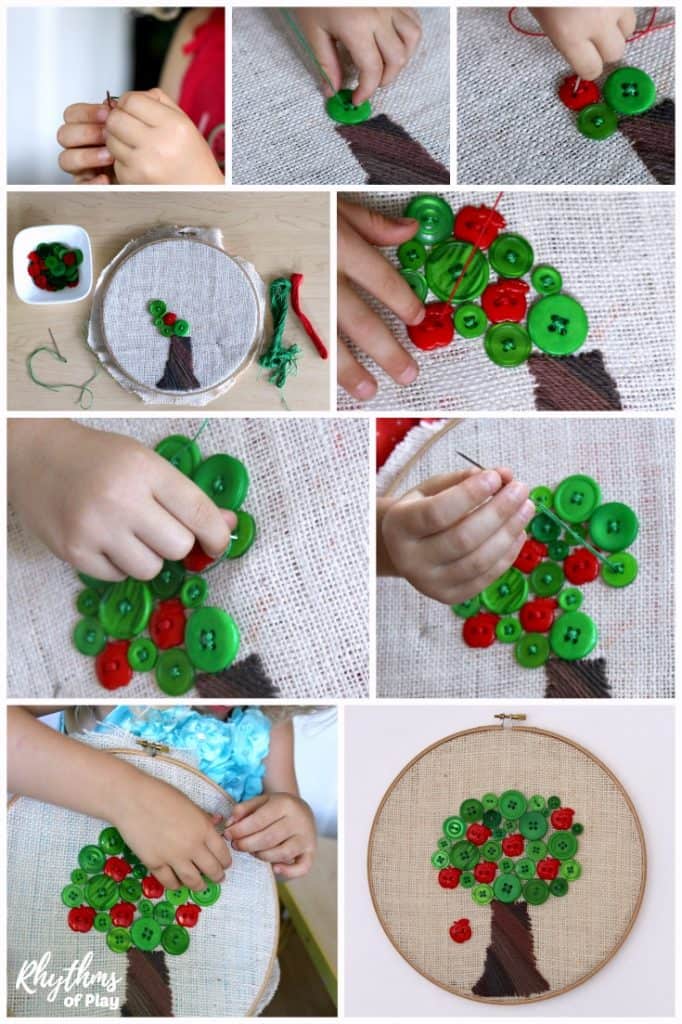
6. Finish the Button Art Tree Sewing Project
- Use a pair of sewing scissors to trim off the excess burlap so it is only 1/2-1 inch larger than the embroidery hoop.
- Fold the remaining burlap over the embroidery hoop and use a glue gun to secure it inside the hoop on the back of the project, as shown in the photo tutorial below.
- Note: Please be careful not to burn your fingers. Glue guns are hot and dangerous tools; the glue can be very hot to the touch until it cools.
 to trim off the excess burlap so it is only 1/2-1 inch larger than the embroidery hoop.
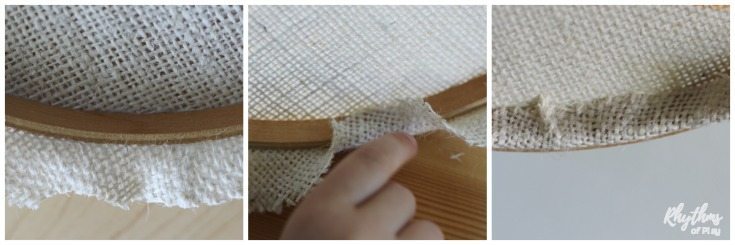
7. Hang the Aple Button Tree or gift it.
- Finally, a small finishing nail and a hammer to hang your beautiful apple button tree on the wall.
- Or, give it to your child’s favorite teacher, grandma, nana, or anyone else as a beautiful handmade (or hand-sewn) gift!
Apple Tree Sewing Project for Kids
Teach children kindergarten age and up how to sew a button with this simple beginner sewing project for kids and adults. A button tree makes a great homemade gift idea for a teacher that kids can make!
Another fun alternative is this Apple Button Tree Craft for Kids. Or look at this giant list of homemade gift ideas kids can make for parents, grandparents, siblings, cousins, friends, and teachers for even more great ideas!
You may also like learning how to sew a pocket pet mouse, narwhals, or felt lovebirds. Click on the links for the beginning sewing patterns and tutorials!
Learn more about Rhythms of Play HERE.
If you Liked How to Sew a Button Apple Tree, You May Also Like
- Fingerprint Art Glass Magnets
- 15 Reasons to Climb a Tree and Other Benefits of Risky Play
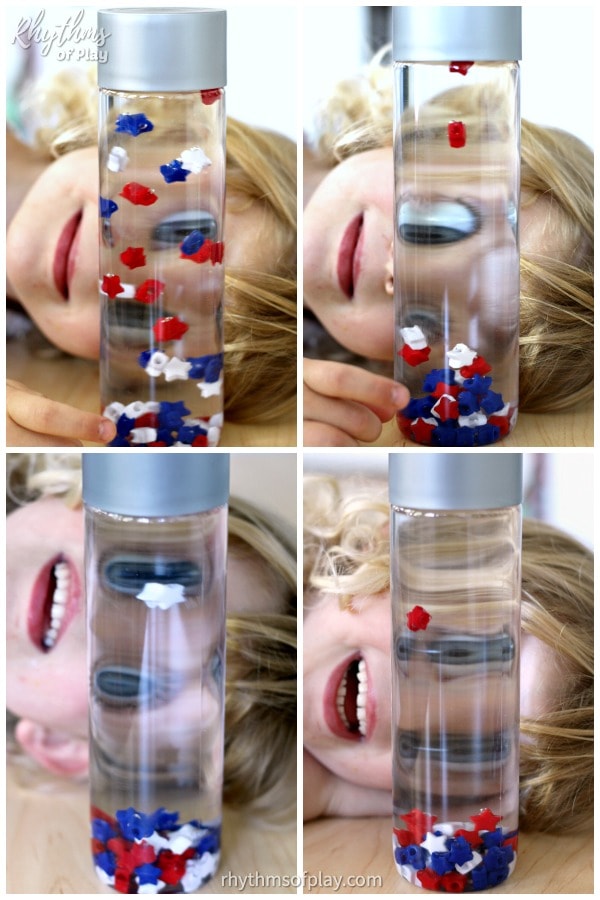
- Calm Down Sensory Bottles 101
- Four Season Handprint and Fingerprint Tree
Apple Crafts, Activities, and Recipes
- Painted Oak Apple Craft
- Button Apple Tree Craft
- Best Fall Nature Crafts (Apple Craft Ideas Included)
- Apple Orchard Feild Trip Ideas ( Includes Apple Activities and Apple Craft Ideas)
- Easy Apple Pie Oatmeal Recipe


Leave a Comment