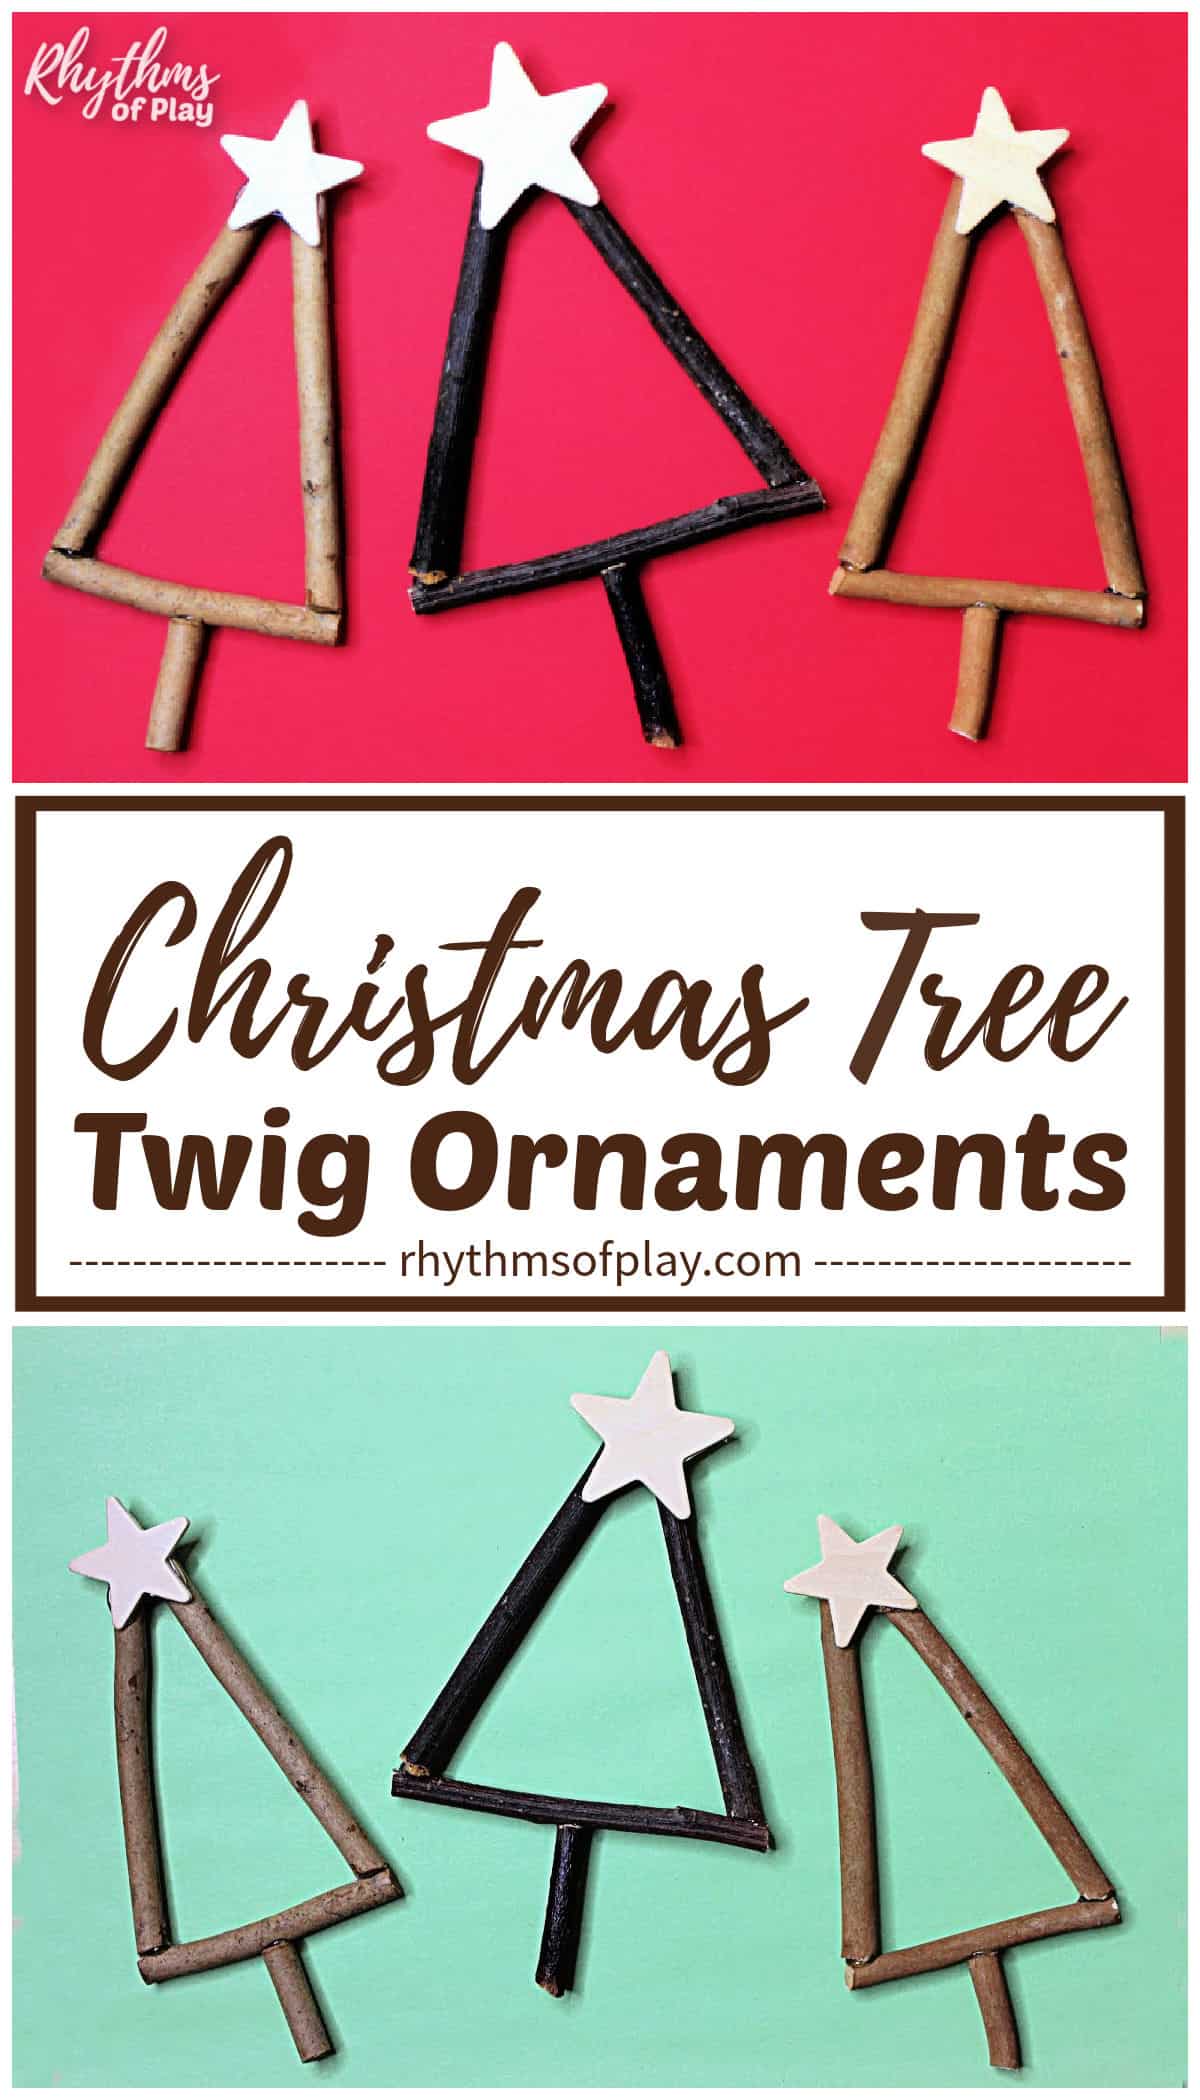
Add a natural rustic touch to your Christmas tree with festive homemade ornaments made of twigs or sticks. (First published December 15, 2020; this post is updated and republished to improve the content.)
These cute Christmas tree twig ornaments are a fun craft for kids and adults to make to decorate the Christmas tree or add to your DIY winter holiday decor. Scroll down for the complete step-by-step instructions and DIY video tutorial that explain this rustic Christmas craft project. You might also enjoy these other nature crafts and art project ideas made with nature’s many varied treasures.
Scroll down to learn how to make rustic twig ornaments in the shape of a Christmas tree with a wooden star on top. To see more Christmas ornament craft ideas for kids or adults, look at these DIY Christmas Ornament Ideas.
Twig Tree Ornaments and Craft Ideas for Kids and Adults
Creating Christmas ornaments and crafts using twigs is a charming and eco-friendly way to add a unique touch to your holiday decor. This simple DIY Christmas project tutorial offers an excellent way to recycle natural materials and involve family members in a fun holiday activity for crafters of all ages. So, it’s also a great way to get the kids outside to clean the backyard and pick up small fallen limbs and branches.
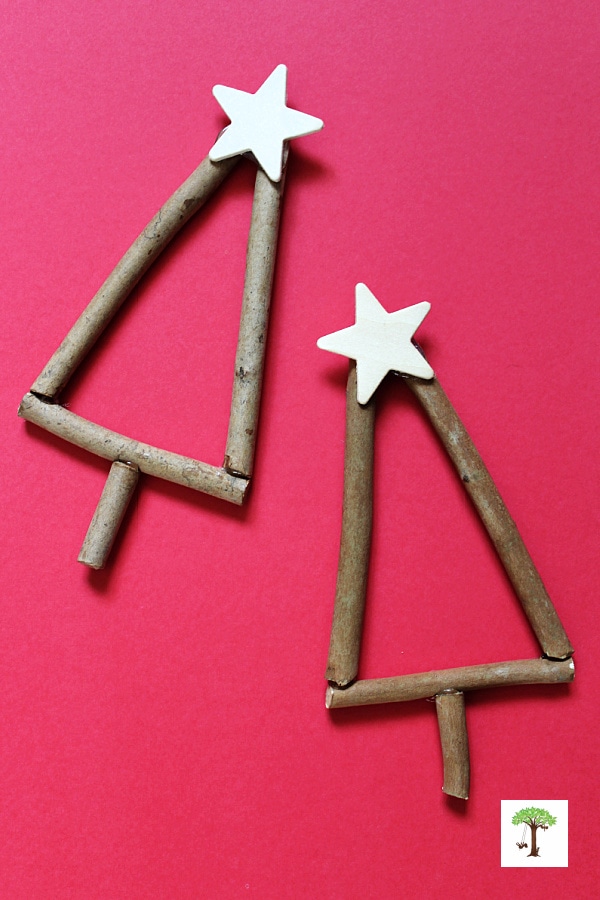
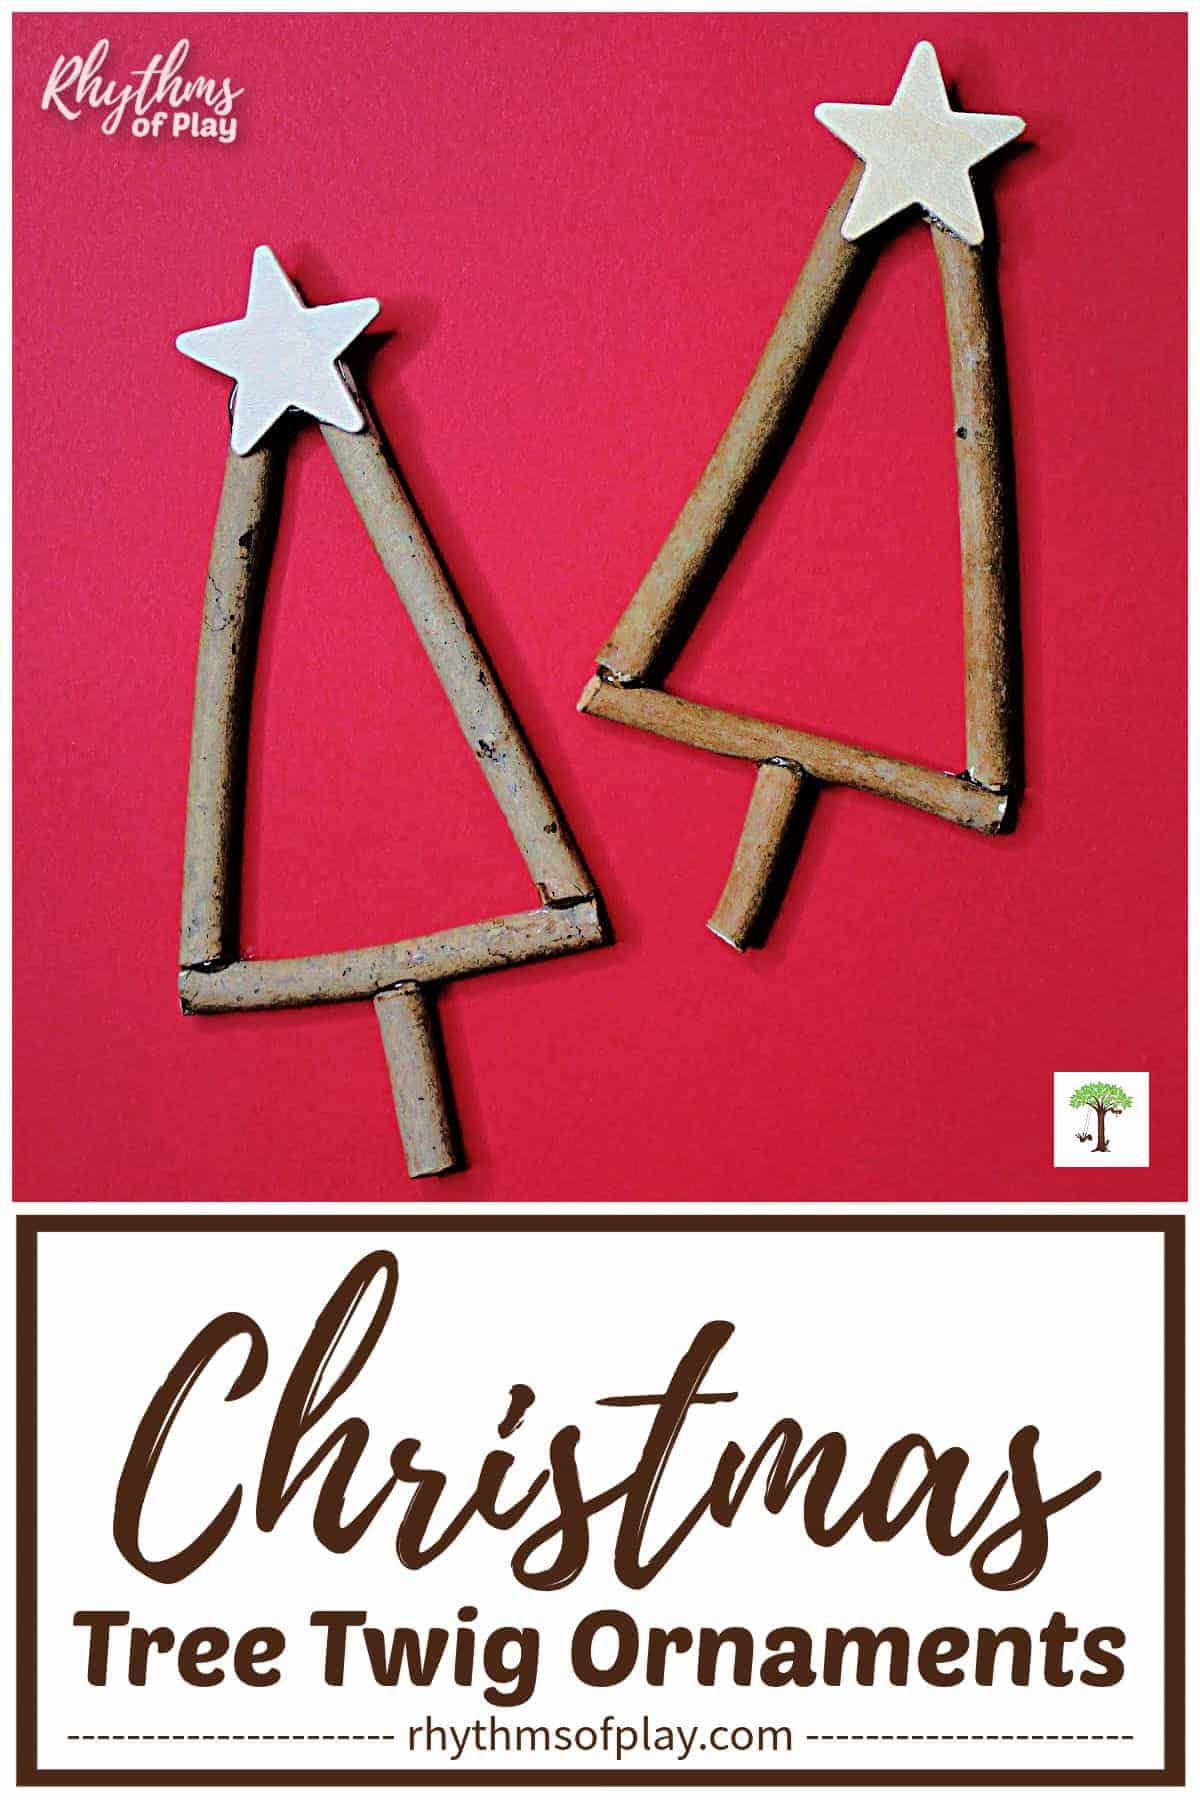
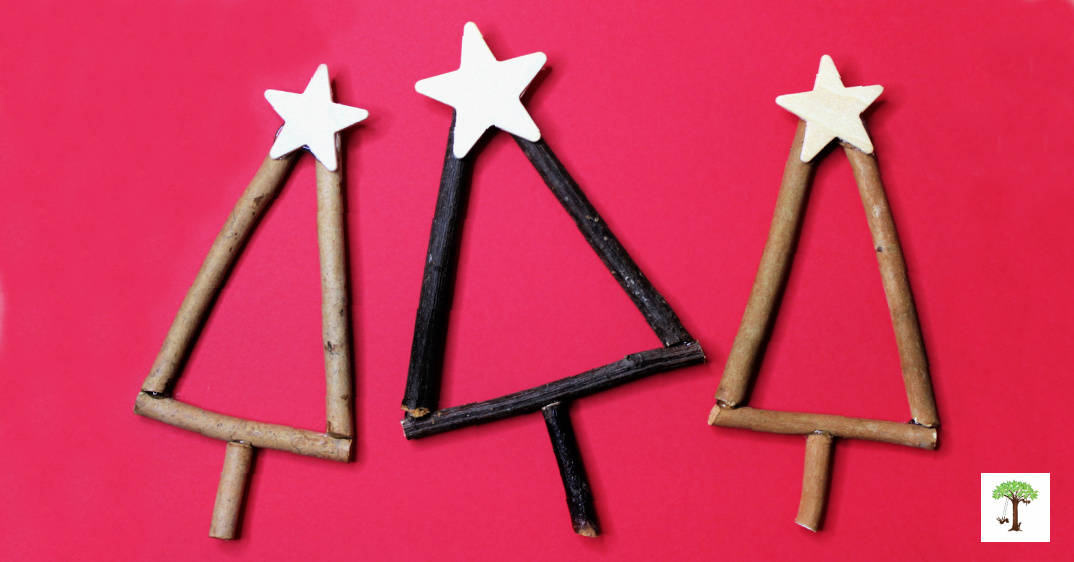
One popular twig craft idea is to fashion twigs into the shape of a Christmas tree with a triangular outline, as shown in the photographs. For more Christmas crafts and activity ideas, please look at these Christmas Traditions for Kids and Adults.
Handcrafted twig tree ornaments such as these festive ornaments made in the shape of Christmas trees can be hung on the Christmas tree or added to other winter crafts, DIY projects, and Christmas displays to add a natural, rustic charm to your winter holiday decor. You might also enjoy making these easy Fingerprint Christmas Lights Cards.
How to Make Twig Ornaments
Learn how to make rustic twig Christmas trees to decorate the tree and add to your winter holiday decor with the step-by-step instructions below. Before you start to make rustic twig Christmas ornaments, gather twigs and the twig ornament supplies you want from the craft supply list below, and plug in your glue gun.
Safety note: glue guns are hot and dangerous tools. Teach children how to use one safely and keep them under your direct supervision when in use. (Even when using a hot glue gun with a low-temperature setting, as we recommend.)
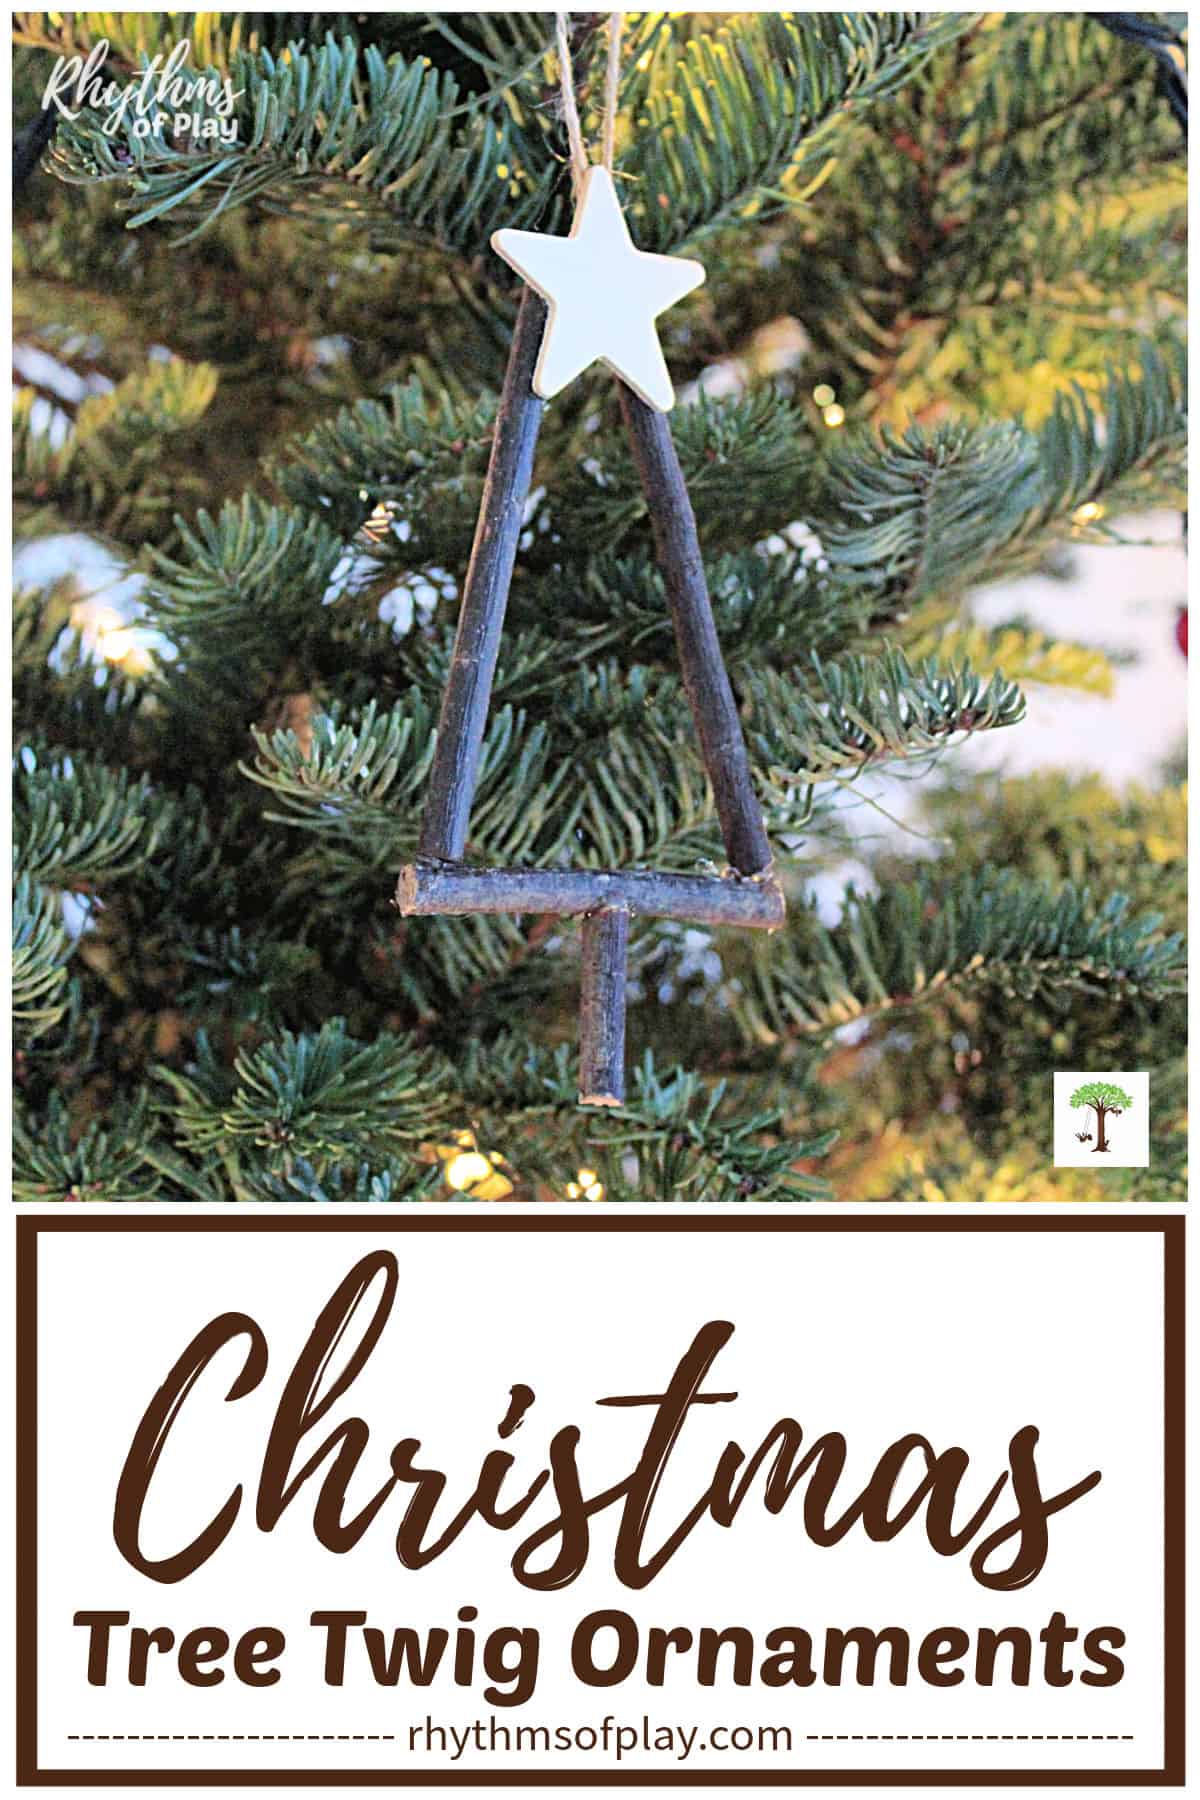
You will also need twine or ribbon if you would like your rustic twig Christmas tree ornament to have a hanger. Or place the twig Christmas tree ornament right onto a limb, through the center of the Christmas tree shape or outline created by the twigs, as shown in the photo below.

Twig Christmas Tree Ornament Craft Supplies:
- Collect and gather twigs or sticks (directions are in the next section), or use THESE.
- Pruning shears
- Wooden stars (assorted sizes)
- Glue gun with glue sticks
- Jute, baker’s twine, or Christmas ribbon (optional)
Gather and Prepare Supplies to Make Twig Christmas Tree Ornaments and Crafts
Stick and twig ornaments made into the shape of Christmas trees are fun for kids or adults to make. Please read the step-by-step instructions below (and in the next section) before making twig Christmas tree crafts and ornaments so you know the steps involved and what to expect before starting this rustic Christmas craft project. You might also enjoy making these Rhinestone Pinecone Ornaments and crafts or these Acorn Marble Ornaments.
1. Collect small twigs and sticks (or use rose stems).
- Invite children outside to go on a nature hunt for thin twigs and sticks to make Christmas tree twig ornaments.
- Please encourage them to search for twigs, sticks, small fallen tree limbs, branches, or rose stems in your backyard, around the neighborhood, in the woods, at a farm or orchard, or in the park. (Please ask the property owner for permission if needed.)
- Find and gather sticks and twigs approximately 1/8 – 1/4 inch in diameter.
- Rose stems are another “twig” you can gather and cut for twig trees and other crafts.
- Follow the steps below to make rose stems into twigs for your DIY and craft projects:
- Trim the stems of the roses to the desired length. (four to ten inches is a good length for most twig crafts and DIY projects.)
- Lay them on a towel, tray, rack, table, or shelf, and let them air dry and dehydrate completely before making twig Christmas trees and other stick crafts.
- They are ready to be made into twig ornaments or other rustic crafts and DIY projects when they become inflexible and stiff.
2. Trim the twigs with pruning or garden sheers.
- Next, use pruning or garden shears to trim twigs and branches to the desired length (if necessary).
- We cut twigs into lengths of approximately:
- Two sticks are four to five inches long to make the sides of the twig tree. (Cut these sides longer or shorter if desired.)
- One stick, two to three inches long, for the bottom of the Christmas tree. (This stick can also be cut shorter or longer if desired.)
- The twig Christmas tree craft or ornament trunk is made with a small stubby twig 0.5 to 2 inches long, as shown in the photograph below.
- Safety note: Watch out for flying twigs! Wearing safety glasses is optional but recommended when trimming, pruning, or cutting twigs and sticks.
DIY Twig Tree Crafts and Christmas Ornaments: Step-by-step Instructions
When the twig tree craft supplies are ready and a glue gun is set to a low temperature and safely set aside, follow the step-by-step instructions below to make rustic tree twig ornaments.
1. Trim as many twigs to the desired length as you need.
- If not already done, use a pair of garden shears to trim twigs to the desired length in the number of pieces you need to make as many twig tree ornaments as you want.
- To make each twig Christmas tree ornament craft, you will need the following:
- One wooden star.
- Two twigs or sticks that are four to ten inches long. (Cut these twigs to approximately the same desired length for the sides of the Christmas tree.)
- One twig that is two to five inches long. (This stick will form the bottom of the twig Christmas tree craft.
- A shorter stick will produce a taller, skinnier twig tree craft, while a longer twig will create a shorter Christmas tree ornament craft.)
- A final twig or stick that is half to two inches long. (This small final twig is for the trunk of the Christmas tree ornament. Cut it to the length you prefer.)
- Length of Jute, bakers, or ribbon that is five to ten inches long (optional)
2. Glue a loop of twine or ribbon onto the back of a wooden star (optional).
- This step is optional: If you don’t want to add a hanger to the twig tree ornament, skip this step and move on to step three in the next section.
- As mentioned, twig Christmas tree ornaments can also be hung directly on the tree without a hanger or loop (if desired).
- To hang a twig tree without a hanging loop, thread it onto a tree limb or branch through the center of the Christmas tree ornament, as shown in the photograph above.
- If you want the DIY Christmas tree twig ornaments to have hangers, follow the steps below:
- First, cut a five to eight-inch length of Jute twine or Christmas baker twine.
- Then, fold the length of the twine in half to create the loop for the twig tree ornament hanger, with the ends of the loop next to and parallel to one another, as shown in the DIY twig tree ornament video tutorial below.
- Next, place a drop of glue on the back of the wooden star.
- Finally, lay both ends of the twine loop in the glue, as shown in the DIY twig tree video tutorial below.
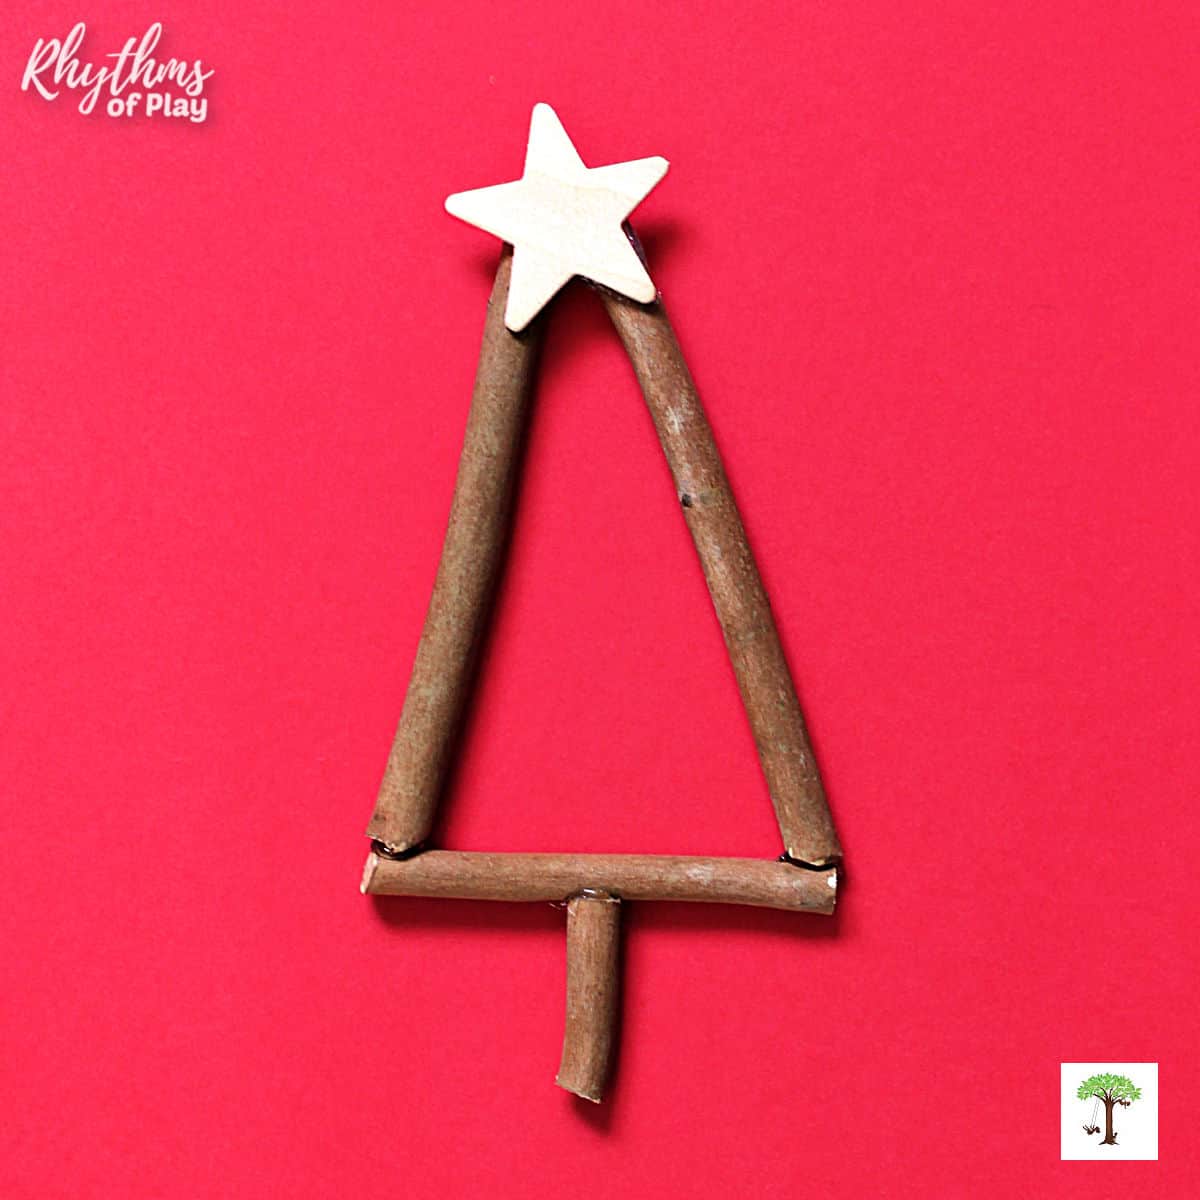
3. Glue a pair of twigs to the back of the wooden star at an acute angle.
- Create the top of the twig Christmas tree by gluing the twigs cut to the same length for the sides onto the back of the wooden star at an acute angle of less than ninety degrees.
- This step is demonstrated in the Christmas twig tree ornaments video below the written instructions. Press play to watch this step in action.
4. Add the third twig to make the bottom of the Christmas tree twig ornaments.
- Use pruning shears to trim a third twig about an inch long and set the smaller piece aside for use in step five below.
- This final stick will be laid across the bottom to connect the first two sticks to complete the Christmas tree.
- When this step is complete, you will have a small triangle in your hands with a star glued at the top.
5. Glue the fourth and final twig to create the bottom of the twig Christmas tree
- Please pick up the larger piece of the remaining twig and put a dollop of hot glue on both sides of the stick to attach it in place.
6. Add the trunk to the bottom of the twig tree ornament to complete the Christmas tree craft.
- Glue the final twig at the bottom of the twig tree to create the trunk.
- Please ensure that this final piece is glued in the middle and perpendicular to the bottom stick of the twig tree. For a bit of whimsy, you can also glue the truck so it sits off-center.
- As shown in the DIY video tutorial below, we use the small section of twig that remains after cutting the third twig to make the bottom of the trunk ornament.
- In other words, we use the small piece of twig left over after trimming the third stick to the size we’d like for the bottom of the twig ornament.
7. Paint or decorate twig tree crafts (optional).
- Enhance twig tree crafts and ornaments by painting them in festive colors, adding glitter, or wrapping them with yarn or small fairy lights.
- Adorn them with miniature ornaments and figurines to create a woodland scene or Christmas display.
- Add ribbons for extra flair.
- Or leave them natural, as shown in the photograph below, and allow their simple rustic charm to add a festive touch to Christmas trees and other winter holiday decor.
Christmas Tree Twig Ornaments DIY Video Tutorial
Watch the step-by-step video below to “see” how to make rustic twig ornaments with small sticks and wooden stars in assorted sizes. You might also enjoy these easy DIY Ornaments kids or adults can make.
For more festive holiday ideas, look at this list of winter solstice celebration ideas or these Christmas Traditions. You might also enjoy these winter activities with a printable bucket list.
Rustic Twig Ornaments
Invite children to help you make twig ornaments in the shape of Christmas trees, and then use them to decorate your Christmas tree. Natural homemade ornaments add a rustic touch to your winter home decor you can’t get at the store.
Learn how to make rustic Christmas ornaments in the shape of a snowflake, star, and Christmas tree slightly differently over on Simple As That Blog. Or, hop over to have a look-see at Show and Tell U to see the fun way that they make Xmas trees out of twigs and sticks. You might also enjoy the Christmas craft ideas in this collection of DIY Ornaments.
Crafting with natural materials is fun for kids and adults of all ages. Look at these nature crafts (and the rustic Christmas ornament crafts made with natural materials below) for even more craft ideas and art activities. You might also enjoy these fun Winter Solstice and Christmas traditions and celebration ideas.
Natural Rustic Christmas Ornaments Kids or Adults Can Make
- Acorn Marble Ornaments
- Walnut Shell Baby Jesus Ornament
- Rhinestone Pinecone Ornaments
- Clay Snowman Ornament with Twig Arms
- Wood Slice Alphabet Ornaments
- Orange Slice Ornaments


These are wonderful! I am in New Zealand, and it is summer time here, so we grimace a bit with Christmas crafts that assume it is snowing outside when our kids are in togs for swimming. Absolutely lovely.
Thank you for the vote of approval, Rachel. Although I live in Cali where the seasons do not change as dramatically as other parts of the US, I have often wondered what it would be like to experience summer at Christmastime. I hope you and your children enjoy making Christmas tree twig ornaments!
Summer here means it is the perfect time of year to expand our shoe fence in addition to decorating for Christmas.
I’ll bet it is Rachel, I can’t wait to see what you do next!