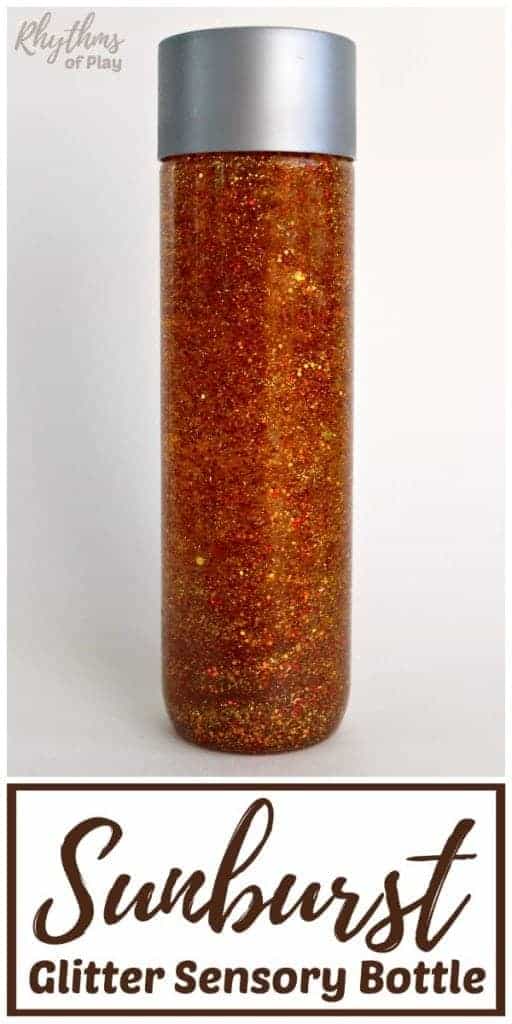
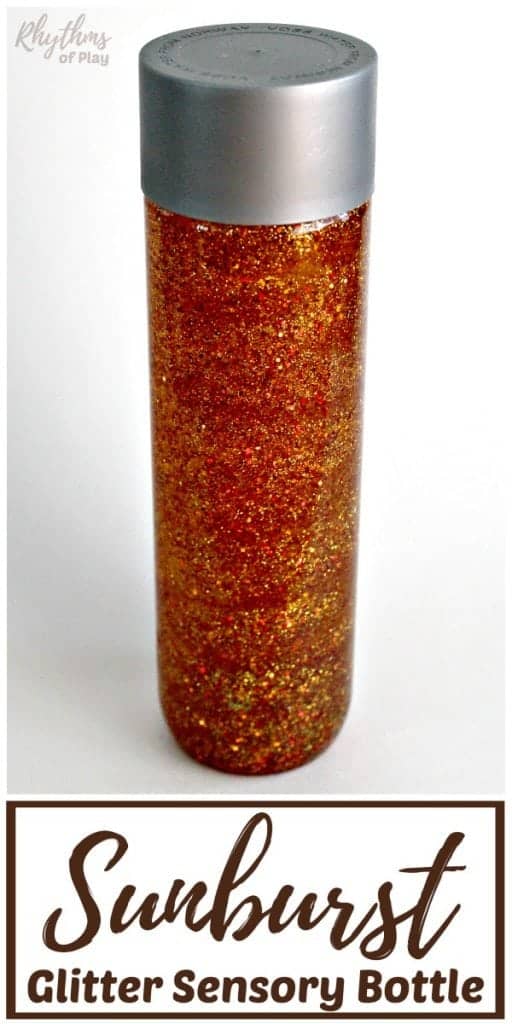
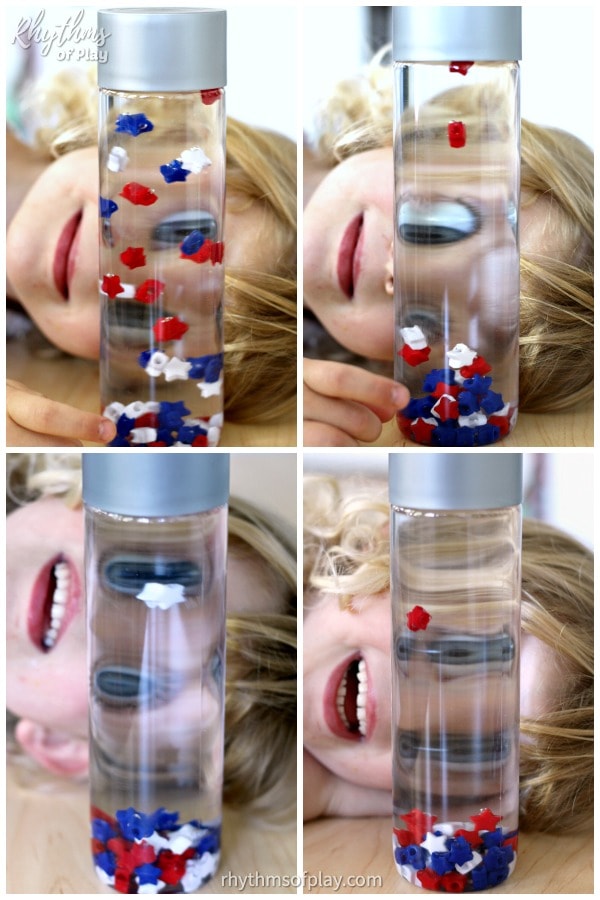
This glittering sun sensory bottle and calm-down jar can also be used as a weather sensory bottle to represent a sunny day.
Here’s a sunburst DIY glitter sensory bottle recipe, accompanied by step-by-step instructions and a video tutorial, that provides an easy way to calm an overwhelmed or anxious child. Give this gorgeous, glittering sunburst glitter sensory bottle a shake to see it swirl, sparkle, and shine, cheering your children up and putting a smile on their faces, just like the sunshine on a sunny day!
Calm down, discovery jars like this sunburst sensory bottle can be used for portable, no-mess, safe sensory play, calming an overwhelmed child, and helping children learn to self-regulate. They are just as effective for adults. For more information about sensory bottles and their uses, check out Calm Down Sensory Bottles 101.
Related: Glittering Mermaid Tail Sensory Bottle
How to Make a Glitter Sensory Bottle:
You can make a DIY glitter sensory bottle in two ways: mix the glitter in a 1-quart glass measuring cup before pouring it into your sensory bottle, or mix it directly into the plastic bottle. If you choose the second option, please make sure you use water that is not too hot to melt plastic. Your sensory bottle will warp and be misshapen if the water is too hot.
I have created glitter sensory bottle recipes using both techniques and found that each method has its pros and cons. It can be a bit messy, no matter which way you try when glitter is involved! After trying it both ways, I prefer to use a measuring cup to mix our glitter sensory bottles because it allows us to use boiling water to mix the glue and glitter. Warm water doesn’t mix the ingredients as well. Hot water helps the glue and glitter mix so that it does not clump.
Using a measuring cup to mix sensory bottles also makes it easier for the little ones to help with DIY sensory bottle making. Children love to throw glitter into the measuring cup and mix the glue and glitter with a whisk, creating a glittery soup as they wait for the water to cool enough to pour the mixture into the calming sensory bottle.
The DIY glitter sensory bottle video below provides step-by-step directions on how to mix it directly in the bottle. However, I used a quart measuring cup to mix the glitter and glue to create Frozen-inspired glitter sensory bottles, as well as this mermaid tail glitter sensory bottle, before pouring the mixture into an empty plastic bottle. The step-by-step directions below share both options. Try making glitter sensory bottles both ways to see which method you like best!
Sunburst Glitter Sensory Bottle Recipe Supplies
- An empty plastic water bottle or a tempered mason jar.
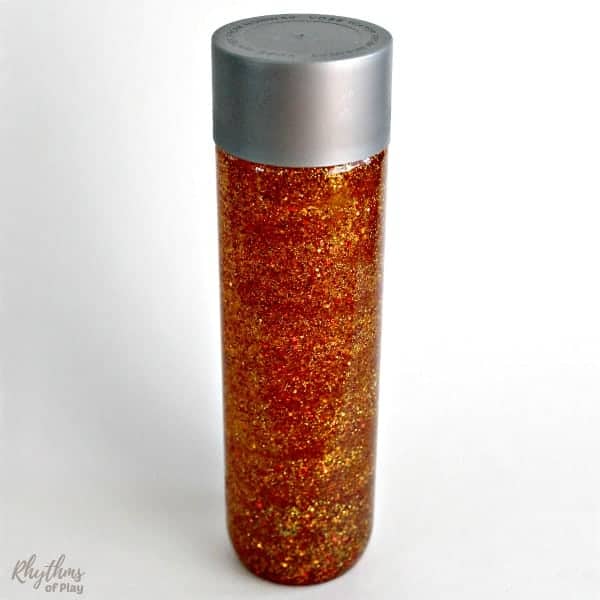
- I used a Voss water bottle to create the sun sensory bottle featured in the photos for this tutorial, but several other types of bottles from the recycling bin will also work.
- Tempered (heat-resistant) canning jars make it possible to add boiling water to the jar without shattering it, and eliminate the need for a glass measuring cup or whisk.
- Goo Gone
- Tap or distilled water
- Pink, orange
 , yellow, red, or gold glitter glue or clear glue, or use
 - Orange or yellow liquid watercolor paint or food coloring
- 1-quart glass measuring cup (optional, read the step-by-step instructions for more information)
- Whisk (optional)
- Super glue or hot glue (optional)
 , yellow, red
 , or
, or Related: Sea Shells Calming Sensory Bottle
Glitter Supply Options:
You will need a combination of hexagon, flake, and fine glitter in any combination of yellow, gold, orange, and red to make this sunburst DIY glitter sensory bottle recipe. I used a mixture of chunky hexagon gold glitter with flakes of orange and red, but you can choose from any of the glitter options listed below to make this DIY glitter sensory bottle. Ensure you select at least one of each type (hexagon, flake, and fine) and color (gold, orange, and red) of glitter to create this sunburst glitter sensory bottle. Choose from the glitter craft supply options below:
- Hexagon chunky and fine flake glitter in any combination of the following colors:
- Multi-pack of a hexagon, flake, and fine glitter
- Chunky and fine glitter set
- Multi-color fine glitter set
- Flake glitter in orange, red, or gold.
- If you plan to create other glitter sensory bottles, such as this Snowflake Snowstorm or this Mermaid Tail, I recommend purchasing the multi-color sets of glitter.
Related: Rainbow Galaxy Glitter Sensory Bottle
Sunshine DIY Glitter Sensory Bottle Recipe and Step-by-Step Directions:
Follow the step-by-step instructions to make a DIY glitter sensory bottle that shines like the sun. For more information about making glitter sensory bottles, visit the DIY tutorials for this Frozen-inspired or this mermaid tail.
1. Remove the label and clean the bottle:
- Remove the label from the Voss Water Bottle and use Goo Gone to remove any sticky residue.
- Wash the bottle with soap and warm water to ensure it is clean.
2. Pour hot water into a glass measuring cup or directly into the bottle or jar:
- Pour 1 1/2 cups of super-hot (boiling is best) water into a 1-quart measuring cup or a tempered (heat-resistant) glass canning jar.
- Alternatively, pour hot water directly into a recycled plastic bottle, as shown in the video below.
- Please ensure that the water is not too hot if you try this option, or it will warp or melt the plastic.
3. Mix the glue with the hot water:
- Squeeze 1/3 of a 2-oz bottle (2 oz) of pink, red, orange, yellow, or gold glitter glue, or 2 oz of clear glue, into the measuring cup or directly into the sensory bottle, and mix well.
- Mix the glue and glitter in the glass measuring cup with a whisk, or put the lid on the canning jar and shake well to mix.
- When I first made this glitter sensory bottle, only pink and blue glitter glue was available, so I used pink to make it. Today, you can purchase any color of glitter glue! However, different brands and colors go in and out of stock.
- Clear glue is also an excellent option; you can add as much glitter as you like to the mixture in the next step.
4. Add Glitter:
- Add pinches and shakes of chunky glitter, flake glitter, and fine glitter in the color combination of choice.
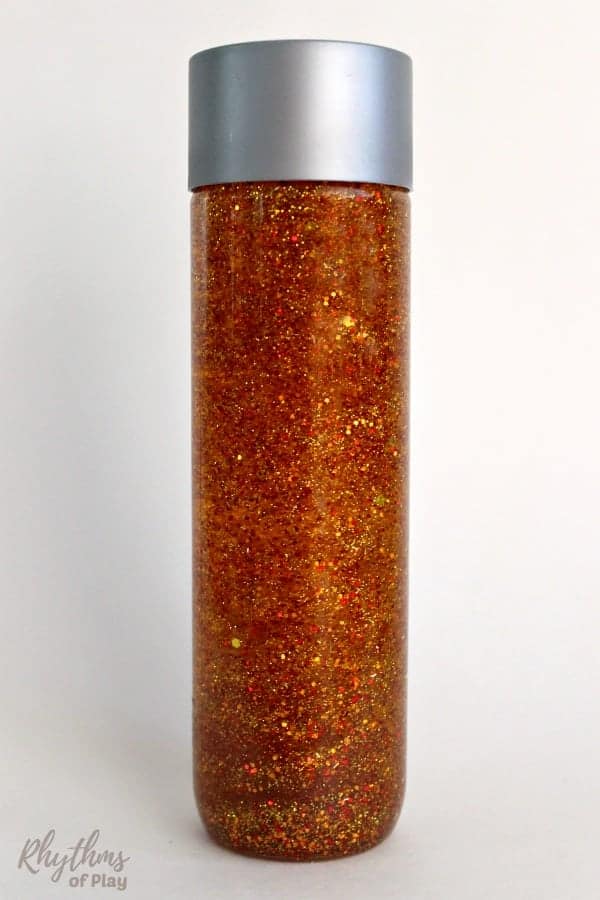
- The hexagons and flakes give the appearance of larger sunspots and sunbursts, while the flake and fine glitter fill out the body of this gorgeous glitter sensory bottle, making it look more like a shining sun.
- I used an assortment of golds, oranges, and reds to make the glitter sensory bottle in the photographs and video tutorial.

 in the color combination of choice.
5. Put a drop of color into the mixture:
- Add a drop or two of orange or yellow liquid watercolor-paint, or food coloring, to give the sunburst sensory bottle an orange or yellow tint like the shining sun.
- Be careful not to add too much, a tiny drop goes a LONG way!
 -paint
 , to give the sunburst sensory bottle an orange or yellow tint like the shining sun.
 6. Mix ingredients well:
- If you are using a measuring cup to mix your glitter sensory bottle, give it a final stir with a whisk to ensure the glitter, glue, and color are thoroughly mixed.
- Otherwise, mix it with a whisk in the jar, or place the lid on it and shake well to combine.
7. If using a glass measuring cup, pour the mixture into the bottle:
- Mix the glitter sensory bottle ingredients in a glass measuring cup using a whisk, and then quickly pour the mixture into your bottle.
- You may need to use your fingers to get some of the glitter into your bottle, but don’t worry about every last flake.
- If you mixed the ingredients in the sensory bottle, proceed to the next step.
8. Put the lid on the bottle (if you haven’t already):
- Place the lid on the glitter sensory bottle and give it a shake to see if you like it.
- If you need more glitter or color to fill out the bottle, add it to the jar before proceeding to the next step.
9. Fill the bottle or jar to the top:
- Add water or glue to fill the bottle to the top:
- If you want the ingredients to move more slowly, add more glue; if you’d like the ingredients to move faster, add room-temperature water.
- Alternatively, you can add a combination of water and glue to the jar or bottle to fill it to the top.
10. If you’re making a pumpkin sensory bottle with glitter instead of loom bands for Halloween, visit the following post to learn how to add a face to the bottle or jar:
- Visit this Halloween pumpkin sensory bottle tutorial.
- Scroll down to step 5 for instructions to add a Jack-o’-Lantern face to the pumpkin sensory bottle.
Related: Rainstick Musical Sensory Bottle
Sunburst Glitter Sensory Bottle Step-by-Step Video Tutorial
Related: Nature-Inspired Sensory Bottles
DIY Glitter Sensory Bottle Recipe Tips:
Play with your sunburst glitter sensory bottle for a day or two. Make sure you are happy with it before gluing it shut. Need more glitter? Add more! If you’d like it to move a little slower, pour out some water and add more glue or clear liquid hand soap.
For more information about making glitter sensory bottles, visit the DIY tutorials for this Frozen-inspired or this mermaid tail to learn more.
For more troubleshooting tips, please visit Calm Down Sensory Bottles 101 to explore all our helpful advice.
Related: Butterfly Sensory Bottle Calm Down Jar
Calming Sunburst Glitter Sensory Bottle for Kids and Adults:
Both children and adults will love this gorgeous sunburst glitter sensory bottle recipe. Calm down bottles like this sunburst sensory bottle are most often used for portable, no-mess, “safe” sensory play, to help calm an overwhelmed child, as a “time out” timer, or as a meditation technique for children. They are just as effective for adults.
Reading books that help children understand their feelings, playing social-emotional games, and practicing yoga are great ways to help children learn to self-regulate.
For more information about sensory bottles and their uses, check out Calm Down Sensory Bottles 101.
You may also like our seasonal activity guide for summer.
Learn more about Nell Regan Kartychok, author, photographer, and creator of this original glitter sensory bottle craft HERE, and Rhythms of Play HERE!


The video goes too fast and I can’t see the ingredients clearly. It would help if it was captioned as to exactly what it was that is being put into the bottle. What is the first ingredient: water?? You don’t identify it. And in your article above it you mention boiled water. Is boiled, cooled water used? And in one place it is mentioned using corn syrup. And I can’t identify the last ingredient either. Please make a better video so one can see what ingredients are being used.
Hi Penny, I’m sorry that you are having trouble… but the video is meant to be a companion to the directions, not the other way around. Every question you ask is gone over in detail throughout the body of the article including the materials list and the DIY details. The text above should answer your question about water temperature. Here is a direct quote, “Pour 1 1/2 cups of super hot (boiling is best) water into a 1-quart measuring cup. (Or, pour hot water–not too hot or you will melt the plastic–directly into the bottle as shown in the video below.” In other words, use boiling water if you will be mixing your ingredients in a large glass measuring cup, otherwise, wait for the water too cool a bit so it does not melt the plastic bottle. I hope that helps!
How long does the solution stay good?
We have sensory bottles that we made 4 years ago that are still just as lovely as the day we made them. 🙂
Can gold glitter paint be used instead of glitter glue?
Hi Shereen! It might work to use gold glitter paint, give it a try and see what happens! You can always add some more glitter to the sensory bottle later.
Hallo,ich habe bei sensorikflaschen jetzt schon öfter das Problem gehabt,dass der Ring mit dem Gewinde vom Deckel bricht und die Flasche dann natürlich aufgeht.Woran mag das liegen?Die Flaschen waren nicht verklebt.Zersetzen die Zutaten eventuell das Plastik?zb bei Flascjen mit Seife oder Öl?
Maren, unfortunately, I do not understand your comment or questions. Could you perhaps translate them into English for me so I can respond?