
This easy DIY tutorial shows you how to turn your favorite photos into personalized picture keychains to keep or give as handmade gifts.
A custom photo keychain is an easy homemade gift idea that kids and adults can make for Mother’s Day, Father’s Day, Valentine’s Day, birthdays, an anniversary, or Christmas. DIY photo charms also make lovely wedding favors for bridal parties or guests. Turn your favorite photographs into personalized picture keychains your friends and family will treasure!
Use family portraits, baby pictures, wedding photos, or a favorite snapshot of someone you love. Follow the step-by-step tutorial below to learn how to make DIY picture keychains using pendant trays and glass cabochons. Adults can handle the cutting tools and adhesive while children help choose photos and plan each gift.
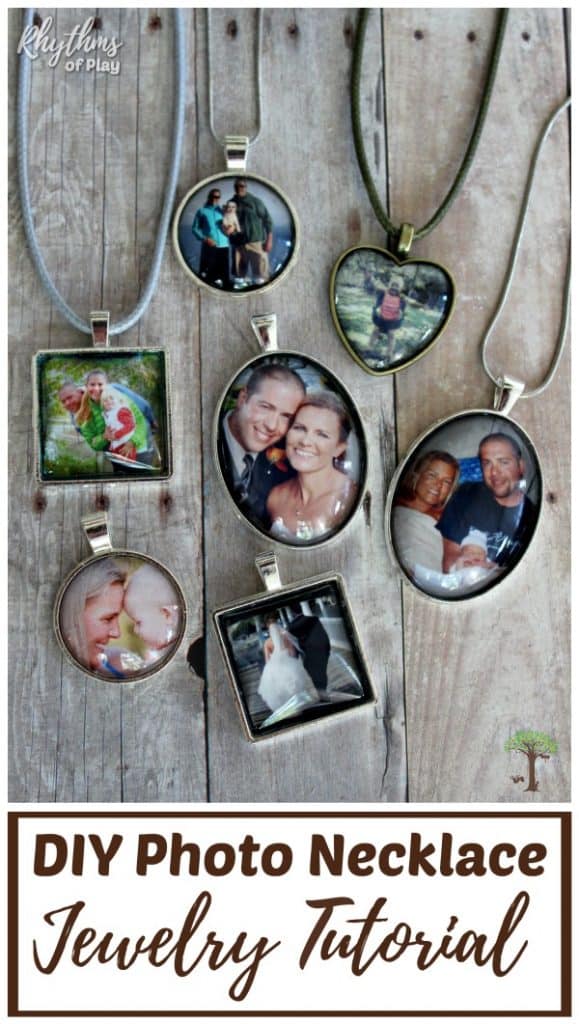
Prefer something you can wear? Try making a DIY picture necklace with the same photo charm method.

Find What You Need to Make a Photo Keychain
Follow the full tutorial or use the links below to jump to the section you need. Start with the supplies if you’re gathering materials, or head to the instructions when you’re ready to make your photo keychain.
- Supplies
- Video Tutorial
- Step-by-Step Instructions
- Troubleshooting Tips
- How to Care for Your Photo Keychain
How to Make Keychains with Pictures
Gather the DIY photo keychain supplies below, then follow the step-by-step instructions to make your own personalized picture charms. Choose a pendant tray with a matching glass cabochon and a keyring that fits the pendant’s hanging loop, as shown in the photo below.

Related: DIY Gifts for Him or Her
DIY Picture Keychain Craft Supplies
Use these supplies to make a personalized photo keyring, also called a photo keychain.
- Small personal photographs, one per charm. Use copies rather than irreplaceable originals.
- Photo pendant trays with matching glass cabochons, one set per charm. (See the options below)
- Diamond glaze or B7000 jewelry adhesive. Test your chosen adhesive on a spare photo print before starting, since results can vary with the ink, paper, and photo coating.
- Choose one option for tracing and cutting photos:
- Use an ultra-fine-point permanent marker for tracing and detail craft scissors for cutting.
- Or, use a Precision knife and a self-healing or glass-cutting mat for adults to trace and cut around the glass cabochon.
- Keyring: Use a swivel lanyard snap hook with a keyring, or a smaller keyring with a larger lobster claw clasp, to attach your photo charm and make a personalized photo keyring or keychain depending on your preference.
- Optional: split-ring opening tool to help attach the charm.
Photo Pendant Trays and Glass Cabochons: Shape Size Options
Choose matching trays and glass cabochons in your preferred size and shape, such as 25mm round, 25mm square, 40x30mm oval, or heart. A variety pack offers several shapes for making different picture charms. Check the tray’s inside measurements and the glass size before ordering. A matching tray-and-glass set can simplify shopping.
- 40x30mm oval photo pendant trays with 40x30mm oval glass cabochons. Or buy them as an oval tray-and-cabochon set.
- Set of 25mm round bezel trays and cabochons.
- Heart photo pendant charms with glass heart cabochons.
- Silver and bronze bezel tray pendant variety pack with heart, round, square, teardrop, and elliptical mirror with matching glass cabochons.
- 25mm square picture pendant charms and square glass cabochons.

DIY Picture Keychain Charms Video Tutorial
This step-by-step photo charm video tutorial shares how to make picture necklace photo jewelry. Use the same method to make photo keychains. Attach the finished photo charm to a keyring instead of a necklace chain.
The written instructions below explain each step, including how to attach the glass cabochon and finish your personalized picture keychain.
Related: Beautiful Homemade Gifts
Personalized Photo Keychain Step-By-Step Tutorial
Follow the steps below to make a photo charm and attach it to a keyring. If you’re making several personalized picture keychains, cut and arrange all your photos first so each one is ready before you begin gluing.
1. Select a Photograph for your Personalized Photo Keychain:
Select a photograph to make one photo keychain or several photographs to make a bunch of picture keychains. Use copies rather than irreplaceable originals.
- Place a glass cabochon over each photograph to check the fit. Keep faces and other important details visible beneath the glass and away from the edges.
- If printing photos, resize the images to fit your cabochons. Print a test page using “actual size” or 100% in your print settings.
- Allow freshly printed photos to dry fully.
- Not all photo papers work with all adhesives. Test your chosen adhesive on a spare print and let it fully cure. Check for bleeding ink, discoloration, or cloudiness before proceeding. Use the same paper, printing method, and adhesive planned for your finished keychain.
2. Trace Around the Glass Cabochon
Choose the tracing method that matches your cutting tools:
- Place a glass cabochon over the photo and trace it with a permanent marker. Keep the glass steady so it doesn’t slip.
- Alternatively, adults can use a precision knife and a cutting mat to trace and cut around the cabochon in one step. Place a glass cutting mat or self-healing mat beneath the photo to protect your work surface.
If you trace and cut with a precision knife, skip the next step.
3. Cut Out the Photograph for your picture keychain
- Use scissors to cut out each traced photo. Cut just inside the marker line so it won’t show around the edge.
- Place the cut photo inside the matching pendant tray to check the fit. Trim a little more if needed so it lies flat without bending or bunching.
- Skip this step if you already traced and cut your photo with a precision knife, but check its fit before gluing.
4. Glue the Photograph into the Photo Keychain Pendant Tray
- Apply a thin, even layer of diamond glaze or B7000 adhesive inside the pendant tray, following the product’s application directions.
- Place the photo face up in the tray. Check that the picture hangs upright from its loop.
- Gently press the photo into place so it lies flat without wrinkles or trapped air.
- Clean away excess adhesive around the tray’s edges as directed on the product label.
- Let the photo adhere securely before adding the glass cabochon in the next step.
5. Glue the Glass Cabochon Over the Photo:
- Check that the glass cabochon is clean and dry.
- Apply a thin, even layer of your tested clear-drying adhesive to the flat side of the glass, following the product’s directions.
- Lower the glass onto the photo with the rounded side facing up. Press gently to spread the adhesive evenly and push out trapped air.
- Check for bubbles and adjust the glass while the adhesive still allows movement.
- Clean away excess adhesive around the edges using the method recommended on the product label.
- Leave the charm flat and undisturbed until the adhesive has fully cured according to the manufacturer’s recommended curing time before attaching the keyring or using the charm.
6. Attach Photo Charms to Keychains:
- Once the adhesive has fully cured, choose your swivel lanyard snap hook with a keyring or a smaller keyring with a larger lobster claw clasp.
- Open the split ring and attach the photo charm by its hanging loop, as shown in the video and photo tutorial. A split-ring opening tool can make this easier.
- Rotate the charm’s loop around the split ring until it sits securely inside both coils.
- Check that the ring closes fully, the clasp works, and the glass cabochon is firmly attached before using or giving your personalized picture keychain.
How to Make a Photo Keychain in Pictures
The photos below show how I turned my family pictures into personalized photo keychains. Use this visual guide alongside the written directions to see how the pieces fit together, from cutting the photos to attaching the finished charms to a keyring.

Related: DIY Mother-Daughter Necklace Set
DIY Photo Keychain Troubleshooting Tips
- The photo won’t lie flat: Remove it before gluing and trim a little from the edges. Check the fit again before adding adhesive.
- The ink smears or the photo changes color: Stop and test a spare print with your adhesive. Try a different printing method or paper before making another charm.
- There are bubbles beneath the glass: While the adhesive still allows movement, gently press the cabochon to spread the glue toward the edges. Avoid shaking Diamond Glaze before applying it, which can introduce bubbles.
- The adhesive looks cloudy: Allow the full curing time listed on the label before judging the result. If it stays cloudy, test a thinner layer on a spare print before trying again.
- The charm won’t fit onto your existing keyring: Try a smaller split ring that fits through the pendant’s hanging loop, such as the one in this keyring and lobster claw set, then use it to connect the charm to your keyring. Check that both rings close fully and the charm moves freely.
How to Care for Your Photo Keychain
Gently wipe your photo keychain with a soft, dry cloth. Do not wash, rinse, or soak it. Keep it out of showers, baths, swimming pools, and dishwashers. If you use the same photo charm on a necklace, remove it before showering or swimming.
Even if the adhesive is labeled waterproof, the finished photo charm may not be. Avoid household cleaners, and dry the charm promptly if it gets splashed.
Check the glass and keyring occasionally. If either becomes loose or damaged, stop using the keychain until you repair it.
More Ideas for Personalized Keychain Charms and Pendant Necklaces
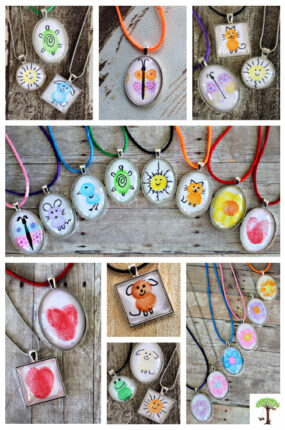
There are many fun and easy ways to use pendants to make homemade personalized necklaces and keychains. Try another photo keepsake or turn fingerprint art into a wearable gift:
- Picture Necklaces: Use the same photo charm method to make a necklace.
- Fingerprint Flower Necklaces or Keychains: Turn tiny fingerprints into colorful flower keepsakes.
- Fingerprint art necklaces and Fingerprint Art Keychain Backpack Charms: Make miniature artwork to wear or attach to a bag.
- Thumbprint Heart Necklaces and Thumbprint Heart Keychains: Create heart-shaped designs with two overlapping thumbprints (pictured below).

More DIY Jewelry Tutorials
Enjoy making personalized gifts? Try another jewelry project with beads, family names, or a touch of nature-inspired inspiration.
- How to Make a Beaded Necklace or Bracelet: Learn three ways to start and finish beaded jewelry, including methods with and without clasps.
- Personalized Name Necklaces: Use letter beads to spell a name, meaningful word, or short phrase.
- Easy Beaded Bracelets: Choose colorful wooden beads and make a bracelet to wear or give.
- Mother-Daughter Necklace Sets: Create coordinating beaded necklaces as a keepsake of your connection.
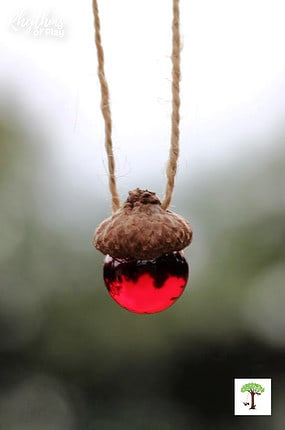
- Acorn Marble Necklaces: Pair an acorn cap with a glass marble to make a nature-inspired pendant.
Personalized Photo Keychains: A Thoughtful Homemade Gift
Personalized photo keychain charms, thumbprint heart keychains, and photo necklaces make an easy homemade gift idea for Christmas, Mother’s Day, Father’s Day, Valentine’s Day, or a birthday. Choose a picture that means something to the recipient, such as a family portrait, a wedding photo, a favorite pet, or a shared memory.
Custom picture keychains also make a great wedding favor idea. Use an engagement photo or another meaningful picture to make keepsakes for your wedding party or guests. For anniversaries, graduations, or memorial gifts, choose a photograph that celebrates the person, relationship, or moment you want to remember.
Turn your favorite photographs into one-of-a-kind keepsakes that friends and family will treasure for years!
For more DIY gift ideas, explore homemade gifts for dads, or these gorgeous handmade gifts for parents, grandparents, teachers, and friends that kids can make.
Learn more about Rhythms of Play on our About page, or meet the author and photographer, Nell Regan Kartychok.




I enjoyed learning how to make photo jewelry and picture necklaces with this great post thank you! Please keep sharing the valuable DIY information like this. 🙂
I’m so glad that you found this photo necklace tutorial useful, and I will most certainly continue to share quick and easy DIY projects like this!