Use this step-by-step tutorial to make your own wooden height growth chart ruler.
A homemade wooden growth chart is a practical way to measure your children’s height as they grow from toddlers into teens. And, you can take it with you when you move instead of leaving all those memorable marks behind on the wall or doorjamb of your old house. It doesn’t hurt that they are also beautiful works of art that you can proudly display in your home. We made our wooden growth chart look like a giant wooden ruler, which turned out fantastic. Get the supply list and DIY details for this gorgeous do-it-yourself height growth chart ruler below!
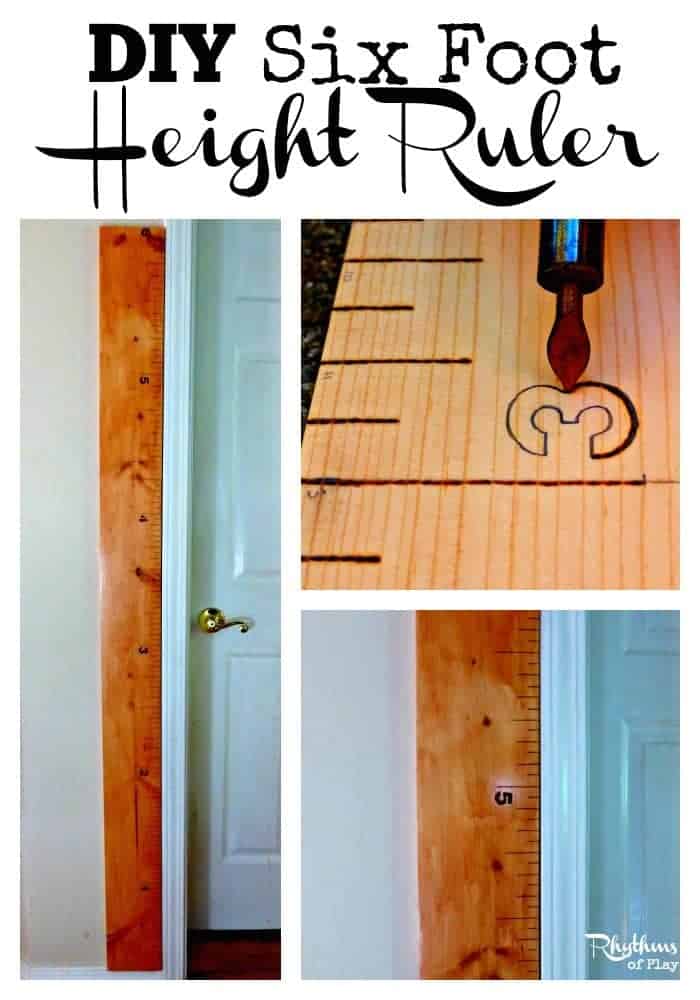
DIY 6 Foot Height Ruler Growth Chart
Learn how to make a height growth chart that looks like a giant ruler with this simple DIY project tutorial.
Wooden Growth Chart Ruler DIY Supplies
- Wooden plank of piece of wood that is 1 inch deep and at least 6 feet long. The width and type of wood can vary based on space and taste. We used a 6 foot long 1 X 6 inch plank of pine to make the height growth chart ruler in the photos of this tutorial.
- Sandpaper or electric sander
- Tape measure
- Pencil
- Hand or skill saw [unless you intend to use entire height of board]
- Ruler
- Carpenters Square [optional]
- Woodburning pencil, vinyl stickers, or paint pen
- Wood finish of choice [Beeswax, stain, polyvinyl, etc.]
How to Make a 6-foot wooden growth chart ruler
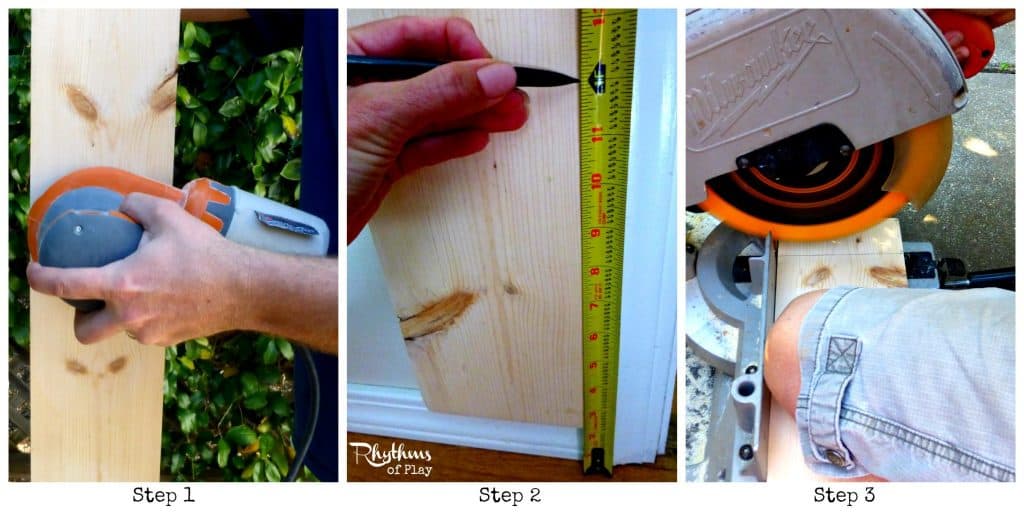
Step 1: Sand plank of wood
- Sand the wooden plank with an electric sander or sand paper.
Step 2: Measure BAseboards
- Unless you plan on cutting out a part of your baseboards to hang it flush with the floorboards of your home, measure the first foot on your height ruler by placing it on the wall where it will sit above the baseboard and using a measuring tape and pencil to mark off the first foot. See tutorial photos below.
Step 3 Cut Wooden Board
- Use hand saw or skill saw to cut the board or plank to the height you prefer. We could have left ours 6 foot 2 inches, but we opted to trim it down to the 6 foot mark to make our wooden growth chart ruler an even 6 feet.
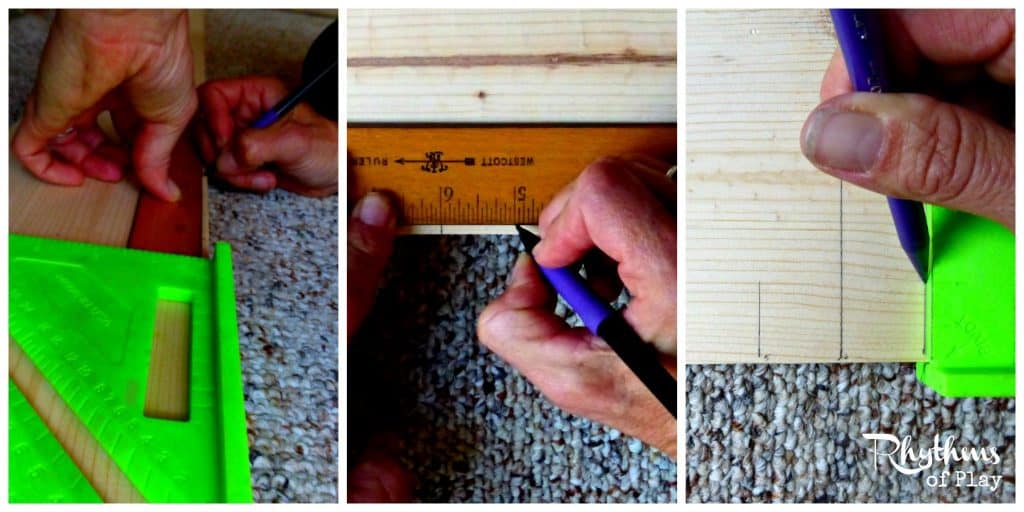
Step 4: Measure and mark Feet and Inches
- Measuring and marking off the feet and inches is an important step in the process. Use a tape measure, ruler, pencil and carpenter’s square to mark off the board. We marked our height growth chart ruler down to the half inch, but marking off only the inches and feet also looks nice.
- We marked the feet, inches, and 1/2 inches because we wanted our DIY growth chart to look like a big ruler. So, the foot marks are 2 inches long, the 1/2 foot marks are 2 inches, and the 1/4 foot marks are 1 1/2 inches. While the inch marks are 1 inch long, and the 1/2 inch marks are 1/2 inch long. If you look at a ruler you’ll notice a similar variance and sizing.
- Because numbers mark the feet, changing the size of the hash marks also makes this wooden growth chart much easier to read–just like a real ruler. And, the final product turned out lovely. The different sizes look perfect on the 6 foot long 1 X 6 pine board we turned into a height growth chart.
Step 5: Stencil or Place Numbers
- If you are using a wood burner or a paint pen to make your numbers on the wooden growth chart, use a stencil to trace the numbers for each foot mark on your height ruler. Alternatively you can place vinyl stickers or address numbers on the board for this step.
Step 6: Woodburn or Paint Numbers and Foot and Inch Marks
- Skip this step if you are using vinyl stickers or address numbers to mark the feet and inches on your growth chart height ruler.
- Using a woodburning pencil is really easy and fun. If you have never used one before practice a bit before you try your hand on your project.
- Be mindful–woodburning pens get really hot!! I have provided an Amazon affiliate link to the one I use and love for your convenience here–> Walnut Hollow Woodburning Kit.
Step 7: Add Finishing Touches
- Rub beeswax on your board or use a stain and/or protective coat of choice and allow to dry. Use more than one coat if desired. [I used an oak stain and polyurethane 1 step finish because we had some left from a pantry shelf my husband built.]
Step 8: Hang 6 foot Wooden Growth Chart
- We used finishing nails in a few holes my husband pre-drilled that worked great, but feel free to hang it however you like.
This six-foot height ruler growth chart makes a great keepsake and gift.







What a neat project!
Thanks — glad you like it 🙂
Oh my! I love this idea! Sadly we move often, and I’ve never been able to keep my children’s heights. I wish I had seen this idea many moons ago!
Love it, you did an awesome job!
Thanks, glad you like it. It’s never too late to make one 🙂
What a cute idea! Definitely making this when we have kids 🙂
Thanks! I hope you find it as enjoyable as we do 🙂
Just wanted to let you know that I’m featuring this at our weekly link party! http://www.thelifeofjenniferdawn.com/2015/05/a-little-bird-told-me-link-party-142.html
Thank you for featuring me at a little bird told me – and thank you for hosting such an awesome link party!
I love this site.
Hi Emma, I’m so glad you like this website. Thanks for letting me know, it makes it all worth the while. And let me know if there is a DIY project tutorial or craft you would like us to create.