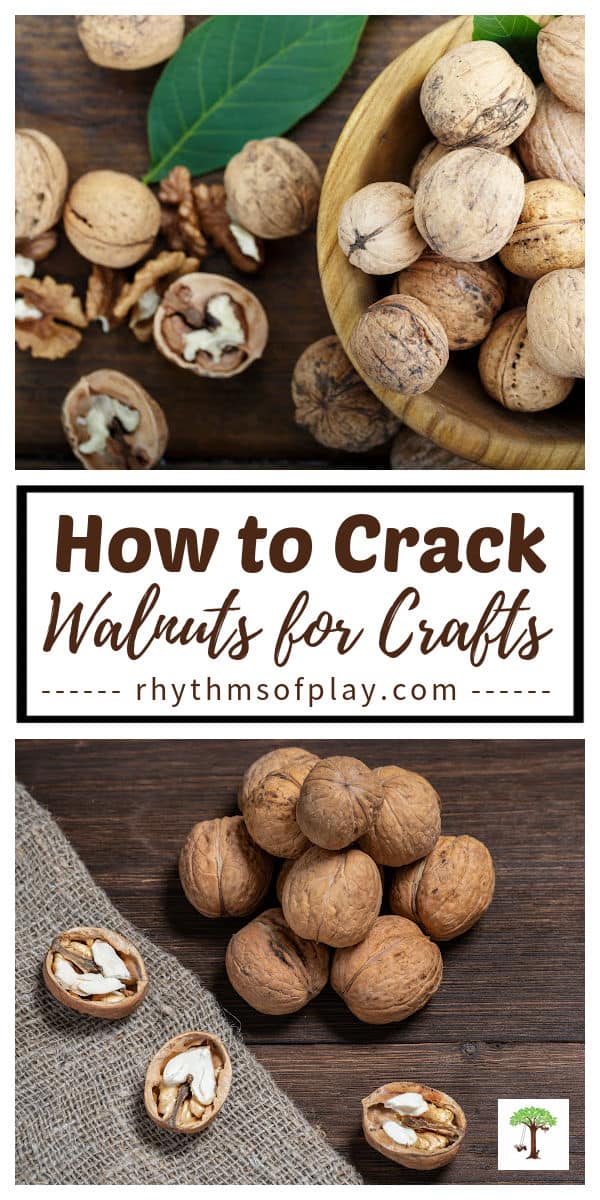
This post will show you how to crack a walnut quickly and easily to get two unbroken halves for crafts and other DIY projects.
If you are looking for the best way to crack walnuts in half so the shells don’t crumble into a hundred pieces spilling from your hands, you’ve come to the right place. This instructional tutorial teaches how to split a walnut open into two perfect halves for crafts and other DIY projects. The unbroken shells make excellent natural craft materials, adding rustic charm to your homemade creations.
When it comes to nature’s bounty, few things are as versatile and satisfying as the humble walnut. Not only are walnuts a delicious and nutritious snack, but they are also rich in healthy antioxidants, fatty acids, and Omega-3s. Their strong shells make them ideal for simple nature crafts. The step-by-step video tutorial and written instructions below teach you how to use common household tools to crack walnuts open into whole halves so you can use them for crafting.
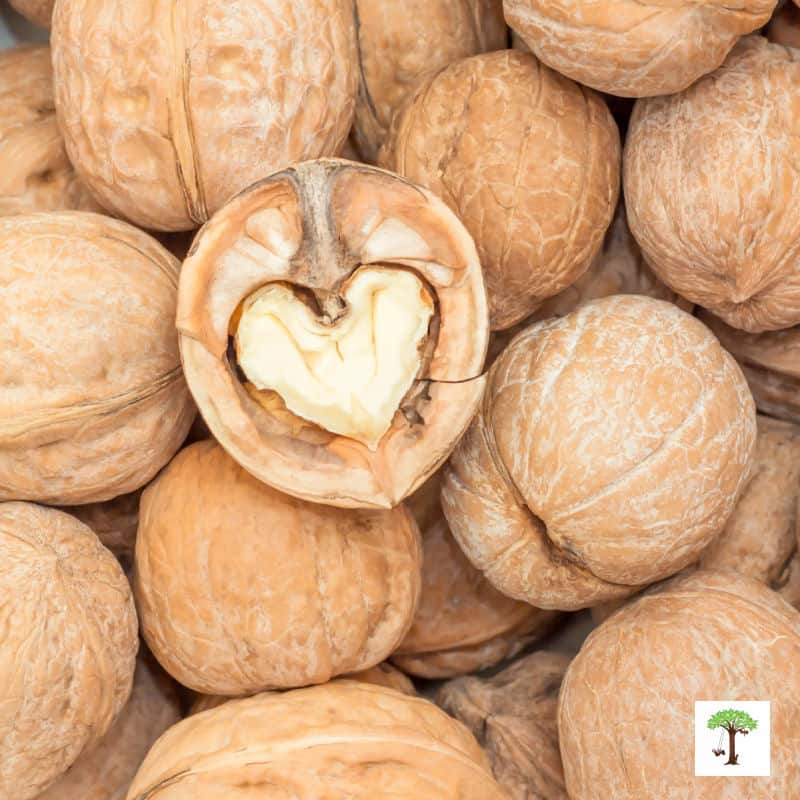
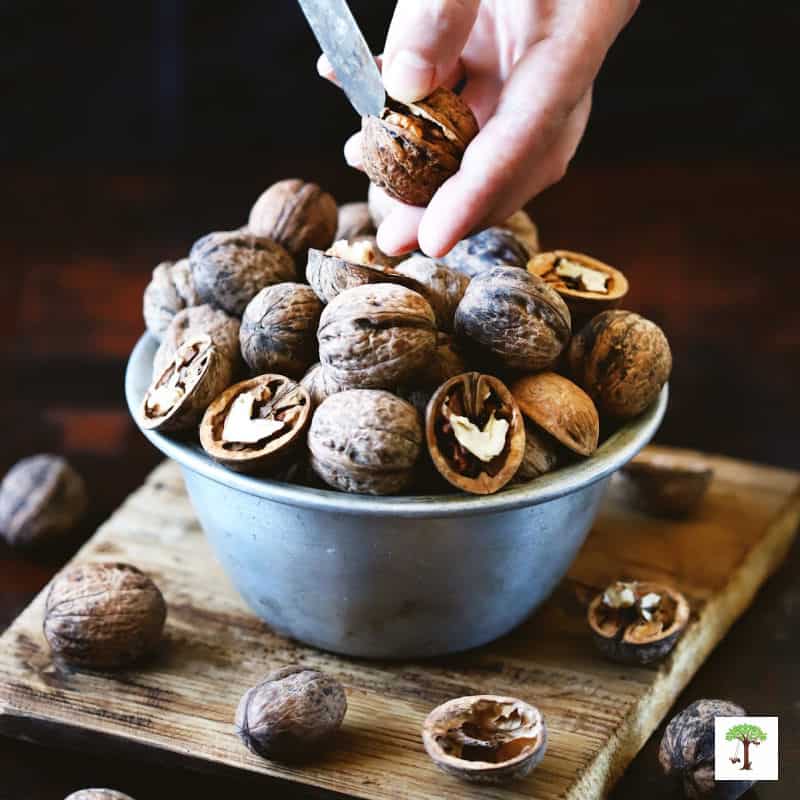
Use this simple walnut cracking hack after the fall harvest and throughout the holiday season. The step-by-step instructions make it easy to crack walnuts like a pro. My favorite thing about this walnut-cracking method is the final result: not only do you get two perfect walnut shell halves, but the walnut’s heart is the surprise that reveals itself from within, as shown in the photograph and video tutorial below. First published in August 2023, this walnut-cracking tutorial is regularly updated to improve its content and keep it current.
How to Crack Walnuts for Crafts and DIY Projects:
Crafting with walnuts requires knowing how to cleanly crack open a walnut for use as a craft material. Since these nuts are so hard to crack, cracking them can be tricky. It’s even more of a challenge to crack a walnut perfectly so that you end up with two unbroken shells to use for crafts. The good news is that cracking walnuts for crafts is simple when you use the easiest walnut to crack and the best tools for the job.
English walnuts are easier to open because their shells are thinner and crack more easily. The inner shell of a black walnut is much thicker, harder, and more rugged, so it is not as easy to crack. Since they are among the hardest nuts, they often require heavy-duty tools or machinery, such as a vice or a sledgehammer, to crack. Using black walnuts in various types of recipes is delicious, but opening them for crafts is much more challenging. This is why I recommend using English walnut shells for crafts.
Related: Fall Nature Crafts for Kids and Adults
How do you crack walnuts without a cracker?
Before I learned the walnut-cracking tips instructed below, I tried cracking walnuts into usable halves with a nutcracker. But this nut-cracking technique never worked very well. More often than not, standard nut-crackers lacked the finesse needed to produce two perfect walnut shell halves.
The step-by-step tutorial below teaches how to crack a walnut without a cracker. Whether you’re a seasoned crafter, a teacher, or someone new to DIYs, this easy trick for cracking walnuts for crafts opens up a world of creative possibilities. What can you use to crack Walnuts? The good news is that you can choose between two simple household tools: A knife or a flat-head screwdriver.
Don’t use a nutcracker or a hammer to crack walnuts if you want usable walnut shell halves:
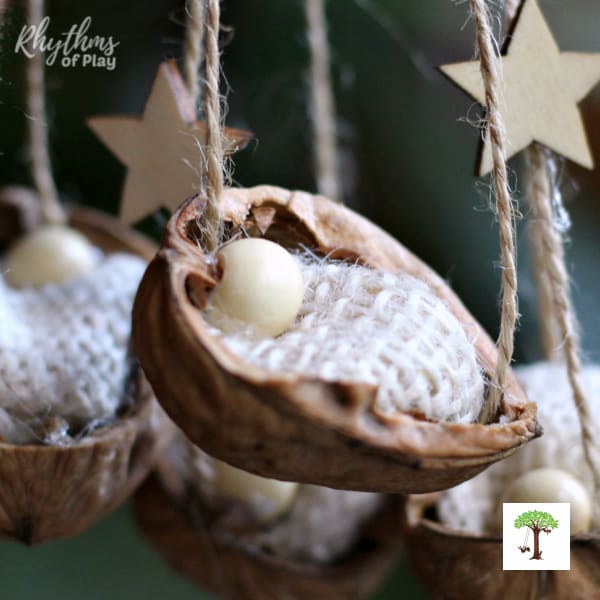
Contrary to popular opinion, I don’t recommend using the jaws of a nutcracker or a hammer to crack walnuts. Unless you don’t care about the shells. It’s best not to use either of these household tools to crack a walnut if you plan to use the shell halves for crafts and other DIY projects. Instead, this tutorial shows a simple way to crack walnuts quickly and easily without a walnut cracker. It also includes a few inspiring walnut craft ideas (like the Baby Jesus Christmas Ornaments in the photograph below), so you can start crafting with walnuts right away. Aren’t these ornaments made with walnut shells adorable?
The Parts of a Walnut: Husk, Shell, and the Meat or Fruit
Before sharing how to crack them, let’s define the parts of a walnut. This will help the instructions make a lot more sense. Technically, a wanut is not a nut, but the seed of a droup. These are commonly known as stone fruits. A walnut’s green, leathery outer layer is known as the husk or hull. The walnut shell is the hard, wrinkled, and woody brown inner layer enclosing the nut’s edible kernel. This strong, inert inner shell protects and surrounds the nut’s kernel, fruit, or meat.
The husk covers the walnut shell before it cracks and falls off or is removed. When the fruit on the tree ripens, the walnut husk usually cracks open, revealing the inner walnut, which falls to the ground. In other words, the walnut shell forms under the outer husk of these unique nutty fruits.
Most people don’t realize that the shell of the walnut only becomes visible after the separation of the husk. This outer covering needs to be removed before reaching the walnut’s protective shell, which covers the meat, or inner fruit or kernel of the walnut.
Fortunately, most walnuts lose their husk when they fall from the tree. However, some walnut varieties retain their husks when walnuts are gathered. These are often removed during processing at a nut plant. Instructions for removing the husk are included in the step-by-step instructions below, in case it is still intact.
How to Crack a Walnut Open Perfectly: Walnut Cracking DIY Video Tutorial:
A butter knife or a flathead screwdriver is the best tool for quickly and easily splitting open walnuts. These everyday household tools produce clean, unbroken half-shells for crafting and other DIY projects. Watch the video below to learn how to crack a walnut into two usable, complete halves for walnut crafts. First, it shows how to split a walnut with a 3/16 flathead screwdriver. Then it teaches how to do it with a butter knife, so you can see how to crack walnuts with either household tool. The written step-by-step instructions are posted below the video tutorial.
Tools and Materials Needed for Cracking Walnuts:
- Walnuts: Choose firm, uncracked whole walnuts with intact shells. The size of the walnuts may influence the scale of your crafts, so pick them accordingly. Gather them in an orchard or yard, or purchase them whole from your local farmers’ market or health food store.
- Safety Gear: To protect your eyes, wear safety glasses. As you’ll see in the video tutorial below, the shell-cracking process can be a bit messy, so gloves and an apron or old clothing are optional but recommended in some situations.
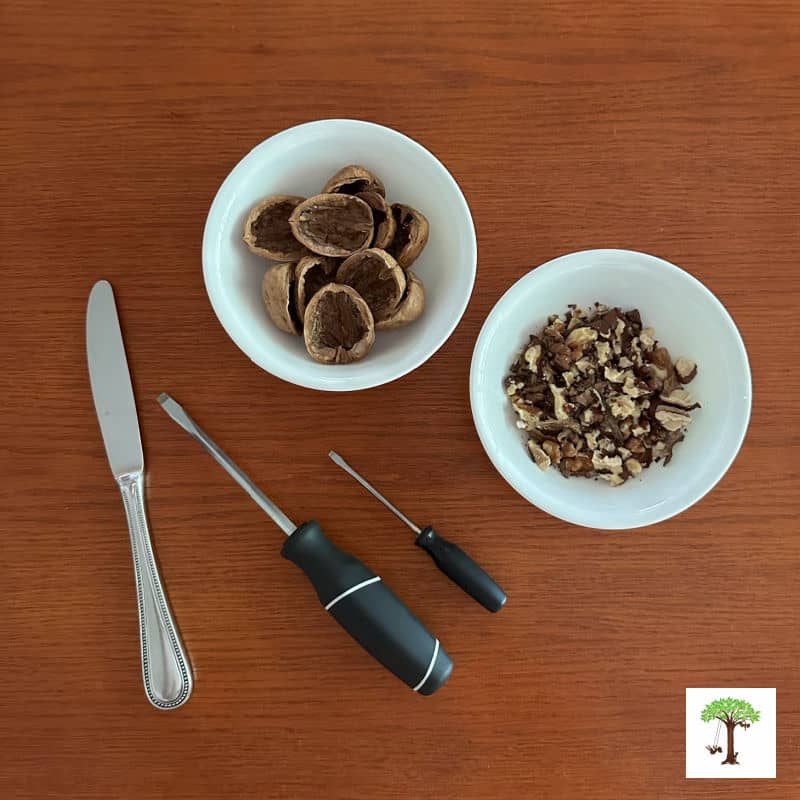
- Butter Knife or Flat Head Screw Driver: Using a butter knife or a flat-head screwdriver is the best way to crack open a walnut so that you have two usable walnut shell halves remaining for crafts and other DIY projects. A standard nutcracker is not recommended unless you want to use crushed shells for your crafts.
- Nutpick: Use a nut pick or a smaller flathead screwdriver to scrape the walnuts from the shell after they have been split open. (A few nut picks are included in this walnut cracking set.)
- Flat Surface: Find a stable and clean hard surface to work on, such as a countertop or table. Use a cutting board to protect the surface if needed.
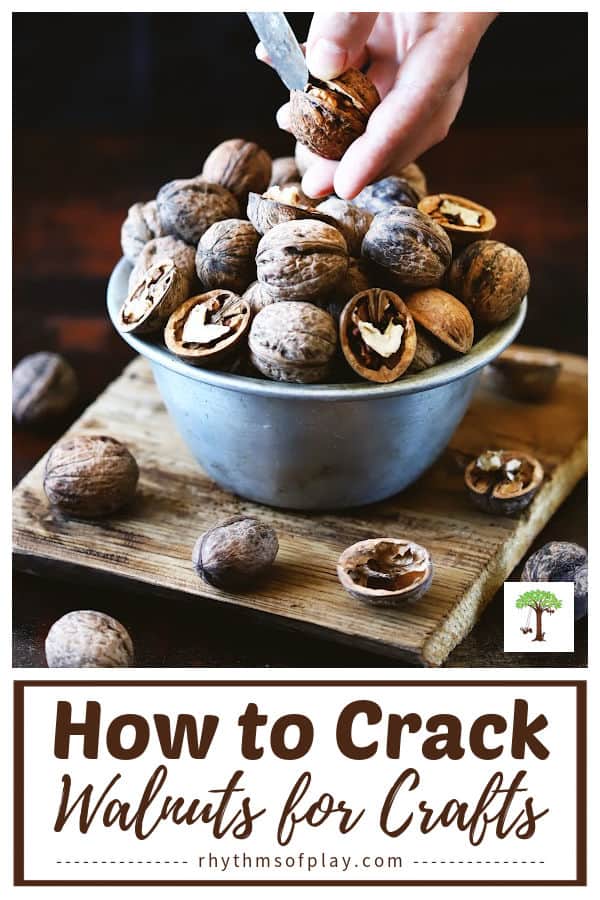
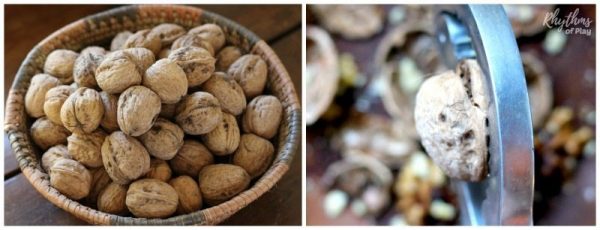
- Containers: Have a few reusable containers, mason jars, or bowls ready to collect and separate the cracked shells and walnut pieces, as shown in the photograph and video below. This will help keep your workspace tidy and make it easier to separate the nut meat or kernel from the shells for eating and crafting. (After we are finished cracking the walnuts, my family likes to clean and chop the walnut kernels and mix them into cookies and our gluten-free fruit crisp recipe for added flavor–yum!)
Step-by-step Instructions for Cracking Walnuts:
The step-by-step DIY tutorial provides a few more helpful details than the video tutorial above. Please read through the instructions before splitting walnuts, so you know the steps involved and what to expect.
1. Prepare your workspace:
- Gather tools and materials and put them in your workspace.
- Put on your safety gear, and have your tools and containers ready.
2. Remove the husk (if needed):
- Most varieties of walnuts lose their husk when they fall from the walnut tree.
- The walnut husk is the green, fleshy outer layer of a walnut that surrounds the hard brown shell.
- In contrast, some walnut husks, such as Black Walnuts, must be removed unless a nut processing plant has already processed the walnuts you are using.
- Follow the directions below to remove the walnut husks, or skip to the next step if the walnut husks have already been removed.
How to remove the husk of a walnut:
- The most common method to remove walnut husks is to soak the walnuts in a bucket of water until the husks soften.
- This usually takes a few days.
- Once the walnut husks are soft, use a vigorous stirring motion to rub them off.
- The friction from walnuts rubbing against each other as you stir will allow the husks to float to the surface, while the clean walnuts sink to the bottom.
- Use impervious gloves to remove the walnuts from the bucket (Black Walnut shells can discolor the skin) and separate the husks from the shells.
- Discard the husks and allow the walnut shells to dry and harden in a cool, dry place for a few weeks before cracking them open for crafts, etc.
3. Position the walnut:
- Hold a walnut in your non-dominant hand so the pointier end faces down and the rounder end of the walnut faces up, as shown in the video below.
4. Crack the walnut open:
- Carefully grip the broader end of the walnut.
- Insert the tip of the knife or the flat-head screwdriver into the natural seam or indentation that splits the nut. Then gently twist to open, as shown in the video tutorial and the photograph below.
- The seam is the thin line or ridge that runs around the circumference of the walnut, between the two walnut shell halves.
- Place the butter knife or screwdriver into the seam where there is often a small hollow at the more rounded end of the walnut to more easily wedge it between the two walnut shell halves.
- Continue to apply gentle pressure as you wiggle and twist the knife or screwdriver until the shells split, pull apart, and pop or crack open along the seam around the middle of the walnut.
- This is easier than cracking the shells with a standard nutcracker or pliers because it opens with just a twist. You will get two half-shells, both perfect!
- If better leverage is needed, tap the back of the knife or flathead screwdriver with a hammer. A small hammer with a short handle makes this easier.
- Be cautious not to exert too much force, as this could break the shells or crush the walnut kernel or meat, rather than splitting it into two perfect halves. (Unless you don’t care about keeping the shells intact.)
- Opening a black walnut with the technique above requires wearing strong gloves and using caution, because its shell is extremely hard.
- It’s easier to crack black walnuts with a hammer, sledgehammer, or heavy-duty vice, but these methods typically break the shell into pieces.
5. Remove the nut meat or kernel from the cracked nut:
- Once the shell is cracked, use your fingers, knife, a small flathead screwdriver, or a small nut pick to extract the nut meat (walnut kernel) from the broken shell and place it in one of the containers or bowls.
- Inspect the kernel for any remaining shell fragments and remove them.
6. Separate the walnut shells from the kernels:
- Place the walnut shell halves in a separate container or bowl and set them aside for use in walnut crafts.
- Put the inner walnut fruit or meat in another bowl or container (such as a glass mason jar) to eat and enjoy, use in salads or your favorite baked goods, or store away for another day.
- Walnuts are a valuable addition to anyone’s diet, providing healthy fats and other vitamins and nutrients in moderate amounts.
- For long-term storage, place the inner walnut kernels in an airtight glass container, such as a canning or mason jar. Then store them in a cool, dry place, such as at the back of the refrigerator.
- Refrigerated air contains less moisture and therefore functions as a natural dehumidifier, pulling water from food and the air.
7. Keep cracking! Repeat the process:
- Continue the steps above to crack the walnut shells you need for your craft project.
- Take breaks if your hands become fatigued to prevent accidental slips.
Cracking Walnuts for Crafts and DIY Projects:
Cracking or splitting walnuts for crafts isn’t just a creative endeavor; it’s a way to engage with nature’s beauty and infuse it into your projects. From walnut crafts to home decor, the cracked walnut shells add a unique, visually appealing element to your craft supplies, making your DIY projects stand out.
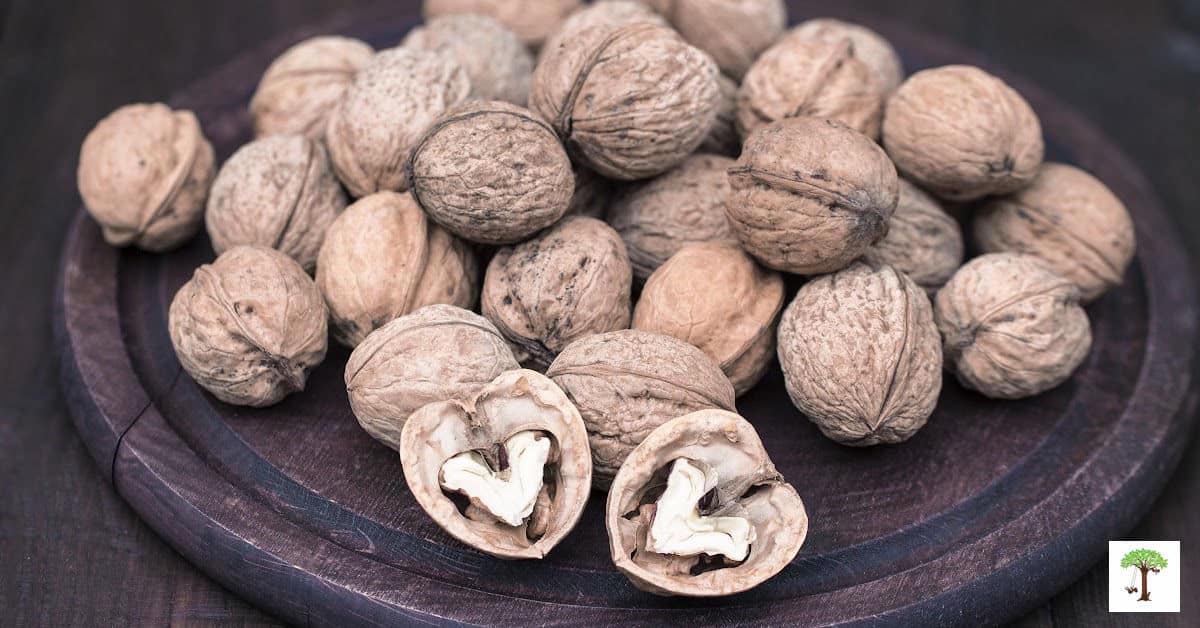
To make this walnut-cracking activity even more lovely, have you ever noticed that the nut kernel inside looks like a heart when you crack a walnut open? My daughter noticed this interesting detail long ago because we enjoy searching for heart shapes. I added a photo of a walnut split open to reveal the heart kernel to the video for this heart-shaped scavenger hunt. Please visit the activity instructions to see each of the other natural heart shapes.
Gather your materials, put on your safety gear, and let your imagination run wild as you explore the endless possibilities of cracked walnut crafts. There are a few walnut craft ideas you can try listed at the bottom of this tutorial.
Why Crack Walnuts for Crafts?
Walnuts aren’t just full of nutrients; their hard shells are perfect for a variety of craft projects. Cracked walnut shells have a distinct, earthy appearance that adds depth and texture to your creations. Using natural materials like walnuts in your crafts can foster a stronger connection to nature and give your DIY projects a unique, sustainable touch. You might also enjoy this list of nature craft ideas and art activities that use natural materials.
How do you crack walnuts to get halves?
When you need walnut shells split and broken open into two perfect halves, not cracked into bits, do NOT use a nutcracker of any kind! Instead, use a butter knife, a flathead screwdriver, and the other walnut-cracking tools and materials mentioned in this tutorial. Follow the step-by-step instructions above to learn how to break open a walnut cleanly in half.
What is the best tool to crack walnuts quickly?
The fastest and best tools for cracking walnuts quickly are specialized, heavy-duty lever-action crackers like Grandpa’s Goody Getter or a mounted crank nutcraker. Cracking walnuts open by hand with a butter knife or a flathead screwdriver works quickly and easily, but it’s not the quickest method. However, these everyday household tools produce clean, unbroken half-shells that retain their integrity for crafting and other DIY projects, unlike most other, faster techniques.
You Can Use a Nutcracker, But Most are Not as Effective at Maintaining Shell Integrity:
Whenever I used a nutcracker, I ended up with a large pile of broken walnut shells on the table. They looked more like scattered puzzle pieces covered in nut dust than shells I could make crafts with. There were always a couple of intact walnut shells lying among the rubble I could use for crafting. But today, I can crack open walnuts perfectly every time, and you can, too! Learn how to crack walnuts for crafts and DIY projects using the easy walnut-cracking method below. You might also enjoy this list of nature craft ideas. It includes several walnut crafts you can make with kids and adults.
However, if you’re going to crack walnuts open to eat them and don’t care about saving the shells, hammer away, my friend. Use a hammer or the jaws of the nutcracker, as shown in the photograph below, to smash them to bits. Then, search for the edible nut meat among the remaining shells, and enjoy! Walnut cracking is an excellent hand-strengthening activity, regardless of the technique you choose. My daughter enjoys smashing and eating walnuts as much as she enjoys carefully opening and crafting with them, and I bet yours will, too. You may not have many usable halves for crafting, but you will gain a belly full of walnuts and stronger hands! Scroll down and follow the instructions below to learn how to crack walnuts into usable halves for crafts!
Best Tools for Cracking Walnuts Based On Use:
To sum up, the best tools for cracking walnuts quickly and efficiently are specialized, heavy-duty lever-action crackers and mounted crank nutcrackers. For tougher black walnuts, a pair of channel-lock pliers or a heavy-duty vise is recommended, as they help prevent the nut’s meat or fruit from being crushed inside. A butter knife and a flat-head screwdriver work well for keeping walnut shells whole. Here’s a summary of the top tools for cracking walnuts based on usage:
- Fastest for high-volume needs: When you have a lot of walnuts, such as from backyard trees, it’s best to use something that works quickly and efficiently. Grandpa’s Goody Getter or a mounted crank nutcracker provides enough leverage to get the job done faster than most other methods.
- Protect the nut of tougher black walnuts: use channel-lock pliers or a heavy-duty shop vise to apply gradual pressure. This will reduce the risk of smashing the shell and crushing the nut or inner kernel.
- Maintaining shell integrity: Using a butter knife or a flat-head screw driver, as described in this tutorial, is a quick and easy method for keeping the walnut shells intact. Insert either of these common household tools into the base of a walnut to twist it open while keeping the shells whole.
- Overall convenience: Heavy-duty lever-type nutcrackers (like Anwenk) offer a good balance of speed and control for regular English walnuts when shell integrity is not a priority.
- Common tools that get results: For quick, small-scale cracking, a hammer and a rock (or mortar) are effective, as are the previously mentioned knife and flat-head screwdriver. Smaller handheld nutcrackers also work well.
Craft Ideas Using Cracked Walnuts:
If you are looking for walnut crafts you can make with the shells of freshly cracked walnuts, try these simple ideas:
- Baby Jesus Ornament
- Holy Family Christmas Craft
- Christmas Nativity Scene
- Walnut Mouse Crafts
- Miniature Scenes from Walnut Shells
More Fun Nature Craft Ideas:
If you like crafting with walnut shells, you might also enjoy the nature craft ideas on the list below:
- Acorn Marble Necklaces or Ornaments
- DIY Leaf Lanterns
- Leaf Lacing or Sewing
- Autumn Leaf Crown or Tiara
- Nature Craft Ideas with Natural Materials (Contains more walnut craft ideas)
- Best Fall Nature Crafts (Contains more walnut shell craft ideas.)


Leave a Comment