
Build a sandcastle with kids to learn, play, and have fun on the beach or in a sandbox.
There is something timeless about building a sandcastle. Give a child a bucket, a little water, and a patch of damp sand, and before long they’ll start creating something entirely their own. A simple mound slowly grows into a castle. Seashells can become windows, treasures, and decorations fit for royalty. Feathers become turrets with flags, and a simple trench becomes a moat full of alligators or sharks. What begins as a pile of sand quickly grows into a complex imaginary world in the hands of a child.
Some of my favorite childhood memories were spent at the beach. Building sand castles with my brothers is one of my favorite childhood memories. There is something special about building a sand castle that I can’t quite put my finger on. Like many other art forms, creating something from nothing is a magical experience no matter what medium you choose, especially when done outdoors. You might also enjoy this list of arts and crafts you can make with natural materials.
I loved it so much I became an Ocean Lifeguard for the Los Angeles County Fire Department as an adult. Not only do I love and have a massive amount of respect for the ocean, but I just couldn’t keep my feet and hands out of the sand. Who doesn’t love walking barefoot in the sand?
Today, I love watching my daughter discover the same joy. Every trip to the shore includes digging, building, decorating, laughing, and eventually watching the tide reclaim our creations. There is nothing permanent in this life but change. Sandcastles are a great example of that. Like the waves of time, they come and go with the tides.
Whether you’re building your first sandcastle or looking for new techniques to try, this informative guide will show you three easy ways to build sandcastles with children. It also includes handy tips, decorating ideas, and simple ways to encourage creativity at the beach or in a sandbox.
Sandcastle Building Activity at a Glance:
- Difficulty: Easy to Intermediate.
- Best Ages: Toddlers through adults.
- Time: 20 minutes to several hours.
- Skills children can develop: creativity, science, engineering, sensory play, problem solving, math and measurement, fine motor and gross motor muscle strengthening. Building a sandcastle is both a STEM and STEAM activity.
Why Build a Sandcastle?
Building sandcastles is much more than a fun beach activity. The best part about building a sandcastle is that the reward doesn’t come from how extravagant the castle is. There is no right way to build a castle. The experience of building it is always the same. It doesn’t matter what it looks like, how big, or how long it takes to make it.
As children scoop, carry, pack, shape, carve, and decorate. They’re experimenting with engineering, playing with science concepts, solving problems, building muscle, measuring size and distance, and using their imaginations. Building sandcastles also encourages families to slow down and create something together with their hands.
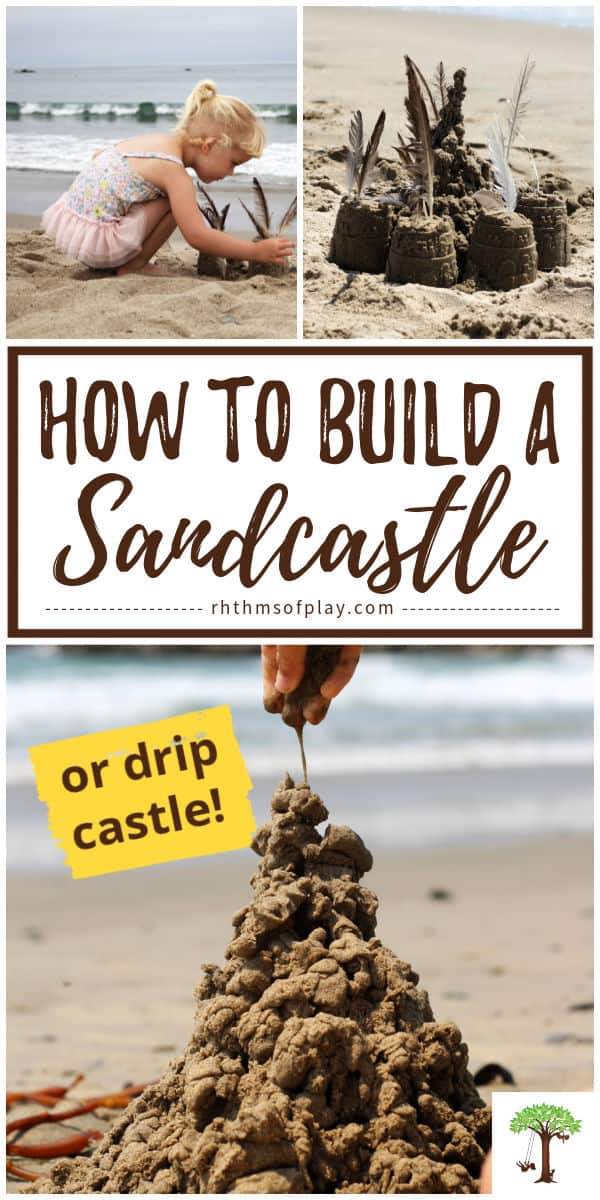
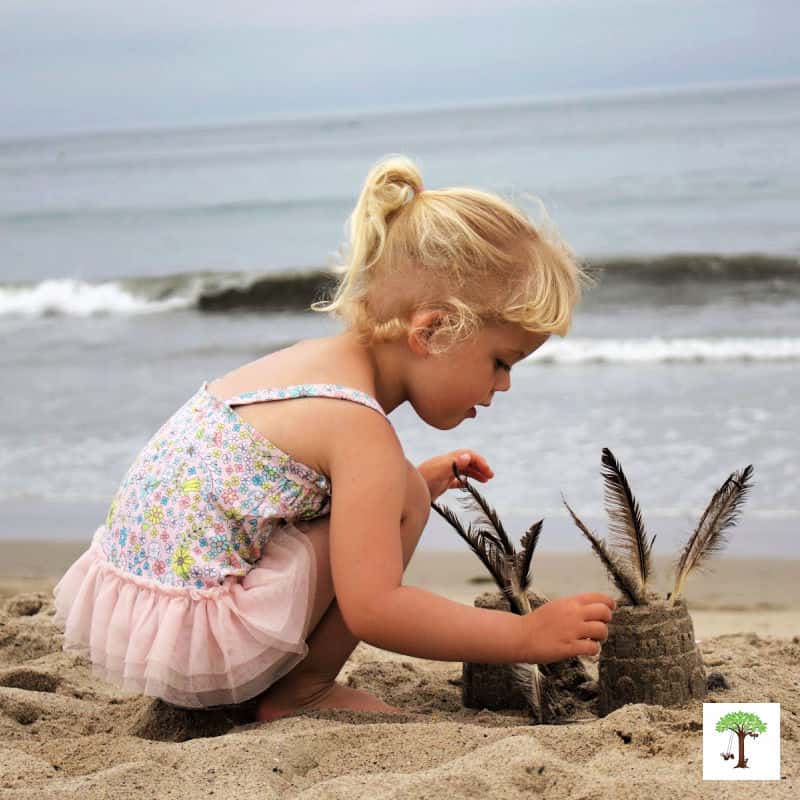
All you have to do is look at my daughter in the photo below to see something special taking place. This was her first sandcastle, and I didn’t want to ruin it by telling her how to do it, that it needed to be bigger, or that she needed to do anything other than what she chose to create on her own.

The only thing I did was demonstrate how to use a few of the sand toys and forms we had on hand to create sand towers. Not that you need any at all. My brothers and I created sand castles with our bare hands and used only the things we found on the beach to decorate them. They always turned out just as magnificently. Every child imagines something different, and so do the parents and teachers who guide them. That’s exactly what makes the experience so rewarding.
After I silently built a few castles as she watched, she knocked them down just like any kid would. Once they were gone, she wanted more, so I told her it was her turn, and that’s when the magic began. You might also enjoy making nature mandalas on the beach with rocks, stones, shells, seaweed, and feathers. Get outside to connect and create!
Before You Begin: Choosing the Right Location and Supplies
A successful sandcastle starts long before the first bucket of sand is turned upside down. Pick a location above the high tide line so your sandcastle won’t get washed away. Make sure the sand is damp but not dry. Dry sand doesn’t hold its shape well. Choose a spot with damp sand close enough to the water for the sand to pack well, but far enough away that the waves won’t wash away your work before you’ve finished.
There are generally two low tides and two high tides each day. These high and low tides are listed on a daily tide chart. You can also ask a lifeguard or park ranger, or watch the water for a while to see if it’s coming up or down. Ensure the tide is going down or that you are far enough away from the waterline if it is coming up. It doesn’t take long for the waves to reach you if you’re too close to the shore when the tide is coming up.
It’s also a good idea to have a bucket or two nearby. Beach buckets and water toys make it easy to bring fresh water up to where you are working as you need it. Wet sand is the secret to strong walls and towers.
Sandcastle Building Materials:
The tools you need are universal, but will depend on the type of sandcastle you are making: 1) a traditional sandcastle built from the ground up, 2) a drip castle, and a sand castle made with sand molds, 3) buckets, and forms. Each tutorial gives more information, while the supplies below list most everything you might need to build a sandcastle.
You only need a few simple materials:
- Water source
- Wet sand (preferably near the waterline, but a sandbox will work with plenty of water nearby).
- Bucket for gathering water and using as a sandcastle form.
- Small shovel or spade for digging and transferring sand.
- Sand trowel for digging and transferring sand.
- Sculpting and carving tools (plastic knife, spoon, melon baller, fork, icing spatula, putty knife, etc)
- Paintbrush or straw for cleaning loose sand.
- Sticks for carving and decorating.
- Shells, stones, rocks, pebbles, seaweed, and driftwood for decorating.
- Other beach or sand toys (optional).
- Sandcastle forms or sand molds (optional).
The best tool, however, is your imagination.
Three Ways to Build a Sandcastle: Step-By-Step Instructions:
There isn’t just one way to build a sandcastle. Here’s a step-by-step guide with instructions and examples to help you build an impressive castle made of sand. Try one of the following techniques or combine all three to create something completely unique!
Method One: Build a Classic Sandcastle from the Ground Up:
This traditional method is perfect for families and first-time builders. You can use most of the recommended supplies in the materials above to make this type of sandcastle. Larger groups can work with more sand to create a larger castle.
1. Build a Strong Base or Foundation:
- Use hands, buckets, and shovels to pile damp sand into a large mound wider than the castle you hope to build.
- Ensure the sand mound is as wet as possible so the sand piles easily without losing its shape.
- The big pile of sand should be muddy and compact, so your sandcastle won’t be easily washed away if it gets hit by a wave.
- Pack each layer firmly with your hands, or the back of a shovel or sand trowel.
- A solid foundation helps support everything you build above it.
2. Add Height:
- Continue adding damp sand one layer at a time.
- Ensure each layer is packed tightly before adding the next.
- Think of it as building a hill rather than stacking separate towers.
- The idea is to build a small hill about 1 to 2 feet tall as your starting point. More hands working together can build larger sandcastles.
3. Shape the Castle:
- Begin carving instead of adding more sand.
- Once your mound of sand is large enough, it’s time to carve the basic shape, such as a tower, wall, or pyramid.
- Use your hands, a small shovel, stick, twig, or even butter knives to gently shape towers, walls, windows, stairs, and doorways.
- Start from the top and work your way down to prevent the structure from collapsing.
4. Add Towers and Walls:
- Use a bucket or toy sand molds to add towers around the base of the sandcastle.
- Use any other sand molds you have to create other features if desired.
- Connect them with walls by piling and shaping more wet sand.
- For example: Use a bucket to create a cylinder for a tower. Fill it with wet sand, press it down, and flip it upside down like a sand mold.
5. Dig a Moat:
- Dig a shallow trench to create a moat around the castle.
- If you’re close enough to the water, small channels can allow the tide to slowly fill it.
6. Carve the Details:
- Use tools like sticks, plastic knives, popsicle sticks, forks, or spoons to add windows, bricks, doors, and textures to the exterior of the castle.
- For finer details, use a paintbrush or a drinking straw to blow away loose sand and debris.
- For example: draw little brick lines into the walls or make an arch-shaped door with a spoon.
7. Decorate and Finish the Sandcastle:
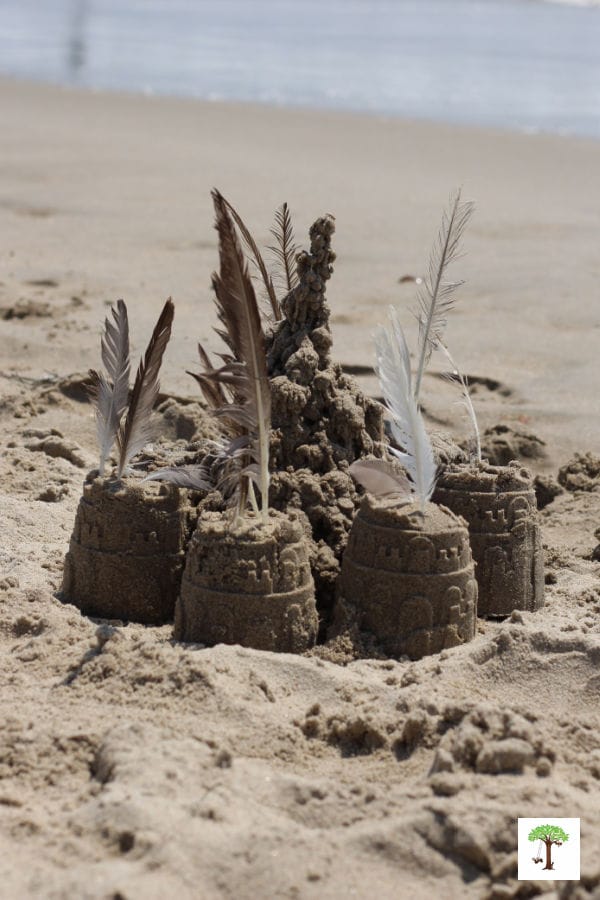
- Finish your castle with shells, seaweed, pebbles, driftwood, feathers, and other treasures you’ve discovered along the beach.
- Please do not disturb any living plants or creatures while gathering natural materials to decorate the sandcastle.
Pro Tips for Success:
- Work quickly: Wet sand dries fast
- Pack the sand tightly: the more compressed it is, the better it holds.
- Keep the sand wet: Have a bucket of water standing by to keep the sand moist while you work.
Example Design Ideas:
- Classic Castle: Four towers connected by walls, with a central keep.
- Fantasy Fortress: Add staircases, turrets, and a drawbridge if you can engineer one.
- Mini Village: Build several small houses around a central tower.
Helpful Design Tips:
- Start with a Central Tower: Begin by constructing a central tower using a large bucket mold. (Fill the mold with sand and water; it should feel like thick oatmeal.)
- Add Surrounding Walls and Smaller Towers: Use additional molds of hand-shaping to create walls and smaller towers around the central structure.
- Incorporate Decorative Elements: Enhance your sandcastle with seashells, seaweed, feathers, sticks, pebbles, or small flags for added detail.
- Maintain Moisture: Keep the sand damp to ensure stability and ease of sculpting.
Method Two: Build a Drip Castle
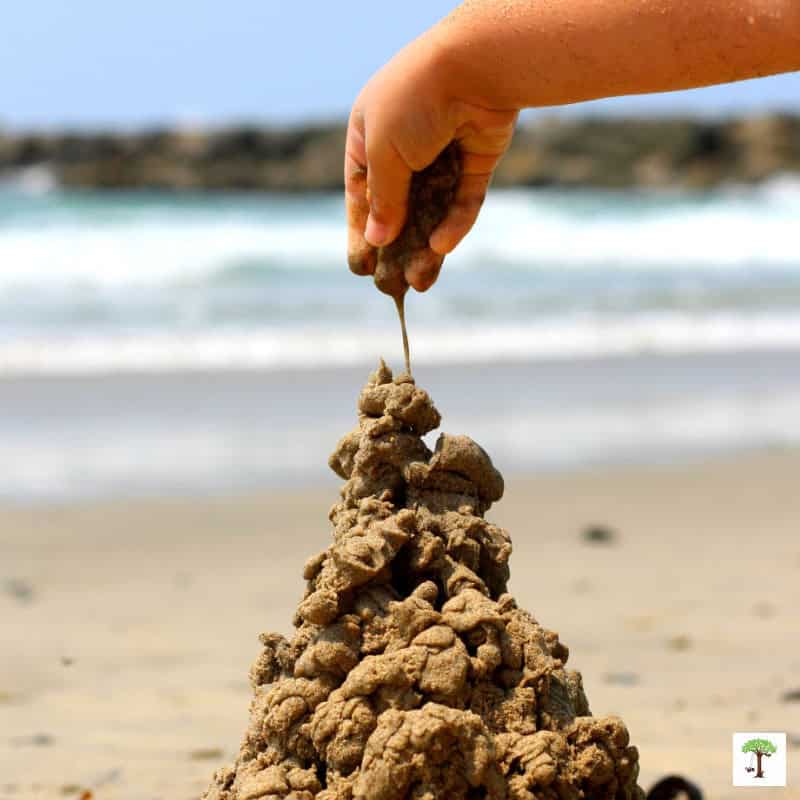
Drip castles create tall, delicate towers that look like they belong in a fairy kingdom. They are fun and easy sand sculptures to make, created by allowing wet sand to drip from your fingers, forming tall, drippy towers that resemble melted candle sticks. Children are often amazed that something so simple can produce beautiful sculptures like the one my daughter is making in the picture below.
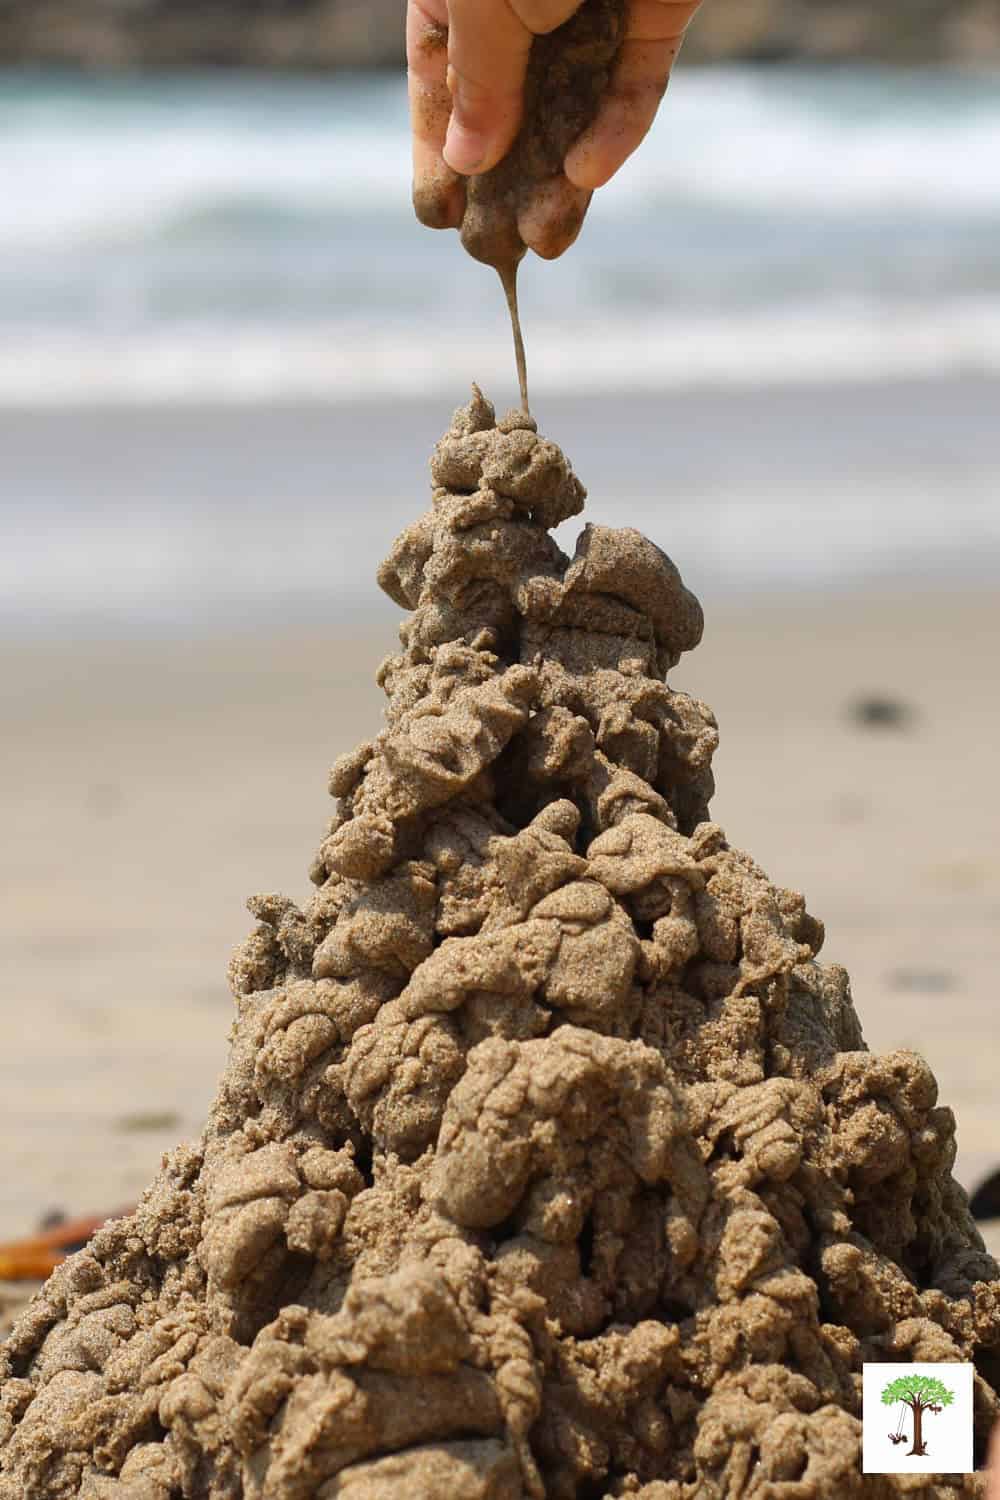
To make a drip castle, you only need sand, water, and your hands. Of course, a bucket helps to bring water close to keep sand wet, and a few decorations are nice, but no other materials are needed. Here’s a step-by-step guide to constructing these whimsical sand creations:
1. Choose the Right Spot and Tide:
- Dripcastles need to be made as close to the shoreline as you can get without getting so close that the water washes it away quickly.
- For this reason, drip castles are best made when the tide is dropping, so you can get nice and close to the waterline.
2. Mix Your Sand:
- Dig a hole and allow it to fill with water and sand. Alternatively, fill a bucket with sand and water until it forms a slurry.
- The consistency should be like thick pancake batter.
- Mix well.
- The sand should be wet enough to drip, but not so watery that it splashes or collapses the second it hits the wet sand or drip castle pinnacle below it.
3. Drip Wet Sand From Your Fingertips:
- Grab a handful of the wet sand mixture.
- Let it drip slowly from your fingertips onto the same spot to form a tower.
- As each drop lands, tiny peaks stack atop one another.
- As you continue to drip more sand and water from your fingertips, gravity will create beautiful organic, bumpy shapes.
4. Build The Drip Castle Up:
- Keep dripping to create one large drip tower castle, or place drip towers next to each other to widen the base.
- You can even build several towers, then connect them with bridges, walls, arches, or pathways.
- Continue adding more drips on top to build the height until your drip tower (or towers) reach the desired height.
- Keep dripping sand from your fingers to build towers and layer and branch out castle spires.
5. Decorate (optional):
- Add shells, feathers, pebbles, or seaweed for decoration if desired.
Pro Drip Castle Tips:
- Use fine-grained sand for better drip formation; coarse sand is not the best for building sand castles.
- Try letting the drips fall from different heights to see how the texture changes. Higher drops create more spatter, while closer drips make smoother towers.
- Continue adding more drips on top to build the height of each drip tower.
- If the sand starts to dry out, add more water to maintain the slurry consistency.
- Be patient and take your time; this outdoor process art activity is meditative and allows for creative expression.
- Rinse the sand off your hands in the ocean or with a little fresh water.
Method Three: Build with Sandcastle Molds or Sand Forms:
Sandcastle molds are a perfect option for toddlers and young children, because they can easily pile damp sand into sand forms and invert them to create simple sand castles.
1. Add Sand and Water to the Sand Castle Form:
- Fill the sand mold completely with damp sand.
- Press it down firmly to remove any air pockets.
- You want the sand to hold its shape without crumbling.
2. Invert, place, and lift to reveal:
- Add a little extra sand on top before inverting the mold and placing it down on the sand.
- Tap gently, then lift the sand form straight up to reveal your tower design.
3. Repeat As Desired:
- Continue filling forms with tightly packed sand and water to stack and arrange different towers and shapes.
4. Create Walls, Gates, Bridges, and Moats (Optional):
- Build several towers before connecting them (or surrounding them) with packed sand walls, gates, bridges, and moats.
- Many families enjoy combining molded towers with hand-carved details and drip-castle decorations.
- Use your imaginations and enjoy yourselves!
Building Sandcastles: A Fun Outdoor STEAM Activity for All Ages
Creating with sand and building towers that reach the sky is fun for kids and adults. Here are a few final tips and ideas to help you master and enjoy building sandcastles:
Tips for Building Better Sandcastles:
- If your castle keeps collapsing, try adding a little more water to the sand.
- Pack every layer firmly before adding the next.
- Carve away sand instead of stacking fragile pieces on top.
- Work slowly.
- Remember that every mistake teaches you something about how sand behaves; experiment and have fun!
- Most importantly, don’t worry about creating a perfect castle. It doesn’t exist. The fun comes from building and experimenting together.
Decorating Sandcastles Naturally:
Some of the best sand castle decorations are just waiting on the beach to be discovered. Please avoid removing living plants or disturbing wildlife while gathering materials. Look for naturally fallen or loose materials such as:
- Shells
- Smooth stones and pebbles
- Sea glass
- Driftwood
- Seaweed
- Feathers
- Seed Pods
- Other interesting natural treasures
More Than a Castle:
One of my favorite things about building sandcastles is watching children, artistic types, and those young at heart like my husband become completely absorbed in the process. They live in the moment. Negotiating where the towers should go. Solving problems when a wall unexpectedly collapses. Proudly decorating each nook and cranny with shells, seaweed, and a fancy feather on top like my daughter in the photo below.
I enjoy watching the process as much as I enjoy participating in it. Before you know it, entire worlds are soon hidden within a few square feet of sand. The finished castle is wonderful, of course. Definitely something to be proud of and admired. Taking a photo is always a good idea. But these are all just souvenirs of the real treasure created when building with sand: the time we spend enjoying the moment together. Get out there and build something meaningful together!
The Rhythm of the Tide:
Every sandcastle eventually returns to the sea: The tide rises. The waves reshape the shoreline just as the wind smooths away tiny footprints. At first glance, it might seem like all that work disappears. But children understand something adults often forget. Tomorrow they can build another one.
Perhaps that is one of the beach’s greatest lessons. Not everything beautiful is meant to last forever. Some things are meant to be created, enjoyed, shared, and gently returned to nature.
Like the changing tides and the passing seasons. Every sandcastle reminds us that there is beauty in creating. Beauty in letting go, and always another opportunity to begin again. Like manalas, sandcastles are an exercise in non-attachment.
Sandcastle Ideas to Spark Imaginative Play:
Children rarely stop with a simple castle. One day it becomes a pirate fortress with hidden treasure that must be protected. The next, it can be a mermaid palace, with a secret hidden room to keep her safe.
Then perhaps it becomes a dragon’s castle, a fairy village, a gnome home, a dinosaur habitat, or an underwater kingdom. Follow your child’s interest and imagination wherever they lead. The stories they invent are often just as memorable as the castles they create.
Get Outside to Build a Sand Castle
Get outside to build a sandcastle this summer. You can create one at the beach, playground, or sandbox. If you go to a playground, bring water if there is no bathroom or water fountain. Don’t forget a bucket for the water, other sand toys, and objects to decorate with if that interests you.
Allow your children to make one as simple or complex as they choose. Often, this depends on the age(s) of your child(ren) and how much experience they have with building sand castles. Making one for them doesn’t allow them to get creative. Please do your best to guide them towards their own creation.
Keep first experiences simple and open to free play. Sometimes, our little ones can get hurt or feel like they are not good enough if we are not careful about what we say or do. The goal is to show them how to do it and then let them build one in their own way. If they don’t make one, don’t force it. Just try again another day.
Older children may want to learn how to make a more complex sand castle worthy of the photo wall. A few more tutorials explaining how to build more advanced sandcastles are included below if you master the basics and want to make things a bit more interesting and entertaining. Building with sand can get pretty comical; enjoy!
A Few Other Sandcastle Building Tutorials:
- Secrets of Super Sandcastles by Sarah W. Caron on SheKnows
- How to Build a Sandcastle by Teresa Coppens on Hubpages
Building sand castles is a beautiful activity for kids. It provides a valuable sensory experience and the opportunity to get creative. Build one today!
This post was originally a part of the Get Outside & Connect series. It is regularly updated to improve the content and remain current. You might also enjoy these outdoor activities for kids.
Please visit our About page to learn more about Rhythms of Play. For more information about this website and the author and photographer of “How to Build a Sand Castle,” please visit the home page for Rhythms of Play or the author page, Nell Regan Kartychok.





We live near the beach and building sand castles is one of our go to activities. I love how the children instinctively start digging, scooping, patting down, collecting seashells, sticks and other wonderful beach and ocean treasures. And you know what? Mom and Dad love building sand castles just as much!
We love it too! My daughter is still so new at it that I have to allow her the space to find her own way or she will just spend the whole time watching me. I look forward to the day we can make wonderful sand castles together. 🙂